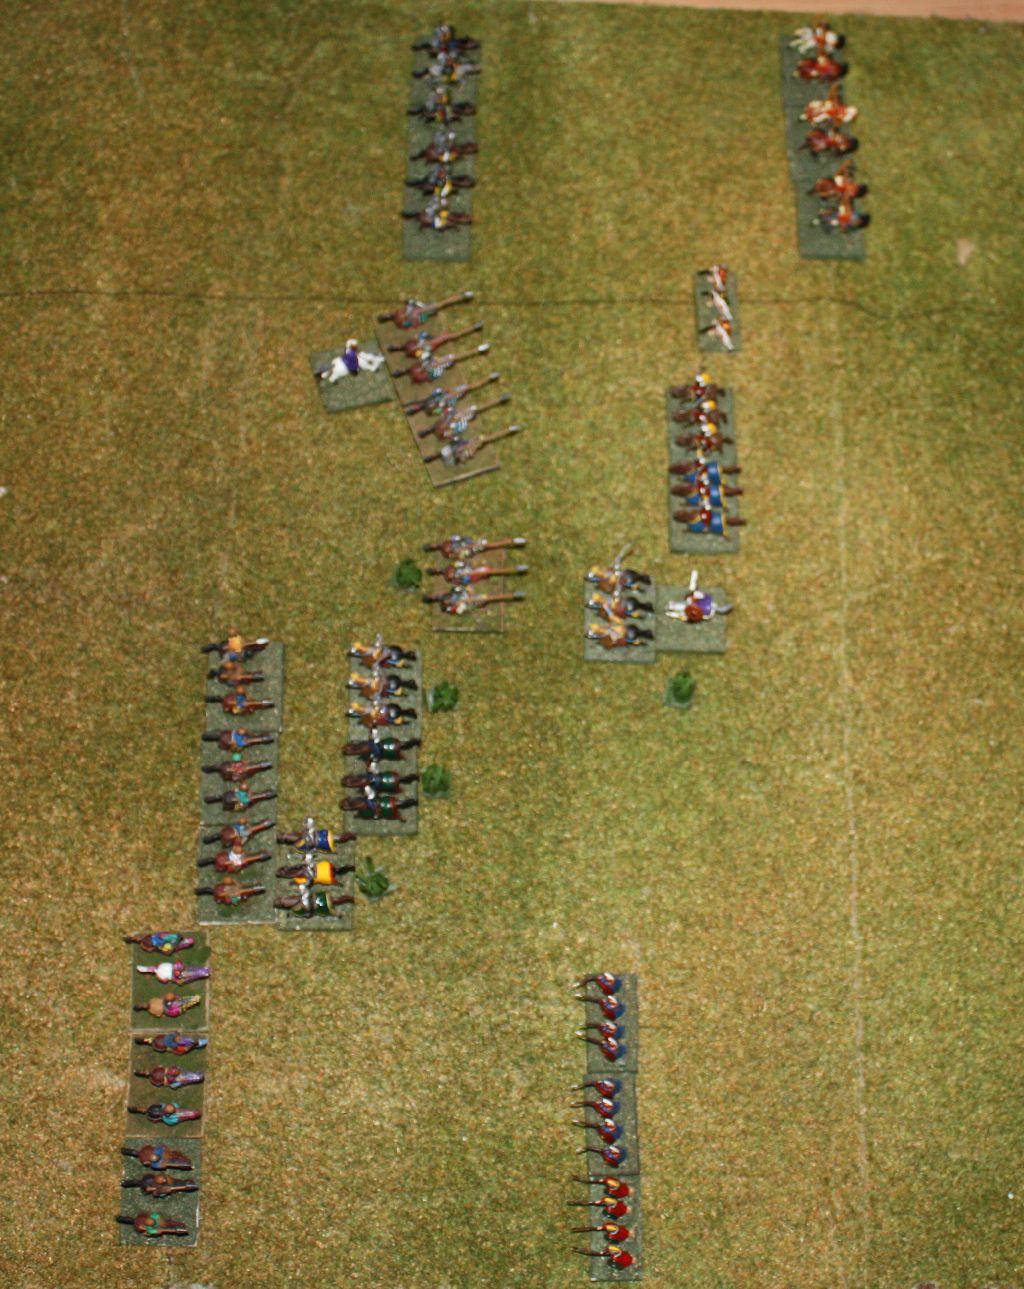
Friday, 30 July 2010

Callinicum refight with Irregular Miniatures Ancients Rules

For Review of Irregular Miniatures Ancient Rules, see here.  I did play through the game listed below while writing the review.  I wanted to play at least one game so I see review how the rules worked rather than just reviewing what I read in the rules.

Using 15mm figures
The game is designed for 6mm with a 2mm option.  As I will be replaying Callinicum with 15mm on 40mm width bases, the following explains how I did the conversion.
The strip widths used for 6mm are as follows:
  • Battle troops (5-8 strips) and auxiliaries (2-4 strips): 23mm to 30mm each.
  • Skirmishers (1 strip): 35mm to 45mm each.
There are the two systems for unit depiction
  1. system 1 where each strip for a unit is represented by an actual strip.
  2. system 2 where battle troops and auxiliaries are 2 strips wide and skirmishers are one strip wide (strip loss is recorded by some sort of casualty maker).
So, for system 2, units will be 46mm - 60 mm wide except skirmishers that will be 35mm to 45mm.  Using 40mm wide bases for all unit types should be OK (skirmisher widths are about 30% less than the other units that is unlikely to effect play). 
Therefore, I will use single bases with 40mm width to represent all units and use casualty markers for strip losses.  Lastly, it is a game of unit versus unit rather than strip Vs strip so the rules should work fine so long as stands are not outrageously different to one another.

An interesting twist
I was going to use each stand being one unit.  I was going through how to best represent the Callinicum forces with each stand being one unit, you need to chose battle/auxiliary/skirmisher; then irregular/regular;A/B/C/D class; how armoured; weapons; and also how many strips in a unit - 5-8 for battle troops, 2-4 for auxiliaries, 1 for skirmishers.  As I was doing this and mapping them to deployment, I noticed that all the heavy cavalry was deployed in groups of 3 (Persian) or 2 (Byzantine).  This is conveniently between the 2-4 strips required for auxiliaries.  And the Skutatoi heavy infantry is the only battle troops and while deployed 3 stands wide, could easily put 3 stands behind this and now have a 6 strip battle troop.  The light infantry could have another strip behind it and be a 2-strip auxiliary and the light cavalry would be individual skirmishers.
Instead of have 12 Persian units and 13 Byzantine units, I would have 6 Persian units (3 heavy cavalry and 3 skirmishers) and 7 Byzantine units (1 heavy infantry, 3 heavy cavalry, 1 light infantry and 3 skirmishers).  This would play a lot faster!  I will play a game with the smaller number of units. Someday I will play nother game with each stand representing 1 unit.  It should still be fast.
So I am effectively playing a system 1 game.  Not sure if the conversion to 40mm wide bases holds up but at least the bases are all the same width.  Ah well...you go with what you have.

Callinicum system 1 forces

Persian

2 Heavy Cavalry - Auxiliary, Irregular, B class (d10), 3 strips, half-armoured horse, body, arm and leg armour, shield, bow
1 Elite Heavy Cavalry - Auxiliary, Irregular, A class (d12), 3 strips, half-armoured horse, body, arm and leg armour, shield, bow
3 Lakhmid Light Cavalry - Skirmisher, Irregular, C class (d8), 1 strip, unarmoured horse, shield, javelin
1 General - 2 strips, A class (d12), half armoured horse, shield, bow

Byzantine
1 Skutatoi heavy infantry - Battle troops, Regular, C class (d8), 6 strips, arm and leg armour, long spear, shield, bow
2 Heavy Cavalry - Auxiliary, Regular, B class (d10), 2 strips, unarmoured horse, body, arm and leg armour, shield, bow
1 Elite Heavy Cavalry - Auxiliary, Regular, A class (d12), 2 strips, unarmoured horse, body, arm and leg armour, shield, bow
1 Isuarian light infantry - Auxiliary, Regular, C class (d8), 2 strips, unarmoured, shield, javelin
3 Lakhmid Light Cavalry - Skirmisher, Irregular, D class (d6), 1 strip, unarmoured horse, shield, javelin
1 General - 2 strips, A class (d12), half armoured horse, shield, bow

A note on the class of troops (A/B/C/D).  I was going to give all troops 'C' class, except the elite cavalry a 'B', and the Ghassanids a 'D'.  Looking through a couple of army list from other rules around the same period as the Irregular Miniatures Ancient Rules, I found this might not be the way the rules would like it to be. WRG has the heavy cavalry at 'B' class by default and 'A' for the elites.  Might Of Arms has all the cavalry at 'B' class.  Warrior Kings has the heavy cavalry at a CV of 5 (which equates to B class).  So, although in my replay with warrior Kings I gave the heavy cavalry a CV4 (='C') and elites a CV5, maybe I should make the heavy cavalry by default B class, and the elites an A class.  I did this.  I will see how it plays out.  I based the armour by looking at some other army lists - WRG, Might of Arms, Medieval Warfare, and also referring to some Osprey and WRG army reference books.

Deployment, Persians on the left


On the Persian side from right flank to left with initial orders:
   1 unit heavy cavalry SLOW ATTACK
   1 unit heavy cavalry in reserve QUICK ATTACK
   1 unit elite heavy cavalry QUICK ATTACK
   3 units of Lakhmid skirmish cavalry QUICK ATTACK

On the Byzantine side from left flank to right with initial orders:
   1 unit Skutatoi heavy infantry SLOW ATTACK
   1 unit heavy cavalry SLOW ATTACK
   1 unit elite heavy cavalry SLOW ATTACK
   1 unit heavy cavalry SLOW ATTACK
   1 unit Isaurian light infantry SLOW LURE
   3 units of Ghassanid skirmish cavalry SLOW LURE

Note the Isaurian light infantry is deployed 2 strips/stands wide - under the rules if one stand was deployed behind the other, this would be a march formation - faster move, not good in combat.

The General is supposed to be 2 strips/stands - I have put an additional stand behind the general stand to remind me.  Generals attach to other units to add their strip value to panic tests rather than get into combat so this representation is hopefully fine.

The Persian Lakhmid skirmish cavalry have attack orders rather than lure as lure doesn't really allow for charging, and they will want to charge the opposing Ghassanids.

Camps are supposed to be deployed but are not relevant to the scenario so I have not used them.

Turn 1

Initiative
I will give the Persian's the initiative for turn 1 to reflect being the attacker. Turn 2 onwards will roll as normal for initiative.

Charges, Routs, Rallies, Pursuits
No rout or charges

Persian move
Lakhmid Light Cavalry move full distance and spread out.
The Heavy Cavalry all move up.  No wheels as that takes entire movement allowance.

Byzantine move
Moved up Skutatoi 1/2 their move allowance.
Moved up Heavy Cavalry next to them 1/2 as well.

Missile fire
While simultaneous, calculate Persian first, right to left:
Heavy Cavalry long range fires at Skutatoi: 2 (3 stands /2 rounded up) -1 firing while moving -1 target has arm/leg armour = 0.  No effect.
Therefore other Heavy Cavalry long range firing will have no effect.
Note: there is a +1 for medium range (1/3-2/3 ranged) and no -1 if not moved so there may be chances later on.

Byzantine left to right:
Skutatoi at opposing Heavy Cavalry: 3 (1/2 stands) -1 moving -1 armoured horse -1 arm and leg armour = 0.  No effect.
Other missile fire will also have no chance due to -1 for armoured horse and -1 for arm and leg armour.

Hand to hand fighting
No hand to hand.

End of turn 1


Turn 2

Initiative
Persians have 4 unengaged units, Byzantines 6.  Both commanders choose to add a d10. Byzantines win.

Charges, Routs, Rallies, Pursuits
Byzantine Heavy Cavalry have a 160mm charge range but Persians out of range.
The Persian Light Cavalry charge the Byzantine Light Cavalry one on one.  No charge test required as have same number of strips (1) as the Byzantines.  Stops 10mm away so pre-contact missile fire can occur.  Byzantines could counter charge but this would give them a -1 in missile fire (but this does mean they miss out on a +1 for countercharging in hand to hand fighting).

Byzantine move
Byzantine does no moves except attached general to a unit of Heavy Cavalry.

Persian move
Persians move up elite Heavy Cavalry veering slightly to the left and move the reserve Heavy Cavalry up.

Missile fire
Byzantine Light Cavalry fires at each opposing Light Cavalry : 1 for one strip +1 unarmored target +1 target unarmoured horse +2 short range -1 target moved 110mm or more =  4.  All Persian Light Cavalry pass casualty check (using d8).
Persian fire: 1 for one strip +1 unarmored target +1 target unarmoured horse +2 short range -1 firing while moving = 4.  Byzantine rightmost Light Cavalry fails, rest pass.

Remaining Byzantine:
The 2 Heavy Cavalry in centre will both target the Persian Elite Heavy Cavalry : 2 (4 strips/2) +1 medium range -1 target armoured horse -1 target arm/leg armour = 1. Persians pass.
Remaining Heavy Cavalry would have a score of 0 or less so I won't work it out.
Skutatoi : 3 (strips/2) +1 medium range -1 target armoured horse -1 target arm/leg armour = 2.  Persians pass.

Do the Persians:
Elite Heavy Cavalry on opposing Heavy Cavalry is a 1. Byzantines pass.
Reserve Heavy Cavalry vs opposing Heavy Cavalry is a 1: Pass.
Other Heavy Cavalry vs Skutatoi is a 1: Skutatoi roll a 2 which is 1 more than the number and so halt next move.

End of missile fire so move the 2 Persian Light Cavalry into hand to hand combat.

Hand to hand fighting
Edge Persian Light Cavalry vs Byzantine Light Cavalry:
Persian: 1 (strip) +1 charging +2 horse =4.  Byzantine fail (and are destroyed).

Note: if the Persians had initiative, they would have got a +2 for charging with initiative.
 
Byzantine: 1 (strip) +1 countercharging + 2 horse = 4.  Persians fail (and are destroyed).
Next Light Cavalry vs Light Cavalry has same scores; both Byzantine and Persian fail and are destroyed.

 End of turn 2

The rules are not clear, but when a unit is removed from the board due to casualties, it seems is not counted as a rout.  A rout seems to be only if a unit is actually routing by moving away from the enemy.  This is important as friends near friendly routing units may need to take panic tests.  As skirmishers are only one unit and a casualty will cause the unit to disappear, this means skirmishers do not cause friendly units to take panic tests when they are removed.  Clever. 

so..only one unit of Light Cavalry left on the board.

End of turn 2 (overhead view)


Turn 3

Initiative
Persians 4 units +d10 of 4, Byzantine 5 units + d10 of 9. Byzantines win.

Charges, Routs, Rallies, Pursuits
If the Persians charge while they have initiative, they get an additional +2 in hand to hand.  It doesn't apply this turn so is an opportunity for the Byzantines to charge the Persians while the later are disadvantaged.
Byzantine Heavy cavalry with general attempts to charge the opposing Elite Heavy Cavalry with general.  Need to pass charge test (4 strips vs 5). Passes but stops 10mm from the Persians for pre-contact missile fire.  Persian Elite Heavy Cavalry countercharge the Byzantine.
Persian Reserve Heavy Cavalry charge the opposing Heavy Cavalry , and stop 10mm away for pre-contact missile fire.

Byzantine move
Byzantine Light Infantry wheel to their right to protect flank against the Light Cavalry .
Byzantine Elite Heavy Cavalry move up closer.

Persian move
Light Cavalry move 160mm almost directly to the front, trying to outflank the Light Infantry.

Missile fire
From what I know from previous turns, I am just going to throw the die for the target unit, and if it is low actually work it out.
Skutatoi fire at opposing Heavy Cavalry: no effect.
Persian Heavy Cavalry return fire: no effect.
Persian Reserve Heavy Cavalry pre-contact missile fire: no effect.
Byzantine Heavy Cavalry return fire: no effect.
Persian Elite Heavy Cavalry : no effect
Byzantine Heavy Cavalry return fire: rolled a 1.  Better work it out: 1 (2 strips/2) +2 short range -1 firing while moving -1 target on armoured horse -1 target has arm/leg armour =  0 so could never hit (if moving).

Note: As I was tidying up the review, I noticed that a charging unit can only pre-contact missile fire if armed with javelin/pilum. A stationary target unit can missile fire with anything.  So if a unit is armed with bow, and charges or counter charges, there can be no missile fire.  The pre-contact missile fire that I did for the heavy cavalry above, and continue to do for the remaining turns, should not have occurred.  Oops. This is important as later on units lose strips due to pre-contact missile fire from charging units.  The charging light cavalry pre-contact missile fire is ok as they are armed with javelins - it is only the heavy cavalry that are all armed with bows.  Next time I will know better.

Hand to hand fighting
Do the generals and associated units first:
Note: It is not clear in the rules, but I'm assuming the generals do not add their 2 strips to the unit as they can add their strip value to the panic test (to increase the chance of passing).  But I do assume that generals on their own count as a 2 strip unit.   This is an important omission of the rules.  As it stands in rules, generals are useful in that they
  • add a d10 roll to initiative (again, this is not clear as it says commanders may add the roll, so if the overall commander is lost, my assumption is you cannot roll the d10 for initiative)
  • changing orders of a unit
  • can modify the panic test for the better by subtracting their number of strips from the panic test (a good thing).  However, for cavalry battles, panic tests scores are often low and would usually pass.  But generals can make a critical difference between a chance of failure and no chance of failure.
I think that adding the general strips to a attached unit may be overkill.  However, I believe that possibly a general unit should be counted as a support unit in hand to hand fighting (support units add +1 in round 2 and +2 in round 3).  If I played it again, I would do this.

Byzantine: 2 (strips) +1 charging +2 horses +1 body armour + 1 arm/leg armour = 7.  Persians roll 7 (d12) and lose a strip at the end of the round.
Persian: 3 (strips) +1 counter charging +2 horses +1 body armour +1 arm/leg armour +2 half/fully armoured horse = 10.  Byzantines roll a 5 (d10) and lose a strip.
Losses are equal so on to round 2:
Byzantines: 1 (strip) +2 horses +1 body armour + 1 arm/leg armour +1 regulars= 6.  Persians roll 7 and do not lose a strip.  Note charging does not count in round 2 and regulars get a +1.
Persian: 2 (strips) +2 horses +1 body armour +1 arm/leg armour = 6.  Byzantines roll a 9 and do not lose a  strip. Note that 1/2 armoured horses do not get the +2 bonus after round 1 (only fully armoured horses do).
Losses are equal so on to round 3:
Byzantines - 1 (strip) +2 horses +1 body armour + 1 arm/leg armour +2 regulars= 7.  Persians roll 7 and  lose a strip.  Note regular bonus increases to +2 in round 3.
Persian - 2 (strips) +2 horses +1 body armour +1 arm/leg armour = 6.  Byzantines roll an 8 and do not lose a strip.
Persians lost the round and roll a panic test: 4 (which exceeds the number of strips lost) and so passes.
It was the third round and ended in stalemate so the lower class units retires 40mm (as classes are equal and unit are both one strips, I'm assuming the attacker  - Byzantines - retires)

 Generals facing off after combat (from Byzantine side)

Heavy Cavalry vs Heavy Cavalry in centre:
Byzantine: 2 (strips) +1 charging +2 horses +1 body armour + 1 arm/leg armour = 7.  Persians roll 3 (d10) and lose a strip at the end of the round.
Persian: 3 (strips) +1 counter charging +2 horses +1 body armour +1 arm/leg armour +2 half/fully armoured horse = 10.  Byzantines lose a strip.
Losses are equal so on to round 2:
Byzantines: 1 (strip) +2 horses +1 body armour + 1 arm/leg armour +1 regulars= 6.  Persians roll 2 and lose a strip.
Persian: 2 (strips) +2 horses +1 body armour +1 arm/leg armour = 6.  Byzantines roll a 4 and lose a strip and are destroyed.


End of turn 3

Turn 4

Initiative
Persians get initiative.

Charges, Routs, Rallies, Pursuits
The Persian single Heavy Cavalry charges the 2 Byzantine Heavy Cavalry .  It passes the charge test.
Persian Heavy Cavalry with general charges the opposing Heavy Cavalry with the general.
Light Cavalry charges the flank of the Light Infantry. Passes charge test.

Byzantine move
Byzantines only move is to turn the Light Infantry.
Again, rules are not clear, but I assume a charged unit can turn in the move phase but would not be able to counter charge.  As it cannot turn 90 degrees as it move allowance is not sufficient, I will still call it a flank attack.  Note I have found something that would be different with using 6mm figs as a 2 unit frontage would be about 60mm, not 80mm using the 15mm stands I have.  It would make turns a bit better.  I like restrictive turns though...

Persian move
None

Missile fire
Skutatoi at opposing Heavy Cavalry: no effect.  Return fire: no effect.
Byzantine Elite Heavy Cavalry at Persian Heavy Cavalry: no effect.   Return fire: no effect.
Byzantine Heavy Cavalry with general at Persian Heavy Cavalry: no effect.  Return fire: lose a strip (Byzantines rolled a 1 which is what was required).  Byzantine unit lost. Only general unit remains.  Note: As indicated earlier, the Persian unit charged and should not have fired at the Byzantine unit.
Light Cavalry at Light Infantry : no effect.  no return fire

Hand to hand fighting
Heavy Cavalry in the centre:
Byzantine: 2 (strips) +2 horses +1 body armour + 1 arm/leg armour = 6.  Persians roll 4 (d10) and lose a strip at the end of the round.  Unit is destroyed.
Persian: 1 (strip) +1 charging +2 horses +1 body armour +1 arm/leg armour +2 irregulars charging with initiative +2 half/fully armoured horse = 10.  Byzantines roll 5 (d12) and lose a strip.

Light Cavalry vs Light Infantry :
Byzantine: 2 (strips) = 2.  Persians roll a 5 (d8) and do not lose a strip.
Persians: 1 (strip) + 1 charging +2 horse troops + 2 irregulars charging with initiative +4 attacking flank = 10.  Byzantines automatically lose 1 strip (d8) and roll a 3 narrowly missing losing another strip.
Byzantines lost more strips and so undergo a panic test, which they pass.
No one routed so onto round 2:
Byzantine: 1 (strip) +1 regulars = 2.  persians roll a 7 (d8) and do not lose a strip.
Persians: 1 (strip) = 1.  Byzantines roll 4 (d8) and do not lose another strip.  Notice the large difference between round 1 and two for the Persians - if you don't get them in the flank on a charge in round one, you could be in trouble.
Loses are the same so round 3:
Byzantine score is a 4. Persians fails and loses a strip.
Persians score is a 1. Light Infantry fails (!).
Both units eliminated.


End of turn 4


Turn 5

Initiative
Byzantines win initiative.

Charges, Routs, Rallies, Pursuits
Byzantines Elite Heavy Cavalry turn and charge Persian Elite Heavy Cavalry in the flank. Persians cannot counter charge.

Byzantine move
Byzantine general attaches to the elite unit.

Persian move
Persian Elite Heavy Cavalry turns 90 degrees to face the Byzantines.
Other Persians Heavy Cavalry unit moves up to within cavalry charge range of the Skutatoi (but not within the infantry's charge range)

Missile fire
Only effect was Skutatoi lost a strip and the opposing Persian Heavy Cavalry also lost a strip (both rolled a 1).

Hand to hand fighting

The Generals face off

Byzantine: 1 (strip) +1 charging +2 horses +1 body armour + 1 arm/leg armour = 6.  Persians roll...12 (d12) and do not lose a strip at the end of the round
Persian: 1 (strip) +2 horses +1 body armour +1 arm/leg armour +2 half/fully armoured horse = 7.  Byzantines roll a 9 (d12) and do not lose a strip.
Round 2:
Byzantine score is 6. Persians roll 7, no strip loss
Persian score is 7, Byzantines roll 6 and lose a strip.  Unit is eliminated.

I decided to end the game at this point.  The generals could fight it out at this point but the Persians do have the advantage of one extra strip.  If they win, the Persians cavalry could charge the infantry in the flank which would weaken them enough that a charge by the remaining Persian heavy cavalry may finish them off.  Of course, the infantry might score well enough and eliminate the heavy cavalry.  But most units are gone already and really the game should be over by now.  Effectively a Draw.

For interest, here are the potential initial round scores if the game continued heavy cavalry charged the infantry in the flank:
Persian: 1 (strips) +1 charging +2 horse +1 body armour +1 arm/leg armour +2 charging with initiative + 2 horse half armoured +4 attacking flank = 14 which is almost certainly 2 losses to Skutatoi and a panic test of a 3 (3 strips lost).  Round 2 would be very different as most of the factors no longer apply.  It would be about a 3.
Byzantine: 5 (strips) +1 arm and leg armour +2 long spears = 8 which is a likely loss (and elimination of the Persian unit).
And then if the heavy cavalry charged in the front:
Persian: 2 (strips) +1 charging +2 horse +1 body armour +1 arm/leg armour +2 charging with initiative + 2 horse half armoured = 10 which would be 1 loss for the Skutatoi.
Byzantine: 3 (strips left after above combat) +1 counter charge +1 arm and leg armour +2 long spears =  8 which would likely be 1 strip loss for the Persians.
The Skutatoi would need to take a panic test as they lost a strip and at below 1/2 strength. With 4 strips lost they would need to roll a 5 or more on a d8. 50% chance.  If they pass, round 2 would look better for them as they have 2 strips, Persians have 1 and they will have about the same scores.  Would be interesting to play out but really, the game should have been over at end of turn 4.

Verdict
Aside from some mistakes in the rules (my excuse is it was my first game), it plays very smoothly. Missile fire is not overpowering, strips are lost all the time in combat (which I like to see) and the different mechanisms fit in very well together.  The rules suffer from some gaps, but not overly so and I plugged them with my own assumptions anyway.  I thought I might not like the different dice that are used.  I think the last time I seriously used something other than a d6 was about 15 years ago in Tractics.  Oh, and d10s in Fantasy Rules! last month.  But 4 dice types in one game?  I was fine and it was zero hardship to use.  It actually made it easy as the factors are the same, it is only the die you roll that is different.  It would play better with 15mm figures on a 3'x2' board where you would be able to utilise some different tactics (similar to Armati in that is plays OK on a 2'x2' but Armati Intro is better suited to 3'x2' for greater tactical usage).  But on a 2'x2', it played just fine and I had a great time.  I like them.  I would play these rules again and recommend them to anyone wanting a quick game that has a fair differentiation of troop types.  It really did require a game to understand how the rules really worked.

Saturday, 24 July 2010

Irregular Miniatures Ancients Rules Review

Background
I have been meaning to get these for many years but just never seemed to actually get to do it.  Until AngelBarracks announced they would be making Irregular Miniatures rules available as a pdf.  At the moment I much prefer pdf - a fast fix, I have a netbook I cart everywhere and so, as a rules junkie, I can get to them whenever.  So I got the Irregular Miniatures Fast Play Ancient rules by Ian Kay the day after they were available.  But by then I had already started planning the Callinicum Armati refight. There is not much available on the internet about these rules.  The most I could find was some discussion on TMP (all favourable).  As these rules date from at least the early 90's, it is understandable there may not be much available electronically.
The PDF differs from the 'paper' copy in that the paper copy was 7 cards with the rules (based on the turn sequence with one side the rules, the other side examples of the rule) and one sheet of paper with setup and points.  The PDF is all the rules on 18 A4 pages.  My review is based on the PDF version.

Quality
The rules are well laid out and follow the turn sequence.  There are parts of the rules that are there, just not obvious and some that are missing.  Example - what is the class type of a general?  It isn't mentioned with the description of the general but is mentioned in the class description.  Counter-charges are mentioned but no description of how to do them. No army lists or examples, no terrain placement rules and no rules for ending the game.  The biggie is that different classes use a different die (d6, d8, d10 or d12) for panic tests and casualties determination.  This mechanism is mentioned as you go in the rules but you have to piece it together (at least in the DF version anyway).   I'll mention some I find as I go.  But all of these are actually only minor quibbles. They are cheap so I don't expect the quality of rule 10 times the price. All the rules you need to play are documented, the mechanisms all have examples that really do help.  One play through got me to understand what the rules were about, although I am sure there are tactical nuances I haven't grasped yet.  I liked the way the rules worked and would play them again.

Mechanisms
While they read a bit like WRG ancients they don't play like it at all.  There are only a few main troops types - battle, auxiliaries and skirmishers.  But there is a number of extra troop descriptions - 4 classes, regular/irregular, armour and weapons.  Units are made up of 1 to 8 'strips' (bases). Casualties result in strips loss  Each class also has associated with it a die - d6, d8, d10 or d12.  This die is used to determine casualties and also resolve panic (morale) and charge tests. So factors for missile, melee and panic tests are the same for all classes, but the higher the die, the less chance of casualties and the better chance of passing a panic test.

Each turn sees sides rolling for initiative, winner charges first, moves first; then a simultaneous missile fire phase and lastly a simultaneous melee phase.  Charges require units to roll a charge test against their class die. Missile fire only results in casualties.  The loser of melee must pass a panic test otherwise they rout. Melee in one phase can consist of up to three rounds of fighting if one side does not rout.

Army Lists
There are no army lists.  There are some examples of play which describe some unit types, but this is only enough to assist in describing a rule mechanism.  You are on your own for unit types, army composition etc.  However, there is a point system.

Basing
The rules are designed for use with Irregular Miniature 6mm strips/blocks,  It also mentions how to use with 2mm.   With only minor tweaking, the rules could be used with any size figures, so long as the basing on each side is the same.  My re-fight using these rules will be using 15mm figures and I'll explain on my battle report how I used 15mm figs.
There are two systems available to depict units - one systems uses a number of strips/blocks to make up a unit.  Casualties to units cause strips/blocks to be removed from the unit.  Strip loss also occurs from panic tests and failed charge tests.  The second system uses less figures - each unit is represented effectively by 2 strips/blocks, and strip casualties for the unit are recorded via roster sheets, casualty rings, casualty dice behind the unit etc.

Units

Types
There are 7 units types
  • Battle Troops - Infantry intended to fight hand to hand.  Consist of 5-8 strips (each strip is 23mm-30mm for 6mm figures)
  • Skirmishers - light troops that are not intended to fight hand to hand.  usually missile armed.  Can be infantry or cavalry or light chariots.  Consist of 1 strip that is 35mm-45mm wide.
  • Auxiliaries - cavalry, chariots and infantry that are not battle troops or skirmishers. 2-4 strips (strip width as per Battle troops)
  • Elephants. 1 strip
  • Scythed Chariots. 1 strip.
  • Artillery. 1 strip.
  • Generals - a subcommander has 1 strip, a general has 2 strips.
Classifications

And two unit classifications:
  • Regular - more maneuverable, stable combat bonus
  • Irregular - can move faster and first turn melee bonus.
Classes

And 4 classes (with associated die):
  • A - elites and roll d12
  • B - veterans and roll d10
  • C- average and roll d8
  • D - raw and roll d6
The die is used to determine casualties an perform panic tests. If number of hits equals the die type, remove a strip; and also the chance of losing another strips for fractional casualties - e.g. 24 hits on a class B unit results in two strips lost and a roll of 4 or less on a d10 will remove another. Panic tests occur frequently and unit passes a panic test by rolling (on its die type) more than the number of strips lost (since the start of the game).

Armour and Weapons
Lastly, troops have armour and weapons.  The different options are buried in the point system.  but strips can be shield/shieldless,  armoured/half armoured/ arm and leg armoured/no armour.  However, although not in the point system, there are additional armaments a strip can be armed with as they exist as bonuses in the movement/missile and melee table. Examples:

Missile armed isn't mentioned, but in missile fire you can be armed with javelins, pila, crossbow, handgun, longbow, bow, sling.  So obviously these don't cost anything different but should be noted as part of the unit description.

Pikes move slower.

Lancers, long spears, pikes and two-handed weapons give combat bonuses but cost no more.  So these also form part of the unit type.

However, even though none of these arms are specifically mentioned in the troop classification, a strip armed with two types of weapons does cost +1 point.

Terrain and setup
There are no rules for deploying terrain.  Terrain effects are located in the section applicable to them e.g. missile fire into cover is -2,  moving in rough terrain or crossing obstacles is a movement penalty.
Battle units, non-skirmish cavalry and pike unit cross rough terrain suffer a strip loss (pikes suffer two losses) that is recoverable with no movement in the following turn.

A camp is required to be setup for each army to their rear.  A camp captured by the enemy and in LOS of a unit is detrimental to that units' panic tests.

There are rules for scouting based on a sides skirmisher and cavalry numbers.  If neither side is outscouted, each side deploys one unit at a time alternatively.  concealed units, or units hidden behind terrain, do not need to be placed on the table.  If one side is outscouted, the units are set out one for two alternatively, and one for three if completely outscouted.

Turn sequence
Turn sequence has initiative determined at the start of the turn.  The winner of the initiative moves first.  Missile fire is next and is simultaneous.  This is followed by simultaneous hand to hand fighting.

1. Establish initiative (side A wins)
2. Side A rout, charge moves
    Side B evade, rout, pursuit, charge move/tests
3. Side A normal moves
    Side B normal moves
4. Simultaneous missile fire
5. Simultaneous hand to hand fighting
6. Applicable strip recovery

Initiative is determined by comparing each sides initiative score.  This is the total number of unengaged units, plus a bonus for each village, wood and hill held, plus an OPTIONAL d10 roll that can be added or subtracted from the score.  Highest score wins.  So it can been seen there is room to try and position yourself to go second.

Orders
Orders are quite simple and of two parts.  Orders can only be changed by attaching the general to the unit.
Movement order is either
  • QUICK: 1/2 to full
  • SLOW: none to 1/2
Combat order is either:
  • ATTACK: always charge or counter charge
  • HOLD: attain a position and keep it
  • LURE: evade all charges except by skirmishers/auxiliary.  In the latter case can counter charge.
Panic Tests
Panic tests are fairly common in a game turn,  which usually occur when a unit
  • is trying to rally from a rout
  • sees a nearby friend routs
  • is less than 1/2 strength and loses a strip
  • loses a round of hand to hand fighting
A unit passes a panic test by rolling (on its die type) more than the number of strips lost (since the start of the game). If a unit rolls lower, it loses a strip and routs if in hand to hand fighting.  An attached commander reduces a units strip loss number by the number of strips the commander is.

Moving
Rout moves (these occur first) are at a faster rate than normal movement.  After a rout move, the unit takes a panic test and if passes, it spends the next turn rallying.  Pursuit movement is normal move + a d6.  Units must pursue is fail a panic test.  Pursuing units may instead charge a new enemy is within 30mm of rout path.

No pre-measurement before charging.  If the target unit has more strips than the charging unit, a unit must pass a charge test before charging. If it fails the test, a strip is removed and the unit halts.  If the distance is further than the units charge movement allowance, lose a strip for each 20mm further.  Although the rules mention counter charging (in a header, order restrictions, and also for factors in hand to hand fighting and even in the hand to hand fighting example is mentions one side counter charged), I can find no mention of HOW or WHEN a unit counter charges.  The rules are absent on the actual mechanism for counter charging.  If I had to make an assumption (as I did when I was playing), I would say that side B can counter charge if side A unit charges at it (in the turn sequence, Side A charges, then side B). Based on this turn sequence,  I've also then assumed that side A cannot counter charge a charge by Side B. But does the counter-charger move towards the charger?  I've assumed not.  Lastly,  of course a unit must have the right order to counter-charge.  

Skirmish and auxiliaries may evade (evade move +1d6).

If charged or charging unit is capable of applicable missile fire (charging with javelin/pila/francesca or target with any missile weapon), units are put 10mm apart and missile fire resolved in part 4 of the turn sequence.
Movement distances are different for Pikes, battle troop infantry, auxiliary infantry, the different types of skirmishers, differently armoured horses, chariots and elephants.  There is a corresponding move distance if in rough terrain.  March (column) movement is faster for infantry and cavalry.  Units can veer up to 10% when moving forwards.  Example distances are 80mm for battle troops, 100m for infantry skirmishers and 160mm for cavalry skirmishers.

Regulars can wheel 90 degrees, about face, mount/dismounts, change formation, and then make 1/2 move.
Irregulars can do what regulars do for a full move, or 1/2 move and lose a strip.

Skirmishers can interpenetrate.

There are a number of formations that a unit can use (at least if using system 1 for basing) with the most common being a line (2 units wide at a minimum).  Germans, Romans and Viking can use a wedge and get a bonus in combat.  Skirmishers can form a circle that allows all the strips to missile fire at a target. Pikes can setup in a phalanx (single column) but initially I could not see any benefit to doing so - in system 1 there probably isn't; in system 2 it allows for a lot of strips on a single strip frontage (all of a unit's strips count in melee so multiple phalanx units can have more strips on the  same frontage compared to another battle troop unit deployed in a line (minimum 2 strips wide).  All units can form up in a march column for bonus movement rates.

Missile fire
Resolved simultaneously.
Ranges are different (with some examples in parentheses) for artillery (480mm), crossbow/longbow, foot bows (240mm), mounted bows, slings, handguns and javelins/darts (45mm).
For all units firing at the same target, add up all the strips and divide by 2, rounding up.  Add some modifiers for range (3 ranges - short, medium, long), target protection, movement.  Crossbows, slings and handguns treat armoured targets as unarmoured.  There are no dice rolled to add a random element.  Missile fire does not cause panic tests - its role it to wear down the enemy with strip loss.

Casualties are removed based on class.

If 1 above the inflicted number is rolled, the unit halts next move.

Except for pre-contact fire, I found in my replay the missile score totals were quite low (3 or less and more commonly 1).  For C class units using a d8, a 2 is only a 25% chance of a strip loss, and for B classes (d10) this is only a 20% loss.  Although ranges are long, for cavalry troops moving there is usually only one or two shots, for infantry this would be closer to 4 shots. It is similar to Armati and WRG Ancients in the respect of missile fire opportunities.

Hand to Hand fighting
Nothing about how bases line up - assume corner to corner front (as per WRG 7, DBM etc).  Nothing about what happens when a two units are attacking one - how does each of them do hand to hand fighting.  I've assumed that you would simply split your total factors between the enemy nits while the enemy units would be worked out individually and then totaled.

Each unit totals their hand to hand combat score.  This is +1 for each strip left in a unit and a list of about 20 additional factors, all cumulative.  These include charging, horse troops, opponents shieldless, the armour worn, type of weapon being used, regular/irregular. As per missile fire, there is no random factor added as a die roll.  Casualties are lost based on class as per missile fire.

If the strip losses are equal, another round of hand to hand fighting occurs immediately. If one side lost more strips, it takes a panic test.  On failure it routs during next rout phase.  If it passes, another round of hand to hand fighting occurs immediately.  If three rounds of hand to hand fighting occur with neither side routing, the lower class unit moves back 40mm.  If both units are the same class, it does not indicate what happens.  In my replay, I  assumed the unit with less strips, and then the attacker.

The interesting thing is that the factor score may change depending on whether is is round 1, 2 or 3 of hand to hand fighting. Some don't change e.g. number of strips, armor worn, opponent shieldless. Others do such as irregulars charging with the initiative get +2 in the first round but nothing for subsequent rounds; regulars get nothing in the first round but +1 in the second round and +2 in the third round.  Horses only get their specific bonuses in the first round. Long spears, pikes only get a +2 bonus in the first round.

Units in hand to hand fighting can be supported by other units to the rear but this factor only kicks in in the second and third round.

Skirmisher units are only 1 strip so once in hand to hand fighting, there will be no routs - one or both side will either be eliminated or both will survive 3 rounds.

Auxiliaries and cavalry in small strip units (they can have a maximum of 4 strips) goes differently.  If one side loses a strip in a round, then it undergoes a panic test.  As this is based on strips lost, they only have to roll higher than a 1 (first loss) or a 2 (for a second loss) on their die (d8 for the common C class).  So a unit will usually pass the panic test and fights continue into another round.  After 3 rounds, it is possible for a unit to be eliminated (unlikely) or more commonly be reduced in strips, pass all panic tests and then the units separate.  So routing does not happen very often for these units either.

But, between infantry battle troops, this is where routing can happen as the starting point for the unit is 5-8 strips, and panic tests are based on the total number of strips lost, so after a few rounds (also likely spread over 2 turns) the unit will need to be rolling above a  3 or 4 or even 5 on their die.  A lot harder to pass.
So routing is more common in the clash on infantry battle lines but will take several turns.  Cavalry/Light infantry losses occur faster with elimination rather than routs, and skirmishers disappear fast if in combat.

Wednesday, 30 June 2010

Callinicum refight with Fantasy Rules!

For musing on Fantasy Rules! and deployment for Callinicum see here.

Note: Unlike my previous ruleset replays, this is the first game I've done with FR! so be gentle.

For other games I've deployed the battlelines 25cm apart, FR!TCE recommends 12" (30cm) deployment distance apart.  Light Cavalry has the same move distance in FR! as in Armati and Warrior Kings and I used 25cm separation in those games. I'll maintain the 25cm, just to be consistent, and it is a scenario after all.

The Persians will go first.

Deployment; Persians on the left.

Turn 1

Persian

Moved the Lakhmid Light cavalry ahead 5.  Also moved up the Elite cavalry and the Reserve cavalry so there is a nice diagonal line of Persian troops with the Lakhmids in front at one end.  All out of missile range of the Byzantines.

Byzantine
Moved the infantry forwards and some heavy cavalry in support of the infantry.

End of turn 1

Turn 2

Persian

Move:
The Lakhmid light cavalry charge the Ghassanid light cavalry. The Ghassanid's throwing weapons result in one demoralisation.  Lakhmid's throwing weapons result in 2 demoralisations.
An Elite heavy cavalry moves up to about 1" from the light infantry.  The rest of the diagonal wave of cavalry move up slightly and form a block of 4 to oppose the Byzantine block of 4, and angling a bit more to the left.  Now within missile range of some of the opposing cavalry.

Melee:
The base CF for the Lakhmids is 3, while the Ghassanids is 2, but the Ghassanids get a +1 bonus for being charged, and both have stands with a -1 for demoralisation.
The result of the melees is the Ghassanid on the edge of the board is demoralised again and pushed back.  Otherwise, one Lakhmid received a demoralisation and one Ghassanid received a demoralisation.

View of the centre from the Persian side

Phase winner: The Persians (2 demoralisations) Vs Byzantines (3 stands demoralised/double demoralised). Morale clock is Persian 7, Byzantine 6.

Byzantine

Rally: no recoveries.
Firing: Gang up 2 missile Vs one opposition for the two blocks of facing heavy cavalry.  Managed to demoralise a Elite Persian heavy cavalry.

Demoralising is important - demoralised units cannot charge.

Move:
Moved the Skutatoi heavy infantry full distance.

Note sure what else to move - not familiar with the rules and melee effects.  Ah well - lets see how it all works!

Moved the Elite cavalry and the general into contact with opposing heavy cavalry.  Also moved some other heavy cavalry into the flank of the Persian cavalry and also a heavy cavalry to 'pin' an opposing heavy cavalry. I assume (not 100% clear) that the heavy cavalry that is flanked cannot countercharge as one of the charging units was outside its forward arc.

Melee:
The charging and counter charging heavy cavalry get +2 charge bonus.  Also +1 for being armed with missile (although not stated that countercharging units get the missile bonus, countercharging units get the charge bonus so I assume units that are countercharged are counted as being charged.
The heavy cavalry are base CF4, the elite base CF5.
The elite charging the flanked unit gets +1 for the flanker.

Persian flanked unit double demoralised.  Cavalry follows up.
Persian unit opposed by general loses and is double demoralised.  Cavalry followup.

I think the Ghassanids are not going to fair so well in melee...and it wasn't so bad - the double demoralised stand was destroyed. The demoralised stands were double demoralised.  Lakhmids must followup.

Again, not clear in the rules but implied; I'm assuming that for determining the phase winner, you count new demoralised units.  Inflicted a demoralised result onto an already demoralised unit (resulting in a double demoralised unit) does not count towards determining the phase winner.

Phase winner: Byzantine.  Clock is Persian 6, Byzantine 6.

End of turn 2

Turn 3

Persian

Rally: The Lakhmid's demoralised result removed (rolled an 8 for both!), demoralised heavy cavalry successfully rally, the doubled demoralised heavy cavalry fail.
Firing: No result.  Even did some ganging up to no avail.

Move:
Far left Lakhmid turns to flank Ghassanid.
Elite heavy cavalry charge opposing light infantry and cavalry.  Light infantry throwing weapons no effect.  Byzantine cavalry counter charge.

Realise that maybe I should not just charge in but it is a learning game and there is not much room on the flanks.

Melee:
One Byzantine Ghassanid destroyed, one Persian Lakhmid demoralised.
Light Infantry double demoralised and cavalry followup.
The two Persian Elite Cavalry facing two Byzantine cavalry result in one double demoralised stand each.
The battle with the two double demoralised Persian elite cavalry result in the routing of the Persian cavalry.  Byzantine cavalry followup.

Phase winner: Byzantines.  Morale clock now Persian 5, Byzantine 6.

Byzantine

Rally: All attempts unsuccessful.
Firing: All firing caused nothing.

Move:
Moved Elite heavy cavalry and another heavy cavalry to surround a Persian heavy cavalry.  Throwing weapons demoralise both charger and counter-charger.
One heavy cavalry makes it to the flank of a Persian elite heavy cavalry.

Melee:
Ghassanid light cavalry destroyed (no surprises here).
Light infantry causes demoralisation on opposing heavy cavalry.
The two Persian elite cavalry facing the two Byzantine cavalry resulted in each of the double demoralised stands being destroyed (one each side).
The surrounded Persian heavy cavalry is destroyed.

Phase winner: Byzantines.  Morale clock now Persian 4, Byzantine 6.

End of turn 3

Turn 4

Persian

Rally: Rallied off a heavy cavalry demoralisation.
Firing: All firing caused nothing.

Move:
Two Lakhmid light cavalry surround the light infantry while the third moves as far as it can round the back of the light infantry.
The Elite heavy cavalry with the general (doesn't count as a move against the morale clock limit) turns and charges a heavy cavalry in the flank.  Enemy unit turns to face but cannot counter charge.
The heavy cavalry group facing the heavy infantry decide to oblique movement with two of them and charge one end of the heavy infantry line with one heavy cavalry making it to the flank.  The heavy infantry will have only +1 in support.  Interesting game tactic.
That is the 4 allowed moves (plus the move with the general).  I like the effect of the Morale clock.

Melee:
Light infantry destroyed.  Not unexpected.
Elite heavy cavalry with general destroys opposing heavy cavalry.  It over-pursues, is demoralised and charges into another heavy cavalry.
The heavy cavalry attacking the heavy infantry loses the melee and is demoralised.
Phase winner: Persians.  Morale clock is Persians 4, Byzantines 5.

Byzantine

Rally: All fail.
Firing: Demoralises a heavy cavalry.
Move: Only move is move the heavy cavalry stands on the left flank to contact the Persian heavy cavalry in melee with the heavy infantry.  One of them is demoralised and so cannot charge - it simply moves out the way.

Melee:
The Byzantine heavy cavalry that was contacted due to over-pursuit is double demoralised.
The General and Elite heavy cavalry cause a double demoralisation on opposing Persian heavy cavalry but it cannot be pushed back due to the infantry at its back and so is destroyed.
The other Elite heavy cavalry manages to also cause a double demoralisation (outscoring by only 1 the opposing Persian cavalry).  The unit was already demoralised so it is destroyed.

Phase winner: Byzantines.  Morale clock now Persians 3, Byzantines 5.
Persian Morale clock now at 3: Persians must demoralise 1/4 remaining units.  Persians currently have six units and demoralise two of the Light Cavalry.

 End of turn 4

Turn 5

Persian
Rally: One light cavalry is undemoralised.
Firing: Nothing.
Move: Moved some of the light cavalry and an Elite heavy cavalry on the left flank of the field.
Melee: Destroyed the Byzantine heavy cavalry facing the elite heavy cavalry and general.
Phase winner: Persians. Morale clock now Persians 3, Byzantines 4.

Byzantine
Rally: No effect.
Firing: Nothing.
Move: Moved the heavy infantry and an elite heavy cavalry to attack the Persian heavy cavalry on the left flank.  Persian turns to face the elite heavy cavalry that contacted on the side.
Melee: The only melee is as a result of the move.  The Persians lose. They are already demoralised and so are destroyed. Cavalry pass a rally roll and so do not over-pursue.
Phase winner: Byzantines. Morale clock now Persians 2, Byzantines 4.

Turn 6

Persian
Rally: Removed demoralised from Elite heavy cavalry.
Firing: Demoralised an Elite heavy cavalry.
Move:  The Elite heavy cavalry with the general charges the Byzantine Elite heavy cavalry just demoralised in firing.  A Light cavalry also charges the flank.  With the last movement allowed, the Persians move the other elite heavy cavalry closer to the action.
Melee:  The Byzantine elite heavy cavalry loses melee and destroyed.  Persian heavy cavalry passes rally roll and does not over-pursue.
Phase winner: Persians . Morale clock now Persians 2, Byzantines 3.
Byzantine morale now at 3: Byzantine must now demoralise 1/4 or remaining stands (one of five stands) - demoralises a Skutatoi heavy infantry.


Byzantine
Rally: no effect.
Firing: Nothing to fire at.
Move:

About faced the Skutatoi heavy infantry (i.e. 180 degrees).
About faced the Elite heavy cavalry with general and moved slightly forwards.
About faced the demoralised heavy cavalry and retreated (can't charge and was just in range of a Persian unit).
Melee: None.
Phase winner: No phase winner

End of turn 6

Turn 7

Persian
Rally: no effect.
Firing: Nothing in range.
Move: Rearranged the cavalry near the Byzantine Skutatoi to get them together.
Melee: None.
Phase winner: no phase winner

Byzantine
Rally: A cavalry stand is undemoralised.
Fire: An elite heavy cavalry is just in range of a Persian stand...but misses.
Move: Rearranged cavalry and wheeled the Skutatoi heavy infantry.
Melee: None.
Phase winner: no phase winner

End of turn 7

Turn 8

Persian

Rally: No effect.
Firing: no effect.
Move: Elite heavy cavalry charges a cavalry that then counter charges.  General comes too.  Other move is to about face the other elite heavy cavalry.
Melee: Only melee has no effect (scores were equal).  Oops - pinning hopes on a result here and possible morale clock reduction.
Phase winner: no phase winner

Byzantine
Rally: none.
Firing: no effect.
Move: Wheeled the Skutatoi heavy infantry again.  Charged a cavalry with general into the flank of the Persian elite heavy cavalry already in melee.  Now have a General and stand versus general and stand.  It seems to happen a lot in my refights.
Melee: Byzantines win and Persian double demoralised and pushed back.
Phase winner: Byzantine. Morale clock now Persians 1, Byzantines 3

End of turn 8

Turn 9

Persian
Rally: Double demoralised cavalry in melee rallies.
Firing: No effect
Move: An Elite heavy cavalry rotates and manages to charge the Byzantine elite heavy cavalry (with general) in the flank.  Enemy doesn't turn but now the Persian has an advantage of a +1 for a flanker.
Melee: Persians lose and are double demoralised and pushed back.

 General on General

Phase winner: Byzantine. Morale clock Persians 0, Byzantines 3

End of game as Persian morale clock is 0.

End of game position

Byzantines have lost 330 points so Persian score is 330.
Persians have lost 360 points of units and their morale clock is 0 so Byzantine score is 360+50 (for Persian morale clock)=410.
Difference is less than 100 so marginal victory to the Byzantines.

Verdict
The game went on longer than I am used to.  Not longer in time, but longer in that it carried on until there were few stands left.  Normally the game is over when 50% or so are gone (this is an artifact of the other rules or I applied that rule).  But these rules are fun and fast.  They are simple but not simplistic - there is distinctive troop types and diverse tactical options.  While the flanking of stands occurred often - and with my Armati background flanking is death - it was not as bad as I expected ad worked fine.  Troops have limited movement options, which I like. The morale clock didn't dictate command and control too much until the end game but it worked fine.  I would play this again.  The results 'felt' right. Fast and plays fine on a 2'x2' (though I would potentially use less troops to provide some flanks and also possibly reduce the morale clock to 6/3 to account for the smaller board). In my opinion, unmodified (except for troop types), Fantasy Rules! is an excellent fast play historical rule set.

Thursday, 17 June 2010

Fantasy Rules! overview and Callinicum deployment

Background
As I was looking for fast play ancient rules a few years ago, I found a discussion that mentioned using a ruleset called Fantasy Rules! for historical play. I have played and own rules that originate with a fantasy version (Warmaster Ancients comes to mind) but zero interest in the rules they were derived from. So, not being a fantasy player at all - and the only few people I know that do play fantasy use Warhammer Fantasy Battles - this led to lots of interesting reading of various fantasy rules reviews and discussions.  My aim was for quick play, and I also wanted a set that was based around historical concepts that had fantasy elements mapped to it.  Fantasy Rules seemed to consistently top the list (Age of Might and Steel has potential too, which is why it is also on my list of rules to play).  Fantasy Rules! version 3 is the latest version, but Chipco have recently released FR!TCE which is a tournament version of FR!3.  Simplifying, it is a cutdown version of FR!3 without lots of the magic and characters and a very good army builder based around characteristics, rather than lists.  I'll be using FR!TCE although for my purposes, it is the same as FR!3 (just not so many pages to look through for rule clarifications). 

Why not use Days of Knights? Days of Knights (with version 2 the most recent) is also from Chipco, based on the FR! mechanisms but for (historical) late medieval battles.  There are a number of changes between the two, some large, some small.  for instance: command and control is different, movement is more restrictive, DoK has a panic check (FR! has sort of an equivalent with a double demoralise on cavalry charged units).  DoK double demoralise is not as bad.  DoK unit characteristics (combat factor, rally etc) are very specific to the period. All in all, DoK, from what I read and can see, captures the period specific flavour very well. DoK uses characters to manage command and control and I really like the morale clock in  FR!3.  FR!3 is more 'generic'.  I think I will be better off using FR!3 with minor mods rather than trying to make DoK, a period specific ruleset, work for something in 531AD, over 700 years earlier than it was designed for.

FR!/DoK links and reviews

A FR!: TCE description and where to purchase is at the Chipco FR!TCE webpage.  Reviews of FR!2 can be found at RPGnet and The Miniatures Page. The FR!2 Annex (Oct 2013: updated link to archive.org as original site no longer online) contains a whole lot of information for FR!2, including the FR!Ancients variant.

Days of Knights description and where to purchase is at the Chipco Days of Knights webpage. Here is a link to a The Miniatures page review and the Grognards review . The Ken Blackley DoK website  has some DoK information, including a review.

Lastly, the chipco yahoo group  has an active discussion on Chipco games.

Changes
I really want to limit the changes I make to FR!3 to make it fit to the game. One change I was going to do was restrict changing facing movement allowance.  FR! allows left faces, right faces and about faces for a cost of 1/2 the movement rate.  DoK has it costing the full move.  I was going with the full move cost.  but I have changed my mind - why implement what I think onto the ruleset.  I would prefer to be as generic as possible.The other changes are:

1.  Light Cavalry has a LOT going for it in FR! - x2 flank attacks etc.  Mounted (as a unit class) in FR! are mounted warriors.   In DoK, FR! Light cavalry equate to the Horse Archer units. So I will be going with the stats for the Callinicum Light Cavalry as per FR! Mounted (CF2, RF7+) but allow them to have some of the FR! light cavalry options at a total unit cost of 30: disengage from Infantry, Free facing and formation changes, Interpenetrate Cavlary, arm with bow or throwing weapon for extra 10 pts.  Maybe a better way to phrase it, thinking on it further, is to use the FR! Light Cavalry but reduce to 30pts by making it RF7+ and removing the doubling of flanking bonus.  Much better.  FR! Light Cavalry I would use only for specialist Horse Archers.  I'll make the Lakhmids elite as they performed much better than the Byzantine Ghassanids on the day.

2. Light Infantry as a class of unit doesn't really exist in FR! although Militia comes close.  I'll base it on the Light MAA class from DoK to represent the Isaurian Light Infantry. So light infantry is 30pts, MV 4/3 (no penalty for difficult), CF2, RF6+, +1 bonus when charged, armed with throwing weapons.

3. The Skutatoi are spear and bow melee heavy infantry.  I am going to use the spear class but add bow (not in FR!TCE but could be army specific in FR!3) for 10 points.  This should also make the cavalry  a bit fearful about charging them, as historically.

4. The Morale clock starts at 7 with a penalty when you reach 3.  I think Callinicum will be about 70%-80% the points of a normal 1000pt game (I'll work this out when I work out the actual force composition).  The Persian have 4 units and the Byzantines have 6 (although if you combined all the 6 stands of heavy cavalry into one unit there would only be 4).  I was going to start use a morale clock of 6/2 rather than 7/3 but have changed my mind - will stick with 7/3 and see how it does.


Units

Persian
6 Heavy Calvary (in two units of 3 stands each) with bows (300 pts)
3 Heavy Cavalry with bow, elite (+1RF, +1CF) (180pts)
3 Light Cavalry with throwing weapons, elite (+1RF, +1CF) (120pts)
1 Hero General (+2RF, +2CF) (190pts)

Total points:  790

Byzantine
3 Skutatoi: Spears with Bow (120 pts)
4 Heavy Calvary (in two units of 2 stands each) with bows (200pts)
2 Heavy Cavalry with bow, elite (+1RF, +1CF) (120pts)
1 Light Infantry (30pts)
3 Light Cavalry with throwing weapons (90pts)
1 Hero General (+2RF, +2CF) (190pts)

Total points: 750

Deployment
My troops are based for WRG 7th/DBM.  FR!3 really works best with 40mmx40mm bases.  The cavalry should be OK as 40mmx30mm - but will have to fudge it if a line all faces to the left or right - and I simply added an extra stand of infantry behind each other to create 40mmx40mm bases.  Otherwise, the deployment will be identical to that for Armati, Warrior Kings and Justified Ancients.

Tuesday, 15 June 2010

Callinicum refight again with Justified Ancients

Why a replay? and some house rules
I set up for the next rules - Fantasy Rules! -  had the troop types nearly worked out but Justified Ancients just kept bugging me at the back of my mind.  Although I suggested some minor changes at the end of my last replay, the one that keeps sticking in me is to make LO mounted also suffer disorder.  This will help a lot get the game moving a bit faster (disordered units are -1 in melee).  currently there is only a 2 in 9 change of 2 equal mounted units ever casing damage (a 1 and a 3 or a 3 and a 1).  But a +1 difference causes a push back but only disorders CO.  So a +1 difference will have an effect between mounted units.  I will also extend the support definition for +0 result to include adjacent stands (adjacent stands cannot be in melee - the order of choosing melee to roll for will be important).  Currently supported is only for stands with stands in support directly behind.  +0 effect is supported stands will push back unsupported stands.

OK now I've just double checked the rules and +0 unsupported push back only happens between foot units.  So now I am thinking that it should be extended to all non-skirmisher, not just foot.  lastly, for +1, pushed back doesn't happen if you outnumber the enemy 2-1.  So I am thinking supported Vs unsupported are not pushed back on a +1 result either (but would suffer all the other results such as disorder)  So the summarise my rambling I am going to use these two house rules:
  • Mounted LO receive disorder just like CO troops.
  • if one or more stands are adjacent (side to side contact or directy behind - not limited to corner-to corner) to a meleeing unit, then the stand is counted as supported for purposes of the +0 result.  Supported is not limited to foot, but is available to all non-skirmish stands.  Note the number of supporting stands doesn't count - a stand is either supported or not (you don't "outsupport" an opposing stand just because you have more stands in support).  A supported stand versus an unspported stand is not pushed back on a +1 result. 

Deployment is the same as last time.  Breakpoint for the armies is 1/3 (rounded up) rather than 50% I used in the first replay.  So breakpoint for Persians is 4, Byzantines is also 4.  A general does not count in working out the breakpoint, but will count as a lost unit if lost (similar to Armati).


Turn 1

Persian Lakhmid move up 5" to block Ghassanids.  Wheeled the elite and reserve cavalry
Byzantine attempted to move up Ghassanids but only one passed orders.  Moved up some heavy cavalry and the Skutatoi.


Turn 2


Persian
Lakhmid charges light infantry with no effect.
Moved up all the heavy cavalry in the middle.

Byzantine
Ghassanids past orders and moved up - one in support of the light infantry.
Moved up Skutatoi and supporting heavy cavalry.
Missile fire pushes back  elite heavy cavalry.
Light infantry pushes back light cavalry.


Turn 3

Persian
Lakhmid charges Ghassanids that fire and evade, one charger continues.
elite heavy cavalry charge and one pushed back. in melee, one flees (and is additionally disordered using my house rules).
Two heavy cavalry on the left charge opposing heavy cavalry.  In melee, one flees (and is additionally disordered using my house rules).
Charging Lakhmid pushed back.

Note: this was a a result of the house rule - the melee result was +0 but the Ghassanid is supported and the Lakhmid is not so it is pushed back.

Lakhmid  routed by light infantry.  Infantry do not pursue.

Note result was +2 but Lakhmid was fatigued so routed rather than fleeing.

Byzantine
Reforms the two heavy cavalry that fleed (and removed disordered - note that this is a 4+ order, without disorder, it could have been a  3+ order to about face).
Some charges that returned fire resulted in pushback.

But in another score for the house rule (but it is because the house rules exists that the move happened anyway) - an elite heavy cavalry moves up to support a disordered heavy cavalry in combat.  The general also moves into support.  The result was +0 but as the Byzantine is in supported and the Persian is not, it results in a push back.

Turn 4
No picture for turn 4 - don't know what happened to it.

Persian
Moved up some heavy cavalry
A Lakhmid charges a Ghassanid, the latter fires and evades.
The one combat resulted in the Byzantine heavy cavalry fleeing.

Byzantine
Successfully reforms fleeing heavy cavalry
Two heavy cavalry charge the elite heavy cavalry with the general. One Byzantine routs but the one with the general gets a pushback.

Turn 5
No picture for turn 5 - don't know what happened to it.

Persian

Lakhmid charge opposing Ghassanid, ,the latter receive and fire as if the evade they will be off the table.  The Ghassanid stand routs.
Elites heavy cavalry charge opposing heavy cavalry who are pushed back.
Heavy cavalry charge depleted heavy cavalry but no damage received anywhere.
The two generals fight it out and the Persian cavalry and general are routed.

With the general routed, I am assuming all order rolls are at -1.


Byzantine
Elite heavy cavalry charges a heavy cavalry that flees.

Turn 6

Persian
Where possible, moved into melee, managed to rout a heavy cavalry.

Byzantines
Managed to rout a heavy cavalry.

Note, the elite heavy cavalry is directly  behind a Persian heavy cavalry that fleed last turn.  But because charging units are fatigued at the end of the turn, the Byzantines can't charge again. It also meant that the Persian had a chance to reform (which it did), which meant it would not be hit in the rear, and also that the disorder is gone.

Regardless,  the Persians have lost 4 stands (3 plus the general) and reached their breakpoint.  The Byzantines have lost 3. End of game.


Verdict
Liked this game a little bit better  - maybe it was because I 'got' the tactics and how the interactions worked better than the first game.  There wasn't really any more damage. The rules cry out for tweaking.  If it was me (and the game would not be JA anymore), I would
  • do away with the turn sequence and go with the flow of newer games and do move, missile and combat per stand - this would make the game VERY dynamic!
  • Also include an order modifier for adjacent stands - maybe +1 for each adjacent (not behind) stand and can order all at once (must move/charge together).  I would increase by one the success number for ALL order types (move/charge/wheel/reform etc).  It would keep stands together. 
  • I would possibly also not do lining up of stands (just a personal thing - never liked it but would keep lining up for a semblance of JA).
  • Allow counter charging (as per John Davis experimental rules)
  • Get rid of push backs - push backs don't do much in this game; in DBx push backs are important as it opens up the the possibility of support for adjacent melees with the bonus -1 to that melee.   Alternatively, give a +1 for one or more adjacent stands and keep push backs.
  • Everyone except Skirmishers and LO foot can be disordered.
  • Support is defined as if one or more stands are adjacent (side to side contact or directly behind - not limited to corner-to corner) to a meleeing unit, then the stand is counted as supported for purposes of the +0 and +1 result. The number of supporting stands doesn't count - a stand is either supported or not (you don't "outsupport" an opposing stand just because you have more stands in support).   Support is applied for ALL stands except skirmishers.
As I said before , the rules would no longer be JA.  Maybe try these changes later on, after I've tried a few more other rules.

Wednesday, 9 June 2010

Callinicum refight with Justified Ancients

Introduction
For deployment see here.  The only other thing is there is nothing in the rules about when one side can claim victory.  I will work on a simple 50% loss rule.  At the end of any player turn, if a side has lost more 50% or more of its starting units, it loses.  if both sides would lose, the side that has lost the most units loses.  If this is equal, call it a draw.  With this simple rules, Persians will lose if they lose 6 or more stands, Byzantines lose if they lose 7 or more stands.  A lost general will count as a lost stand.

The rules state that after a charge, the resulting action (fire, evade etc) is done immediately for the charged stand.  This make a lot of sense to me.  But then in the example, all charging is done for a side AND THEN the resulting actions are done for each charged stand.  I prefer the former and have done this throughout the replay.  Charges should be done first before all other movement but I did some moves before charges if I didn't think it would effect the outcome.

The main points that may help in this replay is
  • Each stand must pass a d6 roll to perform a movement activity - 1+ for a straight move, 2+ for a small wheel or a charge, 3+ for a reface.  Major modifiers are +1 for trained, -1 for untrained, -1 for poor and -1 for each 6" further than 6" from the general.  for example trained units charging within 6" of the general are 1+ (no need to roll).  The Ghassanids are poor and so getting them to move is not a guarantee.
  • charging units are fatigued at the end of the turn.  Fatigue is removed at the end of following turn is not in melee.  Fatigued units cannot charge, flee or evade.
  • Melee is based on opposed 1d3 rolls. 0 is no effect, 1 is push back, 2-3 is flee and depleted (take a hit), 4+ is flee and dispersed (routed).  Two depletions (hits) will rout a stand.  The Elite Heavy cavalry can take 3 depletions.

Persians move first in all the turns.  Generals are +0 each.

 Deployment - Persians on the left

Turn 1

Persian

MOVE
Lakhmids move forwards to 6" from the Ghassanids (6" is charge reach - 5" move +1" bonus for a charge). No orders roll; move is a 1+ except for furtherest one (as it is  6" from general).
Elite Heavy Cavalry wheel 45 degrees to their left.  Again, no orders roll.
Reserve heavy Cavalry wheel about 30 deg to their left.

Byzantine

MOVE
Byzantines move up the Skutatoi. and the 2 units of cavalry next to them.
No other movement.

 End of turn 1

Turn 2

Persian

MOVE
A single Elite Heavy Cavalry stand charges the opposing Byzantine elite heavy cavalry (with general).  The elite heavy cavalry receive and fire.  Result is Persian's pushed back (and will be fatigued at end of turn).

Note get extra 1" to move if charging.

Remaining 2 Elite Heavy Cavalry wheel slightly to right and move 4" to close the gap.
The Reserve heavy cavalry wheel to the left (now aligned to the rest of the Persian's) and move straight ahead.

Note: I use green markers are fatigue. When it happens I'll use flesh rings for depleted and a black ring for disordered (only applied to Skutatoi as they are only CO troops on the board.  Only CO can be disordered).  I get a bit confused about already fatigued units and ones that should be fatigued at the end of a turn, so what I took to doing after this turn was placing a little brown tuft marker behind stands that should be fatigued at the end of a turn.  At the end of the turn I then removed fatigue markers from applicable stands and then changed the brown tuft into a green fatigue marker.

Byzantine

MOVE
Skutatoi moved up 2".
Elite heavy cavalry (with general) charges opposing Persian heavy cavalry. Persian Elite heavy cavalry receive and fire - byzantine pushed back (and fatigued at end of turn).

Note: missile firing at Heavy Cavalry will only ever result in a push back - never a depleted (need a 7 for disorder - +1 mounted, -1 heavy means a 6 is the most that can be rolled).

The other Elite heavy cavalry and the 2 heavy cavalry to its left charge the opposing reserve heavy cavalry.  They receive and fire  with the result the Elite heavy cavalry and middle heavy cavalry pushed back (and fatigued at end of turn).  The remaining heavy cavalry can melee.
Moved the remaining right flank heavy cavalry and Light Infantry up about 2" to provide better flanking opportunities.

MISSILE FIRE
No results.

MELEE
heavy cavalry vs heavy cavalry


Note all combat is 1d3

Byzantines roll 1, +1 horse, +1 charging = 3.
Persians roll 2, +1 horse = 3.
Result - conform and continue.

Note: The Byzantine heavy cavalry is fatigued for charging.

End of turn 2

Turn 3

Persian

MOVE
Persian middle elite heavy cavalry charges the opposing heavy cavalry that receives and fires - result is push back.
Other elite heavy cavalry tries the same thing.  Opposing heavy cavalry receives and fires - result is no effect.
left most light cavalry charges Light Infantry that receives and fires - result is depleted and pushed back.
For the block of cavalry on the left - moved the one of the left up to maybe flank attack the nearby byzantine heavy cavalry (needed to roll for this order).

MISSILE FIRE
Lots available.  The only result was to push back one of the byzantine heavy cavalry.

MELEE
Heavy cavalry vs reserve heavy cavalry - Persian wins +1 = push back with followup
Persian elite heavy cavalry vs heavy cavalry - Persian wins (Persian rolls 1, +1 horse, +1 general, +1 charging = 4; byzantine rolls 1, +1 horse) +2 = Byzantine flees, depleted, fatigued.  Persian may pursue and do so.
All charging units are now fatigued.

The 'zig-zag' that is happening in the centre

Byzantine
Options limited as many units are fatigued.

Note: I am starting to get into these rules - the push backs and fatigue is what did our head in last time but I think I am beginning to understand how it shapes the tactics of the game.  it is a lot more dynamic than Armati.  I seem to remember DBM100 (and DBA) plays with similar dynamism (although the mechanics are different).

MOVE
Skutatoi move up 2"
Ghassanid Light Cavalry move up to aggressively (well, as aggressively as they can!) threaten opposing Light Cavalry but only one passes the move order die!  Oops.

MISSILE FIRE
Results in some push backs.

MELEE
Only one heavy cavalry vs heavy cavalry.  Byzantines win by 1 - result is push back with followup
All byzantine fatigue markers (except the heavy cavalry in combat) are removed.

End of turn 3

Turn 4


Persian

MOVE
Light Cavalry charges opposing Ghassanid (needs a 3. ok).  Ghassanid fires and evades with no missile .  Lakhmid light cavalry continues its charge, and as it moves 6" when charging, ends up contacting another Ghassanid which must just receive.
A heavy cavalry attempts to charge an opposing heavy cavalry through gap  Byzantine heavy cavalry receives and fires.  Result is no effect.
A heavy cavalry attempts to charge opposing elite heavy cavalry.   Elite heavy cavalry receives and fires.   Result is no effect.
Right most heavy cavalry stands move up to align with the other heavy cavalry but only one is successful on the order roll.

MISSILE FIRE
Every heavy cavalry not in combat can missile fire.  Not one result.

MELEE  (from right to left to make it easier to follow)
Light Cavalry  - Persian Lakhmid wins by 1 - push back and followup.
Heavy cavalry vs elite heavy cavalry - elite heavy cavalry loses by 1- push back and followup.
Heavy cavalry vs heavy cavalry - Byzantine wins by 1 - push back and followup.
Heavy cavalry vs heavy cavalry - Byzantines lose by 2 - flee but as fatigues are dispersed. Persians decide to pursue.

Fatigue is important.  cannot be removed if in melee.

The Persian left with the breakthrough heavy cavalry in the middle of the picture

Byzantine

MOVE
Light Cavalry flank attacks the Lakhmid.  Passes order roll (4+).
Fleeing heavy cavalry attempts to wheel 180.  Successful
Elite heavy cavalry with general charges opposing elite heavy cavalry that receives and fires - no effect.

MISSILE FIRE
The Skutatoi managed to Pushed back two heavy cavalry facing them.

MELEE (from right to left for convenience)
Heavy cavalry vs heavy cavalry - Byzantine wins by 2 - Persian cannot flee (fatigued) so dispersed.  Byzantine does not pursue.
Elite heavy cavalry vs heavy cavalry - Persian wins by 2 - Byzantine flees, depleted.  Persian purses.
Elite heavy cavalry with gen vs elite heavy cavalry - equal score. No effect.
Light Cavalry into Light Cavalry flank - equal score. No effect.

Note that Skirmishers have no flanks for melee purposes so the Ghassanid do not get the +2 for a flank attack in this melee.

Light Cavalry vs Light Cavalry - Ghassanid wins by 1.  Push back and followup.

End of turn 4

Turn 5

Persian

MOVE
The breakthrough heavy cavalry rolls to wheel > 45, fails.
Elite heavy cavalry charges heavy cavalry that receives and fire - no effect.
Elite heavy cavalry with general charges heavy cavalry that receives and fires - no effect.
Lone Lakhmid Light Cavalry to the rear and far left charges opposing Ghassinid Light Cavalry - receives and fires - no effect.

MISSILE FIRE
Only into the rear of fleeing elite heavy cavalry - pushed back

MELEE (from right to left for convenience)
Elite heavy cavalry vs elite heavy cavalry with general - Byzantines lose by 1 - push back and followup.
Elite heavy cavalry vs heavy cavalry - Byzantines lose by 1 - push back and followup.
Elite heavy cavalry with general vs heavy cavalry - Persians win by 2 so heavy cavalry depleted and dispersed (as fatigued).  Persian does not pursue.
Middle Light Cavalry vs Light Cavalry - loses by 1 - push back and followup.
Rightmost Light Cavalry vs Light Cavalry - wins by 3 - flees and dispersed.  Persian does not pursue.

After Persian turn 5 with a number of gaps in the Byzantine line

Byzantine

MOVE
Skutatoi - 2 out of 3 manage to move forwards. 
Heavy cavalry moves to threaten flank. (cannot charge as more than 45 degrees out of arc)
Elite heavy cavalry with the depletion attempts to wheel 180.   Successful.

MISSILE FIRE
Only result is push back to the Persian middle heavy cavalry (from the depleted elite heavy cavalry).

MELEE (from right to left for convenience)
Elite heavy cavalry with general vs elite heavy cavalry - equal. No effect.
Heavy cavalry vs elite heavy cavalry - equal. No effect.
Light Cavalry vs Light Cavalry flank - equal. No effect.
Light Cavalry vs Light Cavalry - equal. No effect.  Damn - just a +1 would get rid of the Persian Cavalry as it is flanked.

End of turn 5

Turn 6

Persian

MOVE
Heavy Cavalry on right flank attempt to charge Skutatoi.  All fail their orders roll.
Heavy cavalry opposite elite heavy cavalry charge.  Elite heavy cavalry receives and fires - result is no effect.
Heavy cavalry to the right of this moves ahead so can charge elite heavy cavalry in the flank next turn.
Heavy cavalry with general about face.
Light cavalry on extreme left attempts to about face but fails.

MISSILE FIRE
Only result is to push back a Skutatoi.

MELEE (right to left)
Heavy cavalry vs elite heavy cavalry - Persians win +2.  flees, depleted, fatigued. Persians followup.
Note - Elite heavy cavalry are high morale and it takes 3 depletions before they are dispersed.
Elite heavy cavalry vs elite heavy cavalry with general - equal.  no effect.
Elite heavy cavalry vs heavy cavalry - Persians win +2 - flees, depleted, fatigued. Persians followup.
Light cavalry vs light cavalry to front - Persians win by +2 - flees offboard so count as routed.  Persians followup.
A lot of fatigue is removed.


Byzantine

MOVE
leftmost heavy cavalry charges heavy cavalry in the flank.  Can only receive.
Skutatoi charges same heavy cavalry that receives and fires - no effect.
Far left Skutatoi charges opposing heavy cavalry that receives and fires with a push back.
Middle Skutatoi moves up 2".
Elite heavy cavalry successfully about faces.
Heavy cavalry with one depletion successfully about faces.
Light cavalry about faces.

MISSILE FIRE
A few push backs.

MELEE (right to left)
Elite heavy cavalry with general vs elite heavy cavalry - equal. No effect.

 
 Heavy cavalry vs heavy cavalry in flank. Byzantines wins +4.  dispersed.  Byzantines do followup and contact next heavy cavalry (but this is not a flank attack)


End of turn 6

Turn 7


Persian

MOVE
Rightmost heavy cavalry charges Skutatoi that receives and fires with no effect.
Heavy cavalry charges opposing elite heavy cavalry with 2 depletions that receives and fires - push back.
Other heavy cavalry moves up to hopefully charge the elite heavy cavalry in the flank next turn.
Elite heavy cavalry charges heavy cavalry with 1 depletion vthat receives and fires with no effect.
Elite heavy cavalry with general moves to behind elite heavy cavalry with general.


Elite heavy cavalry with general moves to behind elite heavy cavalry with general.


Far left Ghassanids turn 90 degrees.

MISSILE FIRE
Only result is to push back elite heavy cavalry with 2 depletions.

MELEE (right to left)
heavy cavalry vs heavy infantry - no effect
heavy cavalry vs heavy cavalry  - Byzantines win by +1 - push back and followup.
Elite heavy cavalry vs elite heavy cavalry with general - equal.  no effect
Elite heavy cavalry vs heavy cavalry - no effect.


Byzantine

MOVE
Heavy cavalry charge elite heavy cavalry with two depletions that receive and fire - no effect.
Heavy cavalry to the side also charge in.  Note is not a flank attack.
Elite heavy cavalry with general charges the rear of the elite heavy cavalry with general.
Light cavalry charge heavy cavalry with one depletion in the flank.

MISSILE FIRE
none.

MELEE (right to left)
Heavy cavalry vs heavy cavalry - Byzantines win +1 - push back and off the edge so routed.  Byzantines followup (so a push back by the Skutatoi results in a dispersal).
Heavy cavalry vs heavy infantry - Persians win by +1 - push back and followup.
Heavy cavalry vs heavy cavalry (with 2 depletions) to front - Persians wins +1 - push back and off the edge so routed.
Elite heavy cavalry with general Vs  rear of the elite heavy cavalry with general - Persians win +3.  Byzantines dispersed.
Elite heavy cavalry vs heavy cavalry (with no depletion) - Byzantines win by +1 - push back and followup.

End of game - Byzantines have lost 7 stands (6 plus the general).  Persians have lost 3.

 End of turn 7 and the game

Verdict
Hmm...not sure I actually enjoyed the game.  Party because I am not that familiar with the rules and so tactics I thought would work didn't really seem to.  Not sure how to use Skirmishers and would need to think on it further - maybe a bit more of a test using them.  Also, there is no benefit to maintaining any line formation.  In DBx there is a -1 bonus for flanking stands, so it encourages you to have some friends on either side of a stand.  Warrior kings gives a +1 benefit to passing reaction tests for each friendly stand in contact.  Fantasy Rules! (and Days of Knights) gives a +1 combat bonus for a friendly adjacent stand. Armati has divisions that force you to move and melee in multiple stand units (and a combat system where 2 units can both  do a full attack against a single stand enemy making one stands vulnerable)  Enough examples but JA has nothing that promotes any stand being next to another, other than the obvious to prevent flank attacks.  But that is true of almost any ancient ruleset where you need to protect the flanks.  Maybe it is just me.  I really want to like it.

Push backs aren't really my thing either.  Maybe it is because every heavy unit has missiles as well so there is a lot of push backs but it certainly seemed that every turn every second unit got pushed back either from missile fire or combat.

I like systems where combat will inflict damage - Armati is a good example where melee will almost always inflict a hit on one of the involved stands.  It is not east to remove hits.  Warrior Kings - it is quite easy to inflict a hit, and most bad reaction tests result in more hits.  Hits cannot be removed.  JA has a melee system where fairly equal units (of which most of the cavalry were) will find it difficult to inflict damage on one another.  DBx doesn't either, but the -1 for adjacent stands and the push back/followup mechanism assists in making a more decisive result to combat.  I think it has more to do with the fact that it was an mostly cavalry battle with lots of missile and all similar units that made JA perform not as well as i expected.

How would I fix it? Some simple things come to mind - a +0 result is a push back if outnumbered (i.e one side has more adjacent units than the other).  Horse units (not skirmishers) can be disordered just like CO units. Possibly add in Elite units but not a simple +1 to melee roll (that is too much) but maybe something like nt pushed back if outnumbered on a +0 result or if they score less than their opponent in melee, they add 1 to their result.  Three training levels for orders seems like a lot - I think I would just have trained or not where trained is +1, otherwise -1 (naturally, this wold lead me to rewrite the orders table so all orders are  Other than that,  the things I would like to change take it away from JA (such things like not lining up units).  I do like the rolling for orders, I like the missile system (d6 and fire after moving). I do like the d3 combat system and results and how fatigue works and is integral to the game structure - all very elegant but from the above comments I would like to tweak combat for next time. I am tempted to come back to Justified Ancients with Callinicum and try out a couple of the ideas above.


Oh, and the game probably took nearly an hour.  Hard to tell writing it up as I go.