Introduction
This is game 72 in play testing my ancient rules by
replaying historical battles. I started
by using my own rules Ancients Battlelines Clash (ABC). A friend is looking for a fast game an so I
went back to where it all began - ABC was originally based on Bill Banks
Ancients (BBA). So started with BBA and then judiciously added some of the ABC
mods from over the years: converted the CRT to 1d6, tweaked some of the combat
values, shooting using same table as melee, grid based movement, more detailed
pursuit and mandatory charging for impetuous units. No reaction moves, no rolling for
activation. I may add these later. ABC is designed to finish in around 30
minutes on a 2’x2’ or smaller table; I am currently using a 40cmx40cm table.
Battle of Milvian Bridge, 312 AD
After the death of Constantius his son Constantine
invades Italy to overcome the usurper Maxentius.
Scenario source: Peter Sides Ancient Historical
Battles Volume 1.
Link(s):
Wikipedia:
https://en.wikipedia.org/wiki/Battle_of_the_Milvian_Bridge
Troops
Romans (Constantine)

2 LDR, 1 HC, 1 MC, 2 LC, 3 HI, 2 LA.
Breakpoint: 3
Romans (Maxentius)

1 LDR, 2 HC, 1 MC, 2 LC, 2 HI, 4 LI.
Breakpoint: 5.5
Scenario
Map: Open.
There is an unfordable river on Maxentius's deployment edge.
Special rules: None
This scenario was setup and unplayed for several
weeks. I just could not bring myself to
play it as I could not see any way Constantine could win historically - he won
on the right flank using cavalry superiority. The older scenario I had drawn up had parity
of cavalry, in fact one less Light Cavalry for Constantine. The issues with using so few units and
scaling down the scenario! I added a
Light Cavalry to Constantine’s right flank, and also moved the “leader” that
was with the legions (aka made them elite) to the medium cavalry. This gives Constantine just a slight edge on
the flank but at least means the historical result is more likely than not.
Deployment
Romans (Constantine):
LC LA HI HI HI LA. MC* HC* LC in front of right LA
Romans (Maxentius):
LC MC HC*HI HI HC LC. LI split behind Cavalry on both flanks
 |
| Deployment (Constantine on the left) |
Game
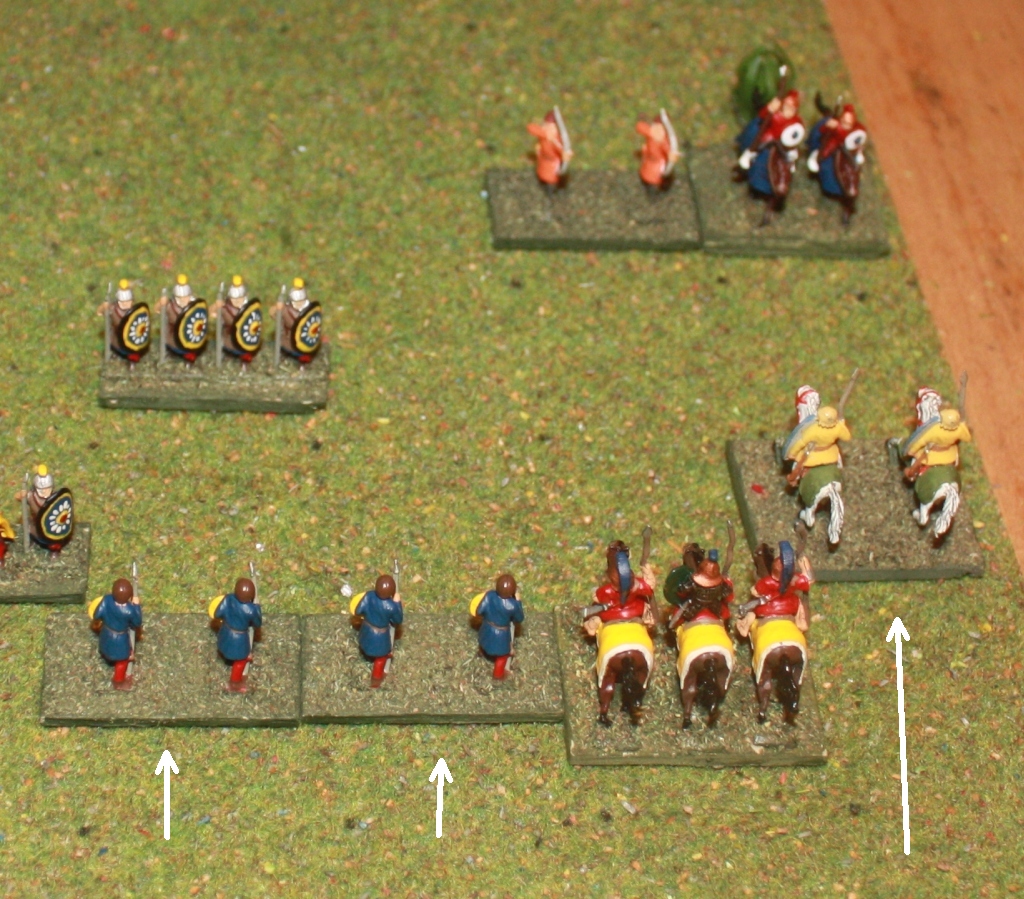
Constantine’s immediately advances his right flank
into melee where possible. Worked out ok
for Constantine. A few disorders but
most importantly Constantine and his heavy cavalry does not get one. Constantine’s cavalry is still stronger on
this flank.
The centre legions advance but Constantine withholds his weak left flank.
 |
| Constantine’s aggressive right flank |
Maxentius quickly advances his strong right flank. He does not do much else but on his left flank he does engage the enemy light cavalry with his own and disorders them in the arrow exchange. Note: in these rules melee is optional unless or charged or have an advantage.
 |
| Maxentius advancing his right flank |
Missile fire continues into the next round and Constantine’s Light Cavalry routs. Heavy Cavalry combats continue but with no change.
Maxentius continues to advance his right flank and disorders the Light Cavalry. The heavier cavalry does not advance in fear of being flanked by the legions. M moves his light infantry up to harass Constantine’s legions.
 |
| Maxentius continues the right flank advance |
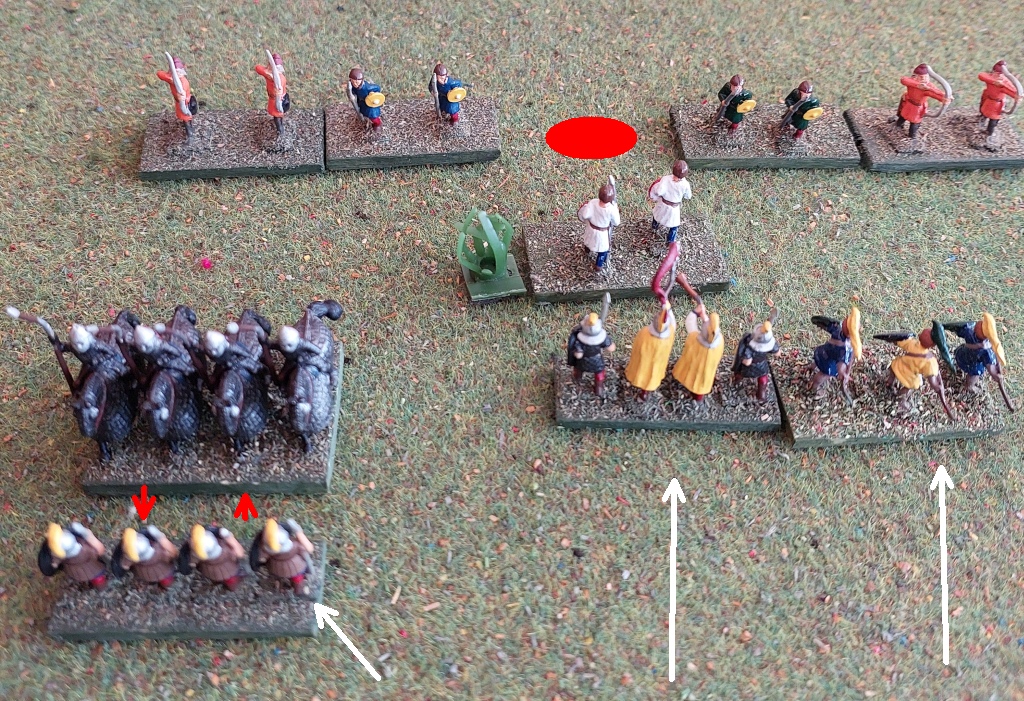
On Maxentius’s left flank, the Light Cavalry advance to the flank of the Constantine’s Medium Cavalry. This helps the Maxentius cavalry drive home the attack and rout the opposing Cavalry. Oh dear (for Constantine).
 |
| Constantine’s Medium Cavalry about to be routed |
Constantine manages to rout Maxentius and his Heavy Cavalry! The Constantine Light Archers move up to plug the gap from the previous turn’s cavalry rout. A rebel legion moves into the spot where Maxentius was. Note this sliding across to plug a gap is what brought me back to grids. Never happy with gaps appearing that units then just charged through. Worked on various options – zones of control extending to the side etc. Not sure where I came across this but think it was when playtesting Dominion of the Spear on a grid and I already had the house rule for reserves being allocated to a sector but able to slide into adjacent sector to plug a gap. Anyway, grids are back in my life.
 |
| Constantine routs Maxentius and his Heavy Cavalry |
Constantine advances the legions, the Light Archers pushes back the cavalry on the left flank. But Constantine’s left flank Light Cavalry routs under missile fire from the enemy cavalry.
 |
| Constantine’s left flank not going well (as expected). |
On the rebel left flank the cavalry advances to the flank of Constantine and his cavalry. The resulting melee see Constantine and the cavalry rout.
 |
| Constantine surrounded |
The rebels win!
 |
| End (Constantine still on the table – forgot to take the unit off) |
And I realised when writing this up that I finished the game one unit too early - Constantine needs to lose one more heavy unit to lose. Luckily I still had it setup so played a couple more turns (no pictures). The rebels lose a legion in the centre but then the rebel cavalry arrive in the centre as well and Constantine loses a legion and then exceeds their army breakpoint. It made it a much closer game as Maxentius was close to losing as well.
Verdict
I should have advanced Constantine’s legions at the
same time as the cavalry and possibly held Constantine’s Light Cavalry back so
they would not be engaged so early. If Constantine’s
Light Cavalry had survived, the game would have seen Constantine’s likely win,
or at least not lose so quickly!
Oh, and for the second outing with the rules, quite
liking the feel of them still.


.jpg)


