For deployment see here. The only other thing is there is nothing in the rules about when one side can claim victory. I will work on a simple 50% loss rule. At the end of any player turn, if a side has lost more 50% or more of its starting units, it loses. if both sides would lose, the side that has lost the most units loses. If this is equal, call it a draw. With this simple rules, Persians will lose if they lose 6 or more stands, Byzantines lose if they lose 7 or more stands. A lost general will count as a lost stand.
The rules state that after a charge, the resulting action (fire, evade etc) is done immediately for the charged stand. This make a lot of sense to me. But then in the example, all charging is done for a side AND THEN the resulting actions are done for each charged stand. I prefer the former and have done this throughout the replay. Charges should be done first before all other movement but I did some moves before charges if I didn't think it would effect the outcome.
The main points that may help in this replay is
- Each stand must pass a d6 roll to perform a movement activity - 1+ for a straight move, 2+ for a small wheel or a charge, 3+ for a reface. Major modifiers are +1 for trained, -1 for untrained, -1 for poor and -1 for each 6" further than 6" from the general. for example trained units charging within 6" of the general are 1+ (no need to roll). The Ghassanids are poor and so getting them to move is not a guarantee.
- charging units are fatigued at the end of the turn. Fatigue is removed at the end of following turn is not in melee. Fatigued units cannot charge, flee or evade.
- Melee is based on opposed 1d3 rolls. 0 is no effect, 1 is push back, 2-3 is flee and depleted (take a hit), 4+ is flee and dispersed (routed). Two depletions (hits) will rout a stand. The Elite Heavy cavalry can take 3 depletions.
Persians move first in all the turns. Generals are +0 each.

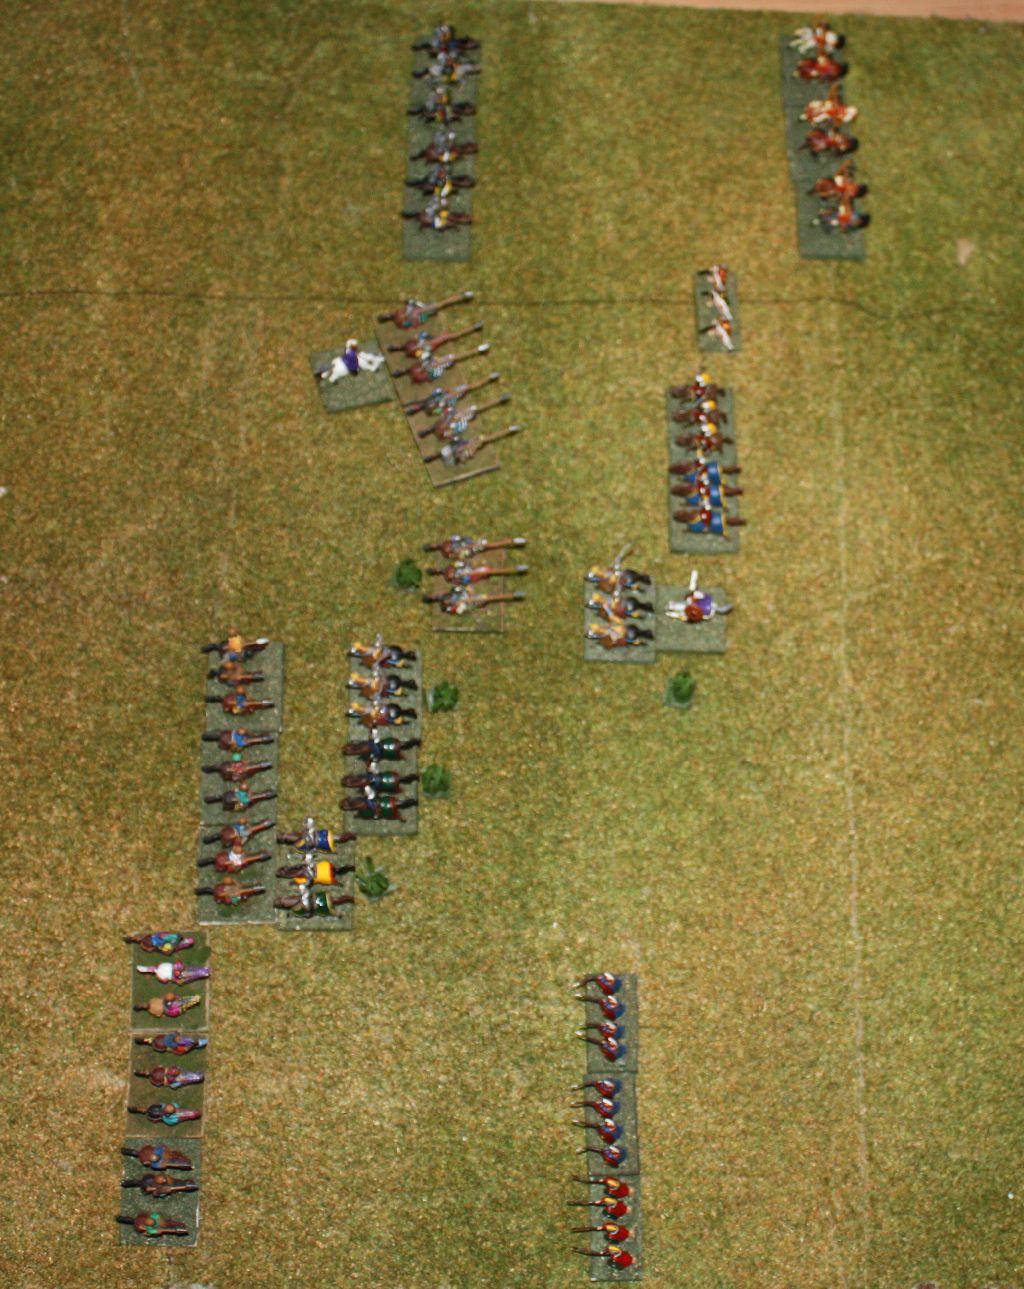
Deployment - Persians on the left
Turn 1
Persian
MOVE
Lakhmids move forwards to 6" from the Ghassanids (6" is charge reach - 5" move +1" bonus for a charge). No orders roll; move is a 1+ except for furtherest one (as it is 6" from general).
Elite Heavy Cavalry wheel 45 degrees to their left. Again, no orders roll.
Reserve heavy Cavalry wheel about 30 deg to their left.
Byzantine
MOVE
Byzantines move up the Skutatoi. and the 2 units of cavalry next to them.
No other movement.

End of turn 1
Turn 2
Persian
MOVE
A single Elite Heavy Cavalry stand charges the opposing Byzantine elite heavy cavalry (with general). The elite heavy cavalry receive and fire. Result is Persian's pushed back (and will be fatigued at end of turn).
Note get extra 1" to move if charging.
Remaining 2 Elite Heavy Cavalry wheel slightly to right and move 4" to close the gap.
The Reserve heavy cavalry wheel to the left (now aligned to the rest of the Persian's) and move straight ahead.
Note: I use green markers are fatigue. When it happens I'll use flesh rings for depleted and a black ring for disordered (only applied to Skutatoi as they are only CO troops on the board. Only CO can be disordered). I get a bit confused about already fatigued units and ones that should be fatigued at the end of a turn, so what I took to doing after this turn was placing a little brown tuft marker behind stands that should be fatigued at the end of a turn. At the end of the turn I then removed fatigue markers from applicable stands and then changed the brown tuft into a green fatigue marker.
Byzantine
MOVE
Skutatoi moved up 2".
Elite heavy cavalry (with general) charges opposing Persian heavy cavalry. Persian Elite heavy cavalry receive and fire - byzantine pushed back (and fatigued at end of turn).
Note: missile firing at Heavy Cavalry will only ever result in a push back - never a depleted (need a 7 for disorder - +1 mounted, -1 heavy means a 6 is the most that can be rolled).
The other Elite heavy cavalry and the 2 heavy cavalry to its left charge the opposing reserve heavy cavalry. They receive and fire with the result the Elite heavy cavalry and middle heavy cavalry pushed back (and fatigued at end of turn). The remaining heavy cavalry can melee.
Moved the remaining right flank heavy cavalry and Light Infantry up about 2" to provide better flanking opportunities.
MISSILE FIRE
No results.
MELEE
heavy cavalry vs heavy cavalry
Note all combat is 1d3
Byzantines roll 1, +1 horse, +1 charging = 3.
Persians roll 2, +1 horse = 3.
Result - conform and continue.
Note: The Byzantine heavy cavalry is fatigued for charging.
End of turn 2
Turn 3
Persian
MOVE
Persian middle elite heavy cavalry charges the opposing heavy cavalry that receives and fires - result is push back.
Other elite heavy cavalry tries the same thing. Opposing heavy cavalry receives and fires - result is no effect.
left most light cavalry charges Light Infantry that receives and fires - result is depleted and pushed back.
For the block of cavalry on the left - moved the one of the left up to maybe flank attack the nearby byzantine heavy cavalry (needed to roll for this order).
MISSILE FIRE
Lots available. The only result was to push back one of the byzantine heavy cavalry.
MELEE
Heavy cavalry vs reserve heavy cavalry - Persian wins +1 = push back with followup
Persian elite heavy cavalry vs heavy cavalry - Persian wins (Persian rolls 1, +1 horse, +1 general, +1 charging = 4; byzantine rolls 1, +1 horse) +2 = Byzantine flees, depleted, fatigued. Persian may pursue and do so.
All charging units are now fatigued.

The 'zig-zag' that is happening in the centre
Byzantine
Options limited as many units are fatigued.
Note: I am starting to get into these rules - the push backs and fatigue is what did our head in last time but I think I am beginning to understand how it shapes the tactics of the game. it is a lot more dynamic than Armati. I seem to remember DBM100 (and DBA) plays with similar dynamism (although the mechanics are different).
MOVE
Skutatoi move up 2"
Ghassanid Light Cavalry move up to aggressively (well, as aggressively as they can!) threaten opposing Light Cavalry but only one passes the move order die! Oops.
MISSILE FIRE
Results in some push backs.
MELEE
Only one heavy cavalry vs heavy cavalry. Byzantines win by 1 - result is push back with followup
All byzantine fatigue markers (except the heavy cavalry in combat) are removed.

End of turn 3
Turn 4
Persian
MOVE
Light Cavalry charges opposing Ghassanid (needs a 3. ok). Ghassanid fires and evades with no missile . Lakhmid light cavalry continues its charge, and as it moves 6" when charging, ends up contacting another Ghassanid which must just receive.
A heavy cavalry attempts to charge an opposing heavy cavalry through gap Byzantine heavy cavalry receives and fires. Result is no effect.
A heavy cavalry attempts to charge opposing elite heavy cavalry. Elite heavy cavalry receives and fires. Result is no effect.
Right most heavy cavalry stands move up to align with the other heavy cavalry but only one is successful on the order roll.
MISSILE FIRE
Every heavy cavalry not in combat can missile fire. Not one result.
MELEE (from right to left to make it easier to follow)
Light Cavalry - Persian Lakhmid wins by 1 - push back and followup.
Heavy cavalry vs elite heavy cavalry - elite heavy cavalry loses by 1- push back and followup.
Heavy cavalry vs heavy cavalry - Byzantine wins by 1 - push back and followup.
Heavy cavalry vs heavy cavalry - Byzantines lose by 2 - flee but as fatigues are dispersed. Persians decide to pursue.
Fatigue is important. cannot be removed if in melee.

The Persian left with the breakthrough heavy cavalry in the middle of the picture
Byzantine
MOVE
Light Cavalry flank attacks the Lakhmid. Passes order roll (4+).
Fleeing heavy cavalry attempts to wheel 180. Successful
Elite heavy cavalry with general charges opposing elite heavy cavalry that receives and fires - no effect.
MISSILE FIRE
The Skutatoi managed to Pushed back two heavy cavalry facing them.
MELEE (from right to left for convenience)
Heavy cavalry vs heavy cavalry - Byzantine wins by 2 - Persian cannot flee (fatigued) so dispersed. Byzantine does not pursue.
Elite heavy cavalry vs heavy cavalry - Persian wins by 2 - Byzantine flees, depleted. Persian purses.
Elite heavy cavalry with gen vs elite heavy cavalry - equal score. No effect.
Light Cavalry into Light Cavalry flank - equal score. No effect.
Note that Skirmishers have no flanks for melee purposes so the Ghassanid do not get the +2 for a flank attack in this melee.
Light Cavalry vs Light Cavalry - Ghassanid wins by 1. Push back and followup.

End of turn 4
Turn 5
Persian
MOVE
The breakthrough heavy cavalry rolls to wheel > 45, fails.
Elite heavy cavalry charges heavy cavalry that receives and fire - no effect.
Elite heavy cavalry with general charges heavy cavalry that receives and fires - no effect.
Lone Lakhmid Light Cavalry to the rear and far left charges opposing Ghassinid Light Cavalry - receives and fires - no effect.
MISSILE FIRE
Only into the rear of fleeing elite heavy cavalry - pushed back
MELEE (from right to left for convenience)
Elite heavy cavalry vs elite heavy cavalry with general - Byzantines lose by 1 - push back and followup.
Elite heavy cavalry vs heavy cavalry - Byzantines lose by 1 - push back and followup.
Elite heavy cavalry with general vs heavy cavalry - Persians win by 2 so heavy cavalry depleted and dispersed (as fatigued). Persian does not pursue.
Middle Light Cavalry vs Light Cavalry - loses by 1 - push back and followup.
Rightmost Light Cavalry vs Light Cavalry - wins by 3 - flees and dispersed. Persian does not pursue.

After Persian turn 5 with a number of gaps in the Byzantine line
Byzantine
MOVE
Skutatoi - 2 out of 3 manage to move forwards.
Heavy cavalry moves to threaten flank. (cannot charge as more than 45 degrees out of arc)
Elite heavy cavalry with the depletion attempts to wheel 180. Successful.
MISSILE FIRE
Only result is push back to the Persian middle heavy cavalry (from the depleted elite heavy cavalry).
MELEE (from right to left for convenience)
Elite heavy cavalry with general vs elite heavy cavalry - equal. No effect.
Heavy cavalry vs elite heavy cavalry - equal. No effect.
Light Cavalry vs Light Cavalry flank - equal. No effect.
Light Cavalry vs Light Cavalry - equal. No effect. Damn - just a +1 would get rid of the Persian Cavalry as it is flanked.

End of turn 5
Turn 6
Persian
MOVE
Heavy Cavalry on right flank attempt to charge Skutatoi. All fail their orders roll.
Heavy cavalry opposite elite heavy cavalry charge. Elite heavy cavalry receives and fires - result is no effect.
Heavy cavalry to the right of this moves ahead so can charge elite heavy cavalry in the flank next turn.
Heavy cavalry with general about face.
Light cavalry on extreme left attempts to about face but fails.
MISSILE FIRE
Only result is to push back a Skutatoi.
MELEE (right to left)
Heavy cavalry vs elite heavy cavalry - Persians win +2. flees, depleted, fatigued. Persians followup.
Note - Elite heavy cavalry are high morale and it takes 3 depletions before they are dispersed.
Elite heavy cavalry vs elite heavy cavalry with general - equal. no effect.
Elite heavy cavalry vs heavy cavalry - Persians win +2 - flees, depleted, fatigued. Persians followup.
Light cavalry vs light cavalry to front - Persians win by +2 - flees offboard so count as routed. Persians followup.
A lot of fatigue is removed.
Byzantine
MOVE
leftmost heavy cavalry charges heavy cavalry in the flank. Can only receive.
Skutatoi charges same heavy cavalry that receives and fires - no effect.
Far left Skutatoi charges opposing heavy cavalry that receives and fires with a push back.
Middle Skutatoi moves up 2".
Elite heavy cavalry successfully about faces.
Heavy cavalry with one depletion successfully about faces.
Light cavalry about faces.
MISSILE FIRE
A few push backs.
MELEE (right to left)
Elite heavy cavalry with general vs elite heavy cavalry - equal. No effect.


End of turn 6
Turn 7
Persian
MOVE
Rightmost heavy cavalry charges Skutatoi that receives and fires with no effect.
Heavy cavalry charges opposing elite heavy cavalry with 2 depletions that receives and fires - push back.
Other heavy cavalry moves up to hopefully charge the elite heavy cavalry in the flank next turn.
Elite heavy cavalry charges heavy cavalry with 1 depletion vthat receives and fires with no effect.
Elite heavy cavalry with general moves to behind elite heavy cavalry with general.

Elite heavy cavalry with general moves to behind elite heavy cavalry with general.
Far left Ghassanids turn 90 degrees.
MISSILE FIRE
Only result is to push back elite heavy cavalry with 2 depletions.
MELEE (right to left)
heavy cavalry vs heavy infantry - no effect
heavy cavalry vs heavy cavalry - Byzantines win by +1 - push back and followup.
Elite heavy cavalry vs elite heavy cavalry with general - equal. no effect
Elite heavy cavalry vs heavy cavalry - no effect.
Byzantine
MOVE
Heavy cavalry charge elite heavy cavalry with two depletions that receive and fire - no effect.
Heavy cavalry to the side also charge in. Note is not a flank attack.
Elite heavy cavalry with general charges the rear of the elite heavy cavalry with general.
Light cavalry charge heavy cavalry with one depletion in the flank.
MISSILE FIRE
none.
MELEE (right to left)
Heavy cavalry vs heavy cavalry - Byzantines win +1 - push back and off the edge so routed. Byzantines followup (so a push back by the Skutatoi results in a dispersal).
Heavy cavalry vs heavy infantry - Persians win by +1 - push back and followup.
Heavy cavalry vs heavy cavalry (with 2 depletions) to front - Persians wins +1 - push back and off the edge so routed.
Elite heavy cavalry with general Vs rear of the elite heavy cavalry with general - Persians win +3. Byzantines dispersed.
Elite heavy cavalry vs heavy cavalry (with no depletion) - Byzantines win by +1 - push back and followup.
End of game - Byzantines have lost 7 stands (6 plus the general). Persians have lost 3.

End of turn 7 and the game
Verdict
Hmm...not sure I actually enjoyed the game. Party because I am not that familiar with the rules and so tactics I thought would work didn't really seem to. Not sure how to use Skirmishers and would need to think on it further - maybe a bit more of a test using them. Also, there is no benefit to maintaining any line formation. In DBx there is a -1 bonus for flanking stands, so it encourages you to have some friends on either side of a stand. Warrior kings gives a +1 benefit to passing reaction tests for each friendly stand in contact. Fantasy Rules! (and Days of Knights) gives a +1 combat bonus for a friendly adjacent stand. Armati has divisions that force you to move and melee in multiple stand units (and a combat system where 2 units can both do a full attack against a single stand enemy making one stands vulnerable) Enough examples but JA has nothing that promotes any stand being next to another, other than the obvious to prevent flank attacks. But that is true of almost any ancient ruleset where you need to protect the flanks. Maybe it is just me. I really want to like it.
Push backs aren't really my thing either. Maybe it is because every heavy unit has missiles as well so there is a lot of push backs but it certainly seemed that every turn every second unit got pushed back either from missile fire or combat.
I like systems where combat will inflict damage - Armati is a good example where melee will almost always inflict a hit on one of the involved stands. It is not east to remove hits. Warrior Kings - it is quite easy to inflict a hit, and most bad reaction tests result in more hits. Hits cannot be removed. JA has a melee system where fairly equal units (of which most of the cavalry were) will find it difficult to inflict damage on one another. DBx doesn't either, but the -1 for adjacent stands and the push back/followup mechanism assists in making a more decisive result to combat. I think it has more to do with the fact that it was an mostly cavalry battle with lots of missile and all similar units that made JA perform not as well as i expected.
How would I fix it? Some simple things come to mind - a +0 result is a push back if outnumbered (i.e one side has more adjacent units than the other). Horse units (not skirmishers) can be disordered just like CO units. Possibly add in Elite units but not a simple +1 to melee roll (that is too much) but maybe something like nt pushed back if outnumbered on a +0 result or if they score less than their opponent in melee, they add 1 to their result. Three training levels for orders seems like a lot - I think I would just have trained or not where trained is +1, otherwise -1 (naturally, this wold lead me to rewrite the orders table so all orders are Other than that, the things I would like to change take it away from JA (such things like not lining up units). I do like the rolling for orders, I like the missile system (d6 and fire after moving). I do like the d3 combat system and results and how fatigue works and is integral to the game structure - all very elegant but from the above comments I would like to tweak combat for next time. I am tempted to come back to Justified Ancients with Callinicum and try out a couple of the ideas above.
Oh, and the game probably took nearly an hour. Hard to tell writing it up as I go.


.jpg)


No comments:
Post a Comment