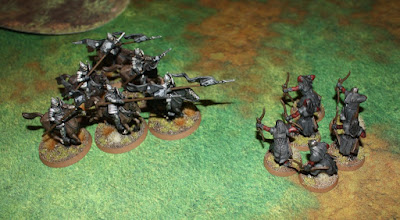
Friday 25 November 2016

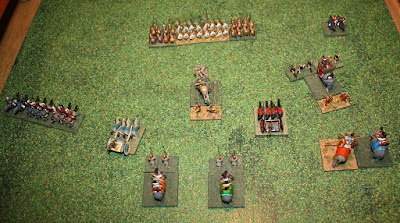
Battle of Ipsus 301BC using Ancient Battlelines Clash

Introduction
This is game 28 in play testing my ancient rules by replaying historical battles.  The latest version of ‘Ancient Battlelines Clash’ is on its own blog page. I am play testing the rules by replaying all the Peter Sides scenarios from his Historical Battles books.  ABC is designed to finish in under an hour on a 2'x2' table.

Battle of Ipsus
In the saga of the Successor Wars, Antigonus One-Eye and his son Demetrius face a coalition of three other Successor emperors – Seleucus, Cassander and Lysimachus.  The three had banded together as they were likely to be destroyed by Antigonus piecemeal otherwise.  This was the last real chance for Antigonus to reunite Alexander’s empire.

There is not much on the internet on this battle:

Scenario changes
Reduced by about a three-quarters the troops due to my smaller sized table. I also roughly halved the Spear or pike units as the scenario units are for DBx that assumes in this case that the units will be rear supported, not the case with my rules.  I also put a bit more cavalry on the Antigonid right flank as the limited information on the battle seems that there was more cavalry here with Demetrius, compared to  the Allies that may have evenly distributed the cavalry.  I also put an elephant on the Antigonid left flank and centre, while the Peter Sides Scenario had elephants on the left and right flank.

Troops

Diodachi Allies (Seleucus, Cassander's brother Pleistarchus and Lysimachus)


4 Phalangites, battle infantry, phalanx
2 Peltasts, aux infantry
1 Psiloi, skirmish infantry, short missile
1 Heavy Cavalry, aux cavalry, high fortitude
1 Heavy Cavalry, aux cavalry
2 Light Cavalry, skirmish cavalry, long missile
4 Elephants, elephant
2 Scythed Chariots
1 General with Guards

Breakpoint: 12

Antigonus


2 Phalangites, battle infantry, phalanx
2 Hoplite, battle infantry, phalanx, some protection
2 Peltasts, aux infantry
2 Psiloi, skirmish infantry, short missile
2 Elephant, elephant
1 Guard Cavalry, aux cavalry, high fortitude
1 Heavy Cavalry, aux cavalry
2 Light Cavalry, skirmish cavalry, short missile
1 General with a phalangite.

Breakpoint: 10

I thought about using subgenerals to represent the sons/generals on each side and have the general in the centre. With the small number of units, I decided against this and to put one general on each side - Antigonus in the centre and a guess that the main allied general is on their right wing cavalry.

Deployment
Deployment:

Allies to the left, Antigonus on the right
For this game I am doing something that someone suggested a few years ago and do double depth for the heavy infantry for visual purposes only.  It looks better.  It does increase the depth of a heavy infantry unit which does mean they would be a little easier to flank.  Not much though.

The Game

The Allies advance the elephants and scythed chariots.

Allied advances
Antigonus responds by advancing Demetrius with the cavalry on the right flank, and advancing his own elephants.

Antigonus advances (view from the Allied side)
The pair of Allied elephants go in.

Allied elephants (on left) on the allied right flank

The two elephants force the skirmisher to retreat and it is out of the game.  But the skirmisher has disordered the elephants.  Both continue their charge into the Antigonid elephant and force it to retreat through the peltasts behind it (disordering the light infantry).  One Allied elephant continues to charge into one of the peltasts and they are locked in melee.

This is why I wrote Ancient Battlelines Clash - all of the above driven by the rules - fast, a little unpredictable but still producing a great narrative with just a few dice rolls.

The result of sending in the Allied elephants (a lot of skimisher casualties)

Scythed chariots hit the hoplites, disorder them but are destroyed in return

Scythed Chariots - at least they caused a disorder

Elephant and skirmishers meet in the centre but all that happened is the Allied skirmishers cleared the opposing skirmishers.

Battle of elephant and skirmishers in the centre.
The other elephant comes in and elephant and skirmisher disordered.

The second Allied elephant joins the fray in the centre
The other scythed chariot charges into some hoplites for no effect and are destroyed.

The second scythed chariot throws itself at the phalanx line for no effect before being destroyed.
Demetrius and associated cavalry charge up the Antigonid right flank into the defending infantry.  The light cavalry exchange missiles before the clash, and both retreat disordered.  The heavy cavalry meet, and it is disorder all round.

On the Antigonid right flank, Demetrius meets the opposing cavalry.
The elephant battle in the centre sees both allied skirmishers routed and the Antigonid elephant in combat with an allied one, but disorder all round and no destruction.

Elephant battle continues in the centre, clearing out the skirmishers.  It is tusk on tusk now.
Through some really great Antigonid die rolling, elephants on the Allied left flank see the Antigonid light infantry take out both Allied elephants.

On the Allied right flank, both Allied elephants are routed by opposing light infantry
In the centre the Antigonid elephant and skirmisher are routed.  The centre is cleared of allied units.and the way is open for the Allied elephants to throw themselves at the Antigonid phalanx.

In a case of brilliant and poor dice rolling,the Antigonid right flank sees one the the Antigonid heavy cavalry routed, but also the lone Allied cavalry as well. Demetrius pursues to near the table edge.

Demetrius routs the opposing heavy cavalry, but losing one of his heavy cavalry as well.
One of the Allied elephants makes it to the phalanx line and disorders a phalanx.  The elephant does not last long and it routed next turn

An Allied elephants makes it into a Antigonid phalanx and disorders them before routing.
The next turn the other charges in to a phalanx unit and disorders an other phalanx but it too is routed in a few turns.

The other Allied elephant makes it into another Antigonid phalanx and disorders them before routing
Across the rest of the field, Demetrius has slowly being turned around, the Antigonid elephant and peltasts are realigning to go against Seleucus and the Allied phalanx has been slowly advancing but staying far enough away for the elephants for if they rout.


Overview of the battle after the initial flank battles and centre skirmishing

The Allies are near their breakpoint (losing 4 elephants and a heavy cavalry) while the Antigonids are still far away from it (losing only one elephant and heavy cavalry).  but now the phalanxes are going to meet...

The moment we have all been waiting for - the phalanx lines meet. The Antigonids have three disordered phalanxes (not good).  The undisordered one has Antigonus with them (that is good).

Phalanx battlelines clash. three of the Antigonid phalanxes (rear) are at a disadvantage as they are disordered.  But the undisordered one has Antigonus with them.
Two Antigonid disordered phalanxes routed.  The elephants did their job in softening up the line.  The Antigonids are now also one heavy unit away from the army breaking as well. Demetrius is closing in on the rear of the Allied phalanx

Two of the disordered Antigonid phalanxes rout.  Demetrius can bee seen botton centre
Antigonus then manages to destroy an Allied phalanx.

Antigonus routs an opposing Allied phalanx
Game over as the Allies have reached their breakpoint.  Interestingly enough, I rolled a die for the other Antigonid phalanx unit in combat, and it routed.  This would have caused the Antigonid army to break if Antigonus had not won his combat.  What a close game!

End game. Antigonid victory

Alternative history - the Allies won this one in reality.

Verdict
I thought about not using so many elephants, but they were important to the original battle's outcome, so I used quite a few.  They tend to get routed early - before the main battlelines clash - and this did cause the Allies to get close to their breakpoint.  It was fine, although there usually only been a couple of skirmisher-elephant clashes in other battles, this one had lots and it does slow the game game slightly.  Normally skirmishers are one  or two-shot  units before retiring from the game.

Saturday 12 November 2016

Dragon Rampant Introductory game

Introduction
This is to prove that I am not just a solo player!  My mate Andy and I arranged to play a game of Dragon Rampant.  He had already played a couple of games but it was new to me.  I do not have a lot of painted fantasy figures but Andy had just enough to deploy two Lord of the Rings based warbands.

Troops

Uruk-Hai (me)


The forces for good (the Uruk-Hai)
1 Offensive Heavy Foot with Leader and enchanted weapon...but not enchanted enough as it was not enchanted for this game.
1 Offensive Heavy Foot
1 Heavy Foot (spearmen)
1 Light Foot
1 Scouts

The Men of Gondor (Andy)

The other side - Gondor

1 Heavy Riders with leader
1 Heavy Riders
2 Heavy Foot
1 Heavy Missiles

Deployment
We threw down some terrain, decided what was rough and what was cover.  We then put the units on the table for the first scenario - a straight up "line then up and advance at each other until dead".

Overview of the table, Uruk-Hai to the bottom. Uruk-Hai scouts off picture to the right.  
Uruk-Hai plan is to send the Light Foot into the cover on the left flank, advance the two heavy foot in the centre to quickly advance, and hold the right flank with the Scouts and Heavy foot. Not to spoil the game report, but only the first bit worked - moving the Light Foot into cover!

Gondor plan was to hold their right flank with heavy foot and missiles and use the two cavalry units to destroy the opposing flank, and then sweep up the centre.

Battle mat is FAT Mats from Frontline Gaming. (this sentence updated 13 Nov 2016 - original entry erroneously ascribed the battle mat to Tiny Wargames).  I am very tempted to get one as I love the rubber backed mats.

Game
First move is done Gondor. No failed activations.  Uruk-Hai move, also no failed activations.. Gondor move and 1 activation - the Heavy Cavalry on their furthermost left flank.

After moves on both sides.  Picture from the Gondor side this time.

Uruk-Hai moves everything in response.  The Gondor Heavy Missiles have an opportunity to fire and a figure is lost from a Uruk-Hai Heavy Foot (with the leader)


Gondor bowmen at a Uruk-Hai Heavy Foot unit
The Gondor heavy cavalry approach to very near the Uruk-Hai Scouts.

On the Uruk-Hai far right flank the Scouts are about to be a speed bump for the Gondor Heavy Cavalry.
Gondor missile unit fires, this time at the Heavy foot spearmen immediately to its front - 1 figure lost.

More Gondor arrows, this time at the Heavy foot that is advancing towards them (never got there due to lack of activation rolls).
Then a unit of Gondor Offensive Heavy Foot attacks the Uruk-Hai Offensive Heavy foot with the leader.

The first melee - Heavy foot on both sides clash in the centre. Uruk-Hai lost this one (this was the beginning of a pattern!)
Uruk-Hai lose two figures, Gondor one.  Uruk-Hai loses the courage test and are battered. So now the Gondor Heavy Cavalry rub it in and charge the battered Uruk-Hai unt.  Both suffer one lost figure (Uruk-Hai were lucky with 3 6’s from 12 dice) and the cavalry retreat.

After the Uruk-Hai retreated, the centre Gondor cavalry charged in.  Note that the lead cavalry figure is the only unpainted unit in the game.
The other Gondor Heavy Cavalry charge the Uruk-Hai Scouts that are just...gone.  7 hits and they are only 1 armour.

The last picture of the Uruk-Hai Scouts before routing after combat with  the Gondor cavalry. 

The Uruk-Hai heavy foot with the leader successfully rallies. and then the Uruk-Hai fails their first activation

Ready for the Gondor heavy cavalry to charge back into the heavy foot unit. Both inflict 2 losses and the Humans retreat (as the attacker); both fail the courage test and both are battered.  Note the Uruk-Hai leader heavy foot unit is now down to 6 figs.

The Men of Gondor Heavy foot and Uruk-Hai Heavy foot face each other off in the centre.

The Uruk-Hai heavy foot with the leader doesn’t rally and once again the Uruk-Hai failed first activation!!  This gives Gondor the opportunity to rallied their battered unit.

The Gondor missile unit fires at the heavy foot spearmen who lose another 2 figures.  Very annoying.

More Gondor arrows at the non-moving Spearmen.

The Gondor Heavy Cavalry that charged into the scouts now charge into the next unit on that flank - a Uruk-Hai heavy foot unit and inflict 3 hits! (Cavalry take one in response). The Uruk-Hai roll snake-eyes for courage, that is unfortunately a definitely big fail and the leader's heavy foot unit routs.

The Gondor heavy cavalry, flush from destroying the Scouts, turn their attention to the next unit on that flank - a unit of Uruk-Hai Heavy foot...that routs.
There were two Uruk-Hai units on this flank and now there is none.

The Uruk-Hai right flank that had two Uruk-Hai units that have been replaced with two Gondor Heavy cavalry units.

The Uruk-Hai get a turn and the Uruk-Hai heavy foot spearmen attack a Gondor heavy foot but receive two hits while only inflicting one.  They retreat, fail the courage test and are battered.

The Uruk-Hai spearmen get an activation and attack a unit of heavy foot, but are repelled. 

The Gondor archers shoot again for two more hit on the battered spearmen unit that loses another two figures, fails courage, already battered, not looking healthy...


The Gondor bowmen add to the misery and shoot at the spearmen for a few more losses.  4 figures left. (the marker on the right represents battered)

The Gondor Heavy foot charges the battered Uruk-Hai spearmen for 2 more hits to put them out of their misery.  Spearmen rout.


The Gondor Heavy foot charge in and finish the spearmen off.  So far the Uruk-Hai  have lost 3 units and the Gondor none.

A unit of Gondor heavy cavalry is coming round the rough terrain to get ready to attack the Uruk-Hai leaders' heavy foot unit


The Gondor heavy cavalry that finished off the Scouts, and then a unit of heavy foot, is galloping as fast as they can to the last unit of Uruk-Hai heavy foot.

The Human heavy foot on their far left flank charges the Uruk-Hai light foot that, over the last few turns, has been coming out of cover.

Meanwhile, the Uruk-Hai come out of the cover on their left flank to unsuccessfully melee with a unit of Gondor heavy foot.

The Uruk-Hai take 4 hits, the Gondor unit 2;  Uruk-Hai retreat back into cover. The Gondor archers shoot at them but not enough damage rolled to inflict casualties.

The Gondor Cavalry charge into Uruk-Hai's leader unit (what is left of it!) and the end result is the Uruk-Hai's leader unit routs off the table.


The last melee - the Gondor heavy cavalry charge into the last unit of Uruk-Hai heavy foot - with the Uruk-Hai leader - and the latter rout.

The Uruk-Hai's last unit -the light foot - pass one courage test for the entire warband being at ½ lost, and  then failed the leader unit lost test.  A convincing victory for the Men of Gondor!

All the Gondor losses.


All the Uruk-Hai losses.  I leave it to the reader to draw your own conclusions on the scale of the loss.

Verdict
Despite my enormous loss ("bloodbath" and "walked over" spring to mind), I shrug it off by blaming the dice :-)  I also blame having a plan and a deployment that was not going to really work under the rules but hey, that's why it was a learning scenario.  Adding quests and different scenarios would make the game even more interesting.    The rules themselves are very easy and after another game or two I can easily see never having to reference the rulebook.  Definitely a keeper for this level of game (between mass battles and 1:1 skirmish).

Andy and I have played the odd game here and there over the last 3-4 years (Mighty Armies Ancients, Ancient Battlelines Clash, Memoir '44) We both like playing with different rules and both affected by the "oh shiny!" and so we are going to try and meet a more often to play some games.

Monday 7 November 2016

Battle of Gaza 312BC using Ancient Battlelines Clash

Introduction
This is game 27 in play testing my ancient rules by replaying historical battles.  The latest version of ‘Ancient Battlelines Clash’ is on its own blog page. I am play testing the rules by replaying all the Peter Sides scenarios from his Historical Battles books.  ABC is designed to finish in under an hour on a 2'x2' table.  However, sometimes I come across a battle that is not in the scenario books that I want to include.  The Battle of Gaza is one that does not appear in the Peter Sides books, but is included in Phil Sabin's Lost Battles book.

Battle of Gaza
In the saga of the Successor Wars, Ptolemy and Seleucus invade Syria to battle with the son of Antigonus, Demetrius.

There is not much on the internet on this battle but here is the link to Wikipedia:

Wikipedia article 


I used Lost Battles (Sabin) to create this scenario.

Scenario changes
I reduced the number of units by about half due to the smaller sized table.

Troops

Ptolemy (and Seleucus)

Ptolemy's army
5 Phalangites, battle infantry, phalanx
4 Psiloi, skirmish infantry, short missile
1 Psiloi (anti-elephant), skirmish infantry, high fortitude, short missile
1 Guard cavalry, aux cavalry, high fortitude, disciplined
1 Heavy Cavalry, aux cavalry
2 Light Cavalry, skirmish cavalry, short missile
1 General, +1 command ability, with Guards

Breakpoint: 9

Demetrius

Demetrius's army
3 Phalangites, battle infantry, phalanx
1 Hoplite, battle infantry, phalanx, some protection
2 Psiloi, skirmish infantry, short missile
1 Companions, aux cavalry, high fortitude, disciplined
1 Heavy Cavalry, aux cavalry
2 Light Cavalry, skirmish cavalry, short missile
2 Elephants, elephant
1 General, with Companions

Breakpoint: 9

Deployment
Deployment:
Deployment

The Game
Both forces generally advance along the line;  except both sides hang back the heavy cavalry, awaiting the outcome of the elephants and skirmishers. This is not how it went historically when it was the other way around - phalanxes did not clash until the cavalry battle was decided.  Due to deployment limits in my rules, the elephants had to deploy in the same group as the phalanxes. The elephants tried to split in their first action.  They failed an group split roll and so the entire group has moved forwards.  I would have liked to have hung back the Antigonid phalanx line to see if the elephant causes any damage to the Ptolemaic line.


First turn advances

A few more advances and the only contact is the Antigonid elephant (on the heavy cavalry flank) meets the skirmishers, including the anti-elephant unit. The elephant is accompanied by a skirmish unit of it own and the latter that retreats due to enemy missile fire.

Antigonid elephant in battle with enemy skirmish line

Against both skirmishers, the elephant rolled snake-eyes!  1's are bad, and the elephant routs, causing no reciprocal damage to the skirmishers. The skirmishers pursue into the Antigonid retreating skirmishers that had cause an Ptolemaic skirmisher to retreat.

...and the elephant is destroyed

The flanks are much the same in quality and quantity.  The centre is the only place Demetrius can make a difference, but it is one elephant and 4 phalanxes Vs 5 phalanxes and some skirmishers.  Demetrius sends them in.

Another Antigonid elephant advances to the phalanx line

Ptolemaic skirmishers cannot face the charging elephant and retreat though the phalanx and retire from the game.  Elephant and accompanying skirmisher continue into the phalanx.  Elephant routed - all those long sharp pointy sticks was too much! - and the skirmisher retires from the game as well.  The elephant had a good chance (50%) of disordering a phalanx, which would have helped, but alas it was not to be.  One phalanx unit did pursue though that did break up the line.

Pointy sticks are too much and the elephant is destroyed

Ptolemy tidies up the line - both the skirmishers and heavy cavalry, and the phalanx battle line.

Overview mid-game.  Ptolemy (left) has redressed his lines and ready to go!

Ptolemy's phalangites crash into the opposing Antigonid battle line.  This is the start of what becomes quite a long phalanx battle.
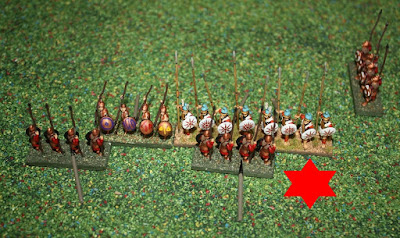
Ptolemy phalangites (red) crash into the opposing better painted Antigonids.

A few disorders, and one retreat on each side.

Mostly disorders all rounf

On the next run of melee, one of the Ptolemaic phalanxes rout!

One Ptolemaic phalanx unit is routed

The next turn, one of the Antigonid phalanxes is routed.  And a retreated Ptolemaic phalanx rallies.  I have never used rallies much as it requires a 6 for a single unit and they are usually busy being in melee.
Then an Antigonid phalanx

Another round of melee for both sides sees the Ptolemaic phalanx charge back into the line, but to ill avail, as another Ptolemaic phalanx succumbs and routs.  A Ptolemaic phalanx is slowly turning on the left flank of the Antigonid phalanx, so they are likely to lose the middle eventually.

Then a Ptolemaic one.

Another one is gone in battle with the Hoplites.

And another Ptolemaic one.  Things are not so great for Ptolemy - 5 phalanx units versus 4, now 2 versus  3.

Ptolemy decides the best chance from here is to try for a win on with the heavy cavalry. Nothing for it but to charge the heavy cavalry in!  Skirmish screen is dissipated with no ill effects, and the cavalry clash just has disorder all round.

So Ptolemy (rear left unit) leads the charge of the heavy cavalry to Demetrius (near left)

Disaster for Ptolemy! The accompanying heavy cavalry routs.

Ptolemy is one heavy cavalry down.

The lone phalanx makes it around the flank and it unlucky and does not rout the Antigonid phalanx.

The flank attack by the Ptolemaic phalanx, due to a very poor die roll, does not do anything to the Antigonid phalanx

And immediately the other Ptolemaic phalanx is routed.

But the front Ptolemaic phalanx is routed.  Demetrius wins and Ptolemy retires the army.

Ptolemy has reached his breakpoint and the game is over.

Game end.

Verdict
Well that did not go as expected.  What I mean is that Ptolemy was supposed to win.  I have a bias to Ptolemy as my first army I started collecting, way back in 1980.  So I was cheering all the way for Ptolemy to win.  Alas, he did not.  It was a close game and could have easily gone the other way - Demetrius was only two units away from his breakpoint..  The phalanx battle lasted longer than I expected.  There was not many pursuits and both sides rolled dice that saw disorder after disorder, rather than some routs.  Only a little unusual, it was only a turn or two longer than usual.