Tuesday 20 August 2013

Battle of Crimisus 341BC using Ancient Battlelines Clash

Introduction
This is game 14 in playtesting my ancient rules - Ancient Battlelines Clash. Previous games used my rules called Ancient Warrior  Battles.  The latest version is on its own blog page. I am playtesting the rules by replaying all the Peter Sides scenarios from his Historical Battles books.  ABC is designed to finish in under an hour on 2'x2' tables.

Battle of Crimisus

Carthage lands in Sicily with a large army and Timoleon leads a Greek army to stop them plundering Sicily.
 
Here is a link of interest and that I used to create the scenario:

Wikipedia article
Plutarch Life of Timoleon 25-29
Diodorus Book 16.77-80

I also used Lost Battles (Sabin).

Changes to the Peter Side's scenario
The Peter Sides scenario had both forces lines up against one another on a slope with bad going occurring after 1d6 turns.  Looking at Plutarch, Diodorus and the Lost Battles interpretation, it seemed that initially some Carthaginian forces were engaged (10,000 including chariots) and then later more Carthaginians crossed the river and those were then fought.  So I had to go back to the original (translated) sources to come up with a scenario more like the Lost Battle one.  I can see where I think Peter Sides was going with the way he set up the scenario - the initial battle could be seen as inconclusive and not really a melee, allowing one to then set up the battle as a more conventional one. 

I did reduced the units by about 1/3 to account for wider width that was in the original scenario.

Troops
Greeks
Greeks - cavalty on the flanks, skirmishers at the foor of the hill and hoplites and peltasts on the hill.
3 Hoplites, HI, protection +1 phalanx
2 Heavy Cavalry, HC
2 Peltast, LI, fortitude+1
2 Skirmisher, SI, javelin
1 General +1 (Timoleon)

Breakpoint:6

Carthaginians
Carthaginians - chariots, pelatasts and skirmishers represent the 10,000 already across the river.  Heavy infantry, cavalry and more peltasts about the cross the river to the rear.
1 Sacred Band, HI, protection +1, phalanx, fortitude +1
2 Hoplites HI, protection +1, phalanx
5 Light Infantry, LI
4 Skirmisher, SI, javelin
2 Heavy Chariot, HCH
2 Cavalry, HC
1 -1 General (Asdrubal)

Breakpoint: 9

Deployment
Deployment:

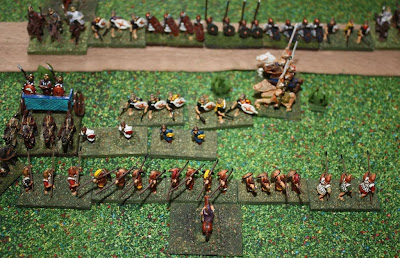
Overhead shot with Greeks at the top and Carthaginians and river at the bottom.
Chariots and skirmishers on one side of the river - others in the process of crossing the river.

I had to add rules for crossable rivers - had rules for streams, none for crossable rivers.  Crossable rivers count as difficult terrain (reduces combat value) but take an entire move - stop when contact, one move to get to other side. Count as in difficult when in contact or in the river.    

After 1+d3 turns, all terrain becomes rough (to account for the turn in the weather).  As the movement rate is faster in my rules than DBA, I reduced the random turn range from that in the original scenario (1d6).

The Game
Greeks advance and the flank cavalry charges the chariots.  The Greek right flank manages to rout the opposing chariot (lucky 6 roll and then successful pursuit) and the left flank sees both cavalry and chariot in disorder.
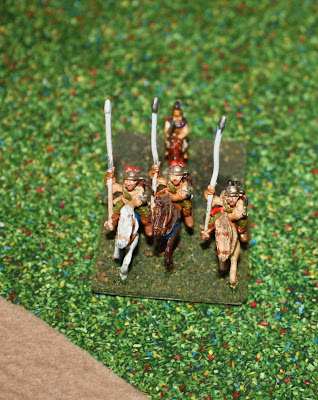
Victorious Timoleon and heavy cavalry (on the Greek right flank)

While on the left, the heavy cavalry (with attached subordinate commander) still in melee with the opposing heavy cavalry.
The rest of Carthaginian army is crossing the river. The right flank Greek cavalry attacks the Carthaginian peltasts and manages to rout one.
 
View of the line from the Greek side.  Note the Greek heavy cavalry in the centre that is rolling up the Carthaginian peltasts while the rest of the Carthaginian army is still crossing the river.

The cavalry routs another peltast, a Greek hoplite advances due to skirmisher fire and forces a Carthaginian peltast to rout; pursues into the river and routs an opposing hoplite.
 
The Greek hoplite in the centre has pursued into the river after routing a Carthaginian Heavy infantry, and is meleeing with a peltast.  The Greek heavy cavalry in the centre has finished cleaning up the peltasts.


A roll of a 6 sees the left flank chariot routed.  This then has the Carthaginians reaching their breakpoint.  They were unlucky to lose the hoplite, I think they would have done a bit of damage once out of the river.
 
A view of the forces at game end.  The Carthaginians are in the river (except for the Greek hoplite from the last picture).
Verdict
Well, that game was faster than I thought.  And I played this is daylight and I am better at photos of the game when playing at night. If I was going to re-do the battle, I think I would only put 1 peltast (not 3) on the side of the river with the chariots and have peltasts more with the river crossing.  As it is the breakpoint can be reached by routing the forces that have already crossed the river and only one more heavy unit the river crossing.

This is the last of the hoplite-type battles, the next is the first battle of the Latin War.  Then there is a whole bunch of pikes (Alexander and Successors) and early Roman battles coming.  But...to speed up playtesting, I have ordered a used copy of Imperator, a light campaign system by the same author (Bill Banks) as Ancients.  As Ancient Battlelines clash owes some of its lineage to Ancients,  I think I can use Imperator to generate a a bunch of battles around a particular epoch.  I may be wrong though - will find out when it arrives. 

Saturday 17 August 2013

Battle of Crocus Field 353BC using Ancient Battlelines Clash

Introduction
This is game 13 in playtesting my ancient rules. Previous games used my rules called Ancient Warrior  Battles.  The latest version is on its own blog page. I am playtesting the rules by replaying all the Peter Sides scenarios from his Historical Battles books.  ABC is designed to finish in under an hour on 2'x2' tables.

Battle of Crocus Field
Philip comes to the aid of the Thessalians to defeat the Pheraeans.  The Pheraeans were allied to the Phocians (led by Ononmarchos) who invaded Thessaly and defeated Philip.  Philip went back to Macedon but returned the year after with a greater force.

Here are links of interest and that I used to create the scenario:

Wikipedia article
DBM Scenario

Changes to the Peter Sides scenario
The width was 37" so I had to reduce the number of bases by 1/2 to reduce it to 24".

Troops
Macedonians

Macedonians - cavalry to the left, hoplites in centre and flanked by peltasts and skirmishers

3 Hoplites, HI, protection +1, phalanx
2 Peltasts, LI
2 Poor Peltasts, LI, fortitude -1
2 Skirmish infantry, SI, javelin
1 Heavy Cavalry, HC, fortitude +1
1 Heavy Cavalry, HC
1 General (Philip II)

Breakpoint:8

Phocians
Phocians similar with cavalry on the right, hoplites in centre and flanked by peltasts and skirmishers
4 Hoplites, HI, protection +1, phalanx
2 Peltasts, LI
4 Skirmish infantry, SI, javelin
1 Heavy Cavalry, HC, fortitude -1
1 General (Ononmarchos)

Breakpoint: 6

Note on unit types: I have updated missile protection in the rules so that instead of missile protection being expressed as either -1,0 or +1 it is not 0, +1, +2.  It made it easier to do the missile firing - most units are missile protection -1 and that meant for every missile fire I have to mentally subtract 1 from the die roll.  Too taxing and I sometimes forgot :-)  A clear sign it needed change. So now that is one less modifier to normally worry about.

Deployment
Deployment:

Phocians on the left with less cavalry but more infantry. Macedonians on the right.


The Game
Philip moves to proximity range of the Phocian poor fortitude cavalry that stand of charging (rolled a 1 for reaction). Oops, Philip was hoping to draw them out and so have a good flanking force for the next turn. So on the next turn, Philip charges them; Phocian cavalry retreat, Philip pursues and routs them.  But now Philip is a fair way from the line and a turn later than he would have liked.

Philip at the back, near the edge and a long way from the enemy battleline (bottom left)

The Phocian main battleline continues to advance.  They have more hoplites and a general as well so need to get into melee as fast as possible before the cavalry comes back. 


Phocian battleline (at rear) moves very close to Macedonian battleline (front)


Proximity tests are required as the Phocians moved with 4cm of the Macedonians.  It would all be a pass here - the worst result to roll would be a 1. For an undisordered with support, the only effect of a 1 will be for skirmishers, archers, shock and impetuous and none of these needed to take a test so I did not roll.  All Macedonian unit stand their ground.

Macedonians about face their elite cavalry (are greater than 20cm from enemy so a normal move, not a complex one that would likely disorder them).

Philip moves to the other cavalry.  botrh cavalry are now at least facing in the right direction - towards the enemy in the centre.

Phocians fire with skirmishers and charge the Macedonian line.  Some reaction tests on each of the ends with skirmishers and the main hoplite clash saw a few retreats (a 1 and a 6 rolled in combat).

Result, looking from the Macedonian side, after proximity tests and one round of melee.  Green 'bushes' are disorder markers.

Another turn sees two Macedonian hoplites routed, for no loss to the Phocians.  But the Macedonian cavalry comes charging in from the rear.

Macedonian cavalry is approaching the rear of the Phocians


...and slams into the rear of the Hoplite unit with Ononmarchos.  The Phocian unit hangs on though.

The rear attack will only fail to rout the unit on a 1 or 2.  Rolls a 2.  Locked in melee. Elsewhere another Macedonian light infantry is destroyed.  The Macedonians have reached breakpoint - all light infantry and two-thirds of the hoplites gone.

Macedonians lose another unit and lose the game.  This is a view of what the centre looks like.

If the cavalry have not gone so far, the Macedonians would have won; or even if the Light Infantry had hung on one more turn.  Maybe sending both cavalry against the single opposing Phocian Cavalry was not a good idea.  I did think about doing just that but two is better than one, even if the Phocian cavalry is crap against the Macedonian elite cavalry unit.  Bad Macedonian tactic by me.

Verdict
Surprised a little that the rear attack did not work, and had a 1/3 chance of still going.  I guess all attacks against it count as flanked and if it was not for the general attached to the flanked unit, the Macedonian hoplite to the front would have routed it.  So, the general kept them in the game. Otherwise still fast, still fun.

Saturday 3 August 2013

Ancient Battlelines Clash first face to face playtest

My first face to face playtest
Andy suggested coming over for a game today using the rules I am working on, Ancient Battlelines Clash (ABC).  It would be the first face to face playtest of the rules I have done.  There have been others out there that have provided feedback over the years but this would be the first time for me.  I have done around 20 solo games of ABC but that is not the same.

In summary, it went well.   There are a couple of changes to the layout and content of test tables to make them easier to read and I need to redo the charge/pursuit table; but the rules themselves stood up - from my point of view - really well.  We only had one game and Andy seems to think they were alright.  The big plus was that good and historical tactics won out.  And those tactics were Andy's.  He won by a lot by using much better tactics than me despite not knowing the rules (he had not read them beforehand). So the rules seem to reward good historical play, at least after one play! Andy took home a copy of the rules with him.

Something that occurred while explaining the rules
While explaining the rules to Andy, I realised that the root of these rules are (and I am generalising a bit here) Warrior Kings - now Rally Round the King - for reaction tests; Bill Bank's Ancients for combat and the way disorder works; Justified Ancients for command rolls and missile fire and Armati for restrictive movement, groups and general ethos.  Andy had read some of these rules but played none of them.  If you have played all four of these rules, it will be really easy to pick up on Ancient Battlelines Clash and what is is attempting to portray - particularly WK/RRtK for a sequence of play based on reaction tests and Bill Banks Ancients for how combat and disorder works.  If you had not played any of these, it will be just as easy as any other set of rules...

The Game
Here is a brief run down on the game - Alexandrian Macedonian Vs Later Achaemenid Persian.

I have a very formula driven excel spreadsheet to generate random armies and terrain.  But I do not have many army lists.  Most of my focus is on the Peter Side's replays.  I do have a draft Macedonian list that I quickly updated to be able to randomly create a army (I have a Later Achaemenid Persian army list).  My randomiser basically stops with the last unit that does not take the army over the defined point level.  But what that means is if the point level is defined as 35, and a 5 point unit takes the army points to 36, the army list will only have 31 points and could have had another 4 points (light infantry, skrimishers etc).  I need to fix this, which may not be easy as it is excel, not code.

Macedonian (attacker) (Andy)
1 Companions (high fortitude, disciplined)
1 Light Cavalry
2 Phalangites (phalanx)
1 Hypaspists (phalanx, high fortitude, drilled)
1 Peltasts
1 Skirmish Infantry

Later Achaemenid Persian (me)
1 Heavy Cavlary
4 Poor Heavy Cavalry (low fortitude)
2 Light Cavalry
1 Hoplite (phalanx)
1 Light Infantry
2 Skirmish Infantry

 Deployment:
Macedonians on the left.  From their right to left, left is cavalry, pikes and the light infantry. Persians left to right is the good cavalry, LI and hoplite, poor cavalry and some light cavalry as flankers.


The Persians move the light cavalry up to flank to get at the Macedonians from the side.  Note this this turned out to be a wrong thing to do - they were too far to order properly and went too far.  They should have stayed where there were and waited - they were not faced by anyone - they did not have to move up.  Some of the Persian poor heavy cavalry move up against the Macedonian peltast and skirmisher and the Macedonians are routed. 


Macedonians move up the entire line; some Persian heavy cavalry at right is threatening the Macedonian light infantry.


A picture a little further along showing the Persians cleaning up the light infantry (to the centre right).  It was the last good tactical thing I did!

The Persian heavy cavalry with general is forced to charge the Companions. While writing this up, I have realised they they should have not been subject to mandatory charge; about 3 games ago I changed it from all heavy cavalry being subject to mandatory charge to only high fortitude and modified the impetuous ability so only impetuous units were subject to mandatory charge. Easier to say units with impetuous ability subject to mandatory charge than have to remember it is Knights, Heavy chariots, elephants and high fortitude heavy cavalry.
 
Persian Heavy cavalry and general in combat with Companions and the Macedonian general.
 A general loss check resulted from the combat.  Macedonians were OK, the Persians lost their general.  This made it hard for the rest of the game to order troops.
 
Where the Persian general was.  The replacement subcommander is required only for distance measuring for orders, otherwise it is useless!
 Persians start to move the right flanking cavalry units back closer to the action, but it is too little too late.  The Macedonians manage to destroy a hoplite, and also the heavy cavalry now the genral is not there to bolster their ranks.

Note the lack of Persian Heavy cavalry, and the hoplite in the centre doe snot last long either! Also note the high quality of Andy's painting (the Macedonians) compared to my ebay acquired Persians.
The Persians then lost one more heavy cavalry (from a hoplite), the Persians reached their breakpoint and game over.  Well deserved win to Andy.  One thing that was good explaining the rules and probabilities is that the game rules made sense in the context of what went on in ancient battles, or at least in my version of events!

The end.
 So that's it - a fun game and not too long.
 
Changes to the rules (for those interested)
I had a number of rows in some of the test tables with the labels "2-5", "6-7", "8+" but they all applied to the same result. I was trying to keep the tables consistent with the combat table but most other tables all have the same result for 2+.  So to un-confuse results, I can just change the "2-5", "6-7", "8+" to "2+".

I was thinking of doing this anyway, but only Infantry and Chariots are -1 to combat when disordered.  Rather than describing this under troop types in the rules, I can add this to the combat table.  It will be more obvious.

I need to add veteran and drilled and some other abilities to the quick reference chart, plus a few minor content additions to the reference chart.

I use the description of +0, +1 +2 general but really the +1, +2 enhances command and control, it does not affect the general itself, better to describe the +0, +1, +2 as command structure, rather than the general.

The biggest change is to the mandatory charge/pursuit test.  It did not sit quite right and the play with Andy confirmed I really have the fortitude modifiers back to front (high fortitude units are should be less likely to pursue).  Currently the table has 2+ for charge/pursuit and less than that no pursuit/charge.  High rolls are good in this game, and most of the time you do not want a unit to mandatory charge/pursue, so 2+ should be changed to no pursuit/charge.  The was the way it was late last year but I changed it.  I am going to change it back, but I have to think through the modifiers to make sure I don't stuff it all up!

Friday 2 August 2013

Battle of (2nd) Mantinea 362BC using Ancient Battlelines Clash

Introduction
This is game 12 in playtesting my ancient rules. Previous games used my rules called Ancient Warrior  Battles.  The latest version is on its own blog page. I am playtesting the rules by replaying all the Peter Sides scenarios from his Historical Battles books.  ABC is designed to finish in under an hour on 2'x2' tables.


Battle of Mantinea
Athens joins the Spartans to attempt to curb the Theban influence over Greece. Once again, Epaminondoas leads the Thebans into battle against the Spartans.

Here are links of interest and that I used to create the scenario:

Wikipedia article
DBM scenario

Changes to the Peter Sides scenario
Originally 44" wide, I reduced the number of hoplite bases to fit to 24".  I also did not place the streams on the table as the scenario indicates they have no effect.  The scenario had Sparta and Allies all Sp(O) and Thebes (and their allies) all Sp(S).  Helped by Lost Battles, I created 1 high fortitude unit on each side, and made the rest average.

Troops
Thebes
Hoplites at back (Deep phalanx on the right); cavalry and skirmishers on the flanks.

1 Elite/formed-deep Hoplites, HI, protection 0, phalanx, fortitude +1
4 Hoplites, HI, protection 0, phalanx
4 Hoplites, HI, protection0, phalanx, fortitude -1
3 Heavy Cavalry, HC
6 Skirmisher, SI, javelin
1 General (Epaminondoas)

Breakpoint: 12

Sparta and Allies
Spartans on the left end of the hoplite line; cavalry and skirmishers on the flanks.

1 Spartan Hoplites, HI, protection 0, phalanx, fortitude +1
6 Hoplites, HI, protection 0, phalanx
2 Heavy Cavalry, HC
2 Skirmisher, SI, javelin
1 General (Agesilaus II)

Breakpoint: 9

Deployment
Deployment:

Thebans at the bottom; Sparta and allies at the top.

The Game
Theban left flank cavalry charge opposing cavalry and with some pursuits, end up on the hill, both sides disordered.  Two on one combats see only the worst result inflicted on the loser, not two results from each one.  Result was disorder and retreat and then both Theban cavalry pursued and all ended up disordered in the followup combat.  Fast, fun and sometimes surprising.

Theban cavalry pursue up the hill.

And in the very next combat, the Allied Cavalry roll a 1 (which is bad) against Epaminondoas and the heavy cavalry.  Allied cavalry routed.

Spartan and allies advance the whole line.  Spartans taking out the Theban skirmish infantry along the way, but are disordered on a unlucky fired-on test of a 1.

Seeing this, the Thebans advance all their non-poor hoplites (basically the left half of the line).  They are just out of reach and the Allies stand (the result of a proximity test - what to do when an enemy is within 4cm).  I have been tempted to class some hoplites as impetuous, just so they will charge when the enemy come close like this, rather than stand.  But I do not know my history enough to call this. Anyway, the rules are flexible enough that you would just add the impetuous ability to hoplites if you so choose.


The battlelines are very close (allies to the back, the non-poor Theban hoplites at the bottom)
This gives Agesilaus II a chance to rally the Spartans (50% chance as he is attached). Woo-hoo!  Rallied, undisordered, back in the game!


Agesilaus and the recently rallied Spartans
Thebans clash with the battleline. First combat sees a Theban hoplites routed!  (Theban hoplite unit roll a 1 - retreat and disordered.  Allied hoplites pursues and roll a 6 - Theban hoplites routed).  But then a Theban skirmisher further back disorders the victorious allies.  Have I said this is fun and fast?


There was a Theban hoplite to the right of the one in the left of the picture.  But it routed.
Next, I could not make this up if I tried.  The Theban deep phalanx rolls a 1 against the Spartans and so retreats.  As Epaminondoas is attached, a 1 means I need to roll to see if the general leaves the field (killed, wounded etc).  I roll a 1 which is a yes. Epaminondoas is out of action.  Just like in 362BC.


Theban deep phalanx (botom left) after retreating.  Epaminondoas was with them but left the field.  The single figure behind the unit is the replacement general.
An unusual string of 1's and 6's sees the battleline broken up and losses mount in one turn - 2 hoplites from the Allies and 1 Theban.  The Allied left flank enters the fray as well but eventually the cavalry take out a disordered allied phalanx.


Overview of battleline from the Theban side.  There is a large gap in the middle and the Theban cavalry has entered melee to the right of the picture (and manage to rout a disordered phalanx)
The Thebans find it hard to move units with a -1 (poor) general and rallying is out of the question (so the Cavalry are effectively stranded on the hill as it will take ages for them to come back).
Agesilaus II attaches to a hoplite and takes out a Theban hoplite.  And next turn attaches to a cavalry unit that came from the left flank and assists it to rout a disordered hoplite (it may look like a flank attack but it isn't - have to be completely behind the front line for that).


A not flank attack but the hoplites are disordered and the cavalry with attached general is too much for the unsupported Theban hoplite, and the latter rout.
Thebans are now at their breakpoint and so have lost.

End game overview - Thebans to the bottom and Theban cavalry on the hill at the top left (and centre top)
Verdict
Great game.  About 80 minutes to play and write up and take pictures and type some clarity into the master rules so maybe 30 minutes all up.  I did get to clarify some parts of the rule in this game - if you capture a replacement general, it is not worth anything to the army's breakpoint count.  A replacement -1 general gives no modifiers to combat was not clearly spelt out.   This game seemed full of two on one combats and I followed the section on it carefully as I have not had many before.  No changes - very happy with how it works.  Onwards to more games!