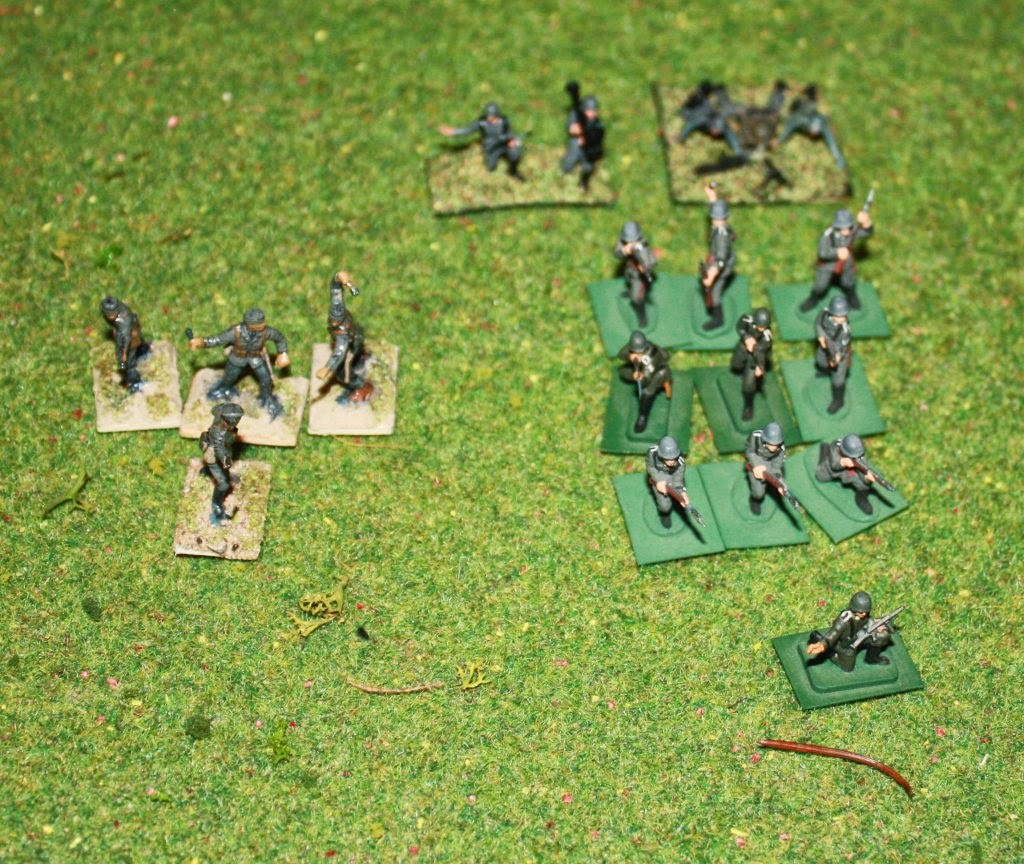
Saturday, 25 April 2015

Operation Jupiter Game 05 - The Ridge

Introduction
This is game 5 is replaying the scenarios from the Briton Publishers Operation Jupiter skirmish scenario book (Lulu PDF link).  I am replaying them on a 4.5'x5' table using 20mm, my own Advance to Cover rules and a figure scale of 1 figure = 1 section.  Background on why I am playing these is at the start of the first game post.

Scenario
Germans are dug in on a ridgeline.  The British start in a nearby walled wheatfield and have 6 turns to dislodge them.

The empty table from the British wheatfield deployment area.  The German ridgeline is in front of the trees. You will have to imagine a slope from the trees to the wheatfield.
Troops
British
The British units.  I have no Crocodiles, even though the tanks are Airfix, I cannot find their fuel trailers - I must have mislaid them sometime in the last 34 years!    So the grey ones will be the flame tanks.
1 Battalion HQ
     6 figures
2 Companies, each:
      1 CO, 1 2" mortar, 1 PIAT and 9 figures
2 Churchill VII
2 Chruchill Crocodiles (flame)

German
The Germans.  One day I will base the second Pak 40!
1 Battalion HQ
   4 figures
1 Company
   1 CO and 9 figures
2 Pak-40
1 MMG
1 fire mission of 80mm mortars

Deployment
The Germans are in foxholes on the ridge.  In the actual battle, the Germans were behind the ridge and the British simply overran them.  So I setup the foxholes on the ridge.

A simple setuip - AT guns and MMG and platoons each in their own foxholes.
The British start in the wheatfield.  The only way out is via the opening, or for the infantry they can jump the wall.

The British - tanks will lead the way out the opening, infantry will follow.
Game
The tanks move out while some infantry follow.  Other infantry race for the wall.

The British move out.
The Germans open up with their anti-tank guns.  good range, good chance...both miss.  And both are spotted (a 4+ was required to spot them).  The tanks continue movement, as does the infantry (when the activation card  actually happens - the joke came out a few times to end the turn before the British infantry could move).

More movement by the British.
The anti-tanks guns get to fire again and pin one and KO another.  This makes up for their earlier  poor performance.   A platoon (3 figures) opens up on the infantry to cause a casualty but is spotted and routed the next turn but some good dice rolling.

Two tanks out of action (one temporary).  The empty foxhole was a German platoon
The remaining Churchill crocodiles open up with HE and via some amazing dice rolls KO the two anti-tank guns.  The British brought their good luck with them on this game.

The two empty large foxholes used to have Pak 40s/
The German mortar is called in, the Germans open up with everything they have and pin one of the two companies.

The pinned British company in the foreground. 
The British then open up with the Churchill HE and the other British company pours fire into the foxholes.  The Germans have had enough and retreat into the woods.

End game.  The British still have a a full company, half the tanks and a pinned company that could rally/ 
Verdict
It may not read like a close game but it actually was.  If one more tank had gone, or the British were less lucky in knocking out the Pak40s, it could have easily gone the other way.  The British must have been using some good luck dice for this battle.

It was a fast game (always good) and I felt it could have easily gone either way.  As with these "vignette" battles, a few lucky dice rolls can determine the game.  

Saturday, 28 February 2015

Operation Jupiter Game 04 - Wicked Wyverns

Introduction
This is game 4 is replaying the scenarios from the Briton Publishers Operation Jupiter skirmish scenario book (Lulu PDF link).  I am replaying them on a 4.5'x5' table using 20mm, my own Advance to Cover rules and a figure scale of 1 figure = 1 section.  Background on why I am playing these is at the start of the first game post.

Scenario
Three German snipers are around the farm complex.  A company of British troops need to fish them out and take control of the farm

I was thinking of skipping this as it is three snipers versus 14 figures.  But then I thought, what better way to test out my rules.  With only three snipers on one side, will the sniper rules work fine?  The answer was yes.  So I am glad I played the game.

Troops
British

The British forces.
1 Battalion HQ
     3 figures + 1 sniper
1 Company:
      1 CO and 9 figures

German
The Germans.  All 3 snipers.
3 snipers
1 offboard 88mm flak battery with 2 missions.
Note: the 88mm flak has direct line of sight to most of the British end of the table and can fire when activated.

Sniper locations.  Note the one on the left cannot actually be seen in the picture.  In fact, as I wrote this up weeks after playing, I am guessing it was about here!
German snipers were setup not knowing how the British were to advance.  I put them in the trees so I could allow them to have line of sight over the walls.  This is the same table as scenario 3.  I thought is was supposed to be the same place by the picture in the scenario book, but it isn't!  The setup is very similar though, so no harm done.

The British decide to advance though the wheatfields down their left, and send one platoon (3 figures) down their right.

Game
There is not much to this game from a photo side other than the slow disintegration of the British forces as they advance.
A sniper can fire as far out as a MMG and with the same dice (3). However, they may only target one figure.  The three dice is to simulate the morale effect they had, rather than killing power.  Also, to spot a sniper at greater than 18" is a 4+ and there are only a few snipers to spot, and a unit can spot once per activation.
The British advance immediately into fire from the 88mm.  Two British figures are down already from the leading company.  The snipers fire and miss and remain unspotted.

The British advance.  Battalion HQ to the rear (on the left), two platoons (minus 2 figures killed by the 88) top middle.  Another platoon on the other side of the road to the lower right.
Two snipers focus on the single platoon on the British right and two British figures are gone.  The one remaining one spots the sniper! But this lone British figure is killed by return sniper fire.  

The lone survivor on the British right after his two mates bail.  He is subsequently killed by further sniper fire but he managed to reveal the sniper before going.
 The flak 88mn strikes for the second and last time and takes out another two figures. The company is suppressed (cannot fire on next activation).  Icing on the cake and the German snipers take out another figure from the company.  All that is left is the company commander who survives the requisite morale check.  So far, Germans have destroyed 9 figures and the British have revealed one sniper.  The British Battalion HQ spots a second sniper and kills him. The British sniper kills the other spotted sniper.  Things are looking better for the British.

The remaining British.  The lone survivor of the company is top right, the Battalion sniper is at the back on the left.  The three centre figures are the rest of Battalion HQ.

The remaining German sniper takes out the company commander.  With the company gone, the only unit left on the table is the Battalion HQ.  A force morale check is taken and the British decide to retreat.  A good decision.  I am not sure pressing on would have achieved anything other than more British deaths.

The British head for the wall, ready to retreat along it.

The remaining sniper, never spotted, in his tree.
Verdict
I was thinking of skipping this scenario.  How exciting could it be - three snipers versus a company advancing?  But it was actually quite tense.  Will the British manage to spot and kill the snipers before they take their toll?   In this case, the British retreat but a few different dice rolls and they would have made it.  I was engaged every activation. A great scenario that worked really well with my rules so that is a good sign that the rest of Operation Jupiter will as well!

Saturday, 21 February 2015

Operation Jupiter Game 03 - barn at Chateau de Fontaine

Introduction
This is game 3 is replaying the scenarios from the Briton Publishers Operation Jupiter skirmish scenario book (Lulu PDF link).  I am replaying them on a 4.5'x5' table using 20mm, my own Advance to Cover rules and a figure scale of 1 figure = 1 section.  Background on why I am playing these is at the start of the first game post.

These games are like vignettes of larger battles.  The report is not long nor that detailed but this is the first one in this series I did take some notes.

Not to preempt anything, but this was the most fun battle I have played in a while.  It was very nail-biting from turn to turn as the British kept assaulting the farm as the clock was ticking.

Scenario
Germans are holed in some farm buildings.  The British have 10 turns to dislodge them (note it is 6 turns in the scenario but I started them on one edge a fair distance from the farm so added 4 turns for the extra movement).

The Germans setup int he farm complex on the assumption the Brits will have a hard time kicking them out in the time limit.  the Pazerschrecke team setup in corner, in case tanks come down the road.

Troops
British
The considerable British force (considerable compared to the Germans)
 1 Battalion HQ
     4 figures + 1 PIAT
2 Company:
      1 CO, 1 2" mortar and 9 figures
1 Churchill VII
3 fire missions of 3" mortars

Deployment - one company and HQ on the left, the other company on the right.
Assume 2 turns used up to get to the deployment position shown above.

German
The small force of German defenders
1 Battalion HQ
   4 figures
1 Company
   1 CO and 9 figures
1 Panzerschrecke team
1 MMG

Defending the farm. Two platoons of the company in the large thatched building with the third platoon in the smaller building to the right  All figures are actually in the building they are behind so I know what is in them!
Game
Two turns gone to get to deployment position, 8 to go.  The British advance the 1st Company (the one travelling down the right of the table).  This take 4 turns - sending one platoon across the field, make sure nothing there and then the rest following.  This is as the British do not kniw if the Germans are at the hedge or tree line so need to be careful.  Of course, the Germans re all in the farm.

1st Company advance across the field on the right and in front of the farm.

2nd company advances in step formation as well and a platoon runs into the Panzershrecke team that is hiding in a corner of the field. The Panzerschrecke team are two figures and fire with their rifles (2 dice in total). Two 6's, two dead Brits. Most of the rest of 2nd company fire at them for only one hit. The next turn a platoon (3 figures) enter in close combat with the single remaining German and the latter are captured.

2nd company.  The figures at the far right have just discovered a Panzerschreke team.
Time is running out for the British. Mortars are called onto the main building prior to some assaults; 2 dead Germans and all are suppressed.  Not bad.

Result of morrar fire on the building - 2 Germans are killed (4 left). I did mention it earlier but the figures are actually in the building but I put them behind so I know what is there.
The mortars softening up the building, a platoon from 1st company charge. The MMG (on overwatch) decides to fires at them - 3 dice - crossing the road but rolls all 1's for all misses. The MMG firing gives their location away, so it was a bit of a risk to do so.  It could have been worth itbut did not pay off. The assaulting  platoon loses close combat: 3 attackers dead (all of them) and one defender. This is close combat in my rules, borrowed from Take Cover!! that took the concept from Rapid Fire: roll 1d6 each, add number of figures and a couple of modifiers. - winner loses 1 figure, loser loses three and retreats 3". It is fast!

British platoon assalting the main building.  They fail.
Germans in the building rally.  The 1st Company get ready for a pincer assault - one on the MMG and one on the main building again.  A platoon (3 figures) has advanced into the next field and is across the road from the MMG.

1st company milling behind the hedges across the road from the farm.  At the right can be seen some of the platoon about to charge across the road in to the MMG 
The British platoon from 1st company charge across the road into building with the MMG and win the close combat, all Germans killed.  A foothold!

Assaulting the MMG held building,  it was a success!
The mortars target the main building again  for 1 casualty.  Another British  platoon and the Company officer from 1st company charge into the building after the artillery lifts. It fails, 3 attackers lost and one defender killed.  The British are running out of men and time.

Another assault that fails.  Readers taking notes will see I failed to remove a German figure that should have gone from the previous assault.
1st Company rolls for morale as they have lost 7 figures and their officer.  They fail and are pinned (no move and no fire until rallied).  Half the British force has gone and only one building taken.

2nd Company is in position. A platoon from 2nd company charges into the main building.  This also fails but 1 defender killed.  Only one defender left!

2nd company platoon assaults (and fails)
The German defending company is 50% down and rolls a morale test that sees them pinned.  This causes the entire force to roll a morale test but it is OK.

Another 2nd company platoon assaults the main building with the one pinned defender.  Unsurprisingly they win.  Actually, based on the past history with assaulting this building, may be it was surprising!

Another 2nd company platoon assaults the main building and finally a win.
 The final Mortar mission targets the small house next to the main building and 2 Germans are killed. The German company morale roll sees them (the two figures left!) rout.  The German force morale also fails. This occurs during turn 10. Another really close game.

End game. Not much left - the 2 German figures at the left are about to rout.  The Battalion HO at the top right will withdraw.
Verdict
The most fun I have have for a while.  All the games have been fun, but this was exceptional.  I think is was the time limit.  I would throw a platoon at the farm - fail; next turn another - fail. Another in the following turn - success but now the company is pinned, use the other company - fail.  tick tick tick goes the clock. I was sweating the dice and the cards (the game uses card activation).

Also, I mentioned it in a previous writeup, but the Operation Jupiter scenarios are more like vignettes of a larger battle. While in another game, the farm would be possibly only a half or a third of the game and the farm one objective of two or three.  I am preferring the vignettes at the moment.

Oh, and the Churchill played no part in the game.  Frightened of hiding enemy Germans, the tank only advanced to the farm in the last turn.

Sunday, 11 January 2015

Operation Jupiter Game 02 - Horseshoe wood

Introduction
This is game 2 is replaying the scenarios from the Briton Publishers Operation Jupiter skirmish scenario book (Lulu PDF link).  I am replaying them on a 4.5'x5' table using 20mm, my own Advance to Cover rules and a figure scale of 1 figure = 1 section.  Background on why I am playing these is at the start of the first game post.

These games are like vignettes of larger battles.  The report is not long nor very detailed...and I took no notes during the game as it was so much fun!

Scenario
Germans are dug-in within a horseshoe shaped wood.  The British have 12 turns to dislodge them.

The Germans setup in foxholes about 12" (300 metres) from the woodline - far enough away to not be spotted too easily, but close enough to fire rifles (18" range). Battalion HQ is in the centre rear foxholes.

Germans in the foxhole.  British enter from bottom right (you can just see the front of a Churchill there).
Troops
British
The British force
1 Battalion HQ
     4 figures + 1 PIAT
1 Company:
      1 CO, 1 2" mortar and 9 figures
2 Churchill VII

Note: I only realised when writing this up there should have been two companies.  One was enough.

German

The Germans - Battlaion HQ and one company + foxholes.
1 Battalion HQ
   3 figures + 1 radio
1 Company
   1 CO and 9 figures
2 2x80mm mortar fire missions

Game
British plan: Advance with a Churchill and a platoon to draw fire and so spot the positions.  Then open up with everything that should be at the edge of the woods.
German plan: Fire at will - the range between the foxholes and the woods is only a few hundred metres.

The British advance to edge of wood.  This takes 4 turns (due to the fall of the activation cards) of the 12 total in the scenario.

British travelling through the woods.
The British advance a platoon and a Churchill out of the wood line and towards the foxholes.

The Germans spot the British moving in the woods and radio in mortar fire that causes 3 casualties to the British Battalion HQ that is pinned and does not do much the rest of the game. Receiving mortar fire in the woods is not recommended.

Not wanting to stay in the woods, another platoon exits the woods behind the first one.

The platoon advances, followed by another one.  The Churchill follows soon after.
British still fail to spot anything after 2 turns of spotting. Finally after another turn, the company spots someone in a foxhole and open fire with everything they have.  One foxhole down.

The Germans have lost half of their battalion HQ (the foxhole centre right)
Fire continues back and forth for a few more turns.  Time is on the Germans side and they are only losing about 1-2 figures a turn.

Some of the defenders, already down a figure in the foxhole.  The Battalion commander and radioman can be seen at the back.
The German mortars suppress a platoon in the open.  4 dice but only one casualty.

The German mortars suppress (green bush markers) a platoon. 
Another foxhole is emptied.

A defending foxhole is lost (centre left).  There are six defenders left - 2 are the remainder of the battalion HQ in the centre.
The German company is reduced to 4 sections and routs. The required overall force morale test fails and German retreat.   This was at game turn 10 so it was a close game.

Routing German company (3 to the top left and one top right, hard to make out).  Battalion HQ left in centre pulls back.
Verdict
Another great game.  Short and fun.  I am enjoying the scenarios and my rules.  The scenario calls for another 10 figures but I think the game would have been much more one sided to the British.

Saturday, 10 January 2015

Operation Jupiter Game 01 - Les Duanes Farm complex

Introduction
Wanting to drag out my 20mm WW2 stuff over the holidays, I looked around for some scenarios to play and settled on Operation Jupiter by Bennett P. Lacy, published by Britton Publishers and available in print or PDF from lulu.com.  A collection of 30 skirmish scenarios set on the 10 July 1944 British offensive Operation Jupiter. Recommended.

The skirmish scenarios are designed for final combat but have been scaled down from Company actions.  The rules I am going to use, Advance To Cover (ATC) are my own rules and are based for about a battalion on the table, so I just scaled them back up!  So 1 figure = 1 section/squad.

It is also designed for a 5'x6' table. when using my rues, I found that using around a 4'x4.5' was all I needed, setup on 1/2 a table tennis table.  As per the suggestion in the rules, I doubled all turn requirements.   All worked fine and have produced some tense games.

Notes on the rules (skip if not interested in rules development)
I restarted playing WW2 in about 2011 and was using Britannia Miniatures Take Cover!! (review here) which is what I used and loved in the early 2000's.  Of course, being a rules tinkerer, I have modified these rules over the last few years, going through various names.  I have just settled on Advance to Cover as a ruleset name and am quite happy with the mechanisms as they stand.  Operation Jupiter will be an opportunity for any refinement required.  They use card based activation; 1d6 for everything; and are derived from Take Cover with the usual spotting, infantry, antitank and indirect fire rules seeming familiar but streamlined.  Latest rules are here.

Scenario
This is Game 1 - Three infantry companies, supported by Churchills and dedicated 25pdrs, attack a Farm across open ground. They have 16 turns to do so.
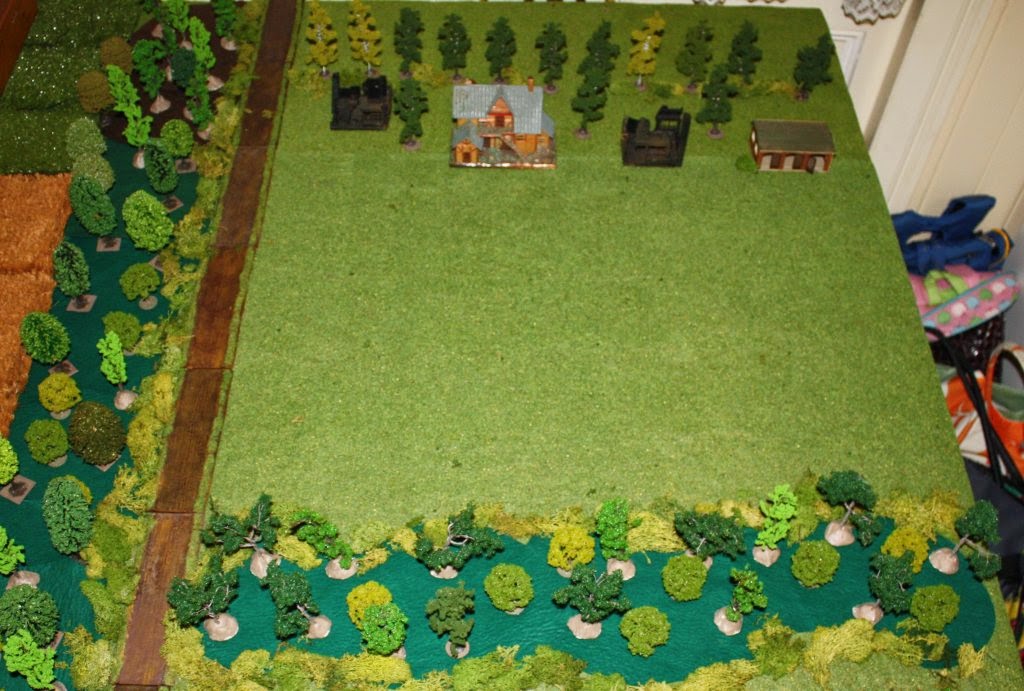
The game board. British start in the woods at the botton and the main building in the centre is the objective.
Troops
British

The British attackers
 Battalion HQ
     4 figures + 1 radioman
3 companies each
      1 CO, 1 PIAT, 1 2" mortar and 9 figures
4 Churchill VII
2 dedicated 2x25pdr fire missions

German

German defenders
1 Battalion HQ
   6 figures + 1 radio
1 Company
   1 CO and 9 figures
   1 MMG
2 Pak 40
1 Nebelwefer fire mission

The Game
British plan: Advance the Churchills with a plation each in support.  Engage the enemy and when reduced, advance the remaining companies.  Destroy spotted AT Guns or MG nests with the artillery.
German plan: Engage any tanks as soon as possible; MMG fire at good targets. Infantry to hold fire until required. Rockets to be used when suitable infantry targets are in the open.

I apologise in advance for those wanting a very detailed battle report (and a sigh of relief for thise that did not) - I was having too much fun during the game to write any notes.  You are lucky I took photos!

The Germans deploy in foxholes and in the buildings.  The anti-tank guns are on their right flank.  The Battalion HQ is split between the main building and the line of tress behind the main building as a reserve.

The German deployment -guns to the right of the photo.
The four Churchills advance with 3 figures and a platoon behind each of them.  The remainder of the infantry in the the woods, waiting to see what happens.

The German anti-tank guns open up - two hits but no damage due to the Churchill armour. If they were Shermans, the British would be two tanks down at this point.  The Churchills spot one of the Pak-40.  In ATC (Advance to Cover) a firing anti-tank gun in total concealment over 18" (about 450m) will only be spotted on a 5+, 3+ if in partial concealment.
The activation cards favour the British who fire HE at the Pak-40s for no effect.  The Pak-40s fire again but both miss.
British Battalion HQ call in the 25pdrs on the building with Pak-40.  There are two 25pdrs, 3 dice each and need a 6+ to hit in hard cover.  Three 6's from 6 dice and one Pak-40 is destroyed.

It is turn 6 already of 16 turns and it will take 4-8 turns for the infantry to cross the field (it is a 24" distance, infantry move at 6" but only on their card that will appear about 50% each turn).  The British main forces advance out of the wood.  And are promptly fired on by the MMG and the squad. This causes one company to lose 4 figures in one attack and are suppressed.

Company advances out of the wood and promptly depleted and suppressed (green bushes are suppression markers)
The German rockets are also called in - rockets in the rules are five simultaneous attacks of 3 dice each with some deviation on where the template for each attack lands.  A 1 is a misfire.  Rocket attack - 3 1's for 3 duds!  And the rest cause no casualties!  This seemed to be the German story for the game.

The other Pak40 is destroyed by concentrated direct HE fire from the Churchills.

The Churchills advancing on the British right. Most of the German defending company can be seen to the left of the picture.
With the Churchills now able to advance without fearing at-guns, they all advance.  The vehicle MGs and HE cause terrible havoc to the German forces.  The British advance is slow, but the Germans are feeling the pain of such fire and being whittled away, figure by figure.  The German MMG goes, as does some of the company.

Another view of the British advance.  They still have all 4 Churchills, and a lot of infantry remaining.
The final 25pdr mission is called down on the main building and manages to remove one figure (section) out of four defedning.  They are also suppressed for being under indirect artillery fire.  A British platoon takes advantage of this (is was planned this way) and charges from the safety of a Churchill to enter in close combat with the occupants of the building.   The result is a tie!   One figure lost each.

British platoon charges into close combat at the objective.  Subsequently repulsed.
The remainder of the German Battalion HQ runs into the building to reinforce the defenders. Next turn the British lose and are destroyed.

All the remaining German defenders - 1 in the main building (about to be reinforced by the rest of Battalion HQ), 7 of the German company.
Even though the Germans have repelled the British from the building, things are not looking good.  The German company in defence is down to 6 figures, the HQ is four figures, the MMG is gone, and is their entire left flank. The British still have a lot of troops left.  The only good news is it turn 12 and so the Germans are slowing down the British advance.


While the German's fire on the British forces in the open, they now only have about 5 figures left in total..  The Churchills pour in fire into the buildings while the infantry continue to advance.  A 6 is required to destory a figure; vehicle MGs are 2 dice, and so it the HE...and the advancing British fire as well. It all starts to add up.  The German company finally routs with only two figures left.  The only remaining unit on the table is the Battalion HQ and a force morale rolls sees them pull back.

Turn 14.  The German company (2 figures left) routed and The Battalion HQ pulls back.  Still lots of British infantry.  
  
The British win on turn 14.

Verdict
Firstly the game - Once the Pak-40s had not taken out any Churchills, the game was a bit of a walkover from a firepower perspective.  It was still a little tense though as time was running out for the British to achieve the objective in time.  I think if the Pak-40s had KO's at least 1-2 tanks, the British would have failed to dislodge the Germans in time.  I found it a balanced scenario.
An after action report for the same scenario using different rules is at Just Jack's BlackHawkHet blog post.

I am finding I am really liking this setup for a game - a few tanks, about 20-30 infantry and maybe some artillery.  And a small table scenario.  For a larger game, this scenario would likely be about a third of the table, with some other objectives as well. Rather than decide how to split forces to achieve these objectives, there is really only one with a small force.  I feel like it is a vignette of what would normally be a larger game.  It also feels a like a puzzle - how to best achieve the objective with the forces your have.   I have played a few of the Operation Jupiter scenarios and am loving this sort of scenario and game.  The size of forces is  what I have found over the years I enjoy the most; now I have also found a scenario type I love that matches them.