Introduction
I play a game with my 20mm WW2 forces – Late war British Vs
Germans – on a 4’x5’ table.
Background
In the last few months, I have had 4 games using One Hour Skirmish Wargames with 2 people a side. I do like the rules but they are not as fast as mine 😊 The half a table tennis is still setup from a previous game so I just repurposed the table and figures for a solo game using my own rules. These are the same rules I used for the half a dozen or so games on the 2’x2’ board from last year. These rules are fairly similar to my WW2 Advance to cover but close combat uses the same mechanics as ranged fire. One day I will write them up - currently a one page QRS.
Scenario
A British Recce company needs to make its way through a German occupied town in late 1944 and take the church to facilitate opening up the road.
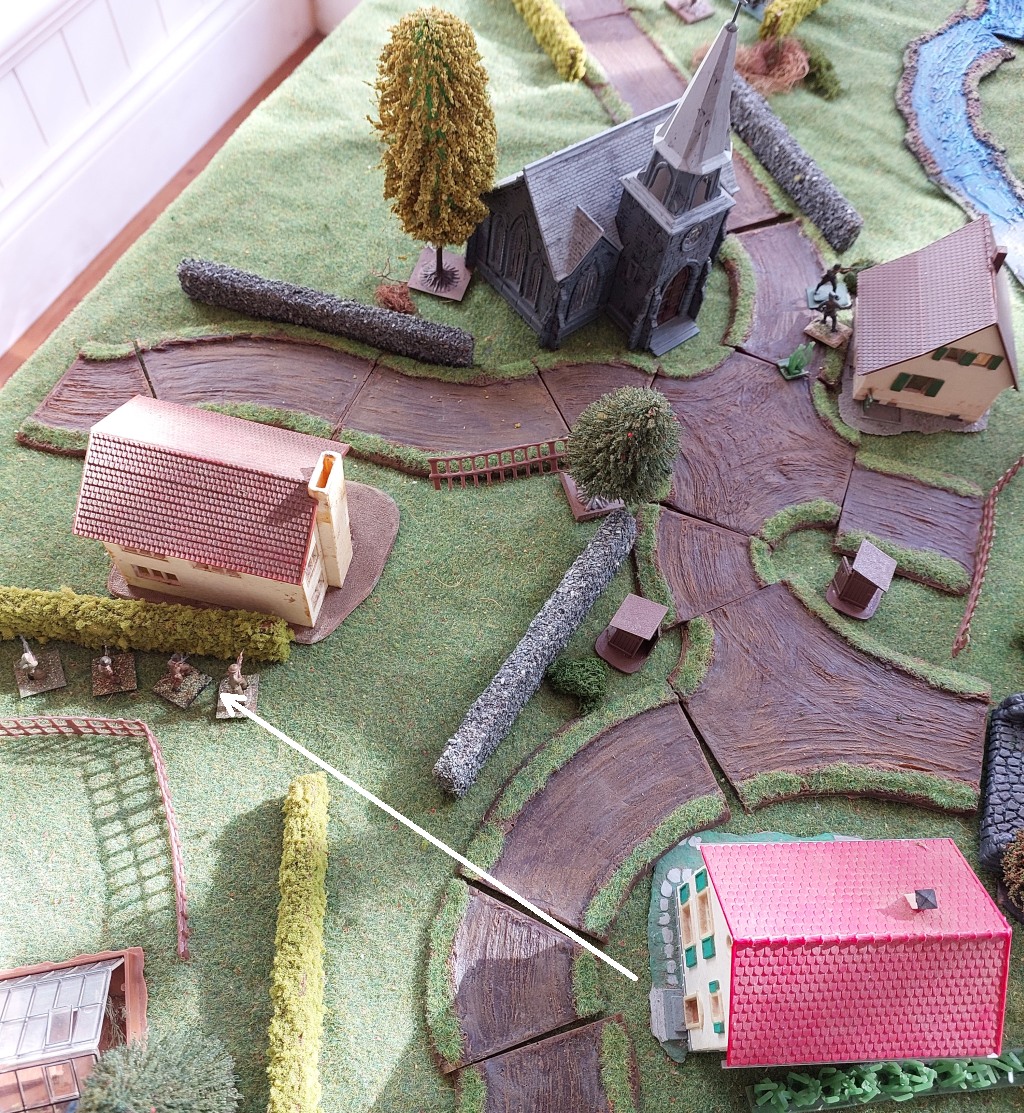
 |
| Battlefield |
Forces
Each figure represents about 3-5 soldiers (so around 6-10
figures for a platoon).
1:1 for vehicles and crew served weapons.
In this game, platoons are around 6 figures.
British

1 Company HQ of 3 figures
3 Platoons of 6 figures each
2 Cromwells
1 81mm mortar
German

1 Company HQ or two figures
2 Platoons on 6 figures each
2 MMGs
2 Panzerschreck teams
Deployment

The German MMGs are situated on the two flanking hills. While a bit of a forward deployment,
hopefully they can inflict enough casualties to slow the British down as they
advance through the wheatfields.
One platoon is deployed to defend approaches the bridge and
any approaches via their right flank. The other platoon defends the left flank
approaches to the church as also a possible counterattack into the church.
The Company HQ is in the church.
The British will advance to the house before the bridge and
also on their left flank. The left flank
offers better protection than via the right.
The house will be used as a base to advance across the bridge. The Cromwells will deploy on each flank and
then hopefully set them on each hill to support the infantry advance across the
bridge and into the village.
Game
British 1st and 2nd platoon advance.
The British 1st platoon is shot at by the MMGs. Only one casualty (average would have been 2).
 |
| British view after advance of 1st and 2nd platoon |
The 2nd platoon get one casualty from the machine guns .
The Cromwells come on the battlefield but don’t spot the MMGs as the latter are concealed, even though they fired. The 1st platoon race up to hide behind the building
 |
| 1st platoon find cover behind the central building |
The second platoon continue to advance to cover.
 |
| Second platoon managed to get behind the hedge |
The second platoon fail to spot the MMG and cannot even fire in the general direction as the platoon has moved
The first platoon move into the building, manage to spot an MMG on the hill and fire, but do not hit them at all.
 |
| 1st platoon firing at the MMG |
The second platoon fire at the MMG as they managed to spot it. They destroy the MMG (very lucky dice). The British third platoon enters.
 |
| Overview, 3rd Platoon in foreground |
MMG manages to destroy another figure in the building (first platoon). The first platoon fires back and reduces the MMG to one crew. Again the MMG removes another soldier in the first platoon. The platoon have to do a morale check that they fail and have to retreat (6”) and are suppressed.
 |
| First Platoon retreats |
Cromwells fire on the MMG but for no effect. Another turn and another firing of HE and the Cromwells take out the MMG. The Third Platoon move up to the house formerly occupied by the first platoon. The Company HQ also enters and advances towards the building.
 |
| The company HQ arrives |
There is a general advance for the British and also the first platoon recover from suppression.
 |
| 3rd Platoon move out of the house to hide behind the wall near the bridge (apologies for the sun!) |
 |
| Second platoon makes it to the hill on their left flank |
The Cromwells take up position on each Hill.
The British are ready for the assault - either third Platoon across the bridge or second Platoon dashes down the hill across the Ford to the left of the bridge. Third platoon will try the bridge. They enter the bridge but fails to spot and the German infantry nearby and so the British have nothing to shoot at.
 |
| 3rd Platoon advancing over the bridge (German view) |
The Germans are distracted and this enables the British on the bridge to continue to move. They advance straight to the building with the German first platoon and a melee ensues.
 |
| Melee in the building |
The Germans have the better position being in cover and not moving. They manage to inflict three casualties on the British. The British only inflict one on the Germans. The British pullback and are suppressed.
 |
| Retreat to the bridge |
To add insult to injury the Germans fire at the British at the retreat and score another casualty. The British platoon check the morale again and the platoon decided to retreat back to their own lines (left the battle).
The Cromwells fire on the building and between the two of
them manage to score another German casualty.
The British Major manages to call the 81mm mortar onto the German occupied building and scores two casualties. The Germans pass their morale check.
 |
| Second platoon race down the hill to occupy the building |
Second platoon race down the hill to occupy the building. The British platoon now manage to spot the Germans behind the wall and fire for no effect. The Germans return fire that is also ineffectual.
 |
| British facing off to Germans |
The Germans get off some more fire and score one casualty on the British. The British return this fire to wipe out the Germans (wow excellent dice!). The remaining British platoon decided to cross the bridge.
 |
| Crossing the bridge |
On the other side of the bridge is the Panzerschreck team but the British don't see it.
The Panzerschreck team fire at the running British soldiers, misses; the British soldiers return fire and destroy the team.
 |
| Panzerschreck firing at the soldiers on the bridge |
The British have so few units left. They will not be able to spot any Germans in the buildings until they get within 6” so the Germans will sit tight. The British need to decide where to move next and if the Germans open fire then the Cromwells can blast them with HE.
The British on the bridge move forwards closer to the church. The Germans take a risk and the three figures in the opposite building fire on the moving British soldiers. Amazing dice roll and destroy all three British figures!
 |
| British soldiers under attack by the Germans |
The Cromwells open up on the building but the first shots miss. They get another chance and destroy a figure and suppress the building.
The British soldiers in the building race across the street to get closer to the church
 |
| Racing close to the church |
Germans unsuppress and fire on the British Platoon, score a casualty but the British platoon - even though at half figures - is still okay. The British really have no choice for victory but to charge the church. They do so - it is occupied by the commander and one other soldier and a melee occurs
 |
| Melee in the church (after the Brits have driven off the Germans) |
The Germans fire first but fail to inflict any hits. The British then rout both of the enemy and occupy the church.
The remaining Germans fail morale and retire from the battlefield.
 |
| Remaining Germans |
The British succeed!
Verdict
I was not sure how hard or easy this scenario would be. The defending Germans had 2 MMGs and two
platoons, compared to the attacking British 3 platoons and 2 Cromwells. And the handheld anti-tank weapons have a shorter range in these rules (6") compared to 18" in One Hour Skirmish Wargames. The British are advancing across wheatfields
but to offset that the Germans need to defend the town. In the end it was very close. About two-thirds through the game I did not
think there was much chance of the British winning but they managed to win two
major firefights (against the Germans behind the wall and then in the
church). So they were quite lucky. Poorer dice in these two instances could have
easily seen the British lose some more casualties and morale checks would have
seen them retire from the battle.
It was a great game.
Never tire of getting out the 20mm WW2 figures on half or a full table
tennis table.


.jpg)


YES!!! Magnificent, my friend, it warms my heart to see you doing some proper, fully clothed (albeit camouflaged) wargaming, absolutely fantastic.
ReplyDeleteAnd that was a helluva fight! Sure, I sniffed some magic dice about three quarters of the way through, but what solo gamer doesn’t put his thumb on the scale for his favorite side at least a little bit, amiright? ;)
Very enjoyable, though it all down to the PBI, wasn’t it? The 3” mortar proved a little useful right there at the end, but the commanders of those two Cromwells ought to be thrashed.
I don’t recollect seeing the Cromwells before; I’d ask if they’re new, but I already know they’re not and you’re just going to tell me you’ve had them since 1972…
Hope all is well, buddy, and I do very much appreciate you sharing this batrep, they’re always enjoyable.
V/R,
Jack
Thanks Jack.
ReplyDeleteThe table can be left setup these days so there should be some more battle reports here and there; well, more than recently anyway.
Most of my games seem to go down to the infantry winning it by charging the objective. (just like in real life I assume!).
And the Cromwells are only 10 years old. Recent additions :-) But you are right, most of the rest of my tanks are from about 1979. lol
Shaun,
Delete“… so there should be some more battle reports here…”
That’s great news, I’ll hold you to it! ;) No gaming for me this weekend, had a party for my daughter (just graduated high school, headed off to college) and my youngest was playing in a baseball tournament, but that closes out baseball for the season so should have more time going forward.
“ Most of my games seem to go down to the infantry winning it by charging the objective.”
Me too! Not sure how realistic it is, but certainly the most fun.
“And the Cromwells are only 10 years old.”
Practically babies then! In that case, I don’t recall seeing those before ;)
V/R,
Jack
I think I have only posted about the Cromwells once before in a blog post
Deletehttps://shaun-wargaming-minis.blogspot.com/2014/05/ww2-20mm-west-front-goodwood-mini.html