Introduction
Kaptain Kobold of The Stronghold Rebuilt has suggested a 6x6 challenge based on the boardgamegeek 10x10 challenge. Play 6 tabletop games 6 times in 2017 and post the game reports (the level of detail up to you). More details are at this blog post.
I generally only play about, 30 games a year. Of these only two I think I have played more than 6 times in one year! 36, and 6 of 6 games, will definitely be a challenge. The choice of 6 games to play is fairly easy for the first few, and gets harder after number 2.
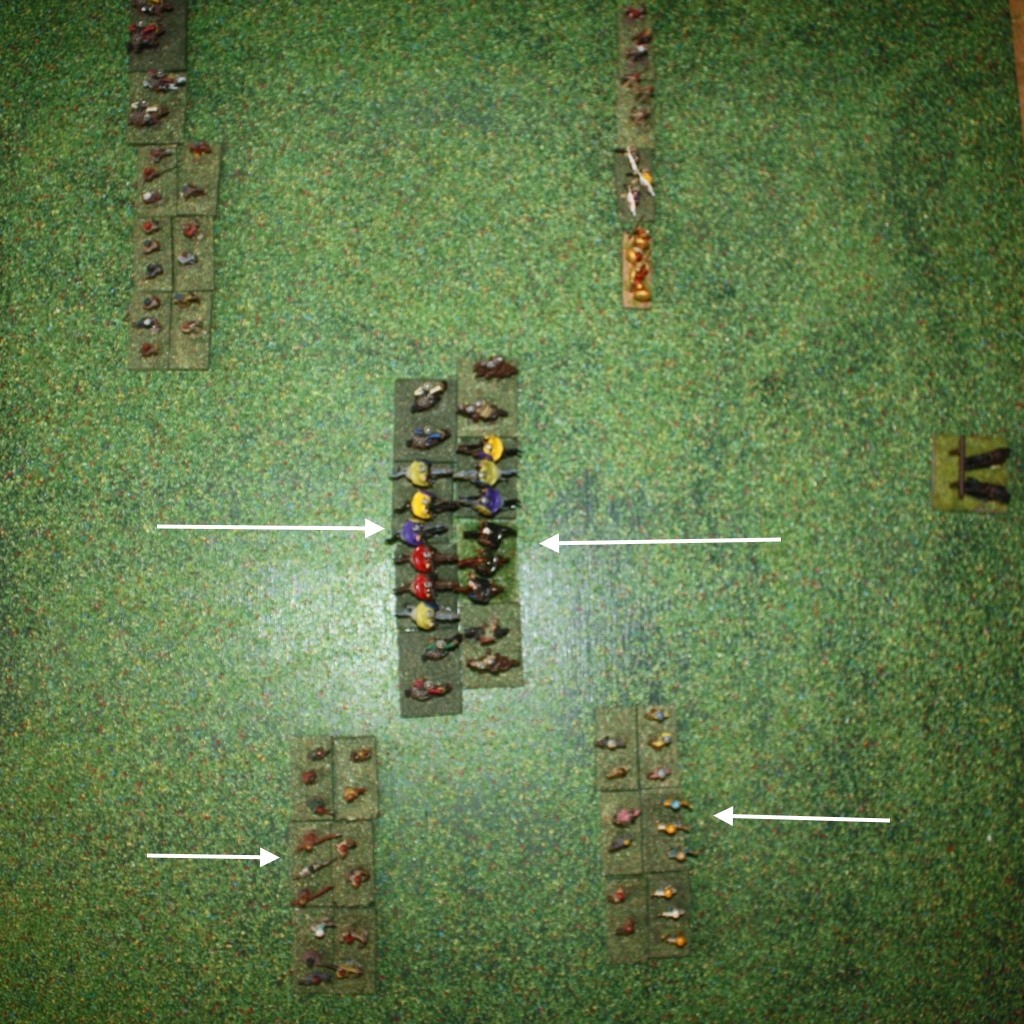
Game 1 - Ancient Battlelines Clash
This one should be easy to meet. I am likely to play at least 6 games using my own ancient rules. i think I have played about 150 games with this rules over the last four years. I am also slowly chronologically working my way through the Peter Sides historical scenarios. I am up to number 30 with about 150 to go.
Game 2- Advance to cover
The second choice is also fairly easy as I was aiming to play four or so games to playtest my own WW2 rules. Six may be a stretch but will see how I go.
And now it gets hard. I tend to dabble in other rules for Ancients and WW2 and dip into other periods with only 1-2 games a year. Luckily the rules around game selection are quite loose - while good to choose up front, they do not have to be, and can change during the year.
Game 3 - Field Commander:Alexander
I bought this when it first came out. I used to play lots of boardgames in the 90s and keep meaning to get back to them. But I haven't. The challenge will be the opportunity to get this out and actually play it. It has god a lot of good reviews. There are four scenarios that link together into the campaign. So two campaigns will be 8 games.
Game 4 - Full Thrust
I have always wanted to play Full Thrust but was in a figure gaming hiatus when it was big. I still really want to play it. I bought some painted Firestorm Amanda figures to play some Full Thrust but ended up playing a bit of Starfire instead (as I was familiar with it). The spaceships have seen only 3 outings since I got them about three years ago and they should get out more. I know Full Thrust is still played. I know there may be better rules out there. Bit I missed out 20 years ago so want to give it a go! However, this is one that has a good chance of changing as the year goes on.
Game 5- Fall of Rome (original 1973 edition)
I played this a little but when it came out and really liked it. I got it out and set it up about 6 months to get back into it but have played other games instead. There are 7 scenarios covering different periods (no campaign). I am hoping not to change this one as with this and field Commander, I feel like I am actually playing a few of the boardgames that are gathering dust in the cupboard.
Game 6 - ???
I have a few games that I may manage to squeeze in 6 of that I may be playing with the children (8yo and 10 yo), a few I would like to play, a few that I may play with some friends. The short list of possibles may also end up replacing one or more of the game above. However, none of these games I can see getting in more than a couple in one year - it will definitely be a stretch to get to six :-( Games include: Warhammer Quest, Retro, X wing, Wings of War, Zombicide, Space Crusade, UpFront. There are likely others and it is quite possible (hopefully!) something else crops up that I play 6 times. Game 6 is definitely one I have no plan for....but...also to add to this list are two games that I have not played much, are good fun and are quite quick. They could be standbys to get 6 games of something: Tiny Epic Galaxies and Dungeon Roll.
Conclusion
So one definite, one highly likely, three possibles and an unknown. Well, it is called a challenge for a reason!
Saturday, 24 December 2016
Monday, 19 December 2016
Battle of the River Thatis 310BC using Ancient Battlelines Clash
Introduction
This is game 30 in play testing my ancient rules by replaying historical battles. The latest version of ‘Ancient Battlelines Clash’ is on its own blog page. I am play testing the rules by replaying all the Peter Sides scenarios from his Historical Battles books. ABC is designed to finish in under an hour on a 2'x2' table.
Battle of River Thatis
Very little on the internet but here are some articles of interest:
Wikipedia article
A description of the battle prelude and troops
A descriptin of the battles with diagrams
I do not have it, but Ancient Warfare VIII.3 magazine has a article on the battle that would likely have been useful.
A description of the battle prelude and troops
A descriptin of the battles with diagrams
I do not have it, but Ancient Warfare VIII.3 magazine has a article on the battle that would likely have been useful.
Scenario changes
Reduced by about two thirds the troops due to my smaller sized table. I roughly also then halved the Spear units as the scenario units are for DBx that assumes in this case that the units will be rear supported, not the case with my rules.
Troops
Satyrus
2 Heavy Cavalry, aux cavalry, long missile
2 Light Cavalry, skirmish cavalry, long missile
5 Foot troops, aux infantry, bow
1 Mercenary hoplites, battle infantry, phalanx, some protection
1 Thracian mercenaries, aux infantry, high fortitude
5 Psiloi, skirmish infantry, long missile
1 General with Heavy cavalry
1 camp
Army command ability +1
Breakpoint: 6 (this should have been 8 - I did not add up correctly)
Eumelus
2 Heavy Cavalry, aux cavalry, long missile
4 Light Cavalry, skirmish cavalry, long missile
6 Foot troops, aux infantry, bow,
6 Psiloi, skirmish infantry, long missile
1 General with Heavy cavalry
Breakpoint: 7
Deployment
Deployment
The Game
Satyrus advances all his troops. The left flank and centre are equal to the enemy, the right flank has less units, but higher quality.
Eumelus advances both flanks and charges into the opposing cavalry in the centre.
![]() |
First move advances |
![]() |
Close up of the cavalry clash (from Eumelus side) |
![]() |
Cavalry clash sees the two Eumelus skirmish cavalry retreat. |
The dilemma - should Satyrus advance his right flank - his quality Vs the pretender's quantity? I choose advance.
![]() |
The Satryus right flank advances within range of the enemy light cavalry bows. |
Eumelus left flank light cavalry fires on the advancing bowmen. This goes well for Eumelus in that is disorders both archers on the enemy right flank.
![]() |
...that cause both enemy to be disordered, and one to retreat. |
While doing the middle melee, i noticed that the Satyrus light cavalry was in contact with the opposing heavy cavalry. How did this happen? Skirmishers, such as the light cavalry, should not be in contact - they would normally retreat at contact. But they were contacted by the opposing heavy cavalry and the light cavalry did their charged test against the opposing skirmisher (the rules are silent on what to do in this case but in all other areas of the rules you match up units, so that is what I have been doing), the latter fired and they retreated. But now reading the rules as written, a skirmisher that is charged normally fires back and then retreats. The last bit in bold is the issue - light cavalry charging light cavalry will have the charged light cavalry retreating, regardless of the result of the fire by the charged light cavalry. Not my intent - if the charged light cavalry successfully force the charging light cavalry to retreat, then it is assumed the charging unit never made it into contact and is forced back, and the charged unit doe snot retreat, or at least stays to fight the other skirmishers. It has only been 150 games and this situation has not really come up - or I have been playing it wrong (by the rules, not by intent!. So anyway, I have updated the rules so the only skirmishers that retreat are infantry skirmishers from other non-infantry skirmishers.
![]() |
The light cavalry unit that caused me to modify the rules |
![]() |
Cavalry clash continues will disorders all round, |
![]() |
Not going so well for the Satyrus right flank - one bowmen routed. |
![]() |
It is bad for Satyrus in the centre - he is forced from the field (the gap between the Eumelus heavy cavalry is only as I have bumped the table - they are supposed to be touching) |
Eumelus moves to attack the remaining central heavy cavalry in the centre. It does not count as a flank attack, but the general unit is better than the opposing heavy cavalry.
![]() |
Eumelus moves around and now it is two heavy cavalry on one (it ends badly for the one) |
![]() |
At the end - Eumelus forces to the left of the while line, Satyrus remaining forces on the right. |
A very quick game - low (incorrectly calculated) breakpoints and a cavalry clash on turn one helps! I finished the game when Satyrus could have lost one more heavy, unit before breaking; I think Eumelus and the heavy cavalry would have charged into the flank of the disordered Satyrus phalanx and thus caused them to reach their breakpoint. So all I really have done it finished one move early. I really enjoyed the game - it was a battle I had not heard of before - but took a while to start as I read up on some of the history on the Bosporan Kingdom at this time. I knew it existed, but not much on its history at all.
Saturday, 10 December 2016
Battle of Raphia 217BC using Ancients Battlelines Clash
This is game 29 in play testing my ancient rules by replaying historical battles. The latest version of ‘Ancient Battlelines Clash’ is on its own blog page. I am play testing the rules by replaying all the Peter Sides scenarios from his Historical Battles books. ABC is designed to finish in under an hour on a 2'x2' table.
Battle of Raphia
This very large battle was fought between Ptolemy IV of Egypt and Antiochus III of the Seleucid Empire. It was the latest battle in the ongoing fight between the two empires for control of Syria.
Surprisingly little on the internet. There is more in the paper books I have. Mostly Total War sites and discussion on the battle. But some sites of interest on this battle:
I used Lost Battles (Sabin) a little.
Scenario changes
Reduced
by about three quarters the troops due to my smaller sized table. I
roughly also then halved the Spear or pike units as the scenario units
are for DBx that assumes in this case that the units will be rear
supported, not the case with my rules.
Troops
Both sides use classic Successor units and deployment.
Ptolemy
![]() |
Ptolemaic army - Egyptians phalanx in the centre, royal Guard (with Ptolemy) with blue shields on the right, |
1 Guard cavalry, aux cavalry, high fortitude
1 Heavy Cavalry, aux cavalry
2 Light Cavalry, skirmish cavalry, short missile
1 Royal Guard, battle infantry, phalanx, high fortitude
2 Phalangites, battle infantry, phalanx
2 Egyptian phalangites, battle infantry, phalanx, low fortitude
1 Mercenaries, battle infantry, phalanx, some protection, low fortitude
2 Peltasts, aux infantry
2 Psiloi, skirmish infantry, short missile
2 Elephants, elephant, low fortitude (to represent them as bush elephants)
1 General with Royal Guard phalanx (to represent where he spent most of his time)
Breakpoint: 12
Antiochus
1 Elite heavy cavalry, aux cavalry, high fortitude
1 Heavy Cavalry, aux cavalry
2 Light Cavalry, skirmish cavalry, short missile
2 Phalangites, battle infantry, phalanx
1 Hoplite, battle infantry, phalanx, some protection, low fortitude
1 Spearmen, battle infantry
1 Persian archers, battle infantry, bow
1 Spearmen, battle infantry
2 Peltasts, aux infantry
2 Psiloi, skirmish infantry, short missile
2 Elephant, elephant
1 General with Elite cavalry
Breakpoint: 13
Making this work with the number of troops was hard - it was one of the largest battles and so to be able to represent the units involved on a small table, and give a reasonable interpretation of the battle, was not easy.
Deployment
The Game
Ptolemy advances the flank elephants and the battleline. The heavy cavalry on the left flank holds back - they are facing Antiochus and will likely lose.
Antiochus responds by advancing his elephants, and skirmishers, into the enemy elephants/skirmishers.
Ptolemaic army continues to advance, no resolution for the elephants battling on each flank.
Ptolemy continues to act crazy but knowing that his infantry battleline should be superior to the Seleucid one, he advances between the elephants locked in melee on both flanks towards the Seleucid battleline. The flanks can be guarded by the cavalry on both sides if need be by going around the elephants.
Persian archers fire on the hoplites that are in range. A 1. The only score that would score damage!
The Ptolemaic peltasts advance due to being fired on. This brings them into proximity to the Seleucid peltasts and Persian archers The archers fire and the peltasts are force back.
Ptolemaic elephant of right flank defeats the opposing Seleucid elephant, that then advances towards the cavalry. The skirmish cavalry fire (the heavy cav do not have shock against the elephants so do not charge them). skirmish cavalry retreats, as does heavy cavalry. Elephant pursues and rolls a 6 that means they add 2cm to their move and reach the heavy cavalry. Cavalry and elephant locked in melee.
The Ptolemaic right cavalry is set to advance to help protect the flank but decides the time is not yet ready to do so (orders failed to arrive to move).
Ptolemaic phalanxes (mostly) advances into the opposing battleline.
Disorders all round, except on the Ptolemaic right flank, the peltasts managed to destroy the opposing disordered peltasts and then advanced into the other peltasts that they also routs! On the Ptolemaic left flank, Ptolemy and his guard phalanx routed the Seleucid peltasts.
Seleucid elephant on the right flank is routed.
Antiochus charges past the elephant to contact the Ptolemaic heavy cavalry
Both are disordered.
Antiochus responds by advancing his elephants, and skirmishers, into the enemy elephants/skirmishers.
![]() |
Elephants clash on Ptolemaic right flank |
![]() |
Elephants clash on Ptolemaic left flank |
![]() |
Ptolemy advancing on the Seleucid army (from the Seleucid point of view) |
Ptolemy continues to act crazy but knowing that his infantry battleline should be superior to the Seleucid one, he advances between the elephants locked in melee on both flanks towards the Seleucid battleline. The flanks can be guarded by the cavalry on both sides if need be by going around the elephants.
Persian archers fire on the hoplites that are in range. A 1. The only score that would score damage!
The Ptolemaic peltasts advance due to being fired on. This brings them into proximity to the Seleucid peltasts and Persian archers The archers fire and the peltasts are force back.
![]() |
Ptolemaic peltasts advance, fired on by the Persian archers, and retreat. |
![]() |
Ptolemaic right flank elephant reaches the Seleucid cavalry |
Ptolemaic phalanxes (mostly) advances into the opposing battleline.
![]() |
Ancient battlelines clash (Ptolemaic viewpoint) |
![]() |
Minor losses on both sides. |
![]() |
Just tusk on tusk after clearing the skirmishers. |
![]() |
And the Ptolemaic elephant is victorious! |
![]() |
Antiochus leads the cavalry past the elephant into opposing heavy cavalry and they are locked in melee. |
Phalanx clash is bad for Ptolemy. While the Guard routed the opposing Seleucid phalanx, both Egyptian phalanxes are routed. Not good.
Tragedy for Antiochus on his left flank - the elephant routs the heavy cavalry and the light cavalry flees off the board. So very lucky, the Elephant pursues to the very edge. A few more millimetres and it would have gone off the board!
Note the elephant on edge needs to rally before it can about face - it cannot turn as it would take it off the board. It unlikely to come back into the game.
Ptolemy breakpoint loss is currently at 7; Antiochus 9. But Antiochus has a few more chances to rout some units, but it is still close.
Ptolemaic heavy cavalry advance on the left flank, Ptolemaic hoplites routed but Ptolemy routs an opposing phalanx.
Elephant advances towards the light cavalry on Ptolemaic left flank and the light cavalvy eventually flees off the board. This gets the Seleucid army to their breakpoint and so P wins!
![]() |
The centre is not going well for Ptolemy - Egyptian phalanxes and one non-native phalanx gone |
![]() |
The right flank Ptolemaic elephant manages to rout the opposing cavalry. |
Ptolemy breakpoint loss is currently at 7; Antiochus 9. But Antiochus has a few more chances to rout some units, but it is still close.
Ptolemaic heavy cavalry advance on the left flank, Ptolemaic hoplites routed but Ptolemy routs an opposing phalanx.
![]() |
One phalanx loss each for the centre, but Ptolemy definitely is worse off here. |
![]() |
The left flank Ptolemaic elephant advances on the light cavalry |
![]() |
The cavalry retreat and the Seleucid army reaches its breaking point, |
![]() |
End game overview |
Verdict
Another very close game. Ptolemy was only one heavy unit away from their breakpoint. This is the last of the Successor battles I will be playing. There are a few more with phalanxes (e.g. Sellasia) and then a very long string of a lot of battles with Roman forces appearing in just about every battle!
Friday, 25 November 2016
Battle of Ipsus 301BC using Ancient Battlelines Clash
Introduction
This is game 28 in play testing my ancient rules by replaying historical battles. The latest version of ‘Ancient Battlelines Clash’ is on its own blog page. I am play testing the rules by replaying all the Peter Sides scenarios from his Historical Battles books. ABC is designed to finish in under an hour on a 2'x2' table.
Battle of Ipsus
In the saga of the Successor Wars, Antigonus One-Eye and his son Demetrius face a coalition of three other Successor emperors – Seleucus, Cassander and Lysimachus. The three had banded together as they were likely to be destroyed by Antigonus piecemeal otherwise. This was the last real chance for Antigonus to reunite Alexander’s empire.
There is not much on the internet on this battle:
Troops
Diodachi Allies (Seleucus, Cassander's brother Pleistarchus and Lysimachus)
4 Phalangites, battle infantry, phalanx
2 Peltasts, aux infantry
1 Psiloi, skirmish infantry, short missile
1 Heavy Cavalry, aux cavalry, high fortitude
1 Heavy Cavalry, aux cavalry
2 Light Cavalry, skirmish cavalry, long missile
4 Elephants, elephant
2 Scythed Chariots
1 General with Guards
Breakpoint: 12
Antigonus
2 Phalangites, battle infantry, phalanx
2 Hoplite, battle infantry, phalanx, some protection
2 Peltasts, aux infantry
2 Psiloi, skirmish infantry, short missile
2 Elephant, elephant
1 Guard Cavalry, aux cavalry, high fortitude
1 Heavy Cavalry, aux cavalry
2 Light Cavalry, skirmish cavalry, short missile
1 General with a phalangite.
Breakpoint: 10
I thought about using subgenerals to represent the sons/generals on each side and have the general in the centre. With the small number of units, I decided against this and to put one general on each side - Antigonus in the centre and a guess that the main allied general is on their right wing cavalry.
Deployment
Deployment:
For this game I am doing something that someone suggested a few years ago and do double depth for the heavy infantry for visual purposes only. It looks better. It does increase the depth of a heavy infantry unit which does mean they would be a little easier to flank. Not much though.
The Game
The Allies advance the elephants and scythed chariots.
Antigonus responds by advancing Demetrius with the cavalry on the right flank, and advancing his own elephants.
The pair of Allied elephants go in.
The two elephants force the skirmisher to retreat and it is out of the game. But the skirmisher has disordered the elephants. Both continue their charge into the Antigonid elephant and force it to retreat through the peltasts behind it (disordering the light infantry). One Allied elephant continues to charge into one of the peltasts and they are locked in melee.
This is why I wrote Ancient Battlelines Clash - all of the above driven by the rules - fast, a little unpredictable but still producing a great narrative with just a few dice rolls.
Scythed chariots hit the hoplites, disorder them but are destroyed in return
Elephant and skirmishers meet in the centre but all that happened is the Allied skirmishers cleared the opposing skirmishers.
The other elephant comes in and elephant and skirmisher disordered.
The other scythed chariot charges into some hoplites for no effect and are destroyed.
Demetrius and associated cavalry charge up the Antigonid right flank into the defending infantry. The light cavalry exchange missiles before the clash, and both retreat disordered. The heavy cavalry meet, and it is disorder all round.
The elephant battle in the centre sees both allied skirmishers routed and the Antigonid elephant in combat with an allied one, but disorder all round and no destruction.
Through some really great Antigonid die rolling, elephants on the Allied left flank see the Antigonid light infantry take out both Allied elephants.
In the centre the Antigonid elephant and skirmisher are routed. The centre is cleared of allied units.and the way is open for the Allied elephants to throw themselves at the Antigonid phalanx.
In a case of brilliant and poor dice rolling,the Antigonid right flank sees one the the Antigonid heavy cavalry routed, but also the lone Allied cavalry as well. Demetrius pursues to near the table edge.
One of the Allied elephants makes it to the phalanx line and disorders a phalanx. The elephant does not last long and it routed next turn
The next turn the other charges in to a phalanx unit and disorders an other phalanx but it too is routed in a few turns.
Across the rest of the field, Demetrius has slowly being turned around, the Antigonid elephant and peltasts are realigning to go against Seleucus and the Allied phalanx has been slowly advancing but staying far enough away for the elephants for if they rout.
The Allies are near their breakpoint (losing 4 elephants and a heavy cavalry) while the Antigonids are still far away from it (losing only one elephant and heavy cavalry). but now the phalanxes are going to meet...
The moment we have all been waiting for - the phalanx lines meet. The Antigonids have three disordered phalanxes (not good). The undisordered one has Antigonus with them (that is good).
Two Antigonid disordered phalanxes routed. The elephants did their job in softening up the line. The Antigonids are now also one heavy unit away from the army breaking as well. Demetrius is closing in on the rear of the Allied phalanx
Antigonus then manages to destroy an Allied phalanx.
Game over as the Allies have reached their breakpoint. Interestingly enough, I rolled a die for the other Antigonid phalanx unit in combat, and it routed. This would have caused the Antigonid army to break if Antigonus had not won his combat. What a close game!
Alternative history - the Allies won this one in reality.
Verdict
I thought about not using so many elephants, but they were important to the original battle's outcome, so I used quite a few. They tend to get routed early - before the main battlelines clash - and this did cause the Allies to get close to their breakpoint. It was fine, although there usually only been a couple of skirmisher-elephant clashes in other battles, this one had lots and it does slow the game game slightly. Normally skirmishers are one or two-shot units before retiring from the game.
This is game 28 in play testing my ancient rules by replaying historical battles. The latest version of ‘Ancient Battlelines Clash’ is on its own blog page. I am play testing the rules by replaying all the Peter Sides scenarios from his Historical Battles books. ABC is designed to finish in under an hour on a 2'x2' table.
Battle of Ipsus
In the saga of the Successor Wars, Antigonus One-Eye and his son Demetrius face a coalition of three other Successor emperors – Seleucus, Cassander and Lysimachus. The three had banded together as they were likely to be destroyed by Antigonus piecemeal otherwise. This was the last real chance for Antigonus to reunite Alexander’s empire.
There is not much on the internet on this battle:
Scenario
changes
Reduced by about a three-quarters the troops due to my smaller sized table.
I also roughly halved the Spear or pike units as the scenario units are for DBx that
assumes in this case that the units will be rear supported, not the case with
my rules. I also put a bit more cavalry on the Antigonid right flank as the limited information on the battle seems that there was more cavalry here with Demetrius, compared to the Allies that may have evenly distributed the cavalry. I also put an elephant on the Antigonid left flank and centre, while the Peter Sides Scenario had elephants on the left and right flank.Troops
Diodachi Allies (Seleucus, Cassander's brother Pleistarchus and Lysimachus)
4 Phalangites, battle infantry, phalanx
2 Peltasts, aux infantry
1 Psiloi, skirmish infantry, short missile
1 Heavy Cavalry, aux cavalry, high fortitude
1 Heavy Cavalry, aux cavalry
2 Light Cavalry, skirmish cavalry, long missile
4 Elephants, elephant
2 Scythed Chariots
1 General with Guards
Breakpoint: 12
Antigonus
2 Phalangites, battle infantry, phalanx
2 Hoplite, battle infantry, phalanx, some protection
2 Peltasts, aux infantry
2 Psiloi, skirmish infantry, short missile
2 Elephant, elephant
1 Guard Cavalry, aux cavalry, high fortitude
1 Heavy Cavalry, aux cavalry
2 Light Cavalry, skirmish cavalry, short missile
1 General with a phalangite.
Breakpoint: 10
I thought about using subgenerals to represent the sons/generals on each side and have the general in the centre. With the small number of units, I decided against this and to put one general on each side - Antigonus in the centre and a guess that the main allied general is on their right wing cavalry.
Deployment
Deployment:
![]() |
Allies to the left, Antigonus on the right |
The Game
The Allies advance the elephants and scythed chariots.
![]() |
Allied advances |
![]() |
Antigonus advances (view from the Allied side) |
![]() |
Allied elephants (on left) on the allied right flank
|
This is why I wrote Ancient Battlelines Clash - all of the above driven by the rules - fast, a little unpredictable but still producing a great narrative with just a few dice rolls.
![]() |
The result of sending in the Allied elephants (a lot of skimisher casualties) |
Scythed chariots hit the hoplites, disorder them but are destroyed in return
![]() |
Scythed Chariots - at least they caused a disorder |
Elephant and skirmishers meet in the centre but all that happened is the Allied skirmishers cleared the opposing skirmishers.
![]() |
Battle of elephant and skirmishers in the centre. |
![]() |
The second Allied elephant joins the fray in the centre |
![]() |
The second scythed chariot throws itself at the phalanx line for no effect before being destroyed. |
![]() |
On the Antigonid right flank, Demetrius meets the opposing cavalry. |
![]() |
Elephant battle continues in the centre, clearing out the skirmishers. It is tusk on tusk now. |
![]() |
On the Allied right flank, both Allied elephants are routed by opposing light infantry |
In a case of brilliant and poor dice rolling,the Antigonid right flank sees one the the Antigonid heavy cavalry routed, but also the lone Allied cavalry as well. Demetrius pursues to near the table edge.
![]() |
Demetrius routs the opposing heavy cavalry, but losing one of his heavy cavalry as well. |
![]() |
An Allied elephants makes it into a Antigonid phalanx and disorders them before routing. |
![]() |
The other Allied elephant makes it into another Antigonid phalanx and disorders them before routing |
![]() |
Overview of the battle after the initial flank battles and centre skirmishing |
The Allies are near their breakpoint (losing 4 elephants and a heavy cavalry) while the Antigonids are still far away from it (losing only one elephant and heavy cavalry). but now the phalanxes are going to meet...
The moment we have all been waiting for - the phalanx lines meet. The Antigonids have three disordered phalanxes (not good). The undisordered one has Antigonus with them (that is good).
![]() |
Phalanx battlelines clash. three of the Antigonid phalanxes (rear) are at a disadvantage as they are disordered. But the undisordered one has Antigonus with them. |
![]() |
Two of the disordered Antigonid phalanxes rout. Demetrius can bee seen botton centre |
![]() |
Antigonus routs an opposing Allied phalanx |
![]() |
End game. Antigonid victory |
Alternative history - the Allies won this one in reality.
Verdict
I thought about not using so many elephants, but they were important to the original battle's outcome, so I used quite a few. They tend to get routed early - before the main battlelines clash - and this did cause the Allies to get close to their breakpoint. It was fine, although there usually only been a couple of skirmisher-elephant clashes in other battles, this one had lots and it does slow the game game slightly. Normally skirmishers are one or two-shot units before retiring from the game.
Subscribe to:
Posts (Atom)