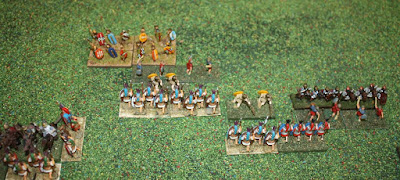
This is game 39 in play testing my ancient rules by
replaying historical battles. The latest
version of ‘Ancient Battlelines Clash’ is on its own blog page. I am play
testing the rules by replaying all the Peter Sides scenarios from his Historical
Battles books. ABC is designed to finish
in around 30 minutes on a 2'x2' table.
I have been slow in play testing these rules for the last
few years. For November 2019 I set a
challenge to play the 10 First and Second Punic Wars battles in the book. This battle is game 4 in the attempt.
Battle of Lake
Trasimene 217BC
It is six months after the terrible Roman defeat at
Trebia. Rome raised new legions and
sent them north under Gaius Flaminus. Hannibal
deployed his troops in ambush in the hills along Lake Trasimene. Completely unaware, Flaminus marched the
Romans along the plains between the hills and the lake.
Here are some internet sites of interest:
Troops
Carthaginian
4 Heavy Infantry (Iberians & Africans)
2 Gallic Warbands, Heavy Infantry, warband
4 Skirmishers, slings
3 Medium Cavalry
2 Numidian Light Cavalry, elite
ACA +2
Leader with the HI
Breakpoint: 12
Roman
4 Legionaries,
4 Allies,
4 Velites, javelins
2
Leader with a
Breakpoint: 10
Scenario changes
None.
Deployment
The Carthaginians are all on a rise and will count as uphill
for all combats that take place where the Romans are deployed. If any Romans do retreat and are pursued,
this will be not counted as uphill.
Being downhill is bad.
 |
| Lake to the left, Head of Romans march at the bottom with two Carthaginian Heavy Infantry facing it. All Carthaginians on a hill. |
Numidians move to behind the line. Carthaginian cavalry charge to opposing
cavalry. Disorders all round.
 |
| The Carthaginian cavalry, lead by Hannibal, charges downhill into the Romans. No ruts though so next turn the cavalry will be at a disadvantage. |
Gauls move up but do not charge. The Carthaginian heavy infantry are attacking
the forward deployed Romans.
Some disorders occurred with the Carthaginians doing better
(one not disordered). But then one Roman
is destroyed.
The Roman centre advance to try and take control of the
centre. They advance towards other
Carthaginian heavy infantry, the Gauls and flank the cavalry.
The right legions make contact and locked in melee. Centre legions see the Velites suffer badly
at the hands of the Carthaginian slingers.
But the legion that flanked the cavalry sees the cavalry
rout. It advances into the cavalry with
Hannibal but Hannibal survives and destroys the cavalry to their front. The other Roman cavalry is also destroyed.
Carthaginian cavalry wheels and attacks the Roman
infantry. Locked in melee. Hannibal survives the flanking infantry
(rolled a 6).
The Gauls charge the legions. All disordered.
Carthaginian heavy infantry wheel and move to flank the
Carthaginians (and are disordered by
doing so) and manage to rout the legion, who is also Flaminus the leader (a 6).
 |
| Back to the Romans at the head of the march. Another Roman unit routed and the heavy infantry surround Flaminus (the general unit) and rout it. |
This causes the Romans to reach their breakpoint and they
lose.
Verdict
I think I forgot to apply the +1 modifier for attacking
downhill in a few of the melees (I know I did when the Gauls charged down the
hill). I also poorly executed the action
on the Roan rear with the Carthaginian cavalry and left them too exposed. This made the game a lot closer than it
should have been, the Carthaginians were lucky not to lose Hannibal in a
reversal of history!


.jpg)


Another nice game Shaun on a 2' x 2' table. Look forward to the next battle.
ReplyDeleteThanks Steve, the next battle is Dertosa - it has been played and being written up.
ReplyDeleteThis comment has been removed by a blog administrator.
ReplyDelete