Showing posts with label fast ancient battles. Show all posts

Wednesday, 19 April 2023

Holiday games – battle reports for WW2 and Ancients and some SF RPG

Introduction

It seems my gaming mojo is increasing.  We were going to the beach at Cooloongatta for a family 5 day holiday; so I thought why not take the three portable games I have recently been interesting in playing?

I managed to get in some Ancient games, a WW2 game and some SF RPG action.  There is a detailed report for each.  Some of the photos are a little poor as I was using my phone and I have not a lot of practice of using my phone in documenting battle in progress. 

Portability

Into a document box (40cmx30cmx7cm) I packed a grassy A4 page for the WW2 game, an 8x8 small gridded timber square (I will use the plain reverse side for the SF stuff), three boxes containing the 6mm WW2, 6mm ancients and some 20mm railway figures that I use for my SF RPG games.  I also packed some ww2 terrain and a one page QRS for each game.

Unopened - picked this up second hand for a few dollars and put in the centre veneer feature to cover up a crack


Opening the box.  WW2 terrain in the plastic packet on the left (under it is 6mm ww2 forces), top is 6mm ancients box, lower is 20mm railway figures.  At the far let next to the box are the A4 QRSs.


Blurry but this is with two figure boxes removed - on the left  is the 6mm ww2 box that was under the terrain packet, some large (Society of Ancients) dice (each figure box also has smaller dice in them as well).   The a4 grassy page and the 8x8 gridded timber square also shown.


Ancients

I have modified Phil Sabin’s Phalanx to work on an 8x8 square grid and with about 6-8 units a side (rather than the standard 10). The number of commands is reduced by 1.  I start play with the units deployed for battle – I am more interested in how the battle played out than the deployment from camp as per Phalanx.  On holidays, I decided to play Marathon as it was easy to setup.  I managed to play it 6 times on one day as each game was only about 5-10 minutes.  This was because the Athenian breakpoint was after the loss of 2 units and this happened a lot. After playing the game I considered should I add a unit to the Athenian side?  It was only when I finished for the day I remembered the Defence Bonus for phalanxes if being attacked from only non-phalanx units.   I played two games the next day with the correct Defence Bonus and both were nail–biters.

And then I played the Battle of Hydaspes just to do something different.  I do a full battle report for it below.

Battle of Marathon

Athenians

2 Hoplites

3 Hoplites – poor

Persians

1 Heavy Infantry (Archers)

2 Heavy Infantry –poor (Archers)

4 Medium infantry (Archers)

Notes:

Poor units subtract one from the Fortunes of War die.

Heavy Infantry attacking Medium Infantry get an Attack Bonus.

Archers being attacked from the flank give the attackers an Attack bonus.

Selection of Marathon game photos

A selection of photos over the 6 or so games.

Marathon setup


Persians (top) attccking a hoplite (with the green marker)


Hoplites attacking some Sparabara (with green marker)


Hoplites successfully routed the Immortals (where green marker is)


General (unit with cavalry) and others have routed a hoplite (where green marker is)

Bonus Battle – Battle of Hydaspes

I thought I would give the Battle of Hydaspes a go as well.  I know the units fairly well as it is a favourite battle of mine.

Macedonian

3 Phalangites

1 Heavy Cavalry – good with general

1 Heavy Cavalry

1 Light infantry

1 Light Cavalry

3 Command points

Indian

2 Elephants, one with general

1 Chariot

3 Medium Infantry (Archers)

1 Medium Cavalry

Note:

Medium Cavalry being attacked by heavier cavalry give the Attackers an Attack bonus

2 Command points


Game

The forces deployed.

Deployment.  Porus at the bottom, Alexander at the top.

The Indian Cavalry charges into the Greek Heavy Cavalry.

Right flank cavalry charge

With the assistance of some Indian infantry, the Indian cavalry routs the Heavy cavalry

Macedonian cavalry routed

The two elephants, with Porus, charge into a phalangite unit and it is routed

Macedonians lose a pike unit in the centre.

On the Macedonian left flank, an Indian heavy infantry is routed by Pikes and Peltasts, but the Indian Cavalry is positioned on the flank.
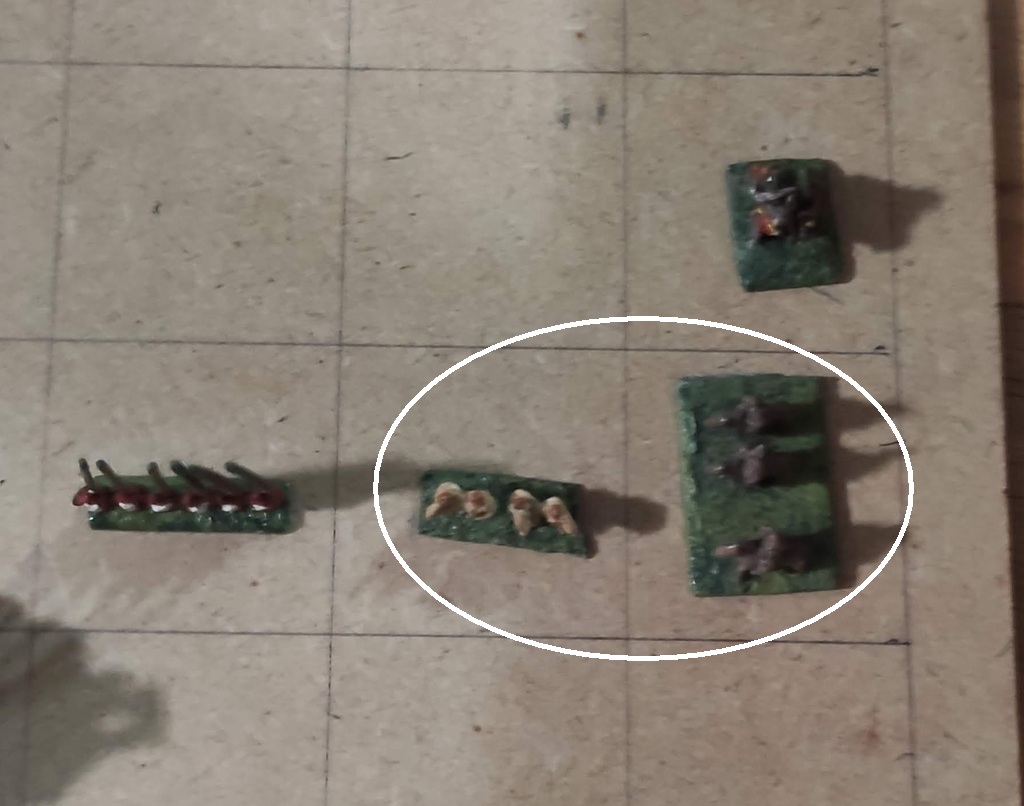
Indian cavalry flanks a light infantry

And it is gone.

In the centre, two Pike units are ready to inflict some damage.

Pikes lined up against the Elephants and Archers


And the archers are routed.

On the Macedonian right flank, finally Alexander and his Companions charge into the enemy Chariots.

Companions facing the Indian chariots

The Indians have lost 3 units and are broken. Macedonians win!

And the Chariots are routed!  Position at end game.

Thoughts on Phalanx

I am not sure how long I will keep using Phalanx but it is fun to play.  I really like how it works and shows the challenges faced by each commander in the historical battles. But it is so fast!  I may tire of it soon; it provides interesting and challenging games but can see I may want something that has a bit more chaos and so more solo friendly.  I am already working on a version with more dice rolling J


WW2

I orginally did setup this scenario to play with other rules and not on a grid.  Bt never played it. I chose this to play on my A4 4x3 grid as it seemed it would easily translate to the small grid.  I looked over my ww2 4x3 grid rules from a year ago and could see no changes required.

The scenario is A Bridge too Late from the web magazine Frontline Observer.  The scenario is still available at the Wayback Machine.

Scenario

A small British force have managed to take a bridge across a canal into a town that the Germans are defending.  British reinforcements are coming from another side of the town.  The Germans win if they can take the bridge back and prevent the British from taking it back for as long as possible. (British minor victory if hold the bridge and 50% casualties inflicted by turn 8, major victory if hold the bridge until turn 11). 

I modified the forces slightly to match what I had brought with me.

German

5 sections with 1 platoon leader

2 Panzer IVG

Breakpoint: 4 lost.

British

The British force

1 section (bridge defenders)

Reinforcements (may enter turn 2 onwards):

    4 sections with 1 platoon leader

    2 Sherman M4

Breakpoint: 4 lost.

Terrain grid (4x3)

Buildings     Buildings     Buildings    <river+bridge> Light cover

Buildings     Light cover Building      <river>              Light cover

Light cover  None          Light cover <river>               Light cover

Game

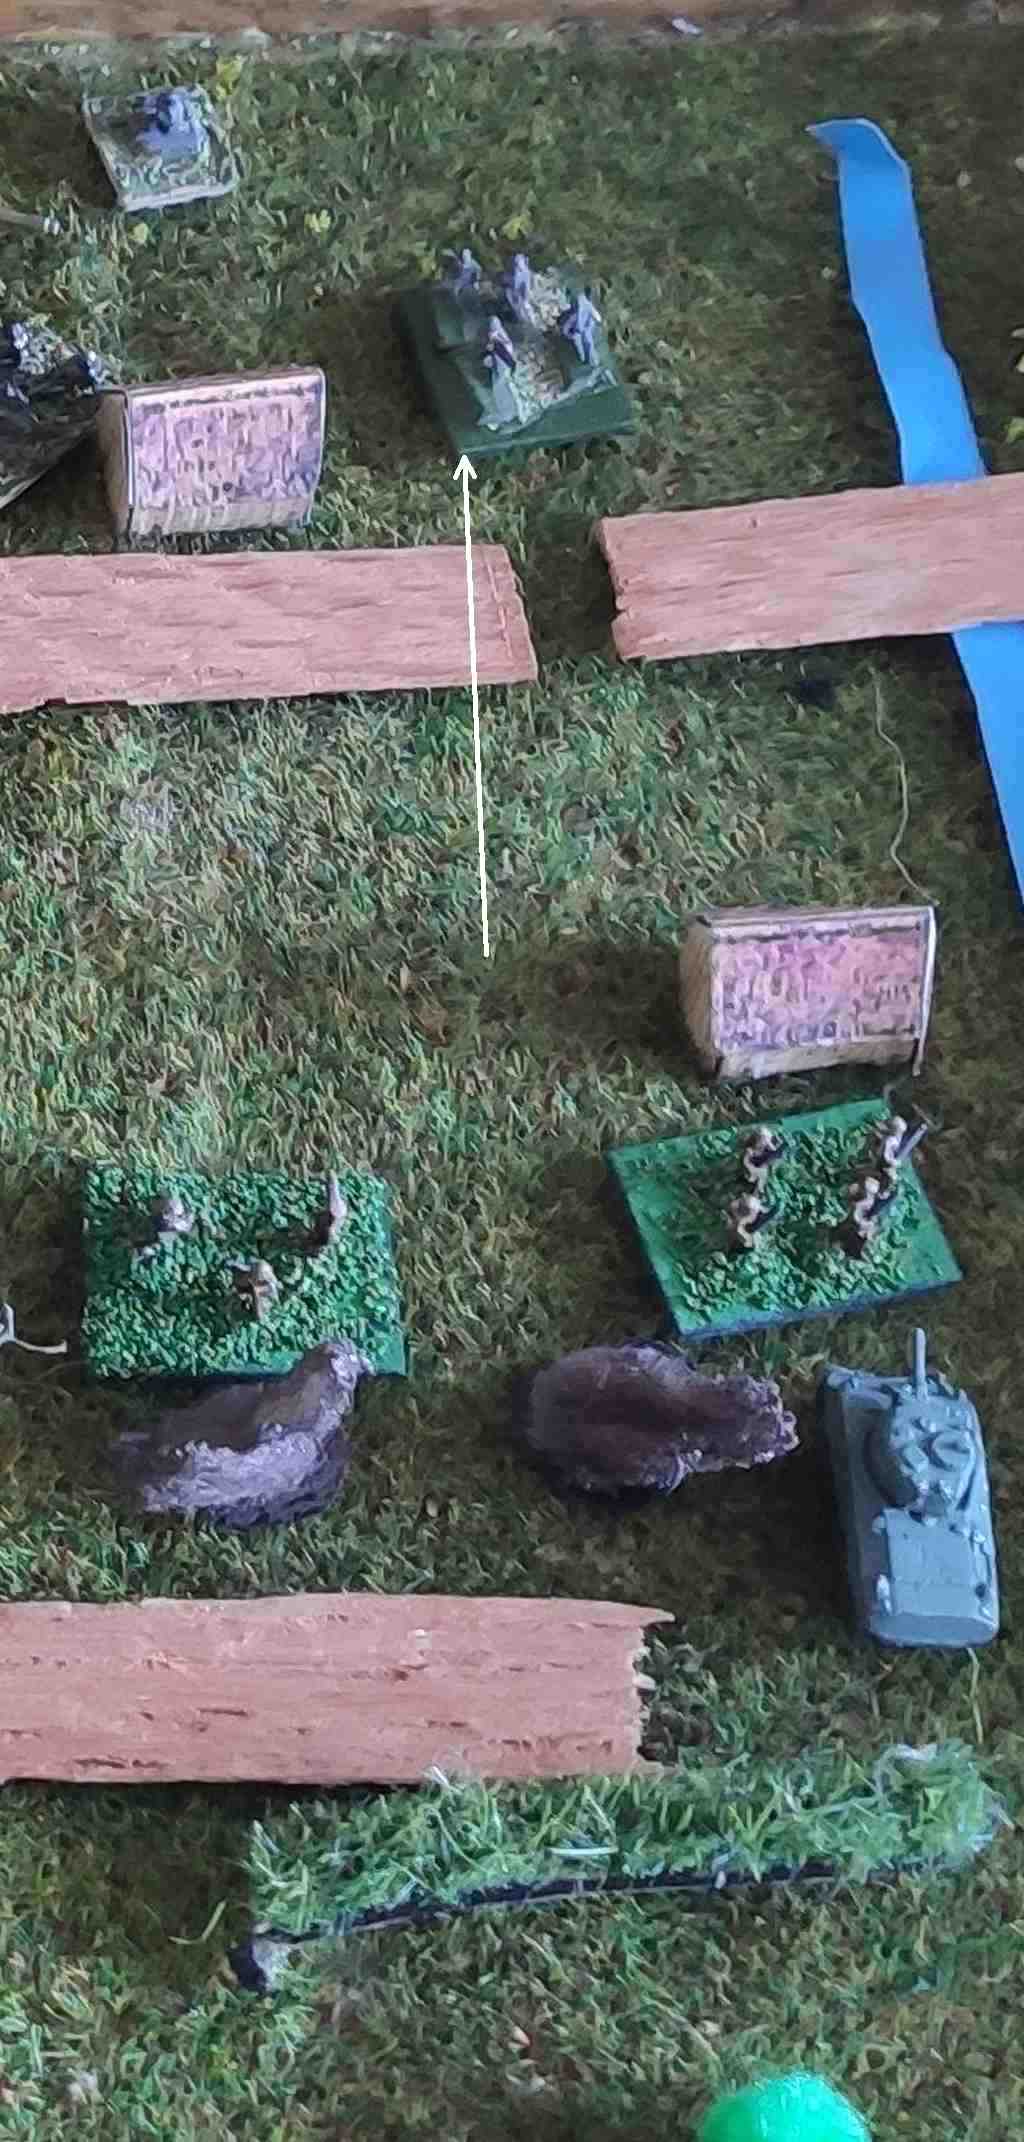
Deployment sees the Germans focus on the rear buildings to protect the bridge.  An advance Gruppe is in the centre to stall a British advance that is likely to focus on coming up the right side of the village.  A single British section holds the bridge on the other side of the river.

Deployment.  British will enter from the bottom of the image.  One section is the bridge defenders (top right)


The 4x3 grid.  I have highlighted the one square that sees all the action (bit of a spoiler).


The Germans spot the Brirish bridge defenders and fire with everything they have.  The defenders are routed! (rolled all 5’s and 6s’!)

The Germans fire at the bridge defenders

The British reinforcements enter.

Two British sections supported by a Sherman enter on the right flank.

The Germans react and move an extra Gruppe in to support the Gruppe in the centre.  They also move one Gruppe to the other side of the bridge as that will help with victory.

Germans reinforce the centre building


The British assault the building.  The Germans fire at them as they advance but miss entirely! In the ensueing close range battle all the infantry on both sides are supressed.   The Germans are forced to retreat as the British have an unsuppressed Sherman in the same area..

The British assault!


The Germans retreat

In the centre the British bring on most of the remaining force - 2 sections, a Sherman and  the commander.

Most of the remaining British force enter in the centre.


The Germans throw everything they can into the centre building occupied by the British – 2 Gruppe, the commander and a tank.

The Germans assault the British occupied building.


Poor German dice rolling and excellent British dice rolling see the Panzer IV and a Gruppe destroyed and the other Gruppe suppressed.   The Gruppe is forced to retreat.  The British force it still intact (although suppressed).  This is not good for the Germans if they cannot dislodge the British.

Panzer IV destroyed.


Germans retreat


The British attempt to unsuppress the sections but one routs and the other remains suppressed.  The Germans take this opportunity to then assault with what they have left and able to move - one Gruppe and one Panzer IV.  The Gruppe is suppressed while assaulting.  In the ensuing firefight the Sherman and Panzer IV are destroyed, leaving one Gruppe and one British section.

The Germans assault with what they have left and can move.


A Gruppe and a section is all that remain of the firefight.

The other British force splits  - one advancing in the centre and the other Sherman, a section and leader into the contested building.

The British advance into the centre an contested building

The British lose a section in the melee.  They are at their breakpoint (the Germans are one away from theirs) and decide to cut their losses and retreat.  The Germans hold the bridge and so score a victory!

 Thoughts

Really enjoyed this game.  At the end of my last blog post of a 3x4 game a year ago I wrote I was thinking of expanding the game to 6x4 so I could play scenarios, as most scenarios are designed for 6’x4’ tables.  I think I will be fine with 3x4 – the above scenario was designed for a 6’x4’ table.  I will look over for scenarios that may convert easily to 3x4.  I am surprised the ww2 3x4 rules have held up – I made no changes to the rules to play them this time.  Normally there is some situation that comes up I have not thought about and need to tweak them slightly.  I guess the simplicity of them helps so that they don’t need much changing anymore.

I am still going to keep playing the Operation Jupiter campaign in 20mm, just need to decide on rules J


SF RPG

I have been playing around with solo SF RPGing for quite a few years and chop and change my own rules all the time.  This time around, I am reusing some rules I wrote late last year and played though about 20 adventures with them.  I have removed most of the modifiers to the various tables so just about everything to set up scenes, encounters, NPCs etc is just a straight 1d6 roll.   I have also made it a lot more friendly to a single PC being in the game. The only exception ito straight rolls are task rolls – there are 6 tasks and have 1-2 modifiers.  I also made the tasks similar in results to make it more consistent.  And it all fits onto 2 (dense) pages.  If you are familiar with Two Hour Wargames Lovecraft’s Revenge it sort of follows that framework but with some Two Hour Wargames 5150 New Beginnings Quick Play type encounters.

Game

This is not so much as narrative as describing the game events.  There are only pictures for the first few scenes.  As I was using a single 2 sided A4 sheet to play the game, I did not have room to put in my normal narrative tables to flesh out NPC names nor descriptions of objects, clue, locations, obstacles, hazards etc.

Opening scene

Yent is a hospitality worker from an industrial, worker background seeking atonement.  Yent skills are excellent physical, excellent technical and good social.  They are armed with a handgun and also have a tech kit.  Yent is starting in Leewin, a rough area of the planet.  They are looking for someone highly experienced to give them an aim in life (objective: find person, class: Achiever).

Yent

Yent encounters a hazard (table and chairs as I had them in the box) and loses some funds to fix things after he fell over them.

Yent with tables and chairs


Oops


Yent meets a cunning mechanic and try to obtain some information but the mechanic knows nothing (result= ignore).

Finally Yent meets a Commander who tells Yent about some lost treasure to seek.

Yent meeting the commander

Scene 1

The Commander asks to be escorted to the nearby desert location. On the way they meet some workers that provide some advice (in rules terms a hint that provides a +1 bonus to a subsequent die roll). 

Yent get some advice from a worker


They then are approached by a ganger. Yent’s extremely poor attempt at negotiation sees the ganger draw their handgun and shoot at Yent, but misses. Yent returns fire and the ganger drops to the ground.

Finally they reach the desert but two shady dealers jump them.  They shoot at Yent but Yent manages to make a run for it and escape.

Yent not going very well in negotiating with some criminals (the two figures to the right).


They have reached the destination, Yent hoping the Commander will help with a clue.  Yent fails miserably to extract a clue from the Commander.  What is worse the Commander takes extreme offense and tries to melee with Yent who runs away.  

There was a lot of really bad dice rolling for Yent when talking to others.

Scene 2

Yent needs to travel to the rural area to hopefully get a clue through investigative methods. After overcoming an obstacle, Yent questions an entertainer and gets some information. They successfully talk their way out of trouble with some criminals before meeting a Patron.  Tough talking get more relevant information.  Meeting another high achiever reveals nothing.  Yent finally gets the information to put everything together by talking to a senior bureaucrat on their own estate.

Scene 3

Staying in the rural area, Yent needs to find an object.  Yent manages to overcome a hazard on the way to the plantation that may hold a clue.  It does and Yent manages to find the object that provides  another clue to seek the lost treasure.

We will leave the adventures of Yent here (as that is as far as I have played!).

Post-game

After the encounters I played out above I realise I have set the roll required for a task success too high – on average a PC is going to succeed at a task about 50% of the time (after modifiers) i.e. a 4+ on a d6.  In my games, PCs are larger than life and should be doing better than that.  So I have since changed the rules and now success will average 2/3rds of the time, a 3+ on a 1d6. 

Holiday verdict

Well, it worked.  I packed a game for each era into a box and played at least one game from each.  So my mojo cannot be that low – I did not have to force myself to play.  My focus since the holiday has been on the 8x8 ancient rules.  But who knows how long that lasts before I am distracted by something else.  Actually, I have been distracted by the Shooting’ Iron rules I found recently. Simple 1d6 rules for Wild West skirmish but I am using some old Warhammer 40K figures I have to test them out.  Simpler than Fistful of Lead and alternate figure activation – will see how I go! 

Tuesday, 10 January 2012

Hydaspes replay number 3 - Fast Ancient Battles

Introduction
This is the third game of four replaying the Battle of Hydaspes with different rulesets.  Go to this post for background, troop descriptions, deployment and comparison to the other 3 rules. 

The battle report is a little bit more detailed than I would do normally do just for a report, but I needed some detail as to who did what as it helped to write the rules comparison. 
 
The main differences between FAB and Bill Banks Ancients (BBA) is that not all units can moved - it is limited to a number of groups per turn.  The number of groups of units able to move per turn is 1 + the number of leaders.  The CRT is replaced with a die roll table but has a similar effect.  Lastly, missile fire cannot destroy any units besides skirmishers - another 'DD' on a unit is no effect.
The Macedonians have 3 leaders, Indians only 1.  In hindsight, Macedonians should have only got 2 leader, and in fact that is the number of generals in the Peter Sides scenario.
 
Game
Horse archers and opposing mounted have a bit of movement and retiring resulting in a disordered Indian cavalry unit.  The archers, with good die rolling, manage to disorder and destroy some skirmishers.

Overview, Indians to the bottom.  Indian mounted has advanced on the horse archers to the left.  Some skirmishers in centre disordered (green marker) from Indian bow fire.
 

The Indian cavalry and chariot charge the horse archers in the flank.  They cannot evade and so are destroyed.  The Cavalry and chariot pursue 4cm.  This may have been a bad move as the Macedonian Heavy Cavalry is going to charge next turn.

Companions (Alex attached) facing the Indian cavalry and chariots

  
Alexander move to attach to the Thessalian Heavy cavalry (the Companions already have a good chance against the disordered Indian cavalry) and both cavalry units charge - The Indian cavalry is destroyed and the chariots disordered.
 
Post combat - Indian cavalry gone, chariots disordered.


The rest of the Macedonian battleline move forward, archer fire results in no hits (this balances out their good rolling last turn).

Indian Elephants contact the skirmishers who fire and evade.  Missile fire disorders the elephant with Porus, who rolls a leader check to see if destroyed.  Rolls a 1.  So yes - Porus has left the battlefield.  That is going to hurt.  Macedonian Skirmishers also disorders two archers.

Porus was attached to this elephant.


Two skirmishers move into the gaps between the elephants to protect the pike from the archers. This was a good move as archery destroyed the two skirmishers. The pike battleline charges the elephants.  The Macedonians ran out of group move points as they would have also really liked to move the hoplites into combat as well.  Note a general moved over from hoplites to a pike to help combat.
Thessalians Vs chariots see the Thessalians disordered.  One elephant is destroyed by a pike unit that pursues into an archer.  Some disorders handed out in other melees.

Battlelines - mostly elephants crashing into the pikes


At the end of the Macedonian turn, remove disorder from the Thessalians and a pike unit  with a general.  This is a large advantage that the Macedonians now have - only generals can remove disorder, and the Indians have no generals.
 
Note that ongoing melees are optional to resolve for the active player.  So the Indians do not resolve the disadvantaged chariot Vs Thassalians, but will do combat against disordered phalanxes as they are at -2 compared to ordered phalanxes.
Hypaspists destroy an elephant.  Pikes in melee destroy an archer and disorder another.  A Macedonian general attached to one of the pike units that is disordered fails the general in combat check and leaves the battlefield.

Battleline - only centre elephant left and the phalanx is getting into contact with the archers.


Alexander moves to the Companions which then move behind the battleline to face the Indian cavalry that came from the other flank - in the next turn they charge and destroy the poor Indian cavalry that had moved so far.   Combat sees one elephant down, and a few disorders on both sides.

Battleline - Alex and Companions on the left ready to charge the Indian cavalry from the right flank.

The Macedonian doesn't progress many melees due to the number of disordered pikes.  The Indian right flank sees the elephant and chariot charge in and disorder the peltasts.

Indian right flank - both elephants and chariots disordered, but so are the Macedonian peltasts.


The Companions turn around ready to charge the archers from the rear.  In FAB, this disorders the Companions, but that is OK as Alexander is with them and disorder can be removed at the end of the turn.  The Hypaspists destroy an archer in melee.

Battleline at end of game - not many archers left.


The Indians have lost 50% of their breakpoints and so the game is over with a Macedonian win.  Phalanxes are really strong in this game, and they also got some lucky rolls.  The skirmish screen worked very well and the phalanx units did not get disordered going in.   The Macedonians lost only the horse archers. Having 3 leaders really helped with undisorder and movement flexbility.  Losing Porus early really hurt as could not move extra groups nor undisorder units.  If I played again I would keep Porus out of combat longer as he is too valuable for group points to throw away for +1 combat.  There were also a number of archers that could have been better used by me on the Indian right flank - possibly outflanking the hoplites and helping remove the peltasts.  Overall a fun game - the multiple leaders and the leader disorder/rally concept is central to this game which make is different to play than most other games at this scale.

Monday, 12 December 2011

Hydaspes replay and comparison with 4 fast play rules

Introduction
I replayed the Battle of Hydaspes on a 2'x2' board using four different rulesets and compared how they went.  The rulesets used:
  • Rally Round the King
  • Justified Ancients
  • Fast Ancient Battles - my miniatures version of Bill Bank's Ancients board game
  • "Ancient Warrior Battles" - my homebrew solo friendly ruleset based on concepts in the above three.
WARNING: This post is the Hydaspes troop definition and deployment plus the rules discussion and DOES NOT contain battle reports.  It is longish - half is troop types, deployment and strategy and the other half comparing the mechanisms of the rules in the context of the replays.  I am writing up the battles and will post links to them here when done.


Why?
As part of Solo appreciation month - November 2011 - I thought I would quickly run through a historical replay with a few of my current favourite fast play ancient rules on a 2'x2' board. The first historical battle I ever played (non-solo) was the Battle of Hydaspes in 1995 using DBM and the Peter Sides scenario booklet as a guide. It was extremely fun.  In 1997 or so, I played Hydaspes with Bill Banks Ancients (BBA) (there is an overview, and battle report with BBA here), and it was also great fun. I then played it with DBA, and it was not so much fun. And then with Intro Armati (one of my favourite rules) on a 2'x2' board - fun but not fast.  This started me down the path of trying to write a set of fast play miniature rules that played on a 2'x2' table and was loosely based on BBA.  I have only recently got to a stage where I am happy with the current draft of the rules I have written.  In the meantime, a few years ago, I started searching for a set of fast play ancients rules for playing on a 2'x2' table.  My current favourites from the range of published rules are Rally Round the King and Justified Ancients (the latter with some of my house rules). It has been 16 years since I've played Hydaspes; as it got me started on the journey of small table play, why not replay it with the current crop of rules in the toolkit?  So I have.  But rather than just using the two mentioned, I will also play with my current draft of Fast Ancient Battles rules (FAB) - it is similar enough to BBA that if you know BBA you will get how FAB works.
 
Three is never enough so there is a fourth I am using. All except RRtK are not designed for solo play and I really like the elegance of some mechanisms in JA and FAB. So I took my Fast Ancient Battles, added in from Justified Ancients the order concept and close combat results, and then integrated it with the concept of reaction tables for firing, charging and proximity from RRtK (although the reactions results are different as they align to FAB and JA).  While it may sound like Frankenstein's monster, it is not really a collection of mechanisms from different rules bolted together, but really an integrated ruleset built from the ground up using concepts from the three other rules, rather than simply knocking it all together.  The working title is Ancient Warrior Battles.  I've played a few games with it already and am still tinkering but it is close to finishing.  I will use these four rules and compare them to each other in the post.  I bit like what I did here after the Callinicum replays.
 
Scenario
The Battle of Hydaspes was fought when Alexander the Great reached the Indian subcontinent and brought to battle King Porus.  It was a long and close fight.  The Wikipedia entry has a decent write up of the battle.  I am going to be guided by the Peter Sides Hydaspes scenario for deployment.  Troop types will be influenced by the scenario description and also the army lists for the rules.
 
Rules Used
Rally Round the King (RRtK)
Fantastic ruleset, great for solo play.  Read a great review here.  Buy it here.  Most popular replay I've ever posted here.  I tend to play with the original Warrior King rules (read my review and also a replay) that are mostly similar, but I replace the Warrior Kings reaction tables with those from RRtK.  For a 2'x2' table, I reduce the distances and move rates by about a third.
 
Justified Ancients (JA)
Have gone through various like/love/ambivalent phases with these rules - the mechanisms are so simple and yet very elegant.  However, I've ended up with some house rules and clarifications that have propelled JA to be up there with RRtK for my fast play fun on 2'x2'.  Here are two replays of Heraclea with JA: replay 1; replay 2.

Fast Ancient Battles
Bill Bank's Ancients is a great simple Ancients board game.  Out of print but there is a new much improved version out there, but it is a different game to the original.  They are both good but I happen to prefer the simplicity of the original.  Fast Ancient Battles is an interpretation of BBA into miniatures.  It is similar, except mounted units have a charge bonus rather than large combat values, the odds-based CRT is replaced with the JP Kelly proposed die roll rule (works similar to the CRT but instead of  halving and doubling and comparing odds, add or subtract 2 to a die roll with this result: -1 or less=AE, 1=AD, 2-5=M, 6=DD, 8+=DE).  If you know BBA, FAB plays very similar. There is an overview and a replay of Callinicum I did using BBA here.


Ancient Warrior Battles
Movement in basewidths, troops classified similar to BBA but also have light, medium, heavy armour and close, loose, skirmish order as per JA.  Orders are rolled for and given to groups or individual units.  Units are either disordered or depleted or destroyed (as per JA).  If fired-on, a unit undertakes a test to see if disordered or depleted and if they evade or retreat.  Units charged take a test to see if they evade or retreat.  A unit may need to take a proximity test if an enemy gets close (similar to enemy threat in RRtK).  Melee results are similar to JA. Units test for pursuit.  A solo friendly version of JA. Have only played a few times with them so needs a bit more testing.
 
Troops
Luckily the deployment and bases in each game will be the same.  Each base is 40mm wide with 15mm miniatures and adheres to the WRG standard. Here is the breakdown I am using for the scenario:
 
Macedonian
5 Phalangites
1 Hypaspists
1 Greek Hoplites
1 Companions
1 Thessalian heavy cavalry
2 Horse archers
2 Peltasts
6 Skirmishers with javelins, bows and slings
 
Indian
4 elephants
10 Heavy archers
2 Heavy chariots
2 Medium cavalry
 
Converting Troops to the rules
 
Macedonian


RRtK JA FAB AWB


Pikes

Foot, Melee, Pike, AC2, REP4, 4 figs
Foot, CO, Light Armour, Phalanx, Trained Phalanx Heavy Infantry, Phalanx, Light Armour
Hydaspists Foot, Melee, Pike, AC2, REP5, 4 figs Foot, CO, Light Armour, Phalanx, High Morale, Trained Phalanx, High Fortitude
Heavy Infantry, Phalanx, Light Armour, High Fortitude

Hoplites
Foot, Melee, AC4, REP4, 4 figs
Foot, CO, Heavy Armour, Phalanx, Trained
Phalanx
Heavy Infantry, Phalanx, Heavy Armour

Companions
Mounted, Melee, AC4, REP 6, 3 figs Horse, LO, Heavy Armour, High Morale, Trained Heavy Cavalry, High Fortitude Heavy Cavalry, Heavy Armour, High Fortitude

Thessalians

Mounted, Melee, AC2, REP 4, 3 figs

Horse, LO, Heavy Armour
, Trained

Heavy Cavalry

Heavy Cavalry, Heavy Armour

Horse archers

Mounted, Skirmish, AC2, REP4, 2 figs
Horse, LO, Light Armour, Missile, Untrained Light Cavalry, Bow Light Cavalry, Light Armour, Bow

Peltasts
Foot, Melee, Dual-armed, AC2, REP4, 3 figs Foot, LO, Light Armour, Missile (Javelin), Trained Light Infantry, javelins Light Infantry, Light Armour.

Skirmishers
Foot, Skirmish, AC2, REP4, 2 figs Foot, Skirmish, Light Armour, Missile (Jav, bow, sling), Untrained Skirmish Infantry, Javelins, Bow, Sling Skirmish Infantry, Light Armour, Javelins, Bow, Sling
 

Indian


RRtK JA FAB AWB


Elephants


Elephant, Foot, Melee, Terror, AC2, REP5, 1 fig
Elephant, LO, Heavy Armour, Untrained Elephant Elephant, Heavy Armour


Archers
Foot, Missile, AC2, REP4, 4 figs Foot, CO, Light Armour, Missile, Untrained Heavy Archer Heavy Archer, Light Armour


Chariots

Mounted, Melee, Dual-armed, AC4, REP5, 1 fig
Chariot, LO, Light Armour, Trained Heavy Chariot
Heavy Chariot, Light Armour


Cavalry
Mounted, Melee, AC2, REP3, 3 figs
Horse, LO, Light Armour, Poor, Untrained
Heavy Cavalry, Low Fortitude
Heavy Cavalry, Light Armour, Low Fortitude


Some comments on troop classifications
In FAB and AWB, there is a concept of fortitude which is a measure of training, morale, staying power etc.  This affects combat.  Units are either high, average or low fortitude with the default being average. And to be fair to Justified Ancients seeming a bit long winded for description, in Ancient Warrior Battles (that is loosely based on JA), a Heavy Archer is classified as "CO, Missile", but Heavy Archer is more evocative.  Troops types in Ancient Warrior Battles match the most common found in Ancient rules, but there is no "medium category".  Much the same could be done with RRtK e.g. define Heavy Cavalry as "Mounted Melee, AC2, 3 figs".


Indian Infantry - how best to represent them?  They are archers and good at melee.  DBM got round this by making a special bow type - Bow(X), Armati has them as Heavy Infantry with bows, RRtK splits them up into Melee units and Missile units, as does the Peter Sides troop descriptions.  For all replays I have gone for a single troop type - Missile/Heavy Archer.  This categorisation may impact them in melee as Archers do not last long in combat in any set but we shall see. Note that in RRtK, Indian Archers are undisciplined, a characteristic that did not exist in Warrior Kings.  I like the introduction of the undisciplined characteristic in RRtK and I would use it if playing full size RRtK; but for this replay, I will not use it (only so play is slightly streamlined).
 
Indian elephants - in JA house rules, I have clarified that elephants are LO with Medium armour.  Due to the effect they had on the Macedonian Phalangites, I have given them Heavy Armour.  I was also tempted to given them high fortitude in FAB and AWB (they have REP5 in RRtK) as they seemed to last a while in the battle.  But I'll see how they go.  Elephants in RRtK are very touch and go - sometimes they do great things, sometimes they just fizzle.  I like that representation.
  
Deployment

Deployment used in all games


Macedonian 
Macedonian army

 
Indian
Indian army


Minor change
I have made one change from the Peter Sides scenario.  In the book, the elephants and archers are in one long line - on a 2x2 table, this would have an elephant, then 2 archers, then an elephant etc.  I have made one long line of archers, and then put the elephants in front on the archer line (but still touching). I believe this worked better in the replays. 


Strategy
I will attempt to follow the same strategy, which loosely follows the actual battle, in each of the four replays.


Macedonian
Use the right flank horse archers to break or at least damage the opposing cavalry and heavy chariot.  Use the skirmish line to block the enemy archery, and rout as many of the elephants as possible. The Phalangites and Hoplites will then enter into combat with the archers while the Companion and Thessalian cavalry rout the softened up cavalry/chariot and then attack the archers from the flank.  The peltasts will hold the left flank.
 

Indian
The right flank cavalry unit will about face and move behind the archers to the left flank to bolster it.  The elephants and archers will advance, the elephants faster than the archers, in the hope of engaging with the enemy battleline and routing it.  The left flank cavalry and chariot will attempt to protect the flank of the archers/elephants.  Lastly, the right flank chariot will engage with the opposing peltasts in the hope of opening up that flank.


Replays Summary


Note I will post links to more detailed replays once I have written them up - Game two to four before the end of January.  

Game 1 - Rally Round the King - see this blog post for more detailed writeup

This game actually went most to plan.  The horse archers managed to inflict some hits on the cavalry and chariots.  The elephants charged into the skirmishers and pikes, causing some damage but eventually getting swept away. The pikes took a lot of damage from the archers with only a few pikes or Hoplites getting into melee with the archers - most were shot up pretty badly.  But then the Companions and Thessalians routed the opposing cavalry and chariot, and the Companions hit the archer line in the flank, and proceeded to roll up three of them, one after the other. Most of the Macedonian heavy infantry had gone, but with two heavy cavalry units behind and to the flank of the archers, I called it for the Macedonians.  Oh, and the chariot got beat up by the peltasts, and it ended up being a stand-off on that flank.

Highlight: The rolling up of the archer line by the Companions.

Alexander and Companions on the archers flank


Game 2 - Fully Justified Ancients see this blog post for the writeup

Mostly to plan.  The horse archers depleted the Indian cavalry, the elephants did disrupt the skirmisher and pike units before going under.  The pikes and hoplites got stuck into the archers, but due to the pikes and hoplites being disordered it was a bit static.  The Companions and Thessalians charged the cavalry and chariots and caused then to rout.  The Indian right flank heavy chariot never passed a single charge order and so that flank was static.   The Macedonians broke half of the Indian units before the Companions had a chance to roll up the archers.  And as I was playing that 50% was the end of the game, I called it a victory for Alexander.  The Macedonians were only two units away from 50% loss as well.
Highlight: a centre elephant charges a skirmisher that flees, charges a Phalangite unit that flees, elephant pursue, pikes routs and elephants pursues off the board - the elephant was like a knife thorough butter!


Elephant pursuing a phalangite unit that it subsequently disperses


Game 3 - Fast Ancient Battles (aka Bill Bank's Ancients) see this blog post for more detailed writeup


This game did not really go the same way as the others.   The horse archers disordered the cavalry, but failed to evade and were destroyed by a charge. While the right flank Indian cavalry made it around the back of the line, it was then immediately destroyed by advancing companions.  Porus was destroyed early on, and with no general the Indians were hard pressed to get an advantage as all their units are less formidable than the Macedonians.  Also, with command and control rules being group based, losing the general meant moving only one group a turn.  On the battleline clash, the elephants did a bit of damage and so did the archers.  But once combat was entered, disordered phalanx were still better than disordered heavy archers, and the latter began to fall and then the breakpoint of the Indians was reached.
Highlight - first general lost test of the game sees Porus leaving the battle.

The elephant that did have Porus (green bush is disorder marker)


Game 4 - (Homebrew) Ancient Warrior Battles see this blog post for more detailed writeup

The horse archers managed to make a cavalry unit retreat off the board.  The elephants did some damage to the pikes and hoplites.  In some freak dice rolling, an elephant managed to rout the Hypaspists and break though.  The Thessalian cavalry intervened but again, very bad dice rolling by the Thessalians saw them retreat.  The Companions finished off the chariots that were damaged by the horse archers.   While this was going on, the damaged pike line contacted the archers and managed to rout quite a few of them for little close combat damage in return.  An elephant and chariot of the Indian right flank routed the peltasts.  After the battleline fight,  the Indians reach 50% losses and so I ended the game. 
Highlight: Elephant (with Porus) routing the Hypaspists (very lucky die rolling) and then forcing the Thessalians to retreat through more very lucky die rolling.

Elephant facing the depleted Hypaspists that they subsequently disperse


Random Observations
Enjoyment
Firstly, which one did I enjoy the most?  Ancient Warrior Battles - fast, not too much die rolling and a great historical feel.  But of course I would say that as I wrote them!  But then, the replay I enjoyed the least was Fast Ancient Battles, and I wrote them too.  Justified Ancients was the second most enjoyable, followed closely by Rally Round the King.  The three I enjoyed the most (JA, RRtK and AWB) were all fun, while Fast Ancient Battles trailled into just being OK.
I think RRtK was the least of the three, and only just less, as it took longer than JA and AWB, and also had a lot of dice rolling compared to the other rules.


Horse archers
These were the first part of the game so will discuss them here. RRtK handles them very well - fire to inflict possible damage but in themselves will be forced to retire and suffer hits themselves, eventually routing.  But not before likely inflicting hits on the opposing units, and so making them more susceptible to routing. JA is quite different as, to quote the author, "ancient shooting is pants".  Against loose-order mounted, there is a 1/6 chance of a damaging result, and if heavy mounted (like the Indian chariot), no chance of damage - just pushbacks.  But the archers themselves are hard to rout as well - they will evade back there full distance and will only die if you can get them in the same turn with another unit. Ancient Warrior Battles has the archers as a bit more formidable on inflicting damage, and are easily destroyed in combat - when they evade they are disordered, and if contacted again they are destroyed. Ancient Warrior Battles is mostly like Justified Ancients but better at evading.


Command and Control
RRtK was the only game with the general permanently with a unit (aka DBA). It has the concept of war ratings (I gave 3 to Alexander and 2 to Porus) that indicates how many gorups you may activate a turn.  However, once activated, a group must continue to move and this requires no activation.  However, groups will stop to fire, and also as a result of reaction tests.  In a rematch, I would give Alexander a war rating of 2 and Porus a war rating of 1. During the game, there was not enough activations available that helped focus what to do each turn.
Both JA and Ancient Warrior Battles have similar control systems - roll for orders to a unit or a group.  I made Alexander a +2 general (+2 to the order die) and Porus +0.  This actually meant it was hard for the Macedonians to fail most order rolls (+2 is very good) and the Indians would fail many.  I would change Alexander to a +1 in a future replay.   This game a good lack of total control to the game.
Fast Ancient Battles uses group activation, with the number of groups able to be moved equal to the number of generals, plus one.  I gave the Macedonians 3 generals and the Indians 1.  In the game, Porus died early which halved (from 2 to 1) the number of activations per turn.  Even when the Macedonians lost a general, this reduced activations from 4 to 3, not as big a loss.  Using activations really helped focus on what to move, which is also why DBA is a tense game.  In a replay, I would only give the Macedonians 2 generals, and also take Porus out of combat for the first few turns - the activations are really important early on. 


Elephants
Elephants in Rally Round the King are unpredictable - while strong initially they can be quite brittle - they are always outnumbered in melee. Being treated as foot rather than mounted really helps show the difference of elephants.  And then when they rout they rampage - normally straight back into their own lines. Elephants are REP5 (one above average) and they need this to offset always being outnumbered and survive a bit of missile fire. In Fast Ancient Battles, Elephants have a really good combat bonus.  Combine this with the fact FAB only has two hits to destroy a enemy, and the Elephants are quite powerful.  For the game and their effect, their should really have been only 2 or 3 rather than 4 on the battlefield.  Justified Ancients and Ancient Warrior Battles treat elephants the same - they have a good combat bonus (+2 compared to the normal unit, and +2 when charging non-phalanx foot units) but a bad dice roll will see them off, and after the first round of combat they lose the charge bonus.  FAB treats elephants as very strong combat units while the others seem to have them powerful, but not too powerful.


Phalanx Vs Heavy Archers
In RRtK, a phalanx unit will generally survive getting into melee with a heavy archer, but be severely mauled due to its low armour class (AC2).  Hoplites fair a lot better with AC4.  An archer is -1 in melee, and a phalanx is +2.  Also archers, as missile units, suffer much worse results when not passing two dice (compared to the phalanx).  So if they can get into melee, the phalanx unit generally wins but has a few hits from the missile fire getting there.  Generally.
In Fast Ancient Battles, archers are poor fighters, and very poor if disordered.  Phalanx units are exceptional fighters when undisordered and poor when disordered (worse than undisordered archers but better than disordered archers).  Archers have a 1 in 6 chance of disordering a phalanx and have two chances to do so while the phalanx in moving in.  So the battleline clash comes down to how many phalanx units can get disordered and so be poor in combat.
JA and Ancient Warrior Battles are similar - Phalanx are great when undisordered (+1 in melee) and -1 when disordered.  Archers are -1 in combat, and additionally -1 when disordered.  Also, archers may retreat when charged in AWB (similar to RRtK).  So, if the archers can disorder the phalanx, they have a chance in close combat, if they don't, they are likely to die.  Overall, I like RRtK and AWB treats the interaction, JA slightly less so, and Fast Ancients battles is still good, but not as much as the others.  Partly Fast ancient Battles suffers as it only  has one damage result - disordered - and so does not quite have the nuances available in the other rules for different damage results.


Overall feel
Rally Round the King is very chaotic but still fun.  For some reason in this round of replays, I really noticed the amount of dice rolling I was doing in the game.  It is a great game to solo as many tactical decisions are out of your hands - you need to concentrate on the big picture stuff.
Justified Ancients have simple but subtle mechanics and, as I mentioned before, I've grown to really like these rules.  Although for Justified Ancients I had to make tactical decisions and the units movement rates are the slowest of all the rules (equivalent to DBA 1 and 2), the game played smoothly and was fun and suited my version of history.
Fast Ancient Battles was the fastest.  The game hinges on pinning units down in melee - melee is optional after the first engagement so you will only do it is there is an advantage to do so, and with only a marginal advantage, most results see combat continuing for another turn.
Ancient Warrior Battles takes the simple mechanics of Justified Ancients and then adds in some action tests where normally the player would have to make a decision (what to do when fired on and when charged) to make the game solo friendly. I wrote them and really liked the way it played - not too much die rolling with the fun and "historicity" of Justified Ancients. 

I liked Ancient Warrior Battles the most, followed closely by Justified Ancients (with my house rules) and Rally Round the King.  Fast Ancient Battles (aka my miniatures interpretation of Bill Banks Ancients) was still good, but not as the rest.  Scoring out of 10 on the combined historical and fun factor scale: AWB: 10, JA and RRTK 9, FAB 7. IMHO of course.