Saturday 13 March 2021

Battle of Tigranocerta 69BC using Ancients Battlelines Clash

Introduction

This is game 55 in play testing my ancient rules by replaying historical battles.  I am using my rules Ancient Battlelines Clash.  I am in the process of writing up some revisions to the rules.  I am play testing the rules by replaying all the Peter Sides scenarios from his Historical Battles books.  ABC is designed to finish in around 30 minutes on a 2’x2’ table.

 Battle of Tigranocerta

Mithridates has sought refuge in Armenia. Lucullus, on behalf of Rome, demands that the Armenians give up Mithridates.  The Armenians refuse to do so and so Lucullus invades Armenia.

Here are a few internet links of interest I used for this replay:

Wikipedia: https://en.wikipedia.org/wiki/Battle_of_Tigranocerta

Luke Ueda-Sarson's DBM scenario: http://lukeuedasarson.com/Tigranocerta.html

Troops

Roman

Romans (with some Armenians in the foreground)


3 Legions, Heavy Infantry, elite, line relief, medium missile protection

3 Allied Legions, Heavy Infantry, line relief, medium missile protection

3 Velites, Skirmishers, javelin

2 Heavy Cavalry

1 Light Cavalry, bow

1 +1 General with the Elite Legions.


All trained.

Breakpoint: 9


Armenian

Armenians (also in shot are some flanking Romans on the hill)

2 Phalanx, poor

2 Allied Heavy infantry, poor

6 Medium infantry, poor

3 Skirmishers, javelin

3 Cataphracts, poor

6 Light Cavalry, bows

1 -1 General with the Cataphracts in the centre.


All trained.

Breakpoint:  16


Scenario changes

The Peter Sides scenario had all the Roman units on the flank on the Armenians.  For this battle I followed the two internet sources above and had them mostly facing each other with some Roman legionaries on a hill on the flank.

 Deployment

Deployment – Armenians at the top, Romans on the left hill and a the bottom


Game

The Romans advance their right flank, the centre but leave the left flank cavalry in defensive mode to protect the flanks of the advancing centre legions.

The flanking legions charge into the Cataphracts


Overview of Roman first moves.

Cataphract routs.  The Roman legion pursues into the next one


Roman pursues into the next Cataphract unit.

This one also routs.  Onto the next one. And then the next one.


All Cataphracts routed.

The Legion continues through the all the light cavalry.  The game is not over yet but has certainly turned into Rome’s favour.


Elite legion with general at the end of stunning flanking attack sequence.

The Armenian right flank light cavalry advance onto the centre legions and the opposing heavy cavalry.  Both are disordered and the Light cavalry evade.
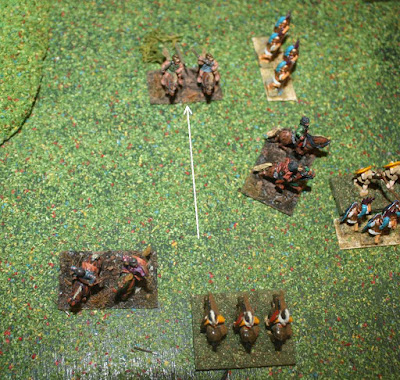

Light cavalry inflicts some damage and evades


The lone legion on the Armenian right is disordered by skirmishers and then subsequently attacked in the flank.  But they stay in melee at the attacking Armenian infantry is disordered.


Legion attacked in the flank.

Roman right flank cavalry charges in, all are disordered.


Roman cavalry (right flank) V Armenians

Centre advances, the left flank heavy cavalry charges the light cavalry that cannot evade as did prior.  Locked in melee.

The Phalanx meets the centre legions – skirmishers wipe each other out.  The phalanxes are poor, there are more legions than phalanxes so melee will be slightly in favour to Rome.  All are disordered.


Phalanx Vs legions.

The right flank light cavalry disorders an opposing infantry unit that advances into the adjacent legion but they are locked in melee.  The Roman cavalry is routed by the opposing infantry!
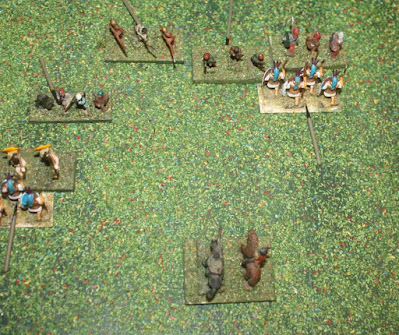

The Roman right flank. 

The flanked legion on the left flank routs.


The Roman left flank

The left flank Roman heavy cavalry routs the light cavalry, pursues into another infantry units, routs that and pursues into another infantry unit but is held in melee.


Heavy cavalry stopped by an infantry unit

Light cavalry charge into the rear of the legion.  Won’t do much as they are light units but it will give the advantage to the Armenians.  But alas, not in time.  The other phalanx –legion melee sees the phalanx routed.


A routed phalanx

The Armenians have reached their breakpoint and flee the battle.
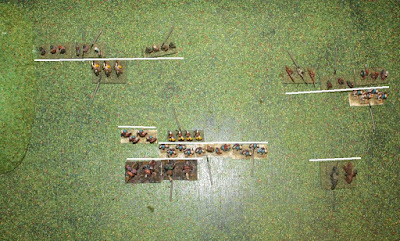

End.

Verdict

This felt like an epic!  I think it was the number of small engagements that happened- normally there are just few melees going on – 2 flanks and the centre.  This one felt like the battles were a lot more localised.  The superiority of the Romans was offset by the larger numbers of the poorer Armenians.  So even after seeing off the Cataphracts, the battle was still a hard fought affair.   It was a great game and one I enjoyed more than the others for some reason, probably the variety and variability of the troops.

If I was to replay it I would only have one Roman legion on the hill.  There only really needs to be one, and it was only 3 cohorts that were on the hill in the actual battle.

This was the last of nine games in the timeframe I loosely called “Republican Roman games”.  I started organising these scenarios (reading, converting troops numbers etc) to replay in March 2020!  I have started looking at the next block of 13 historical games “Early Imperial Roman” for Vosges 58BC to Mons Graupius 84AD.  If past experience is anything to go by these will take me into mid-2022.  My mojo is back so maybe faster, who knows?

Monday 1 March 2021

East Front 1943 Salkov Campaign, Mission 02. 6mm WW2 on a small table

Introduction

This is mission 2 in a small campaign I am doing to get in some 6mm WW2 games.  I am using a variant of Platoon Forward to generate the missions and opposing forces.  I  started with a Russian green company and they are still all green. While the game narrative is all handcrafted, the mission status may seem a little dry as I am using a spreadsheet to keep track of the Company and also to generate the missions.  Second game in and I change from my own rules to give the recently released Rapid Fire Reloaded a go.

Scenario

It is 1943 and a USSR infantry force is attacking a German infantry force. The USSR mission is a hasty attack.

The advancing forces have come up against an enemy position that needs to be cleared.

The terrain is mixed, with some wire deployed:

Key building | Woods |Light woods

Hill | Light woods |Light woods

Open, road | Orchard |Key building

Primary Objective (1) - Key Building

Victory is to capture the primary objective. Lose if do not capture the objective.

Major Victory is achieved if capture objectives with minimal casualties. Minor Victory if capture objective but take major casualties.

The USSR force enters in zones 7-9. The German force deploys in zones 1-6.

The USSR has green morale for its nine sections and four leaders. Support includes MMG, 2x75mm gun.

Available indirect support is 2x82mm.

The German has regular morale for its five sections and one leader. They start dugin. Support includes MMG + tank hunters + Heavy Tank .


The battlefield

Note: I am treating Light Woods as soft cover but visibility is 24 into Light Woods for moving units.

USSR Forces

Russians

1 full Company.

CoHQ Ldr (Salkov)

1st Plt Ldr (Formin), 1st Plt 1st Section (Amelin), 1st Plt 2nd Section (Vetrov), 1st Plt 3rd Section (Yeltsin)

2nd Plt Ldr (Shulgin), 2nd Plt 1st Section (Zimkov), 2nd Plt 2nd Section (Bogrov), 2nd Plt 3rd Section (Letov)

3rd Plt Ldr (Tokarev), 3rd Plt 1st Section (Milyokhin), 3rd Plt 2nd Section (Perov), 3rd Plt 3rd Section (Slobozhanin)

1xMMG

2x75mm AT Gun + tows

2x82mm mortar in indirect support.

German Forces

Germans

1 Zug HQ

   5 Gruppe

   1 MMG

   1 tank hunter team

1 Tiger I

All regular morale

Deployment

Where to defensively deploy the Germans?  I usually just set most of them up and then for a few have an occasional die roll to choose between some likely spots.  I may need to go think more on a plan more along the lines of Platoon Forward of allocating units to cards and allocating cards to locations.  Not for this game though – I want to play and not spend even more time tinkering.

The Germans have ended up with a defence centred around the building.  There is not really a reserve – the units of the hill could be a reserve if the Russians attack through the heavy woods, and if attacking via the hill the woods is the reserve.  The Tiger is a sort of reserve – will depend on the Russian line of attack.


German deployment

The Russians have it really hard in this game.  While they have a 2:1 advantage, they are green and so not great with morale tests.  They do have indirect support and in this game will need to use it to be able to win.  I think they will come around the right flank using the buildings and woods as cover. 

Rules used (a change)

I have been playing using my own rules for quite a few years. For this game I am playing using Rapid Fire Reloaded (RFR). I have already had one game with 20mm forces and hopefully can use RFR rules for the campaign.  For this game I am using 1 base = 1 squad = 2 RFR figures (so a base needs two casualties to be routed.  RFR is similar to rules I used 10-20 years ago - Take Cover!! - and my rules are derived from Take Cover!! So hopefully RFR can be the ruleset I can use, with only minor tinkering I am sure will be coming!  And converting inches to centimetres.

Game

The Russians move on the table.  It is weird - playing games for so long that are limited activation and now going straight to an IGO-YGO with no limits on the number of units that can move!

The Russians have moved 1st platoon (Formin) to in front of the orchards, 2nd platoon (Shulgin) leading; 3rd  platoon (Tokarev) and Salkov (Company HQ) are in front of the buildings.  The MMG is currently amongst the buildings but will move forwards as the infantry advances.  The AT guns are  heading for the edge of the orchards, once Formin has scouted in front to see that it is OK.


Russian entry.

The German MMG opens up on Formin’s platoon and Amelin’s section routs.


MMG opens fire!

Vetrov and Yeltsin move their two remaining 1st platoon sections in a race for the woods – smack bang into the Gruppe at the edge of the words!  Well, there goes the plan of stopping at the woods to call in the mortars.  The Gruppe is eliminated at the cost of Vetrov’s section. Formin’s platoon is down to one section but they pass their morale test.


Russians 1st platoon runs into a Gruppe

The ATguns have unlimbered and the 2nd and 3rd platoons continue to the far side of the woods.


Rest of company continues advances on the right flank

The German pour fire from the hill into the remnants of the Formin’s platoon – Yeltsin’s section - but do no damage whatsoever.    

Formin calls in the mortars that hit their target and rout the Gruppe supporting the MMG.  They also suppress the MMG (this rule borrowed from Rapid Fire for infantry under indirect fire). The AT guns open up on the MMG with HE but for no effect.


Gruppe gone, MMG suppressed.

The Russians continue to pour fire into the MMG but (amazingly poor dice rolls) fail to inflict anything. The MMG is unsuppressed and fires at Formin and Yeltsin’s section and they rout.  1st platoon is no longer in the battle.


The 1st platoon, just before routing.

Shulgin’s 2nd platoon make it to the edge of the woods to the right of the building.  They are spotted by the Germans who open fire on them from the building, the MMG and the Tiger.


Advancing Russians, the lead elements are spotted.

Only one of Sulgin’s platoon section’s  is routed (Zimkov’s), and the entire platoon is pinned.  Shulgin calls in the mortars but no effect.   Tokarev and his third platoon moves to the edge of the wood.  As does Salkov with the Company HQ.


The second and third platoon at the edge of the wood.

The Russians pour fire into the building – mortars, ATguns, Shulgin’s 2nd platoon, Tokarev’s 3rd platoon and Salkov.  They manage to eliminate two Gruppe and the Zug commanding officer.  The Germans check morale and out off the table.  The Russians have reached their objective!


The last German Gruppe in the building

Post battle

The mission resulted in a major victory.

Company HQ Salkov survived the battle.

1st Platoon Leader Formin bailed with others during the battle.

     1st section OK, leader Amelin OK.

     2nd section OK, leader Vetrov OK.

     3rd section lost many and is full of replacements, leader Yeltsin OK.

2nd Platoon Shulgin survived the battle.

    1st section lost many and is full of replacements, leader Zimkov OK.

    2nd section OK, leader Bogrov OK.

    3rd section OK, leader Letov OK.

3rd Platoon Tokarev survived the battle.

    1st section OK, leader Milyokhin OK.

    2nd section OK, leader Perov OK.

    3rd section OK, leader Slobozhanin OK.

Company status

Zimkov: Leader Salkov, morale Green, experience 4.

1st Plt Ldr: Formin, morale Green, experience 4.

1st Plt 1st Section: Leader Amelin, morale Green, experience 4.

1st Plt 2nd Section: Leader Vetrov, morale Green, experience 5.

1st Plt 3rd Section: Leader Yeltsin, morale Green, experience 0.

2nd Plt Ldr: Shulgin, morale Green, experience 4.

2nd Plt 1st Section: Leader Zimkov, morale Green, experience 0.

2nd Plt 2nd Section: Leader Bogrov, morale Green, experience 5.

2nd Plt 3rd Section: Leader Letov, morale Green, experience 4.

3rd Plt Ldr: Tokarev, morale Green, experience 4.

3rd Plt 1st Section: Leader Milyokhin, morale Green, experience 4.

3rd Plt 2nd Section: Leader Perov, morale Green, experience 4.

3rd Plt 3rd Section: Leader Slobozhanin, morale Green, experience 4.

Verdict

The Rapid Fire Reloaded rules worked really well.  There was only one gap on whether the Panzerfaust could fire on infantry (it has 4xd6 HE).  I don’t normally and checking the Rapid Fire rules they can only be fired on infantry in hard cover.

The Russian MMG never got line of sight to any unit to participate.  In hindsight they should have setup with the ATguns.

After playing this game, I dug out my own rules from 2014 that were a streamlined version of Take Cover!! (a Rapid Fire clone). They play very similar to Rapid Fire Reloaded. There are a few things in there that I may add to my games, mainly just to help playing solo.  The first thing I added in 2014 was a simple card deck where red = one side, black the other and when drawing a colour you activated a unit on that side.  The uncertainty helps when playing solo.  May do that for the next game.  The only other thing could be a -1 die modifier penalty for infantry moving and firing.