Showing posts with label ww2. Show all posts

Sunday, 5 April 2026

WW2 Battle report British Vs Germans using 20mm figures and my own rules on a 2'x2' table

Introduction

Playtesting a variation of my WW2 rules.  Using a 2’x2’ board as I still don’t really have the room for the table tennis table (later this year I hope). This is actually the 3rd playing of this same scenario while I bedded down the rules.  No vehicles in this game.

Scenario

I have a scenario generator loosely based on Platoon Forward.

It is 1944 and a UK infantry force is attacking a German infantry force. The UK mission is exploiting a successful attack. The parent force has broken through enemy lines.  This force was held in reserve to exploit this breakthrough.

The terrain is mixed:

Key building | Open, road | Woods

Orchard | Brush | building

Crops | Hill |Crops

Primary Objective is the Key building.

Victory is to capture the primary objective. Lose if do not capture the objective.

Major Victory is achieved if capture objectives with minimal casualties. Minor Victory if capture objective but take major casualties.

The UK force enters at bottom right. The German force deploys in top two thirds of the board.

Troops

UK

The UK has regular morale for its six sections and one leader:

Company HQ (section + leader)

1st platoon 2  sections + 2” mortar

2nd platoon 2 sections

MMG platoon – 2 MMGs

1 Engineering section – engineers

5 units

German

The German has green morale for its six sections and one leader. One section is allocated as the reinforcement.

Company HQ (section +leader)

1st platoon – 2 sections

2nd platoon – 2 sections

3rd platoon – 1 section (reinforcements)

MMG section – 1 MMG

5 units

Map

Deployment

Rules

Slight departure from my normal set but mostly stays the same. 

Card activation – I use most of a card deck.  Draw a card, red an Allied unit activates, black an Axis unit.  Draw another card and activate a different unit if the same side.  Each side can activate up to 3 different units in a row, then ignore more cards for that side if the same colour as the last card.  Picture cards (I add a different amount for each side) counts as an activation but no unit is actually activated. 

1 section = 3 figures but for shooting roll only 1d6 per section, regardless of casualties. 1d6 may result in pin, suppress or 1 figure KO; target return fires on a natural 1.  Reduction is KO does not reduce firing power.  Think of it as morale tracking by figures and when hit zero figures no longer a viable unit.

Grids are used to determine movement and range.  I am using a 4” grid as the table is 24”x24” (so 6x6 grid) but in the next few months hope to get out a ½ table tennis table and play with 6” grids (so a 9x10 grid).  There is no real limit to units in a square – mainly used to simplify terrain and movement.  One square is about 80m across.

Game 1

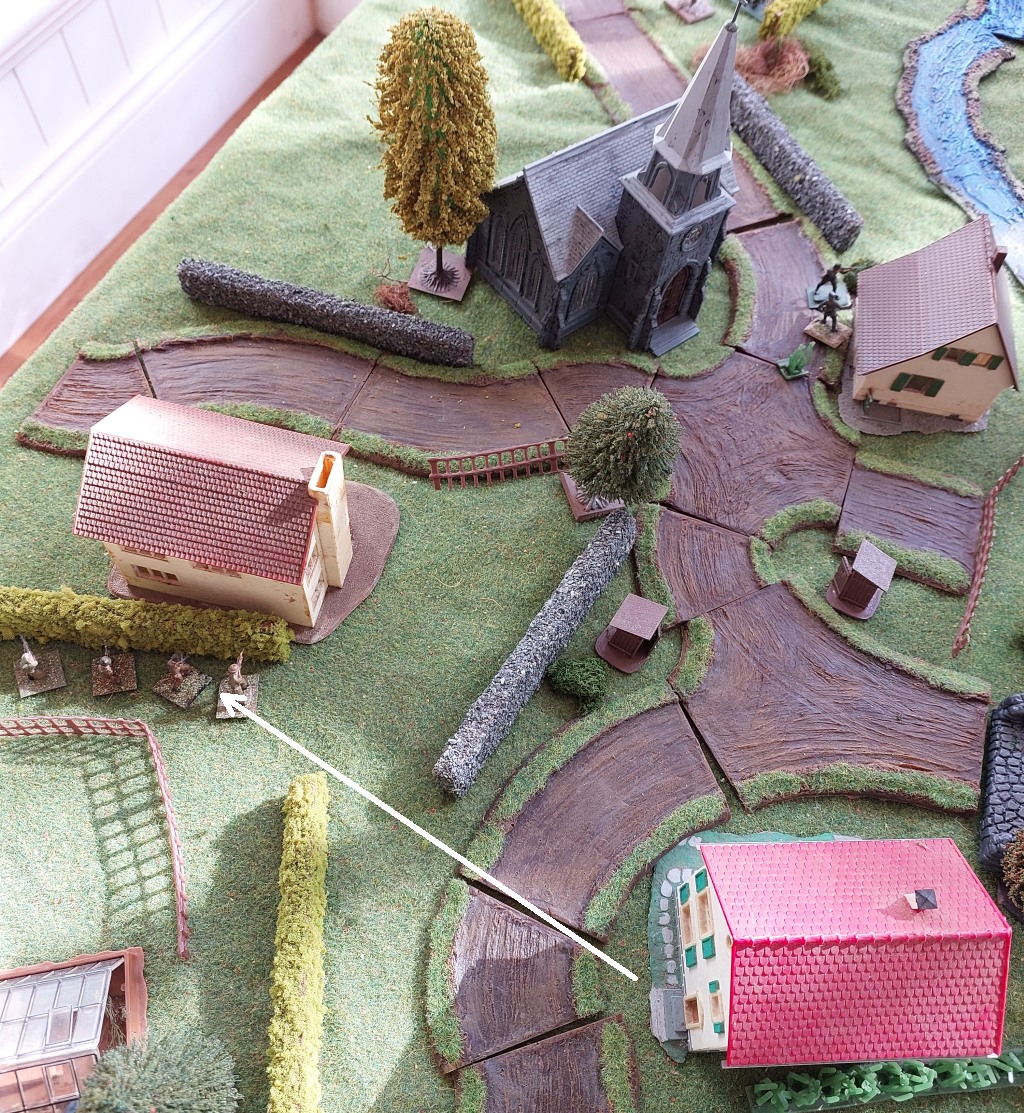
Brits enter 1st platoon onto the table.  Germans react fire as Brits just moved into LOS and suppress a section.

Germans in ruined building fire on the entering Brits

Things heat up as the Brits bring on more units but the Germans manage to suppress another section while only receiving a pin.  The Vickers MMG did bugger all.

Germans managing hold the Brits at bay

The Vickers MMG then manages to force the Germans from the building, the Gruppe losing one figure in the process.  The forward British section advances into the building - the Germans behind the building fire on them and manage to pin them.

The Brits manage to force the Germans out and occupy the building

A few more back and forth and the Brits are forced out of the house and the Germans reoccupy.  The Vickers team is suppressed, as are other sections, and Brits are losing figures here and there.  And the German MG in the orchard is contributing to the British pain.  The British really need to bring on more units.

Not doing well at the house

And it gets worse.  Lots of bad dice rolling see the British lose a few sections and a Vickers.  They are forced back to the entry edge.

British doing really badly

It got even worse. The Brits failed rallies, the Germans in the ruined house passed every single one, even being green.  I gave up at this point.  The Germans have lost two figures, the British their force.

I decide to play again.

Reset – Game 2

The early stages see this game going very different.  The first few activations saw the Brits advance with the 1st platoon and the MMGs and manage to force the Germans from the house.  No suppressions or losses for the British.

British doing well this time

The British advance into the ruined house, fired on by the hidden Gruppe behind the house for no effect and the Brits return fire and force them to retreat.  They later try and rally and retreat even further!

The British at the house

The British move on the 2nd platoon. The German MG in the orchard devastate the Brits in the house (two 6’s result in two figures lost).

German MG opens fire

The British 2nd platoon advances onto the hill.  The German MG spots them and suppress one section but the other section manages to suppress the MG.

British on the hill engage with the MG

The British advance their Vickers team, the German MG unsuppresses but does little damage in a subsequent activation.  The 2 Vickers open up on the German MG and it routs.

German MG just before routing

The German Gruppe in the orchard fires at the British for no effect.  The Vickers then open up, suppressing them.  They subsequently attempt to rally but, being green, it is not so good and they retreat.  Down to 1 figure from 3.

Another German Gruppe is down to 1 figure and suppressed

The Vickers subsequently clears the orchard of a Gruppe.

The two German Gruppe in the woods adjacent to the leader roll to rally.  Both roll a 1 and so are both routed.  One Gruppe had one figure that was lost on a 1, the other had two figures, lost one but must retreat, which they did off the board.  Very, very unlucky.

The two Gruppe in the woods that rout

One Vickers moves onto the hill.  A British section moves into the ruined building but the German HQ fires on them and forces them to retreat. However, the Vickers on the hill takes out half (2 figures) of the German HQ and also moves the Vickers into the ruined building.

Ruined building and depleted German HQ

Lastly, the German reinforcements arrive to bolster up the target building but too late to make a difference.

German reinforcements arrive too late

The German HQ is down to one figure and then eliminated under the fire of two Vickers.

The German Commander just before routing

The Germans are down to two units of the original 5 and force morale sees the Germans retire from the field.

End

Verdict

The first game was really unlucky for the British, in the second the bad luck (though not as bad), fell to the Germans. For small games with limited units a few bad dice rolls can really change the game.  The game really revolved around the ruined house and to a lesser extent the orchards and hill.  It may have gone quite differently if the British had a different entry point.

The rules are very similar rules to previous games but the activation I feel is smother (using most of a card deck rather than a card per unit).  The older rules also had each figure rolling 1d6 and it was hard to limit casualties but also include suppression (as for 1d6 it would be per figure and that means lots of markers, lots more rallying and a slower game).  For these rules a section is 3 figures but only rolls 1d6 until all figures are eliminated.  This gave the game a flow of fire/suppress/rally that I quite liked.  More playing will see if it is still too slow.   Thumbs up so far as three playtests.  Required tweaking after the first two but the two games above saw no changes required to the rules. 

Saturday, 31 May 2025

WW2 20mm battle report British Vs Germans 1944 using my own rules

Introduction

I play a game with my 20mm WW2 forces – Late war British Vs Germans – on a 4’x5’ table.

Background

In the last few months, I have had 4 games using One Hour Skirmish Wargames with 2 people a side.  I do like the rules but they are not as fast as mine 😊 The half a table tennis is still setup from a previous game so I just repurposed the table and figures for a solo game using my own rules.  These are the same rules I used for the half a dozen or so games on the 2’x2’ board from last year.  These rules are fairly similar to my WW2 Advance to cover but close combat uses the same mechanics as ranged fire.  One day I will write them up - currently a one page QRS.

Scenario

A British Recce company needs to make its way through a German occupied town in late 1944 and take the church to facilitate opening up the road.

Battlefield

Forces

Each figure represents about 3-5 soldiers (so around 6-10 figures for a platoon).

1:1 for vehicles and crew served weapons.

In this game, platoons are around 6 figures.

British


1 Company HQ of 3 figures

3 Platoons of 6 figures each

2 Cromwells

1 81mm mortar

German


1 Company HQ or two figures

2 Platoons on 6 figures each

2 MMGs

2 Panzerschreck teams

Deployment

The German MMGs are situated on the two flanking hills.  While a bit of a forward deployment, hopefully they can inflict enough casualties to slow the British down as they advance through the wheatfields.

One platoon is deployed to defend approaches the bridge and any approaches via their right flank. The other platoon defends the left flank approaches to the church as also a possible counterattack into the church.

The Company HQ is in the church.

The British will advance to the house before the bridge and also on their left flank.  The left flank offers better protection than via the right.  The house will be used as a base to advance across the bridge.  The Cromwells will deploy on each flank and then hopefully set them on each hill to support the infantry advance across the bridge and into the village.

Game

British 1st and 2nd  platoon advance.

The British 1st platoon is shot at by the MMGs.  Only one casualty (average would have been 2).

British view after advance of 1st and 2nd platoon

The 2nd  platoon get one casualty from the machine guns .

The Cromwells come on the battlefield but don’t spot the MMGs as the latter are concealed, even though they fired.  The 1st platoon race up to hide behind the building

1st platoon find cover behind the central building

The second platoon continue to advance to cover.

Second platoon managed to get behind the hedge

The second platoon fail to spot the MMG and cannot even fire in the general direction as the platoon has moved

The first platoon move into the building, manage to spot an MMG on the hill and fire, but do not hit them at all.

1st platoon firing at the MMG

The second platoon fire at the MMG as they managed to spot it.  They destroy the MMG (very lucky dice).  The British third platoon enters.

Overview, 3rd Platoon in foreground

MMG manages to destroy another figure in the building (first platoon). The first platoon fires back and reduces the MMG to one crew.  Again the MMG removes another soldier in the first platoon. The platoon have to do a morale check that they fail and have to retreat (6”) and are suppressed.

First Platoon retreats

Cromwells fire on the MMG but for no effect. Another turn and another firing of HE and the Cromwells take out the MMG. The Third Platoon move up to the house formerly occupied by the first platoon.  The Company HQ also enters and advances towards the building.

The company HQ arrives

There is a general advance for the British and also the first platoon recover from suppression.

3rd Platoon move out of the house to hide behind the wall near the bridge (apologies for the sun!)


Second platoon makes it to the hill on their left flank

The Cromwells take up position on each Hill.

The British are ready for the assault - either third Platoon across the bridge or second Platoon dashes down the hill across the Ford to the left of the bridge.  Third platoon will try the bridge.  They enter the bridge but fails to spot and the German infantry nearby and so the British have nothing to shoot at.

3rd Platoon advancing over the bridge (German view)

The Germans are distracted and this enables the British on the bridge to continue to move. They advance straight to the building with the German first platoon and a melee ensues.

Melee in the building

The Germans have the better position being in cover and not moving.  They manage to inflict three casualties on the British.  The British only inflict one on the Germans. The British pullback and are suppressed.

Retreat to the bridge

To add insult to injury the Germans fire at the British at the retreat and score another casualty. The British platoon check the morale again and the platoon decided to retreat back to their own lines (left the battle).

The Cromwells fire on the building and between the two of them manage to score another German casualty.

The British Major manages to call the 81mm mortar onto the German occupied building and scores two casualties.  The Germans pass their morale check.

Second platoon race down the hill to occupy the building

Second platoon race down the hill to occupy the building.  The British platoon now manage to spot the Germans behind the wall and fire for no effect. The Germans return fire that is also ineffectual.

British facing off to Germans

The Germans get off some more fire and score one casualty on the British.  The British return this fire to wipe out the Germans (wow excellent dice!). The remaining British platoon decided to cross the bridge.

Crossing the bridge

On the other side of the bridge is the Panzerschreck team but the British don't see it.

The Panzerschreck team fire at the running British soldiers, misses; the British soldiers return fire and destroy the team.

Panzerschreck firing at the soldiers on the bridge

The British have so few units left.  They will not be able to spot any Germans in the buildings until they get within 6” so the Germans will sit tight.  The British need to decide where to move next and if the Germans open fire then the Cromwells can blast them with HE.

The British on the bridge move forwards closer to the church. The Germans take a risk and the three figures in the opposite building fire on the moving British soldiers. Amazing dice roll and destroy all three British figures!

British soldiers under attack by the Germans

The Cromwells open up on the building but the first shots miss. They get another chance and destroy a figure and suppress the building.

The British soldiers in the building race across the street to get closer to the church

Racing close to the church

Germans unsuppress and fire on the British Platoon, score a casualty but the British platoon - even though at half figures - is still okay.  The British really have no choice for victory but to charge the church.  They do so - it is occupied by the commander and one other soldier and a melee occurs

Melee in the church (after the Brits have driven off the Germans)

The Germans fire first but fail to inflict any hits. The British then rout both of the enemy and occupy the church.

The remaining Germans fail morale and retire from the battlefield.

Remaining Germans

The British succeed!

Verdict

I was not sure how hard or easy this scenario would be.  The defending Germans had 2 MMGs and two platoons, compared to the attacking British 3 platoons and 2 Cromwells. And the handheld anti-tank weapons have a shorter range in these rules (6") compared to 18" in One Hour Skirmish Wargames.  The British are advancing across wheatfields but to offset that the Germans need to defend the town.  In the end it was very close.  About two-thirds through the game I did not think there was much chance of the British winning but they managed to win two major firefights (against the Germans behind the wall and then in the church).  So they were quite lucky.  Poorer dice in these two instances could have easily seen the British lose some more casualties and morale checks would have seen them retire from the battle.

It was a great game.  Never tire of getting out the 20mm WW2 figures on half or a full table tennis table.

Thursday, 31 October 2024

Operation Jupiter 29 – Alone on the Hill. 20mm WW2 battle report.

Introduction

This is game 29 in replaying the scenarios from the Briton Publishers Operation Jupiter skirmish scenario book.   Links to previous games are on this blog page.

Rules used

I am using my WW2 rules that I had for a 3x4 grid that I then made a gridless version for 2’x2’ games.  These games are larger forces on a bigger table (half a table tennis table or 4x5’x5’) so I have modified them a little so now added a few things from my older rules - unit card activation and now each figures is not suppressed but a section can be if fired on by enough dice.  They are very similar to rule I used 10 years ago.

Scenario

The Germans must advance and take over 50% of the British foxholes that are the orchard defence.

Troops

British

British

1xCompany HQ (4 figures)

1xPlatoon (10 figures)

1xVickers MMG

1xPIAT team

2x6pdr AT guns

2 25pdr missions (good availability)

Germans

Germans

1xKompanie HQ (5 figures)

3xZug (8 figures each)

2xPanzerIVG

1x80cm mortar battery (average availability)

Deployment

Deployment

The British setup in a broad line across the centre hedgeline in the orchard.  One section is a little forward and the MMG, 6pdr and CHQ is in the centre.

Game

Germans on the table

Germans all move on.  Aim is to reach the hedgeline and then work out best tactic from there.  The two tanks to hang back.  The Germans continue to advance although failing to spot units.  Finally the centre Zug spots the forward British section.  They open fire but fail to inflict a single hit.  The British are holding their fire, and the radio operator just cannot get through!

Germans at the hedgeline

The next turn sees carnage.  The Germans manage to get one up on the British – the Zugs cross the hedgeline, successfully spot the British in the foxholes and KO 3 figures and suppress a section.  The Kompanie CO calls in the mortars and suppresses the Vickers MG.  The British radio still has no success (in the actual battle, the radio operator was very successful and called down accurate fire).

The Germans advance and fire

The British do manage to inflict hits on the 2nd Zug and is has received 50% casualties, check morale and routs.

2nd Zug routing

The German 1st Zug charge the forward British section (now only 1/3 of its starting strength).  The British lose, but do take one of the Germans with them.

1st Zug charging the lone defender

The 1st Zug then charges the Vickers MMG.  Surprisingly, the British inflict a hit and the Germans do not.  However, the Vickers is suppressed so retreats and abandons the gun.

1st Zug Vs the Vickers MG crew

The 3rd Zug charges the 6pdr and the crew put up a valiant fight but rout, taking one German with them.

3rd Zug Vs the 6pdr crew

The Germans have taken 4 of the foxholes in the time (it is turn 6!) and are victorious.

End

Verdict

The British failed to call in the artillery throughout the game (required a 4+ to call and hit and had 6 chances to do so).  The game would have been a lot closer if they had got in a couple of artillery requests.  The Germans would have had some suppressions (that would have made them stop for aturn or two) and maybe even a Zug rout.  Either way, they would have had less troops to fight and may not have made it in the 6 turn limit.  Although in that case the Germans would have thrown in the tanks that were barely used in this game.  It is only one play but it felt balanced, just unlucky for the British.

This is the last of the four games that I played over a weekend in late September.  I believe I have only three more Operation Jupiter games to play out of the 30 in the scenario book.  Maybe over Christmas.