Saturday 6 January 2024

Battle of Mons Graupius 84AD using When Warriors Collide

Introduction

This is game 66 in play testing my ancient rules by replaying historical battles.  I am using another set of my rules, When Warriors Collide (WWC).  I am in the process of writing up the rules but the current draft is here:  When Warriors Collide V3.0e, .  I am play testing rules by replaying all the Peter Sides scenarios from his Historical Battles books.  WWC is designed to finish in around 30 minutes on a 2’x2’ or smaller table; I am currently using a 40cmx40cm table.

Battle of Mons Graupius

The Caledonians attack the Romans when the latter march on the Caledonian grain supply.

Wikipedia: https://en.wikipedia.org/wiki/Battle_of_Mons_Graupius

Some battle reports:

https://amsterdamwar.game.blog/2022/03/12/mons-graupius-as-wargame-test-drive-scenario/

https://hereticalgaming.blogspot.com/2016/04/the-three-battles-of-mons-graupius.html

https://hereticalgaming.blogspot.com/2017/12/polemos-spqr-battle-of-mons-graupius-i.html

Command and Colors scenario:

https://www.commandsandcolors.net/ancients/index.php?option=com_content&view=article&id=731

Troops

Roman

Roman

4 HI Legionaries

4 MI Auxilia

2 HC Heavy Cavalry

2 Leaders

Breakpoint: 3

Caledonian

Caledonian
4 WB Warbands

2 LI Skirmishers

2 CH Chariots (poor so x1/2 in melee)

2 LC Light Cavalry

1 Leader

Breakpoint: 3

Scenario changes

Reduced the number of units.

Deployment

Deployment

Game

Roman auxilia move and split into two groups to be able to block the opposing 6 units.  Some Light Cavalry and Light Infantry fire at the approaching right flank auxilia for no effect.  The Light Cavalry retreats but causes the opposing auxilia to advance into a light infantry.  Subsequent melee sees both disordered.

Action on the Roman right flank

On the Roman left flank the Light Cavalry fires for no effect and the Light Infantry fire, disorder the auxilia and then retreat.

Action on the Roman left flank

The Caledonian Light Cavalry fires and disorders another auxilia on the Roman right flank.  The right flank auxilia destroys the Light Infantry in melee.

Overview of first battleline status

An auxilia charges a Chariot and it is disordered.  Another auxilia charges another chariot and it is also disordered.  An auxilia charges the Light Cavalry, the Light Cavalry fires at the auxilia and routs it.  The Light Cavalry retires.

Auxilia causing some disorders, but the rightmost auxilia is disordered.

Heavy Cavalry moves to within range of the Light Cavalry. Light Cavalry fires and retreats.  Missile fire causes the Heavy Cavalry to retreat as well.  Light Infantry charges Auxilia in the centre but is disordered.  Light Cavalry fires on Heavy Cavalry and Heavy Cavalry disordered.

Current battleline

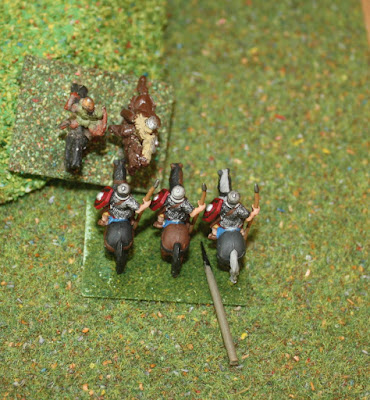
Roman right cavalry continues to try and close with Light Cavalry but is routed by missile fire in the end.  Most unexpected.
Roman Cavalry routed by British Light Cavalry

The auxilia move up to harass the Light Cavalry and the Light Cavalry are forced to retreat.

Auxilia harassing the Light Cavalry

On the Roman left flank things are going better with a chariot and the Light Infantry routed by the efforts of the auxilia and advancing Heavy Cavalry.

Clearing the British right flank

Auxilia rout the chariot and move to the flanks to let the Legion line advance.  The Roman Cavalry on the left charges the Light Cavalry that retreats.

Romans have cleared the first line and ready to assault the hill.

The Roman Heavy Cavalry manage to pin the opposing light cavalry and disorder them.  The Roman legions charge up the hill.

Legions advance!

It was all 1:2 (except the Roman leader) so mostly the legionaries disordered.  Now the Warbands do not get the 1st melee bonus The Romans are now mostly 1:1. Managed to get an auxilia on the left flank and that warband was routed.  Next turn it advanced to the flank of another warband and that too was routed.  The Heavy Cavalry also managed to rout the Light Cavalry.

Tenacious Auxilia on the Warband flanks.

The Britons are at their breakpoint and so retire from the field.  The Romans have won!

End game

Rule changes

None. 

Verdict

A long game as there were two battlelines to get through.  Otherwise an interesting battle with some new troop type interactions tested.

Battle of Boudicca's Revolt 60AD using When Warriors Collide

Introduction

This is game 65 in play testing my ancient rules by replaying historical battles.  I am using another set of my rules, When Warriors Collide (WWC).  I am in the process of writing up the rules but the current draft is here:  When Warriors Collide V3.0e.  I am play testing rules by replaying all the Peter Sides scenarios from his Historical Battles books.  WWC is designed to finish in around 30 minutes on a 2’x2’ or smaller table; I am currently using a 40cmx40cm table. 

Battle of Boudicca's Revolt 60AD

Boudicca leads an uprising against the conquering Romans.

Wikipedia: https://en.wikipedia.org/wiki/Boudican_revolt

C&C ancients scenario: https://www.commandsandcolors.net/ancients/scenario-list/conquest-of-britain-43-60-ad/408-boudicas-revolt-61-ad.html

Troops

Roman

Romans

4 HI Legions

2 MI Auxilia

2 HC Cavalry

2 LDR

Breakpoint: 4

British

Britains

4 WB

2 LI

2 CH (no missile fire)

2 LC

1 LDR

Breakpoint: 3

Scenario changes

I reduced the number of units to fit onto the small board.

Deployment

Woods are on both sides of the table.

Britains on the left, Romans on the right

Game

The Romans advance, as does the British.  The British right flank Chariot charges the opposing Roman Cavalry and both are disordered (it was a 1:1 attack).  The light cavalry stayed out of it awaiting the outcome.  In a subsequent turn the Chariot is routed but the Heavy Cavalry do not pursue.

British Chariot and Roman Cavalry in melee.

The right flank Roman cavalry charges the British light cavalry that fail to get off effective missile fire and is disordered.

Cavalry action on the Roman right flank

The Roman legions advance into range of the British screening light infantry.  The Roman auxilia stay behind to guard the flanks.  The skirmishers inflict a disorder on one Roman unit but the other is forced to advance and in the subsequent melee the light infantry is destroyed.  The Romans are now within charge range of some warband units, one of which decides to charge.  Both the British warband and Roman unit are disordered.

Initial clashes on the battleline.

The left flank Roman Cavalry charges the light cavalry (else the light cavalry would shoot at the heavy cavalry in its turn). It will end up being a 1:1 melee but better than sitting there being shot. The light cavalry fire as the Roman cavalry charge in for not effect.  The Light Cavalry manage to retreat but the Roman Heavy Cavalry pursue.  In the subsequent melee the light cavalry are disordered.  In the next round of melee (next turn) the light cavalry is routed.

British light cavalry in melee with Roman Heavy Cavalry.

The remaining British light infantry fires for no effect at the Roman legionaries.  One warband charges a Roman legionary unit and the warband is disordered.

Warband in melee with the Roman legionary unit

The remaining left flank British chariot charges the Roman auxilia.  Both are disordered.

Chariot in melee with the Roman auxilia

The Roman right cavalry, even with great odds, does not manage to rout the light cavalry.  The adjacent Auxilia does rout the chariots.  The Roman leader does not rout the opposing warband. 

The right side of the Roman line not doing as well as expected.

Roman left flank – one chariot gone but the rest locked in melee.

British light infantry fires at a Roman unit for no effect and the light infantry retreat.  The Roman unit advances into the British warband with the leader.  Must attack (at 1:2) and rolls the worst result – “1” and routs.  The Warbands pursue.

Roman unit pulled into melee with the British leader warband.  Doesn’t end well for the disordered Romans.

The right side of the Romans do well this time.  The heavy cavalry routs the opposing light cavalry, a Roman legionary routs a warband.

Roman right side clearing the opposition

The Roman leader charges into the last untouched warband.  1:1 and rolled a 1! Romans disordered.  Roll again to see if leader incapacitated.  Rolled a 1!  Oh dear.

Roman leader charges a warband but is cut down.

The Romans start manoeuvring on the flanks to bring those units into the centre but then the other Roman leader routs the opposing warband and the British have reached their breakpoint and flee the battle.  The Romans win!

End game

Rule changes

Note that this game was played prior to my 30 games in 30 days so these rules changes occurred before those 30 games.

Prior to the game I changed leaders to be a 1.5 multiplier, rather than 2.  At the end of the last game I did mention I thought they were too powerful.  In Bill Bank’s Ancients they were really makers than moved per turn for local focus of effort.  Not the case with my rules. Also, I have made undisordered WB value 3 rather than 2 (and then only a x2 multiplier for 1st melee rather than x3).  WB should be a bit stronger again HI and MI than they are currently.  

Lastly, melee was always optional unless charging.  So a lot of the 1:1 melees would not occur as the risk is equal for both sides.  And made the game slower, less decisive and more predictive.  So now if you are at 1:1 or greater or charging you must melee.

Added back in a fire and retreat for Light infantry and cavalry.  Last game I said it did not seem like a problem; now it does J

Verdict

The Romans had the slightly superior force but the British could have got lucky.  They did manage to incapacitate the Roman leader but it was too little too late.  A fun game.