This is game 3 is replaying the scenarios from the Briton Publishers Operation Jupiter skirmish scenario book (Lulu PDF link). I am replaying them on a 4.5'x5' table using 20mm, my own Advance to Cover rules and a figure scale of 1 figure = 1 section. Background on why I am playing these is at the start of the first game post.
These games are like vignettes of larger battles. The report is not long nor that detailed but this is the first one in this series I did take some notes.
Not to preempt anything, but this was the most fun battle I have played in a while. It was very nail-biting from turn to turn as the British kept assaulting the farm as the clock was ticking.
Scenario
Germans are holed in some farm buildings. The British have 10 turns to dislodge them (note it is 6 turns in the scenario but I started them on one edge a fair distance from the farm so added 4 turns for the extra movement).
The Germans setup int he farm complex on the assumption the Brits will have a hard time kicking them out in the time limit. the Pazerschrecke team setup in corner, in case tanks come down the road.
Troops
British |
| The considerable British force (considerable compared to the Germans) |
4 figures + 1 PIAT
2 Company:
1 CO, 1 2" mortar and 9 figures
1 Churchill VII
3 fire missions of 3" mortars
 |
| Deployment - one company and HQ on the left, the other company on the right. |
German
 |
| The small force of German defenders |
4 figures
1 Company
1 CO and 9 figures
1 Panzerschrecke team
1 MMG
 |
| Defending the farm. Two platoons of the company in the large thatched building with the third platoon in the smaller building to the right All figures are actually in the building they are behind so I know what is in them! |
Two turns gone to get to deployment position, 8 to go. The British advance the 1st Company (the one travelling down the right of the table). This take 4 turns - sending one platoon across the field, make sure nothing there and then the rest following. This is as the British do not kniw if the Germans are at the hedge or tree line so need to be careful. Of course, the Germans re all in the farm.
 |
| 1st Company advance across the field on the right and in front of the farm. |
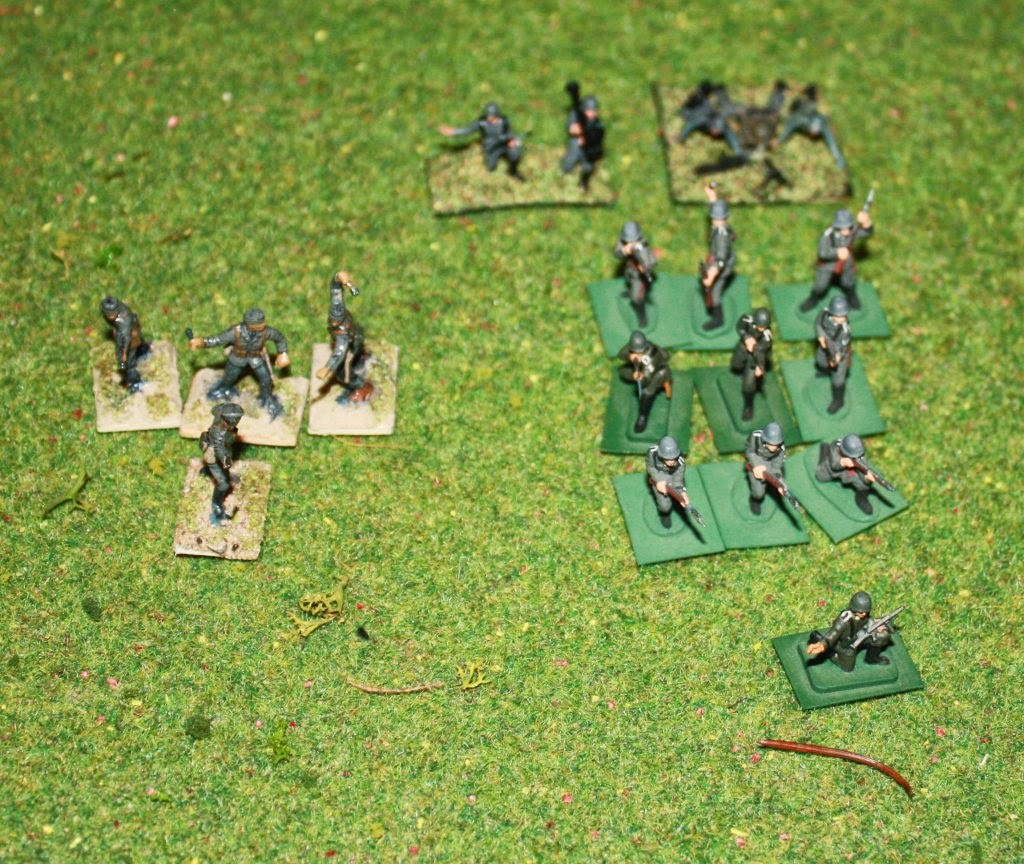
2nd company advances in step formation as well and a platoon runs into the Panzershrecke team that is hiding in a corner of the field. The Panzerschrecke team are two figures and fire with their rifles (2 dice in total). Two 6's, two dead Brits. Most of the rest of 2nd company fire at them for only one hit. The next turn a platoon (3 figures) enter in close combat with the single remaining German and the latter are captured.
 |
| 2nd company. The figures at the far right have just discovered a Panzerschreke team. |
 |
| Result of morrar fire on the building - 2 Germans are killed (4 left). I did mention it earlier but the figures are actually in the building but I put them behind so I know what is there. |
 |
| British platoon assalting the main building. They fail. |
 |
| 1st company milling behind the hedges across the road from the farm. At the right can be seen some of the platoon about to charge across the road in to the MMG |
 |
| Assaulting the MMG held building, it was a success! |
 |
| Another assault that fails. Readers taking notes will see I failed to remove a German figure that should have gone from the previous assault. |
2nd Company is in position. A platoon from 2nd company charges into the main building. This also fails but 1 defender killed. Only one defender left!
 |
| 2nd company platoon assaults (and fails) |
Another 2nd company platoon assaults the main building with the one pinned defender. Unsurprisingly they win. Actually, based on the past history with assaulting this building, may be it was surprising!
 |
| Another 2nd company platoon assaults the main building and finally a win. |
 |
| End game. Not much left - the 2 German figures at the left are about to rout. The Battalion HO at the top right will withdraw. |
The most fun I have have for a while. All the games have been fun, but this was exceptional. I think is was the time limit. I would throw a platoon at the farm - fail; next turn another - fail. Another in the following turn - success but now the company is pinned, use the other company - fail. tick tick tick goes the clock. I was sweating the dice and the cards (the game uses card activation).
Also, I mentioned it in a previous writeup, but the Operation Jupiter scenarios are more like vignettes of a larger battle. While in another game, the farm would be possibly only a half or a third of the game and the farm one objective of two or three. I am preferring the vignettes at the moment.
Oh, and the Churchill played no part in the game. Frightened of hiding enemy Germans, the tank only advanced to the farm in the last turn.


.jpg)


Sounds like you had a great time, thanks for posting buddy. I know this game is from awhile back, I hope you've been able to keep the ball rolling.
ReplyDeletePretty cool that you pulled it off by the skin of your teeth, Germans breaking on the last turn. Of course, things could have gone much worse if the German machine gun had managed to hit something. Of course, that could have been offset if you'd have managed to get your tank in the fight ;)
But that does bring up an excellent point about friction; as you know, I too have been playing rules with friction built in (you don't get to do everything you want), and it's funny because everyone reading is thinking 'why didn't he get the tank into the game?'
I'm glad to see it happening to someone else finally, cause I know the answer(s). I had to send infantry up there to scout it out, then when I figured out what was there I needed to act immediately to take advantage of the situation (which didn't leave time to bring up the tank), etc, etc...
Great stuff Shaun, I really enjoyed it. Though I still think you need to try 5Core Company Command ;)
V/R,
Jack
This game is from the first week of January so definitely awhile back! I have moslty written up the other two from the same week, so expect to see two more soon. As you know, I do use a card deck for activation, with a joker for end of turn. I think this really captures the friction of WW2 battles, you never get to do everything you want when you want to. It feels right from all the battles I have read about. It does not stop you completing the overall plan for a side but it is a bit more frustrating trying to execute it! I first came across the concept while playing IABSM back in 2004 and gave in a few years ago and use it for my rules.
DeleteI have some ideas about playing 5Core company command. I do want to try it. I may be using single 20mm figures on a 2'x'2 table as i have better 20mm terrain than 6mm. But I may use 6mm...who knows?, I certainly don't :-) I will figure it out when I get around to it!
I'm just kidding about Company Command, you look to be having a great time, no reason to mess with that!
DeleteV/R,
Jack
Great game, decent write-up too
ReplyDeleteThanks Al.
DeleteTanks. Just armoured sissies.
ReplyDeleteNice to see all those old Matchbox figures on the table! Great AAR.
Thanks Bill. I think there is nothing but Airfix and Matchbox on the table. In fact, most of my ww2 collection is plastic kit. Most would be at least 30 years old. The oldest in this AAR are the Churchill and the shiny darker figures that are from 1981.
Delete