Introduction
This is mission 5 in a campaign following a British company
through 1944 France. I am using 6mm
forces and playing on a 3x4 grid on a A4 page.
I did a similar East Front campaign in 2017.
Rules
I am using my own rules.
I have modified the ones I used in 2017 to be 1d6 for all rolls, rather
than 1-3 per attack. They are likely to
change slightly as I playtest them on the games. I am using Platoon Forward
to generate the missions.
The rules are here: ww3x4
Advancing Companies V2.0c.pdf but
spoiler (see the end of the post) will change from next game.
In summary, most units move 1
square and can fire out 1 square and non-firing units are seen at 0 or 1
square. Stacking is 3 units of one side per square. Each turn
normally has one square activated (random side but a chosen square) and units
in that square can fire, move or rally. Then the other side activates a
square. After each side has an activation there is a special melee phase
where opposing units in a square fire at each other. Play another turn and keep
this up until one side's morale fails.
Mission 5
It is 1944 and a UK infantry force is attacking a German
armoured force. The UK mission is a small attack. The depleted company is
ordered to make a local attack on an enemy position.
The terrain is mixed, with a bunker and some wire deployed:
Wooded Hill | Brush |Key Building
Crops | Open, road |Hill
Marsh | Stream |Orchard
Woods | Crops |Hill
Primary Objective: Key Building (3).
Victory is to capture the primary objective. Lose if do not
capture the objective.
Major Victory is achieved if capture objectives with minimal
casualties. Minor Victory if capture objective but take major casualties.
The UK force enters in zones 10-12. The German force deploys
in zones 1-6.
The UK has green morale for its seven sections and three
leaders. Support includes 2xMMG, 2xChurchill, 1 Engineer section.
Available indirect support is 2x25pdr.
The German has veteran morale for its two sections and one
leader. They start dug in. Support includes MMG + tank hunters + Sdkfz251/9.
Troops
British

1 Company HQ
1st platoon – 2 sections + 2” mortar and PIAT
2nd platoon – 3 sections + 2” mortar and PIAT
3rd platoon – 1 section + 2” mortar
2 Vickers MMG teams
2 Churchill VII
1 Engineer section
Artillery support – 2 x 25pdrs
Forces relative to campaign:
Co HQ Hodgson (Green)
1 Plt HQ Cole (Green), 1 Plt 1 Sect Burns (Green), 1 Plt 2
Sect Knowles (Green)
2 Plt HQ Ross (Green), 2 Plt 1 Sect Turner (Green), 2 Plt 2
Sect Wade (Green), 2 Plt 3 Sect Hartley (Green)
3 Plt 1 Sect Manning (Green), 3 Plt 3 Sect Williams
(Regular)
German
1 Zug HQ
2 Gruppe
1 MMG team
1 tank hunter team (with Panzerschreck)
1 Sdkfz251/9 (with 75mm/L24)
Deployment
Where to put the bunker?
The hill in front of the building seems like the likely choice and I
went for this position. It gives a line
of fire across all the lines of advance on the building. In it is the MMG.
The wire can go in front of the bunker (between the orchard
and the bunker) to really limit infantry assaults on it.
The tank hunter team needs to be in the same square as a
tank to fire at it. And cannot really be
be seen until the enemy is in the same square.
But the British are unlikely to move the tanks into a square without
having infantry go in there first. So
wooded Hill to the top left or maybe the marsh?
Wooded Hill wins the roll.
Sdkfz251/9 is really anti-infantry and so into the Brush at
the back.
The two infantry units and leader? Into the building. I was tempted to put one in the wooded hill
or the Brush but focus! The objective is to deny the British the building, not
hurt them a lot.
I am a little concerned I have spread defence over 4
squares, considering most of the time will be only one square activating at a
time. But multiple squares have the
advantage of being harder to spot and less susceptible to artillery.
The British will do a two-pronged attack up both flanks. The openness in the centre means each flank can hopefully support the other. More tanks on the right to help with the bunker assault.
 |
| German deployment |
Game
British move 1st platoon and a Churchill onto the hill. The Germans could open up with the MG. At this range is a 4+ and good chance to suppress or KO the two sections. But then that means the Churchill could see the bunker and suppress it. I roll randomly for what the Germans do – they fire with the MG. The 1st platoon that is only two sections is suppressed and must retreat as in the open. They retreat off the battlefield and are lost. Well, that did not go well but the same thing happened in the previous mission (one entire platoon routed after first combat).
 |
| British entry |
Allies move the other Churchill up and then move into the orchards, hoping there is no anti-tank there. I am very nervous with only tanks on the table.
 |
| Churchills in the orchard. |
A British sniper (a random event) gets a bead on the bunker MMG and suppresses them.
Germans move the tank hunters into the brush with the Sdkfz251/9; those Churchills seem as though they will be annoying. The British move the 2nd platoon onto the hill.
The Churchills move onto the hill with the suppressed bunker
(note the Germans have had three attempts to rally the MG but to no avail).
The 1st section of 2nd platoon wanted to move with the Churchills but forgot the barbed wire is impassable to infantry. I will need to bring the engineers on ASAP.
 |
| Churchills assault |
The bunker MG will only be KO’d on a 6. The Churchills have 2 weapons each. They get a 6! The German MG in the bunker is gone.
The British bring on the engineers. The Germans move in the tanks hunters and the Sdkfz251/9 into the Churchill square. The best chance they are going to get to remove the Churchills.
 |
| Germans throw their anti-tank forces at the British Churchills. |
Melee phase is simultaneous.
One Churchill suppressed.
Tank hunter team routs, Skkfx251/1 is fine.
The 75mm/L24 is not going to do anything to the
Churchill. What was I thinking? It retreats.
The Damaged Churchill tries to rally and routs instead. The other Churchill moves off the hill.
 |
| The Churchills in a good supporting position |
The Engineers move up and cut a gap in the wire. British artillery target the key building (this was a random event) and suppress a German defending Gruppe that routs in a later rally attempt.
 |
| The suppressed Gruppe that routs on a failed rally attempt. |
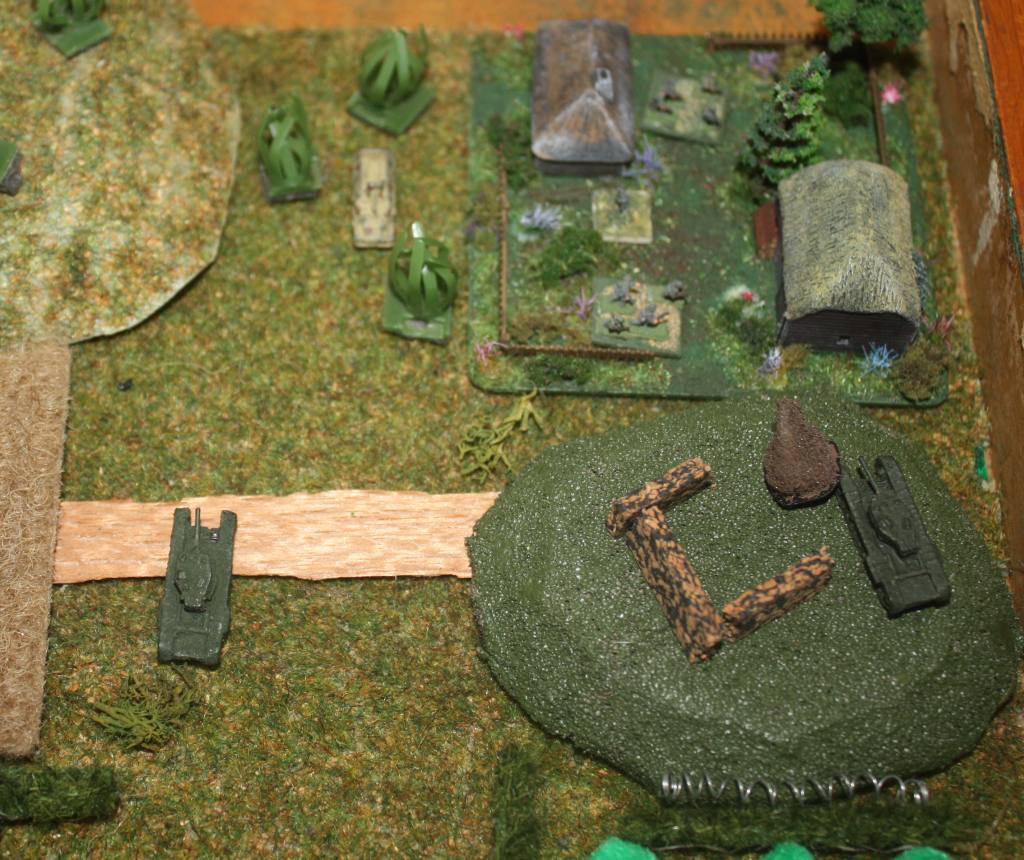
The Churchill fires at the half track and destroys it.
 |
| Churchill Vs the Sdkfz251/9 |
British move up to the hill with the abandoned tank and then advance into the building..
 |
| British advance. |
 |
| British assault the building. |
The Germans fire and miss!
Melee phase sees The German Gruppe eliminated as well as 1st
section of the 2nd platoon.
The British have captured the objective!
 |
| End state |
Post-battle status
Co HQ (Hodgson) New morale level is Regular.
1 Plt HQ (Cole) routed during the mission and are ok to
continue. New morale level is Regular.
1 Plt 1 Sect (Burns) routed during the mission and are
disbanded.
1 Plt 2 Sect (Knowles) routed during the mission and are ok
to continue. New morale level is Regular.
1 Plt 2 Sect (Davies) had no troops prior to battle but have
received replacements.
2 Plt HQ (Ross) 2XP gained.
2 Plt 1 Sect (Turner) routed during the mission and are
disbanded.
2 Plt 2 Sect (Wade) New morale level is Regular.
2 Plt 3 Sect (Hartley) 2XP gained.
3 Plt HQ (Burns) had no troops prior to battle.
3 Plt 1 Sect (Manning) New morale level is Regular.
3 Plt 2 Sect (Hanson) had no troops prior to battle but have
received replacements.
3 Plt 3 Sect (Williams)
Verdict
Another great game.
The fact the British had the Churchills and the Germans had little
Anti-Tank really helped the British. Not
a balanced scenario but the campaign is not about balanced scenarios.
But…after this game I played a game with these rules with my
13yo son, using 10” grid squares. I have
changed the activation sequence. For
that though, you will have to wait until the writeup of that game.


.jpg)


Nice AAR, again a ton of action in that space. Looking forwards to the 10" square game, as I was thinking along exactly the same lines for 20mm (1/72). Also the Sequence of Play changes, which are the sort of dynamic tweaks that I like.
ReplyDeleteThanks Norm. We were going to play with my 20mm on the 10" square grid but they were not available for the games so ended up using 6mm. When I have access to the 20mm again I do want to try them out on the big table, just for a different look and feel to the game.
DeleteAnother lovely little game Shaun. I love Churchill tanks, as they are tough as old boots and always enjoy fielding them on the table in my games:)
ReplyDeleteThanks Steve. I vacillate between Cromwells and Churchills as my favourite British tank. But I do like it when I use them as they were supposed to as infantry support. Which they did quite successfully in this game.
DeleteVery cool, Shaun, and glad the Brits are making some headway! It's definitely been tough, and the way sections keep routing, my goodness...
ReplyDeleteThat's pretty rough that infantry can't cross barbed wire, but it makes sense at this scale (assuming it's wire obstacles in depth, with land mines incorporated as well).
I didn't have a problem with the German halftrack engaging the Churchills and having the opportunity to cause some problems; yes, it's a short 75mm, low velocity gun, but even firing HE at point blank range could cause some real problems for a tank crew. Not likely at all to penetrate the Churchill's armor, but knock a track off, knock the radios out, jam the turret, disable the main gun, all are real options that could convince a crew to bail out.
If they could have coordinated the charge of the halftrack with their AT team, perhaps things could have gotten really ugly, but I was happy to see your company carry out a pretty well coordinated attack.
Looking forward to more, especially with the kid, but ya did let the world down by not going with 20mm ;)
V/R,
Jack
The Churchills did most of the job but then that was their role in the war. They have a lot of armour and my rules are all a single throw of a 1d6 comparing attack ad defence value so the probability of the 75mm/L24 doing much ancillary damage much to it has not made it into the rules. I was hoping to co-ordinate the attack as the tank hunter team had a chance to do some damage, but alas it was not to be.
DeleteThe 20mm WW2 figures left the house in June arrived back in the house a few days ago (they are stored in furniture that went to stage a house) so I am really hoping to get it out soon (where soon = before Christmas at my pace!).
Nice report, interesting game. I must try and give the rules a go!
ReplyDeleteThanks John - the rules do change (turn sequence mainly) from the next post (expected to be published in the next week or two).
DeleteShaun these are excellent rules that you are developing! Was wondering, if a stand that is activated moves to another square, does it get to activate again in the same turn when that new square gets activated? In other words, do stands only activate once per turn, or do they get to activate each time their new square activates? 2nd question, 2 do the sides each alternate activating a square in a turn?
ReplyDeleteHello Noel, Thanks for the comments. To answer your questions:
Deleteif a stand that is activated moves to another square, does it get to activate again in the same turn when that new square gets activated?
No it does not activate again if the square it moves into gets activated. Stands can only activate once per turn.
do the sides each alternate activating a square in a turn?
In the version for this game, one die is rolled at the start of each game turn to see activation sequence. One side will get 1 or two activations, then the other side will get 1 activation. After playing a game with my son (it is the next blog post after this one) I have gone for the simpler alternate activation of 1 square each per turn.