Introduction
This is mission 2 in a campaign following a British
company through 1944 France. I am using 6mm forces and playing on a
3x4 grid on a A4 page. I did a similar East
Front campaign in 2017.
Hoping it will scratch the itch for a campaign that
is quick, no measurements, and fairly simple rules but has tense and tricky
tactical decisions. Game 01 delivered.
The pink case that the battlefield (well A4 sheet)
is in is still here for this report. It
changes next mission.
Rules
I am using my own rules. I have modified
the ones I used in 2017 to be 1d6 for all rolls, rather than 1-3 per
attack. I am using Platoon
Forward to generate the missions.
The rules are here: ww3x4 Advancing Companies V2.0c.pdf
In summary, most units move 1 square and can fire
out 1 square and non-firing units are seen at 0 or 1 square. Stacking is
3 units of one side per square. Each turn normally has one square
activated (random side but a chosen square) and units in that square can fire,
move or rally. Then the other side activates a square. After each
side has an activation there is a special melee phase where opposing units in a
square fire at each other. Play another turn and keep this up until one side's morale
fails.
Mission 2
It is 1944 and a UK infantry force is attacking a German
armoured force. The UK mission is a exploiting a successful attack.
The parent force has broken through enemy lines. This force was held in reserve to exploit
this breakthrough.
The terrain is hills, with:
Wooded Hill | Rough |Crops
Wooded Hill | Hill |Open
Open | Hill |Crops
Open | Open |Open
Primary Objective is a Key Building in zone 1.
 |
| Battlefield |
Victory is to capture the primary objective. Lose if do not
capture the objective.
Major Victory is achieved if capture objectives with minimal
casualties. Minor Victory if capture objective but take major casualties.
The UK force enters in zones 10 (middle of bottom row). The
German force normally would deploy in zones 1-6 (top two rows).
The UK has green morale for its six sections and two
leaders. Support includes MMG,2xSherman.
The German has regular morale for its three sections and one
leader. Support includes 2xMMG, Jadgpanzer IV 75mm (L48).
6 of the German units (minimum squad + armoured vehicle) are
reinforcements that arrive on turn 3 at the right of zone 3 with appropriate
transport. This is what the scenario
rolled up - 6 units as reinforcements.
There are only 6 units. So I will
put 1 Gruppe on the objective and the Germans are rushing towards it to secure
it with the other 5 units before the British can. With the objective defended by only one unit,
they will arrive on turn 2 rather than turn 3.
 |
| Germans |
Troops
 |
| British |
Co HQ Godfrey (Green)
2 Plt HQ Rowley (Green), 2 Plt 1 Sect Turner (Green), 2 Plt
2 Sect Wade (Green), 2 Plt 3 Sect Hartley (Green)
3 Plt HQ Burns (Green), 3 Plt 1 Sect Manning (Green), 3 Plt
2 Sect Hanson (Green), 3 Plt 3 Sect Williams (Green)
MMG
2 Sherman 75mm
Deployment
 |
| The lone German Gruppe defender |
British plan: Rush up to the wooded hill (zone 4) with 2nd
platoon ready for an assault. Tanks up
the right with 3rd platoon to approach from the right flank. There
is no cover for the advance anywhere else.
German plan: Move squads to the building ASAP. MMG and tank in the rough in zone 2. This will provide two zones of fire Vs the
one on the wooded hill.
I have a feeling that wooded hill is going to be a British death
trap.
Unusually neither side has any indirect fire available. This will hurt both sides not having any mortars
to call upon to suppress the enemy.
Game
British move onto the table, Germans follow by bringing on
the halftracks. The Brits focus on
moving 2nd Platoon up to the wooded hill. They get there and fail to spot the Gruppe in
the building (required a 6 so low expectations). The armour for either side is not yet on the
table, the main aim is to get the infantry into the field.
 |
| Early stages of deployment. |
The Brits get a section as a reinforcement; a section from
another company has been sent to help.
Bold move – the Brits see an opportunity to assault the
building before the halftracks arrive.
They take it with Rowley’s 2nd platoon.
 |
| Assaulting the farmhouse |
The British have two sections suppressed but the Gruppe is
suppressed and retreats to the rough.
A suppressed unit in the same square as an unsuppressed
enemy must retreat.
 |
| The British take the objective. |
In the following German turn, they assault the farmhouse. Germans can move in halftracks and unload into assault.
All the British are suppressed, as are the Germans. No one is required to retreat.
 |
| Germans assault the farmhouse |
 |
| Random artillery causes the British to be suppressed. |
In melee at the farmhouse, one German Gruppe is routed while
the British MMG is also routed. The
British fail to unsuppress while one of the Germans recovers. Rowley calls on the platoon to retreat.
 |
| The British retreat |
The Germans get 2 activations and move onto the battlefield
the remainder of their units – a Jagdpanzer and a Sdkfz 251/1 with another
MMG. The German MMG in the farmhouse
opens up on the British on the wooded hill but do no damage. The British bring on the Shermans and the
last section of the 2nd platoon.
They are taking a bit of a gamble as the units on the wooded hill are
exposed.
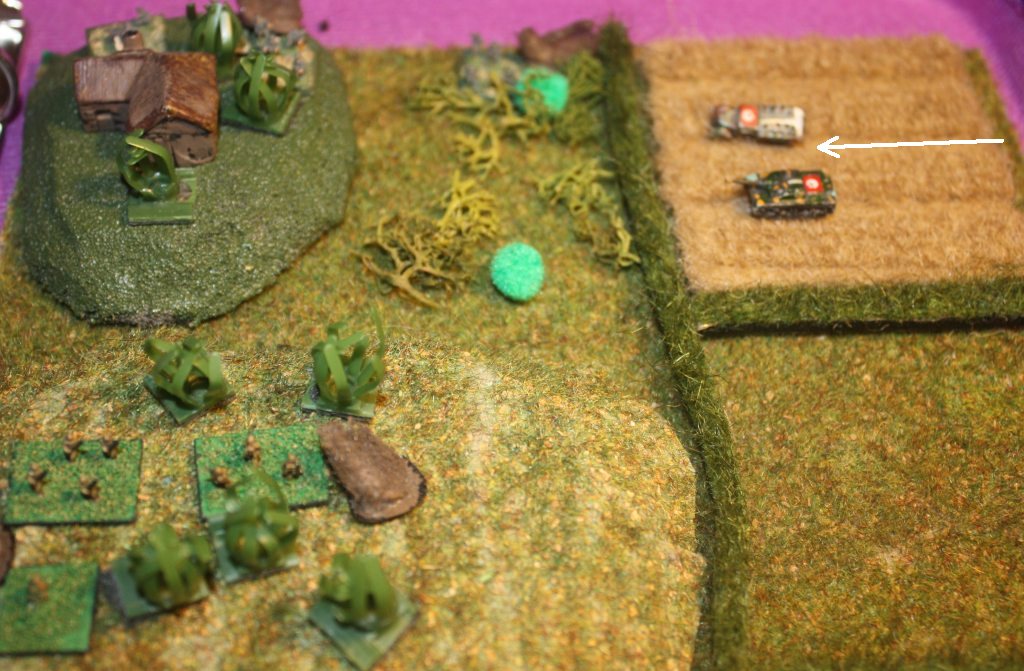 |
| The German advance |
The Germans deploy in the Rough brush and the MMG crew
disembark. The Jagdpanzer and the 2 MMGs
pour fire into the wooded hill but fail to rout any of the two British units (2nd
platoon) there. Statistically one should
have gone by now, with a good chance of both of them. The British Shermans and
the other infantry unit move up on the hill and are now visible to the Germans. The choice to use an activation to move new
units up Rather than ralying the wooded hill was not too hard – each British
unit requires a 5+ to rally.
 |
| The British advance |
The Germans activate and now need to decide if it is the
Shermans or the infantry that are the threat.
Why not both? The MMG fires and
destroys the newly arrived section and the Jagdpanzer takes out a Sherman!
 |
| After much ineffectual fire over the last few turns, two shots and a section and a Sherman are KO’d. |
The Sherman can only damage the Jagdpanzer on a 6; It also
could move into the farmhouse to disrupt the objective but expect the Germans
have Panzerfausts. The Sherman instead
fires with its MG at the MMG in the rough.
Manages to rout it! The Germans
can ill afford to lose units – they started with 6 and have lost 2
already. The British have lost 3, but
most of the remaining ones are suppressed.
They do have on infantry section (the reinforcement) left they have not
yet brought on.
 |
| The MMG in the rough is routed. |
Game note: the best roll for activation for the Germans
is a 5 as they get two activations, and then the British get one. For three turns in a row the Germans rolled 5
for activation, ensuring they got to activate two squares for firing compared
to the one square for the British.
The German Jagdpanzer brews the remaining Sherman, and the
German MMG routs a British unit.
 |
| Another Sherman gone, and also another section from the hill. |
The British 3rd platoon decide they have had enough and to the rear pulls back
due to being in the open while trying to rally.
 |
| British rear suppressed platoon pulls back |
The last onboard British section is routed, along with the
Company HQ and the Germans hold the field.
The British fail in their mission.
 |
| Last British section routed |
Post-battle status
Co HQ (Godfrey) routed during the mission and has been
replaced. Major Godfrey did not last long...
1 Plt HQ (Spencer) was replaced prior to the next mission.
1 Plt 1 Sect (Burns) was not in the battle.
1 Plt 2 Sect (Knowles) had no troops prior to battle but
have received replacements.
1 Plt 2 Sect (Davies) had no troops prior to battle but have
received replacements.
2 Plt HQ (Rowley) routed during the mission and has been
replaced. Another Lieutenant of the company gone.
2 Plt 1 Sect (Turner) routed during the mission and are ok
to continue.
2 Plt 2 Sect (Wade) routed during the mission and are ok to
continue.
2 Plt 3 Sect (Hartley) routed during the mission and are
disbanded. No enough men left to maintain the section.
3 Plt HQ (Burns) OK
3 Plt 1 Sect (Manning) OK
3 Plt 2 Sect (Hanson) OK
3 Plt 3 Sect (Williams) OK
Verdict
Another failed mission. At least in this one the British had a chance and then the combination of the Jagdpanzer and MMG ensured that the British would not be able to respond with enough weight of fire to advance. This game was fun – a few tough decisions had to be made. Unfortunately a loss of the Company commander, Major Godfrey, and second platoon's Lieutenant Rowley.


.jpg)


It's still hard to believe that this is played out on an A4 'table' given so much action was going on. Hopefully it will kick off you campaign itch. I'm struggling to find the desire to game at present, so maybe a small 2' x 2' game might surfice for now.
ReplyDelete2'x2'? That is 6 times the size I am playing on :-) I am enjoying the campaign and want to get back to it. I have not got a game in of it since March though (real life being busy but slowing down as of this week). I have also started testing some ancient rules for a 1'x1' table (I did post some of these these last year but have revised the rules). I am actually looking at continuing my 2'x2' East Front 6mm WW2 campaign soo too. 2'x2' seems so big now!
Delete2'x2 has done me in good stead for gaming over the last 10 years. So easy just to set up an play. And you have done it before! Desire for gaming fluctuates with me too these days; I tinker with rules, read books and watch TV while until it comes back.
A brilliant action on a small scale! It sounds like the German superiority in command (activation) and firepower held sway in this one?
ReplyDeleteRegards, James
Hello James,
DeleteThanks for stopping by. Yes, it was the German superiority in activation, morale and firepower that did the British in. The Brits, even with a lot more bases, just could not manage it.
Hello. this is my first attempt at posting. Have send blind as goole is blocking my line of sight with its cookie policy. I have just enjoyed being on your amazing A4 board. You have given me hint tio think small, I enjoyed your battle very much. Thank you! Kevin
ReplyDeleteThanks for the kind words Kevin!
Delete