This is game 13 in replaying the scenarios from the Briton Publishers Operation Jupiter skirmish scenario book (Lulu PDF link). I played this one on a 4'x4' table using 20mm. The background on why I am playing these is at the start of the first game post.
Normally I play these solo but for this game I played with the 12 year old son of a friend. I had played a few WW2 20mm games with him before over a period of several months (this is the 3rd game). He has been asking to play again for the last year or so but only realised late 2016 that it had actually been two years since we last played! Badgering for two years, not one :-( The stars aligned and he came over during the Christmas break and we got three games in (game 13, 14 and 15 in the Operation Jupiter book). We have a few people staying with us at the moment so there was no room to get out the half a table tennis table I normally use so I used the dining table that gave a 4'x4' area.
Rules used
Games 1 to 5 used my own Advance to Cover rules for battalion level games i.e. 1 figure = 1 section.
Games 6-12 I went to gone to a 1:3ish figure ratio (so 3 figures = 1 section) and 1:1 for everything else.. Games 9-12 have been played but not written up yet (as at January 2017).
Games 13-15 are using a revised company level rules, still at 1:3 for infantry and 1:1 for everything else. The revision is I have done away with roll to hill, roll to kill and gone with rolling 1-3 dice with a die roll of 4-5 is one "success" and a 6 is two "successes". The number of successes determine the result. I have not written these up well enough to post them but they exceeded my expectations and they worked really well. Reasons on why I switched away to this mechanism is at this rambling blog post.
Scenario
At the start of the battle for Hill 1112, the British 5/Wilts advance up the north-west slope to clear some German positions. The British have 6 turns to capture two of the three buildings.
Even though I am using card activation with a turn ends on a joker, we opted to keep the turn limit at 6 turns as the table is quite short, and on the first turn the joker is ignored.
Troops
Normally I play these solo but for this game I played with the 12 year old son of a friend. I had played a few WW2 20mm games with him before over a period of several months (this is the 3rd game). He has been asking to play again for the last year or so but only realised late 2016 that it had actually been two years since we last played! Badgering for two years, not one :-( The stars aligned and he came over during the Christmas break and we got three games in (game 13, 14 and 15 in the Operation Jupiter book). We have a few people staying with us at the moment so there was no room to get out the half a table tennis table I normally use so I used the dining table that gave a 4'x4' area.
Rules used
Games 1 to 5 used my own Advance to Cover rules for battalion level games i.e. 1 figure = 1 section.
Games 6-12 I went to gone to a 1:3ish figure ratio (so 3 figures = 1 section) and 1:1 for everything else.. Games 9-12 have been played but not written up yet (as at January 2017).
Games 13-15 are using a revised company level rules, still at 1:3 for infantry and 1:1 for everything else. The revision is I have done away with roll to hill, roll to kill and gone with rolling 1-3 dice with a die roll of 4-5 is one "success" and a 6 is two "successes". The number of successes determine the result. I have not written these up well enough to post them but they exceeded my expectations and they worked really well. Reasons on why I switched away to this mechanism is at this rambling blog post.
Scenario
At the start of the battle for Hill 1112, the British 5/Wilts advance up the north-west slope to clear some German positions. The British have 6 turns to capture two of the three buildings.
Even though I am using card activation with a turn ends on a joker, we opted to keep the turn limit at 6 turns as the table is quite short, and on the first turn the joker is ignored.
Note that although I am playing with 1:3 ratio and the scenario is at 1:1, I fielded the same number of figures and vehicles as the scenario e.g. the 10 person rifle squad became a 10 figure platoon.
British (me)
1 Company HQ
4 figures
2 Platoons
1 platoon HQ (1 figure)
3 Sections (3 figures each)
1 Vickers MMG
4 Universal Carriers
2 Churchill VII
3 Artillery missions: 25pdrs in direct support
Germans (L----)
1 Kompanie HQ
2 figures
1 Zug
1 Zug HQ (1 figure)
3 Gruppe (3 figures each)
1 MG42 team
1 75cm PAK 40 (scenario called for 88mm but I could not easily find it!)
Germans are all veteran
Deployment
British will all enter on the road. The Germans set up with the AT gun dugin looking down the road and the other mostly in the building. Kompanie HQ dug in between buildings and MG42 at the end of the stone wall to have a good view of any incoming infantry.
All infantry are hidden (in my rules that means if they do not move or fire they can only be spotted at 8").
The only terrain that counts are the three buildings, the stone wall and the roads. Everything else is cosmetic.
Game
Note that I use card driven activation.
Also note that I took only a few pictures for this game - too busy playing!
And last note is I was also testing out some major modifications to the rules, so there are some rules commentary interspersed in the game report in italics.
The British moves one platoon up the to stone wall using the carriers. They also move on the Churchill. The Pak 40 fires and misses! The second Churchill tries to spot the Pak, fails and speculatively fires in the direction of the Pak and pins it.
So, lots of rules in use here. The Pak 40 firing used 3 dice (3 base dice + 5 dice penetration - 5 dice for Churchill's heavy armour). The AT gun got no hits (1 in 8 chance). The Pak has fired and so to spot it at that range required 1 success on a die (i.e. a 4, 5, or 6). Failed to spot. However, it could still fire speculatively at a target that fired/moved but failed to spot at a lower number of dice. The Churchill had only moved 1/2 distance so could still fire. But it failed to hit with only 1 die for the main gun and 1 die for the hull MG. In reality, because the AT Gun was dug in there really should have been one less die, bringing it to zero dice to roll, but thought I should let them have a shot! a Pin means the PAK will fire with one less die next turn.
1st Gruppe in the closest building fires on the on coming infantry and kills one.4 figures
2 Platoons
1 platoon HQ (1 figure)
3 Sections (3 figures each)
1 Vickers MMG
4 Universal Carriers
2 Churchill VII
3 Artillery missions: 25pdrs in direct support
Germans (L----)
1 Kompanie HQ
2 figures
1 Zug
1 Zug HQ (1 figure)
3 Gruppe (3 figures each)
1 MG42 team
1 75cm PAK 40 (scenario called for 88mm but I could not easily find it!)
Germans are all veteran
Deployment
British will all enter on the road. The Germans set up with the AT gun dugin looking down the road and the other mostly in the building. Kompanie HQ dug in between buildings and MG42 at the end of the stone wall to have a good view of any incoming infantry.
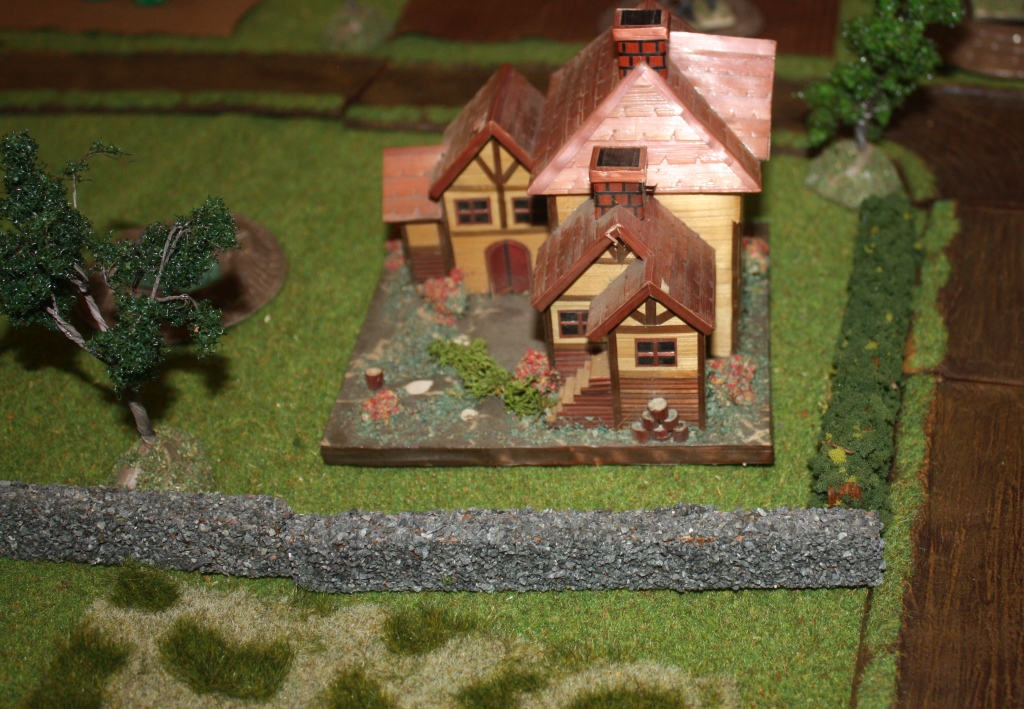
 |
| At start with German units deployed |
All infantry are hidden (in my rules that means if they do not move or fire they can only be spotted at 8").
The only terrain that counts are the three buildings, the stone wall and the roads. Everything else is cosmetic.
Game
Note that I use card driven activation.
Also note that I took only a few pictures for this game - too busy playing!
And last note is I was also testing out some major modifications to the rules, so there are some rules commentary interspersed in the game report in italics.
The British moves one platoon up the to stone wall using the carriers. They also move on the Churchill. The Pak 40 fires and misses! The second Churchill tries to spot the Pak, fails and speculatively fires in the direction of the Pak and pins it.
So, lots of rules in use here. The Pak 40 firing used 3 dice (3 base dice + 5 dice penetration - 5 dice for Churchill's heavy armour). The AT gun got no hits (1 in 8 chance). The Pak has fired and so to spot it at that range required 1 success on a die (i.e. a 4, 5, or 6). Failed to spot. However, it could still fire speculatively at a target that fired/moved but failed to spot at a lower number of dice. The Churchill had only moved 1/2 distance so could still fire. But it failed to hit with only 1 die for the main gun and 1 die for the hull MG. In reality, because the AT Gun was dug in there really should have been one less die, bringing it to zero dice to roll, but thought I should let them have a shot! a Pin means the PAK will fire with one less die next turn.
Another carrier loaded with British infantry (4 figures) comes on and the MG42 fires, pins it and a section with a platoon leader unloads.
Carriers are removed from the table once they have been used to transport the infantry to where they were going. in this case, the carrier was pinned and so the infantry dismounted. The German player decided that they were close enough they could walk from there. If they really wanted to be used again, they could be put back on the table from where they were originally removed.
 |
| Two platoons of British infantry congregate behind the stone wall. The Germans just could not get rid of them fast enough to stop them! |
MG42 fires again at another section and kills a figure and pins a section (4 "successes" from 3 dice; a good roll to make it up from the previous poor roll).
 |
| A wider view from the German side after a couple of turns - The Brits have the Churchills on, and most of the infantry are in the field. |
With 6 dice rolling you would think I would get a few more successes but no. I rolled better in the latter two games I played against L---
One Churchill fires at the Pak AT gun, and the other Churchill fires at the closest building. For no effect.
The First British platoon jumps the stone wall and charges the building. 8 remaining figures in the platoon Vs my veteran 3 guys. The Germans lost all the soldiers guarding the house. The British enter the building. Halfway to the victory conditions already!
Close combat is as fast and as brutal in these rules as my previous ones. Previously I have vacillated between each side rolling 1d6 per figure and comparing hits, or 1d6+no of figures and comparing scores. I have come down on rolling 1d6 per figure. Maximum loss on losing side is 3 figures and retreats and is suppressed.. Winner always loses 1 figure (unless only one figure).
 |
| The first building captured by the British. |
The Germans counterattack! The Zug charge from both the ruined building and the rear dug-in area into the British building. Even had more men that the Brits. But the Germans are fought off while losing two men.
 |
| The Germans counterattack! |
 |
| Now the first building is cleared and the AT gun is silenced, the British bring on the MMG |
 |
| The ruained building and the German occupants, just before one Gruppe routs and the other pulls back! |
Unit morale is roughly at 50% losses (60% losses for veterans, 40% losses for green) and roll 3 dice with 0 successes a rout, 1 success is a pull back, 2 successes all pinned and 3 success OK)
It is now turn 4 and it is not looking good for the Germans. The MG42 is still in play and manages to fire at the 2nd British platton reading behind the stone wall and kills one. But it is not enough to slow down the advance of the 2nd British platoon. They jump over the wall, intent on occupying the ruining building. The hitherto quiet dug-in Zug HQ between the building opens fire at the advancing Brits - in the open and at close range. They suppress a section. The remaining 5 members of the British platoon occupy the building.
 |
| The British take the rusined building. The Zug HQ dug-in bottom left manages to suppress a British section (the one in the open). |
Game over and a win to the British and L---.
Verdict
Firstly the game: I had said it before but this vignette type battles are loads of fun. They do not take long - I think we played the game above in an hour, and L--- is unfamiliar with the rules. I did not hold back on my tactics and the Brits deserved the win. Not sure what I could do better except not fire with every unit whenever I could. I just did not get enough hits to force unit morale checks.
Secondly, the revised rules - they worked really really well. Well, OK I wrote them so I would say that!. Better to say they met all my expectations for the rules from all the thinking I have done over the last 12 months. The mechanisms fit very well together, I think the rules are easier to play and lose none of the subtleties from the older versions. So I just need to write them up properly - all I have at the moment is a QRS !


.jpg)


A really nice sized game. I like the idea of removing the transports once they have done their job. God to see the rule changes survived first contact :-)
ReplyDeleteThanks Norm. I am glad they survived first contact as well :-) Now all I have to do it write them up properly.
DeleteI first came across the idea of removing transports from Blitzkrieg Commander when it first came out. I liked the idea so much I try as use it as much as I can since.
Nice looking game!
ReplyDeleteThanks Phil!
DeleteThought I'd check out what you've been up to :)
ReplyDeleteGreat report. Using your own rules again. You must be enjoying the Operation Jupiter Book then. Nice to work off something like that.
Thanks John. The scenarios are like little vignettes of a battle and I just really like that they are small and also quite a tactical exercise.
Delete