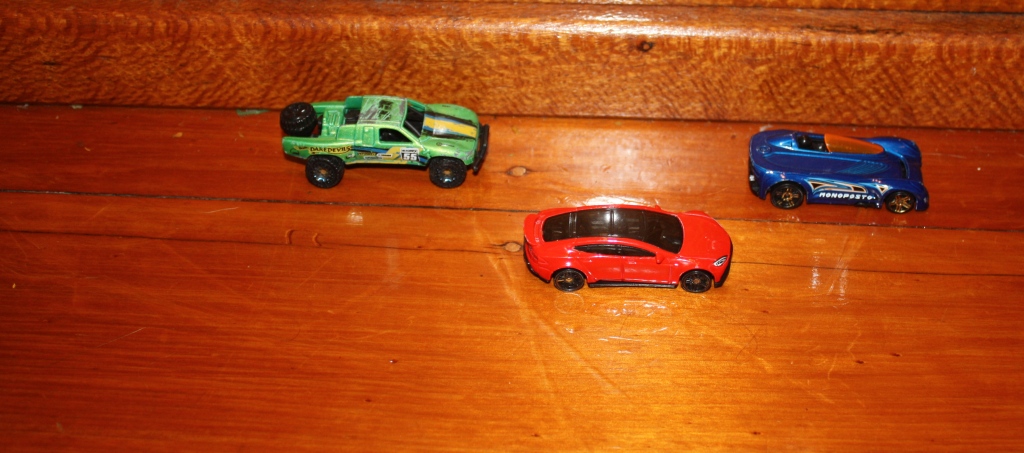
Sunday, 18 February 2018

Machinas - post apocalyptic car dueiing - two solo games report

Introduction
My first two games with the Two Hour Wargames Machinas – car racing in a post-apocalyptic world. Summary: Loads of fun but was looking fora shorter game.


Background
The 2017 6x6 challenge wass nearing an end and I was looking for a simple ruleset to play a few games and I was thinking spaceships.  I thought of X-wing, then onto Wings of War.  I remembered a boardless game of WWI aerial combat from Kaptain Kobold that I could maybe modify into a space game.  However, Spandau and Lewis does require measuring distances, bad memory..  While browsing for those rules I came across Kaptain Kobold's Machinas posts and  Warwell Wargames was playing these as part of the 6x6 challenge. The “boardless” bit of Machinas is very clever as it only concerns itself with the placement of cars relative to each other, rather than using a racing track.  I was a big Car Wars player for a few years when it first came out.  Wow - just remembered that!  I played that and Star Fleet Battles a lot (and I mean a lot) in the early 80's. I have not touched or really thought about post apocalyptic car dueling for 30 years.

So what did I do next?
I thought I would give them a go and see if I could either rework it for a space game, or play it with my children.  I promptly set about spending way to many hours writing a 1-page quick reference sheet and  moving onto writing an Excel car generation tool.  While playing the first game solo, I got tired of remembering the car features and dice rolls and auto successes so I spent many more hours wrote some formulas that calculate the number of successes for the possible actions of a car (passing, shooting, bashing, out of control) with all the modifiers included.  So when a car wants to do something look up the cell with the result for the primary and the target.  The manual bit is doing the compare and implementing the result.  The game is longer than I thought it would be - even with the formulas doing most of the work - so may not be suitable to play with the children (I was looking for something less than 30 minutes but maybe I could do one lap?).  But it is fun! 


Game One
This is a game with 4 Sedans, costing 17-19 and attributes adding up to 9.  I run one car (red) while other three are non-player cars.

I am going to play 2 laps.


Format - name (colour): Savvy-Tech-Speed, driver signature, car customisations
Rapscallion (Red): 4-2-3, Loner, Molotov Cocktails, Power Steering, Big Slab
Yeti (Yellow):3-3-3, Speedster, Tail gun, Tuned Up, Oil
Blazer (Blue): 3-2-2, Slow to React, Cluster Rockets, Leaky Fuel Lines, Oil, Spiked Ram, Anti-lock Brakes 
Gnasher (Green):3-3-2, Bumper, Twin 50s, Clunker, Oil, Spiked Wheels, Power Steering, Barbed Chains 

Here is the actual Excel generated cars:


Lap 1

Zone 2
Yeti starts in front, Blazer goes wide.  Rapscallion (me) ends up last.
Blazer attempt to pass failed, Gnasher bashes Blazer but no effect.  

Zone 3
Blazer attempts to paas Yeti but fails and Yeti gets a shot in with their tail gun!  Blazer loses a speed. Green bashes Blazer and Blazer drops back.

Zone 3
Blazer dropping back has blocked Rapscallions (me) chance to pass. 

Zone 4
Blazer passes Gnasher.  Did not expect that!  Blazer has taken some hits to speed.

Zone 5
Rapscallion goes wide - that way guaranteed of a chance to pass!  Random event sees Rapscallion having a chance to pass immediately, and passes Gnasher.

Zone 5
Rapscallion decides to keep going and attempts to pass Blazer.

Zone 5
Rapscallion passes Blazer!  Why not attempt to pass Yeti and get in the lead.  Using the rest of the bonus dice...

Zone 5
Success!  Rapscallion in the lead!

Zone 5
Blazer nearly loses control when attempting to pass Yeti; and the other pass attempts fail.

Zone 6
Yeti attempts to pass Rapscallion for the lead.  Successful!
Rapscallion attempts to pass Yeti.  Successful!  Rapscallion still in the lead at the end of the zone.

Zone 1
Yeti passes Rapscallion to regain the lead.   Blazer attempts to pass Rapscallion and fails badly, giving Rapscallion a chance to throw a Molotov cocktail at Blazer.  Direct hit!  Blazer loses speed and flips directly behind!  Blazer is out of the race.

Lap 2

Zone 2
Rapscallion gets to close to Gnasher, but both are OK.
All attempt to pass and all fail.

Zone 3
Rapscallion sees an opening opportunity and attempts to pass Yeti and succeeds

Zone 3
Gnasher gets too close to Yeti and both are out of control.  Yeti does nor get their car back under control and flips!  Luciky it flips to the side and so misses Gnasher.  

Zone 4
Gnasher attempts to pass Rapscallion but fails. 

Zone 5
Nothing, just cruising along.

Zone 6
Gnasher attempts to pass Rapscallion but fails.

Zone 1 - the FINISH LINE
RAPSCALLION CROSSES THE LINE FIRST AND WINS!.
Well, that was loads of fun, even if it took awhile.  The NPC cars and the odd random event really make the game unpredictable - each lap is very unique.  I immediately rolled up some more cars to play another game.

Game 2
I am using the same car models but they represent different cars. I am using the same Driver names, but this is from earlier in their careers (Wastelands) and so have poorer stats and different signatures.

The cars:


Format - name (colour): Savvy-Tech-Speed, driver signature, car customisations
Rapscallion (Red): 3-2-3, Slow to React, Tail Gun, Big Block
Yeti (Yellow):3-2-3, Slow to React, Spiked Wheels, Old Tires, Heavy Armour
Blazer (Blue): 3-3-3, Speedster,  Twin 50s, Old Tires, Oil 
Gnasher (Green):3-3-2, Faint of Heart, Grenade Launcher, Heavy Armour

Rapscallion is me and driving in a sports car, the rest are non-player characters and driving sedans.

Again, here is the excel sheet with the generated cars:


I am going to play 2 laps for this game, same as game 1.

Lap 1


Zone 2
The randomly rolled start sees Yeti in front and Rapscallion last. 

Zone 2
Blazer passes Yeti for a change or leader in the first zone of the game.

Zone 3
Rapscallion brakes lock and falls behind. Yeti attempts to pass Blazer and fails badly and loses control as Blazer spills oil on the track.

Zone 3
Yeti loses complete control and flips to the back left, missing Gnasher.  Gnasher moves up into the space now vacant.

Zone 3
Gnasher now attempts to pass Blazer and does so with ease.

Zone 4.
Rapscallion back in the race.

Zone 4
Blazer attempts to pass Gnasher to become the leader and just manages to do so.  Meaning the opportunity for Rapscallion to pass is lost.

Zone 5
Rapscallion sets up to pass Gnasher....

Zone 5
...amd succeeds!  But fails to pass Blazer.n

Zone 6 and Zone 1
Rapscallion manages to pass blazer to take the lead.

Lap 2

Zone 2
Gnasher attempts to pass Blue...

Zone 2
...and succeeds.  But fails to pass Rapscallion.

Zone 3
Blazer attempts to pass Gnasher but fails.

Zone 4
Gnasher sets up for a wide pass.

Zone 4
Gnasher's wide pass succeeds!

Zone 5
Rapscallion sets up for the pass, and fails.

Zone 6
Rapscallion sets up for the pass..

Zone 6
Rapscallion attempts to pass Gnasher, using all bonus dice and passes to take the lead in the final zone.

Zone 1
All attempted passes fail.  RAPSCALLION WINS!

Verdict
Machinas is loads of fun albeit longer than I wanted for playing this game. but that was only what I was looking for - a fast game.  Machinas delivers a great narrative experience (as do all Two Hour Wargames).  I did not even consider changing any rules but I can see that some rules about when NPCs use limited ammo weapons/defense may be needed if I played more.  Kaptain Kobold has some proposed house rules I may need to look at if I play this a lot more.  For anyone into post-apocalyptic car racing, Machinas is a great set of rules.  


Sunday, 4 February 2018

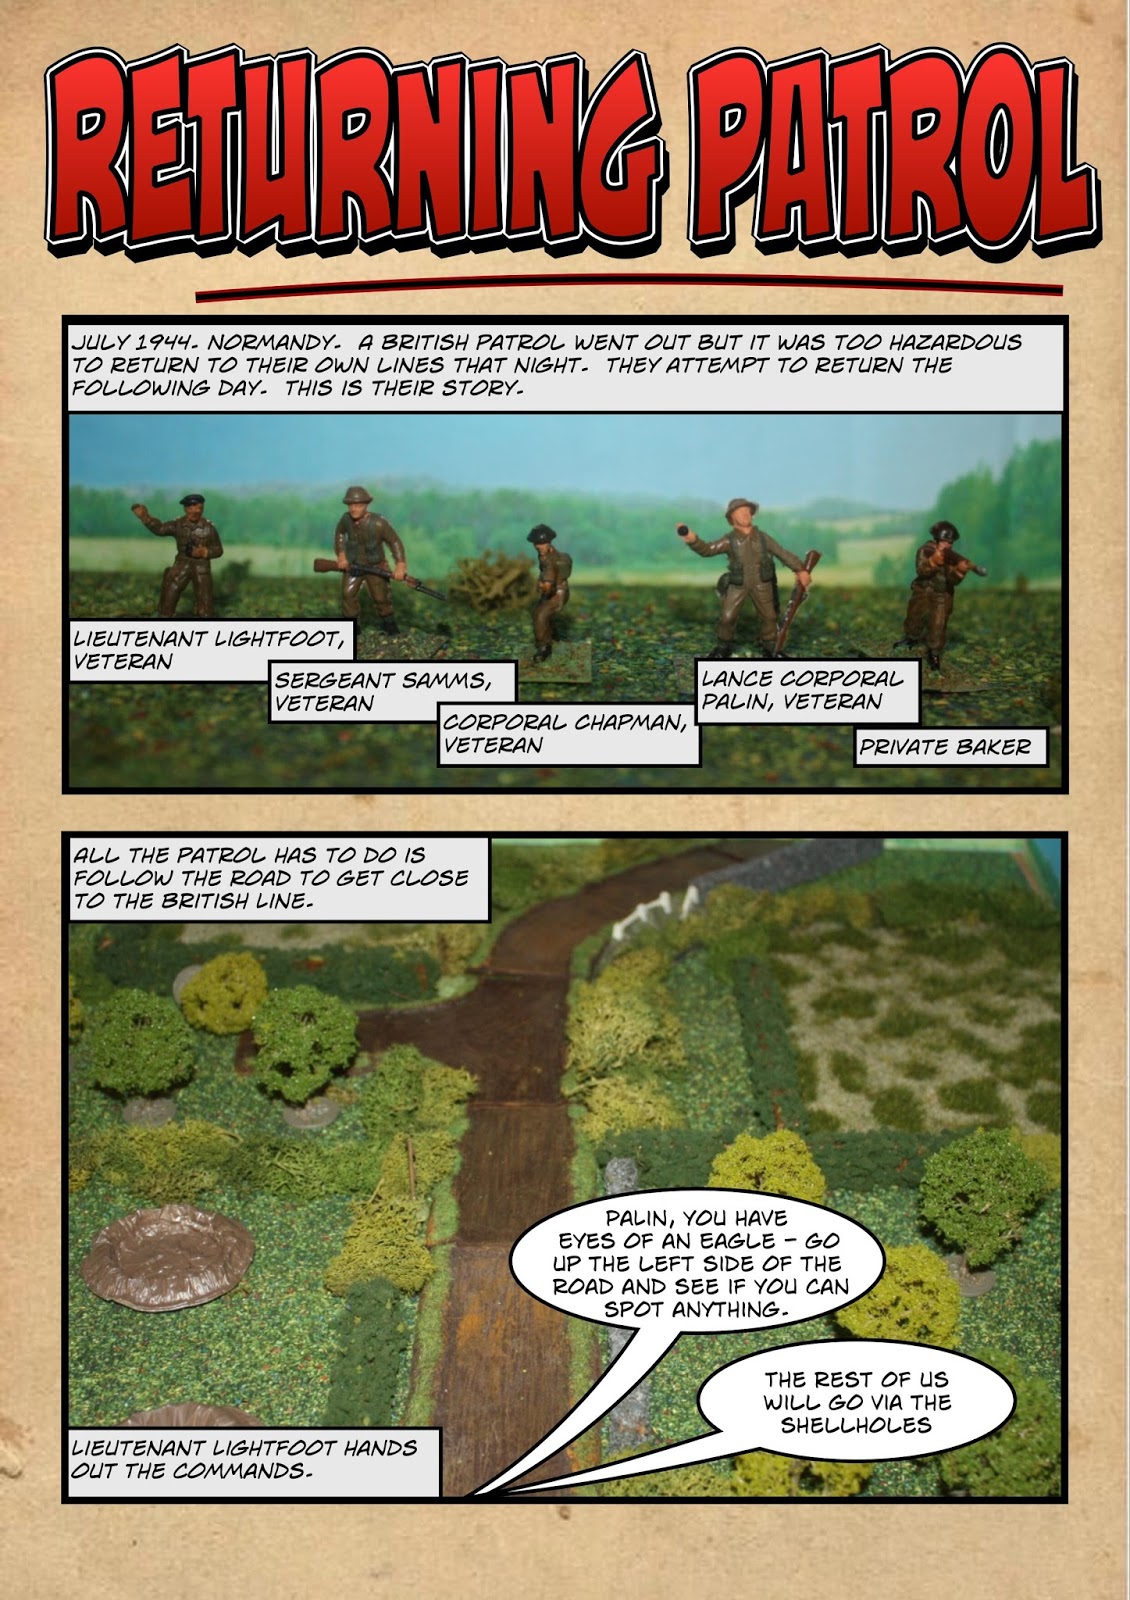
20mm WW2 1944 West Front skirmish - near Cahagnes

Introduction
I have played a little of WW2 low level skirmish in the past.  As part of the 2017 6x6 challenge I  played four of my new-ish company level rules (based on rolling a number of d6 and counting successes rather than rolling 1d6 and adding and subtracting modifiers).   I wanted to try out the mechanics with a skirmish level game.  Lastly, I promised my internet buddy Just Jack I would play a WW2 skirmish game. How many reasons do I need :-)

The game was going to be loosely based on a real world event that occurred with B Company of the 7th Battalion, The Hampshire regiment on 31st July 1944 outside Cahagnes but now a fictional scenario with a small lost patrol making their way back to the lines on that same day.

Game is done in comic book style using Comic Life 3.    Figures are 80's vintage 20mm plastic from Revell, Matchbox and Airfix.  Table size is 2'x2' representing about 100mx100mm.  Rules are my own and are like a cross between NUTS! and FiveCore Skirmish. Sort-of.

Background
I was going to do a fairly normal – for me – game of a patrol of 7-8 British soldiers based on a real event that occurred in July.   Just Jack posted up 5 more battle reports with small units of modern soldiers facing some opposition.  Also, Nordic Weasel released a new version of Five Parsecs from Home – a SF campaign and battle system for a small band of adventurers.  I don’t really have the figures or the time to do Five Parsecs from Home justice but did like the idea of a small band of heroic adventurers.  I am slowly re-watching the Combat! TV series.  I already have a board setup for a WW2 skirmish game. It all came together into an idea. The premise is that a British patrol has been cut-off, a German counterattack has pushed the front-line even further way, and our band it making it back to their lines.  The band is five troopers, mostly veterans and will give them all skills just to spice it up.  This should hopefully appease my appetite for a small heroic game.

The Game


The game in non-comic form
Troopers
Lieutenant Lightfoot, Rifle, Veteran, Agile: move and shoot without the -1 penalty
Sergeant Samms, Rifle, Veteran, Stealthy: Roll one more die to be spotted and if no success on that die, not spotted.
Corporal Chapman, SMG, Veteran, Tough: +1d6 in close assault
Lance Corporal Palin, Rifle, Veteran, Eagle eyes: +1d6 for spotting
Private Baker, Rifle.

Mission
Follow the road and exit on the other edge to entry.  The German MMG at the road curve has not been spotted and is in ambush.

The Game

  • The team move up.
  • Palin spots the two potential enemies that are revealed not to be enemies.
  • Palin moves up and attempts to spot MMG.  He is joined by Chapman who are then attacked by MG.
  • Palin pinned and Chapman suppressed.
  • Subsequently both are out of the fight.
  • The other three move into shellholes, then up through the orchard and across to side of MMG.  All fire but all that happens in one pinned!
  • Meanwhile 3 Germans have appeared on the other side and are moving towards the noise of battle.
  • The British  fire has suppressed one of the gunners.
  • The MG fires back and pins Lightfoot and suppresses Baker.
  • Brit return fire has no effect on Germans (poor dice rolling here!).
  • MG fires - Samms out of the fight, Baker out of the fight. Oh dear.
  • Lighfoot suppresses another of the German crew.
  • MG gunners all rally.
  • MG fires and Lightfoot out of the fight.

Verdict
Well, that did not go as planned, although it was likely realistic.  I have no idea what I was thinking when Palin and Chapman jumped the hedge in front of the German MG.  It does go to show that rifle armed infantry does not do so well against a well placed MG.  I guess I will be using different soldiers for my next patrol.

The rules are still very much a work in progress - as are the company level rules, although the latter are quite close to finished.

Monday, 2 October 2017

Battle of Heraclea 280BC using new When Warriors Collide rules

Introduction
This was going to be a battle with my very recent grid-based rules. But it has reverted to game 31 in playtesting my ancient rules by replaying historical battles using my own  ‘Ancient Battlelines Clash’ (its own blog page), designed for 30 minutes games on a 2’x2’ table. I am play testing the rules by replaying all the Peter Sides scenarios from his Historical Battles books.

With another pivot to the rules though.

I started replaying the rules with a set of my own rules called Ancient Warrior Battles.  In 2013, after a few years of use, I streamlined and renamed them Ancient Battlelines Clash.  Recently, I nearly replaced them with a different grid based set I wrote but could not go on with grids, so I updated them with concepts from the gridded game rules.  I did consider calling them version 2 but have changed the named as the rules are different enough that they deserve a new name -
When Warriors Collide.  I have not setup a page for them yet, but a link to the version of the rules used for this battle is here on Google Drive. Only tested with one battle so far, but did play 12 battles with gridded version.

Background to why the new rules
I recently player the campaign boardgame Imperator and created a set of rules derived from ABC to resolve the tactical battles on an 8x8 grid.  It uses the same units as described in Imperator but most of the mechanisms are from ABC, particularly reactions and the programmed opponent but the melee and fire dice rolls are different - no longer add and subtract with a single die, but based on ratios and uses 1 to 3 dice. I also did away with some of the dice rolls and made some reactions deterministic.  It easily scaled to a 12x12 grid and if overlaid on a 2’x2’ would give 2” squares that fit my 15mm figure bases (40mm) quite well.  It should play faster as it has less dice rolling and easier movement.  I am all for faster games but I am still not quite sure if I am a grid person  ...and I am not, or not yet for my own rules using 15mm ancient battles on a 2x2 table..  I set up the game, put some small markers to shows where some of the squares where and then just could not do it.  So I spent a few days rewriting them to work without squares.  But I did keep one grid mechanism - a base can only ever be facing in one of four directions that align with the board edges.  I am hoping this will make movement easier. 

Heraclea is actually one of the next battles on the list of the Peter Sides scenarios to play.  If is also the battle I replayed using 12 different rulesets during 2012-2016, but never with my own rules.  So what better battle to try out my new When Warriors Collide rules for the first time!

Battle of Heraclea
Pyrrhus comes to Italy to assist the Greek cities their against the Roman aggressors.  For more detail on the battle and the units see this blog post I did prior to my replays: Heraclea deployment and background.

Troops

Pyrrhus

Pyrrhus units
1 Agema, HC,vt (Veteran), ch (will mandatory charge against most heavy units)
1 Elephant, EL,ps (x2 Vs mounted)
1 Hoplites, PH, mp (extra missile protection)
3 Phalangites, PH
1 Hydaspists, PH, vt
1 Peltasts, MM
1 Light cavalry, LC, vt
2 Skirmishers, SI
1 Leader with the Agema

Breakpoint: 9

Romans

The Romans
2 Cavalry, HC
4 Leves, SI
4 Hastati/Principes, HI, lr (line relief)
2 Triarii, HI, vt
1 Light Infantry, MM
1 Light cavalry, LC
1 Leader with one of the legions

Breakpoint: 9

Deployment

Pyrrhus on the left, Romans on the right.  Heavy infantry have two bases but this is just for visual effect.
Note that the heavy infantry and phalanxes units are represented in depth with two bases for one unit.  This is just for visual effect.  Someone mentioned it a few years ago and I use it when I remember! I did find that having two bases to move was harder to do (only a little but I am lazy), so while it looked great, I may only keep using two bases for heavy infantry intermittently in future.

The Game
Normally I rush out with Pyrrhus, the Agema and the elephants on the right flank.  This time I will advance with the centre and use the flanks in support until they may be required.

(turn 1)
both sides advance at a pace to keep in line with the centre battleline.  Except the Roman heavy cavalry that stay out of charge range of the Agema.

Turn 1 advance

Centre Pyrrhic battleline advances and skirmishers fire, a  Leves gone and all the Pyrrhic ones.

Centre battlelines just prior to clearing of the Skirmishers.
The Pike block that was fired at advances on the Leves, routs the Leves, attacks the Legions behind it but is disordered (1 in 6 chance).

A Phalangite unit advances after being fired at by a Leves.
The Romans retaliate and destroy the phalangites and advance.

(turn 2)
Pyrrhus and the elephants move into charge range of the opposing Roman cavalry

Now, here is the a change from my old rules - the army is split into three deployment groups.  Only one move action can occur per deployment group.  The entire centre battleline is one delpoyment group but has been split into two. Only one section can move - do I advance the hoplites or the main battleline? Advance the battline - clear the skirmishers but nothing else.

The state of the battleline.  One Phalangite lost.

The Triarii turn to protect the Roman left flank

(turn 3)
Pyrrhus and the Elephants charge the roman heavy cavalry. One is destroyed, the other is disordered..

The Agema and the elephants destroy a Roman cavalry unit. 
Advance the phalangites and Hypaspists.  Both Roman legions charged are disordered.

Battlelines clash - grey spears are disordered markers.

Move the other Triarii unit to left flank as the left Roman flank it is more likely to succumb.

(turn 4)
Pyrrhus destroys opposing Roman cavalry and does not pursue.  Elephant turns.

Roman cavalry on flank gone and elephant turns to attack the Triarii.
Roman right centre collapses.  Only one more unit away from breaking.

The Roman right flank has collapsed, but the veteran Triarii should hold it for awhile. 
Triarii turn to shore up the battleline

(turn 5)
Elephant crashes into the flank of a Triarii but it is still counted as a frontal attack as the elephant is not behind the front edge of the Triarii.  After doing this, I realise the Elephant cannot attack at good odds (it will be at less than 1:1), so does not attack, but at least they are held in place.

Elephant contacts the Triarii.
Hydaspists disorder an opposing legion.

(turn 6 and last turn)
Triarii attack the elephant and both are disordered

Pyrrhus crashes into the the rear of the Triarii. Odds of 3:1 but gets nothing but a disorder each.

The Agema attacking the rear of the Triarii 
Hydaspists disorder an opposing legion.

Games only last 6 turns  (this is new to these rules) and would have ended in a Pyrrhic win as they had destroyed more units, but in the last combat roll of the game, a disordered legion is unlucky and rolls a 1 Vs an opposing phalanx and routs. This causes the Romans to lose immediately as they have reached their army breakpoint.

Roman legion attacks an opposing phalangite unit but loses and routes.
The game ends with a victory to Pyrrhus!

End game situation.
Verdict
I like the combat mechanism of rolling dice and looking at numbers rather than adding/subtracting die modifiers.  I could get used to this!  I do not mind the new command limitations of only being able to move one group of units in each of the three deployment groups - this makes the game faster than rolling to perform an action with each unit.  I will have to play it a few more times just to make sure it all hangs together, especially with more of the unit types., So far, I think these new rules are faster and easier but give just as many decisions and are just as much fun solo.  

Thursday, 14 September 2017

Boardgame Battlestations game 01 - Starter Mission 1 - Rebellion


Introduction
Back in February 2016, I backed the Battlestations 2ndedition boardgame Kickstarter.  It arrived last month (August 2017).  Battlestations is one of those minis/boardgame skirmish hybrids that are increasingly popular.  I had never heard of the first edition, but the 2nd edition looked like it would be good to play with my children as they enjoy WarHammer Quest.  Battlestations is about the crew of a spaceship and there are lots of missions to undertake on a square based map of the ships and spaceports.  An interesting feature is that you also move the spaceships of a map so you can have space battles as well.  I have not acquired too many boardgames over the last few years; but the ones I have done I seem not to have got around to playing.  So this time I thought I would try and play six games of Battlestations, with or without my children as part of the 6x6 challenge.  The game comes with Quick Start rules that have 8 missions that introduce new rules with each mission.  That is what I hope to play.  The full game has over 40 missions in a very large rulebook.

On the weekend, I broke out the box and played a game with my 10 year old daughter.  It took about 60 minutes.  She had fun and happy to play again.  So hopefully a few more games by the end of the year.  My 9 year old son was busy but may join in some games.

We play most of our games on the floor, a hangover from playing games with them since they were born.  We find it weird to play games on the table so we don’t!

Note that the miniatures are unpainted.

Starter Mission 01 - Rebellion
The ship is docked at a spacestation and a human gang is attempting to take over your ship.  We need to stop them taking over the ship, undock and escape the area as the spacestation (get 13 hexes away) will try and blast us out of existence.

The 4 enemy humans start at various places in the ship.  We start in the cargo bay next to the ship.  4 spacestation robots start on the far side of the station and will move to attack us if able, else they will go to the spacestation cannon to fire at us.

Our crew and the human crew are made up of four roles – Marine (red base), Scientist (green base), Engineer (blue base), Pilot (yellow base).  We played co-op with us roleplaying one crew member each, moving the other two as we wanted, and I moved the enemy based on what I thought they should do.

Game start (actually after our crew had moved in the first turn)
Game
The Scientist (played by my daughter) moved as fast as she can- she wants to take down the enemy scientist in the science bay.  Our Marine moves and melees with the Enemy Pilot renders him unconscious.  This is good as it means that the enemy cannot pilot the ship away.

Our Marine (red base) knocks down the enemy Pilot (yellow base).  Our Scientist at the right rushing on.

Out own Pilot moved to Helm (actually in the next turn as we, OK me, the Engineer) accidentally blocked up the corridors)

The Scientist continues to rush down the ship (she can move quite fast) to face the enemy Scientist.
Our Marine jetpacks to the enemy marine (jetpacks are cool - you get to move a long way.   Our Marine manages to inflict 5 hits points, not enough to knock him out.  The Enemy Marine fired back with a disintegrator, Our Marine does not manage to dodge it and is vaporised.

Towards to top of the Ship, Our Marine tackles the Enemy Marine.  He did not do enough damage to knock him out, and so the Enemy Marine retaliated with a disintegrator and Our Marine is vapourised.
The Enemy Engineer desperately tries to shut down the engines so we have no power to fly the ship  but failed (this was one of those great rolls by my daughter: she said "what do I need to roll?", and  I replayed "A two or a three is good for us." She rolled a 3 and the Enemy Engineer failed the test).
Our Pilot starts up the ship navigation and undocks from the spacestation.

The ship is undocked! (I used a painted firestorm Armada ship I had on hand)
The Enemy Scientist have moved to try and intercept us but Our Scientist (my daughter) got to the Science Bay and attacked in close combat first, landing some great moves with her vibroblade and knocks the enemy out (she actually rolled very bad and did some rerolls to get a good high damage score)

Our Scientist managed to use her vibroblade to good effect on the Enemy Scientist.
I, as Our Engineer, moves up to the Enemy Marine and finishes him off.

Our Engineer knocks out the Enemy Marine.
The ship moved 1, managed to increase speed to 2 until the Enemy Engineer successfully stops the engines producing more thrust (reduces power output to 0).  The ship will continue to move at current speed (2 hex per tun) but cannot accelerate.
The ship is 3 hexes away from the Spacestation. The Enemy Marine Bot is at the Spacestation cannon and fires at the ships and misses (with a 3! - my daughter rolling great, for our side).

Enemy Bot at the spacestation cannon, and it managed to hit us!
Our ship is Now 5 hexes away from the Spacestation.  Our Scientist, my daughter, moves to Enemy Engineer and knocks him out.
The Enemy cannon fires at ship and hits!  The ship damage system is very interesting and does not take long, I like it. Two damage is inflicted on the engine room with Our Scientist and Our Scientist takes 5 hit points.  The engine room escapes any severe damage.  I, as Our Engineer, am rushing down the the engine room to give some power to the Helm.

Enemy Engineer is down, thanks to my daughter as Our Scientist (green base).  Our Engineer has arrived but still needs to get to a blue star to increase power.  The damage maker is just to show the engine room is hit, it actually does not have any damage. 
Ship is 7 hexes away; the enemy canon fires and misses (it gets harder the further away we are).  Next turn is is 9 away and I (Our Engineer) an in the Engine room and increase the power output of the engines to 1. Our Pilot fails to increase the speed of the ship :-(
Not that is matters to mush as at the beginning of the next turn we are 11 away from the spacestation

Our ship is 11 hexes away and has been moving as fast as it can to the other side - nearly at the 13 hexes required to escape!
The enemy cannon still manages to miss hitting our ship and we get to 13 hexes away and success!

An overview of the spacestation and ship at the end of the game.
A great introductory scenario.  Need to get the Pilot out of the way really fast, and if the enemy engineer had got the power output to zero in the first turn it would have got very ugly.  We did lose Our Marine with the first shot fired by the enemy.

Verdict
My daughter picked here card based on the picture and so chose a Scientist Cheetah.  I picked an Engineer for myself and them just Randomly selected a Marine and a Pilot.  I had read the rules a few weeks ago and the only thing I really had trouble with was the symbols on the cards – there are quite a few and remembering which one was which was hard but by the end of the game I was fine with them.  Another thing is the rerolls – each character gets a certain number of rerolls, commonly around 6.  I am not a huge fan of them – I don’t mind them but it is just one more thing to track.  The only person that I did rerolls for was my daughter.  Otherwise nobody, even me, didn’t.  I may play that only the crew played by actual people rerolls.  

My daughter roiled nearly all the dice and all she wanted to know was if she needed to roll high (for us) or low (when the enemy wanted to do something).  She rolled some good dice during the game!  

The game is a RPG on a minis board with the game controlled by square movement on some really nice boards that you lay down to create the game. Not a nedw concept for us and have played a few games like this before. The characters has about 10 characteristics all up (strength, combat, movement, health, pilot, science, engineering etc).  It does not take a long time and that I really do like.  I like it enough to play the game again, as does my daughter.  So hopefully a least five more games by the end of the year.


Monday, 11 September 2017

Fall of Rome (1973) boardgame replay - Scenario 4

Introduction
I am playing through the six scenarios in the SPI boardgame Fall of Rome  (1973 version).  I have already written up Scenarios 1 and 2 in a previous post and Scenario 3 in this post.

Scenario 4

So, scenario 3 was very bad with lots of barbarian invasions, revolution and unhappy legions.  Scenario 4 does have barbarian invasions and starts with a bad one – 25 Germanic strength points heading for Rome.  It took quite a few turns to get rid of the German barbarian invasion of this size when they randomly appeared in scenario 3.  The legions are happy and won’t rebel the moment they get together, random barbarian invasions chances are moderate and there is a one-third chance of internal revolutions happening each year.

The big difference between Scenario 4 and the previous 3 is that the militia for some roman provinces are active.  This mean that when a non-Roman force invades one of these provinces militia strength point will appear to help defend.  Militia was not active for Roman provinces in the previous scenarios and even in scenario 4, they are active only to ½ the strength they should be for the province.  And it is only some provinces – Britannia, Gallia, Illyria, Thracia, Syria and Aegyptus. This works two ways – it is good they will be there to assist with invasions, but bad because if there is a chance of revolution and militia are on the map, they will automatically revolt :-(  And worse, in scenarios 1, 2 and 3, there were about 34 legions to move around the board.  Scenario 4 has 12.  Not a lot. I am assuming this low legion count and province militia is to represent the field army concept of the later Roman Empire.

Luckily I do not need to hold all the provinces I start with to win, and can lose about 30 points of provinces and still claim victory.  So it will an interesting scenario – trying to hold on to what I can, and likely making a decision on what provinces to abandon.

Setup.  White markers are to remind me the provinces with active militia.

Turn 1 - 332 AD
Revolt in Africa (1SP) but put it down.  Germans moved in Illyria.  Reading the rules they will not control the province if there is Militia,of which the Romans have some now!  So I put the Militia in a different area and the Germans are attritioned at the end of the turn.  And then I bribe them to stay in Illyria and not move to Rome.  a plan to deal with the German invasions!
The Scythian stack entered Dacia and then I remembered Dacians have active militia - they turn up and defeat the Scythians!  I should have been doing this for the last fee scenarios as well.
Persians take Armenia.
End of turn 1 - Persians control Armenia, Germans still in Illyria

Turn 2 – 333 AD
Persians in Syria eliminate the defending militia and legions, but now down to 8SP.  I move in 3 legions to dispute control.  Taurican raiding party arrive in Thrace. 15SP appear in Scythia.
End of turn 2 - Persians in Syria, some Germans still in Illyria.

Turn 3 – 334 AD
Scythians fail to move, Persians in Syria eliminate the 3 legions I moved there, at a loss of 3 themselves.  I move 2 more legions in to continue to dispute control.  Persians have only 5SP and so do not control Syria yet.  I am running out of legions though!  Taurican raiders are routed.
End of turn 3 - Germans in Illyria (not many now) and Persians still in Syria.

Turn 4 – 335 AD
Scythians still do not move.  Persians fail to dislodge the legions in Syria (due to the 1/2DE combat result is treated as No Effect for legions). A 8SP Scythian raiding party is created (rolled same result twice!).  Germans is Illyria finally dissipate due to attrition.
End of turn 4 - Germans finally cleared from Illyria.

Turn 5 – 336 AD
Scythians don't move. Taurican and Dacian raiding parties appear. Hopefully some militia will help stop them reaching the high victory provinces  Managed to eliminate the Persians in Syria at the cost of losing 3 Legions.   So I keep Persia and Persian reinforcements will only trickle in over a number of turns so the militia may be able to take them out.
End of Turn 5 - Persians kicked out of Syria, Empire free of revolts and barbarians. 

Turn 6 – 337 AD
None of the four barbarian stacks moved (all failed the movement die).  Pictish 2SP appeared but hopefully Britannia's 3SP militia will see them off.  2SP of Persians come back to the board, as well as five legions.  I am now back to full strength for legions - 12.
End of turn 6 - The growing stacks of barbarians continue to fail to move (there is a one-third of a chance they will not moved each time they want to move)

Turn 7 – 338 AD
Well, it had to happen - revolts in Britannia, Hispania, Illyria, Cyprus, Aegyptus.  Lucky no militia were out in those places or the revolt would be harder to put out.  I put down all the revolts except Aegyptus, Britannia and Illyria, and also survived a possible legion rebellion with the 4 legion I put into Illyria. Bribed the Scythian barbarian horde; but not the Scythian raiders that go via Taurica and get caught up in battle there.  Persians and Roman legions stand off (i.e. combat was no result) in Syria.
End of turn 7 - Revolts occur across the Empire and put down some of them.  Persians come back to Syria.  I am now bribing some of the barbarians not to move.

Turn 8 – 339 AD
Amazingly all the non-Roman combat Vs the legions had no effect, all but one was a 1/2DE (which is no effect on legions)! German 25SP appears.  I bribe that instead of the Scythians.  Persia and Legions eliminate each other in Syria.
End of turn 8 - Syria cleared of the Persians.  Scythians are coming as bribing the Germans not to move instead. Illyrian revolt still going one year on. 

Turn 9 – 340 AD
Another 20SP of Germans appear that I will bribe.  Scythian horde bogged down in Dacia.  Persian 3SP into Syria but the Syrian militia knock them down to 1SP.  I lost 4 legions to the Illyrian revolt and 2 revolting militia still in Illyria. Mutual destruction in Aegyptus but the revolt there is put down.  I have three legions on the table, none coming at the end of the turn. 
End of turn 9 - I have three legions in the Empire.  Illyria still in revolt, some Persians arrive in Syria.

Turn 10 – 341 AD
A good turn - one lot of Scythians eliminated by the Dacian militia and attrition,the other raiding party goes to Thrace but eliminated by militia. Persians eliminated by Syrian militia and finally the revolt in Britannia put down.  And 3 legions return. Still bribing the two German stacks.
End of turn 10 - Dacian militia take care of the Scythians; Persians in Syria eliminated but Illyria still in revolt.

Turn 11 – 342 AD
not much to report - German raiding party appear but will bribe it to stay in Germania.  Attempted to put down revolt in Illyria but no luck.  Got back the rest of my legions.  Persian 3SP heading for Syria but not worried as militia in Syria is 5SP.
End of turn 11 - Illyria still in revolt! 

Turn 12 – 343 AD
Last turn. Failed to put down the revolt, failed to get rid of the Persians in Syria.  But other than that, I still control the rest of the Empire I had when the scenario started.  I control 80 victory points and only needed 65 to win!
End of game - never did manage to put down the Illyrian revolt; more Persians arrive in Syria.  Still own the rest of the empire though so a win!

Verdict
Firstly, I was really lucky with revolts - there is a third of a chance and so on average i should have got 4, but only got 2.  It would have been a very different game with a few more revolts, especially the midgame when I had so few legions - I would not have been able to put them down.

Secondly, I stopped worrying about the Treasury for both Persians an Romans after turn 3.  If I did not go crazy bribing barbarians (i.e. at least 50SP a turn!), the treasury was not going to be an issue for the Romans.  The Persians were getting enough they could but all their units back when needed.

Lastly, having some militia available in some of the provinces really helped offset the lack of legions and they saved the day quite a few times during the game.  Of course, this is offset by the fact that they have a random chance to revolt at a larger value than normal.

It is a little like a training game to show how Roman militia work, getting you ready for scenario 5 and 6 where they play a greater part than in this scenario. A bit of a slow moving game with some of the turns having very little of interest happening.  If more had happened though I would have lost!