Saturday, 5 February 2011

Take Cover WW2 rules review


Introduction
Following is an  overview/review of the Take Cover! WW2 miniature rules. Take Cover was published in 1998 by Britannia Miniatures, along with a slew of army organisation booklets.  Authored by Dave Howitt (& others), it is a game best compared to Rapid Fire as it is designed for 20mm miniatures, and you play with one to several battalions.  Each figure represents 10 men in Take Cover!, which is similar to Rapid Fire’s 1:15 ratio.  They are long out of print, there is a dearth of Take Cover! information on the internet (I have found two passing references and the Take Cover yahoo group has been just spam for many years) and the Britannia Miniatures site makes no mention of anything Take Cover!

I played a lot of Take Cover! around 2001-2004.  I have played a few games of it since, due to lack of time rather than lack of enjoyment.  I was recently digging out my WW2 stuff to start to attempt to play again, and looking for rules.  I was looking for rules where 1 base = 1 squad and 1:1 vehicles.  None of the rules I looked at were really satisfying so I started on the track of writing my own and after a couple of months realized I was really just tweaking Take Cover.  So I dug out Take Cover! and remembered how good it was.  Although set with 1 figure = 10 men, it plays more like a set at the next level down, which is why I am looking at using them, only slightly tweaked, for the 1 base = 1 squad, 1:1 vehicles.  Note this criticism is similar to that aimed at Rapid Fire, and there are many similarities between both games.  I prefer Take Cover! They play sort-of like Rapid Fire and if you know and like that, Take Cover! will not make you switch.  But if you think Rapid Fire is just OK, and a looking for something similar but better, then that could be Take Cover!  It appears occasionally on eBay.

Just a week after brushing off Take Cover! to start to get into it again, I read with sadness about the passing of Dave Howitt.  So, in remembrance, I thought it would be useful to review the WW2 rules he wrote that I enjoyed and hope to continue to enjoy.   A lot of this post is taken from a document I wrote in 2002 as an introduction for some of my friends to the rules.  I hope to play a game and post a battle report soon-ish.

Summary of the rules
 This section is a quick overview of the game.  If you don’t want to read the detailed review that follows, this section should give enough of a feel of the rules.

Each figure represents 10 men and infantry figures are classed as rifle or SMG.  A vehicle generally represents 4 vehicles.  Infantry support weapons represent 3 weapons and have 2-3 crew.  1”=25 yards.  The smallest units is a company (usually 10-14 figures for infantry or 2-4 for vehicles).  And Companies are formed into Battalions.  There were a lot of army organisations available for Take Cover, of which I only have a few.  The die/dice used throughout the rules are a single d6 with +/- modifiers. Figures are removed as casualties are scored.

Turn sequence is split into a number of phases:
  • Initiative
  • Movement
  • Spotting
  • Aircraft
  • Firing
  • Close Quarters
  • Morale
  • Orders
Within each phase, one side will go first, followed by the other side.  This side with the initiative determines this for each phase.  This causes for interesting decisions at times.

Each turn each side rolls a die for initiative, better commanded troops get a modifier.

Movement: Infantry move cross country 6” a turn while the average tank moves 8”.  Various and expected penalties for obstacle crossing, reverse, road, limbering etc. Company figures/vehicles must stay within a command radius of the unit commander (12” for infantry, 24” for AFVs).  Generally vehicles cannot move and fire.  Infantry may move and fire at -1 to the die roll.

Units (companies)  or individual AFVs try and spot enemy units to their front.  You can only fire at units you can see. The arc for spotting and for firing for all (including vehicles) is 22.5 degrees to either side.    Units in the open can be seen out to 80” but for units concealed most of the time they cannot be seen beyond 36” – even if firing - and often at 8” only.  There is a simple chart for spotting.  There are rules for the non-moving player to fire at moving troops that move into cover or out of a units arc.

Straightforward aircraft rules based on mission type.  Only played with them a few times but they mesh in well with the rest of the system.

Indirect HE fire occurs by
  • indicating the target
  • rolling for a radio link (generally a forward observer calling in the fire)
  • rolling to register the target
  • rolling for casualties
Radio link is normally 2+ on d6 .  A company commander calls in their own battalion assets using the same system.  To register a stationary target is 3+.  If not registered, target is automatically registered next turn.  Most HE attacks will cause at least a 1 figure casualty to targets in the open.  There are also rules for pre-registered, pre-planned and pre-game fire.

Anti Tank is roll to hit the target (base 4+ +/- a number of modifiers), and then, if hit, roll for possible damage.  There are a total of 10 gun types in the game (3 are for hand held anti-tank) and vehicles, for armour, are classified into light, medium and heavy.   The is a small chart with gun type on one side and range bands (close, battle, long, extreme) on the other.  The intersection gives the damage result, one of three possible:
Ricochet (3 ricochets and crew test for bailing out)
Damaged (tank is either immobilised or guns out of action; half-tracks, carriers are destroyed)
Kaput (2 damaged = Kaput)

Major modifiers are +1 light tank, -1 Heavy.
Example of the damage table: Gun type 5 (German 75/L48) at battle range (18”-36”)  is R:1-3 D: 4 K:5-6.

Simple but there are nuances in the damage table, especially for the different guns. Seems to reflect their relative effect well.

Small Arms fire is performed by 1 to 6 figures and resolved with a single d6 roll, plus modifiers.  The more figures, the better chance of scoring casualties.  There is a table that gets better with the number of figures.  Infantry support weapons are classed in terms of figure comparison.  A MMG is classed as 4 figures, with +1 to the die; an LMG is 3 figures with +2 to the die. 1 figure will score a casualty on a 5-6 in the open.  An MMG will always score 1 casualty in the open.  It is really only possible to score 2 casualties using 4 figures or above. Rifles fire out to 18”, while Medium machine guns fire out to 36”.  Each weapon has two ranges but for nearly every weapon the chance to hit is the same at any range.
Grenades are represented in the rules with a 3” range.

Infantry groups will be suppressed in a turn if they
  1. Are within 18” of enemy fire
  2. receive a casualty
  3. and receive fire from twice the number of enemy figures (or support weapons equivalents)
They are also suppressed from indirect fire if receive a casualty and it was 2 or more guns firing.
Suppression is lifted at the end of the similar phase in the following turn.

If troops are in base to base contact then close quarter fighting may occur. Each sides rolls a die, adds the number of figures and some other modifiers. If you lose, lose 3 figures and retreat.  Winner loses 1 figure and advances.

Units are militia, regular, veteran or elite.  This classification is mostly used for morale. A  regular company checks morale once it has lost more than 30% (Veterans are 40%). of the troops, and for every casualty received after that. Results vary from OK to staying in place to withdrawing to routing.  Once a certain level of figures in a battalion are lost or withdrawing/routing, a higher level morale test, with similar results, is also performed.

At the start, companies are given general orders on what to do during the game.  Orders change requests are made at the end of a turn, generally on a 4+ modified for nationality.  Order changes occur, if successful, at the end of the following turn.

The game also includes some ‘chrome’ such as rules for German and Russian political interference/military police and German armoured assault advantages.

Note: there are 4 pages of amendments which I don’t know when published, but I found them as images on the Britannia Miniatures site in 2003.  The changes to the game include:
  • Extending the range of direct HE fire
  • Rules for elements outside command range
  • Rules extensions for beach landings
  • Implemented an orders network with chains of command
  • A d10 (with modifiers) motivation test for infantry units under fire, taken prior to moving.  Another big change as ½ the time infantry will not move.
  • Vehicles can move and fire (with a -1 modifier to firing).  This is a big change
  • LMGs for rifle groups are now separate figures.  This is a big change but as we were never sure what it really meant, we did not implement it.  Some members of the TakeCover yahoo group concurred.
  • Minor changes and clarifications to sections of the rules
Click here for the amendments in PDF.

End of summary.  Read on if you want to know even more.

The Rulebook and addons

The rulebook is 55 pages on glossy paper with a colour cover.  The sections follow the rules sequence.  Included are vehicle, gun and aircraft classifications for all major  nationalities  Two large NW Europe scenarios. No organisation lists. No points but there is a flowchart on building a force.  No quick reference chart.
As well as the rules, a large number of army organisation booklets were produced.  I don’t know how many, and I’ve only got about 5 myself, I seem to remember lots. Each booklet had about 10-20 pages with each page have a subset of the division organisation.  They were broken down by broadly by side, division and year.  For example,  British Infantry Division 1943-1945 had pages for Artillery, Infantry Battalion, Divisional Support etc.  Specific notes pertaining to specific divisions was occasionally included e.g. No Comets in Italy.
Lastly, there was a booklet called Tactical Memoir Aide #1 that has about 20 pages of WW2 infantry an armour tactics, mostly diagrams with a small amount of explanatory test.  But a handy introduction.

Units
The rules are designed to use 20mm  miniatures.
Each infantry figure represents 10 men (a section).
Each tank/vehicle represents 4 vehicles, except passenger vehicles that represent 10: A company of Panzer Grenadiers - 10 figures - is carried by 1 half-track.
Each support element (e.g. Mortar, Anti-tank gun, MMG) represents 3 support elements.  Support units have a  crew of 2 or three figures.
The ground scale is 1” = 25 yards and all measurements are done in inches.

By having such a scale the combat, command and morale rules can be made simpler.  The game actually still plays like a tactical game.

The following shows a typical British NW Europe Infantry battalion from 1944. 

1 Battalion HQ:
   1 CO (Rifle)
   2 Rifle
   2 figs with PIAT
   1 Sniper
   1 Jeep
   1 15cwt truck
4 Company, each
   8 Rifles
   2 figs with PIAT
   2 figs with 2” Mortar
1 Support Company
   1 Anti-Tank Platoon
       1 6pdr AT Gun
       1 Carrier
   1 Mortar Platoon
       6 figs
       2 3” mortar
       2 Carriers
   1 Pioneer Platoon
       3 Mine Detector
       1 FlameThrower
       1 15cwt
  1 Carrier Platoon
      2 figs with PIAT
      2 Rifle
      1 Bren Carrier
  1 MMG Platoon
      3 figs with MMG
      1 Carrier

Note: the amendments split out inherent LMGs into distinct bases.  This was a significant change to the organisational charts and we were not sure what that meant , likely split out each one and using the 1:3 ratio for support weapons, increase companies with 9 figures with 3 LMG bases.  This was quite a change.  We did not care for it and so ignored it. No one on the take cover yahoo group owned up to using this change.

AFVs
Tanks have 2 values – type and gun class. Type is either Heavy, Medium, Light, Passenger (same as light but can carry figures), Soft-Skin.
Type is used for armour class and movement.  There is one other class – Cruiser – that is identical to Medium except it moves slightly faster.  Gun class is the gun for the tank – there are 7 general gun classes.

Example Tanks:
(tank, type, gun class)
Panzer IV, M, 5
Tiger II, H, 2
Sdkfz251/1, P, MMG
M4 Sherman, M, 6
Sherman Firefly, M, 4
Stuart, L, 7
Bren Carrier, P, LMG

Orders
Basic orders need to be given to each Battalion and Company.  This should be simple, for example:

Battalion to advance up to take the village with 1st company going via the road, 2nd company through the fields and 3rd company to act as backup behind the first to.  Support Company to advance to hill on right.
Will hold and defend against enemy attack.

For each battalion a left and right axis needs to be drawn down the table.  This is the area of operational control for the battalion – it cannot move outside this area of control (although it can fire out of it).

New orders may be given in reaction to visible enemy forces (or knowledge by radio via recce forces of such units) or when achieved objective.  Orders request happen at the end of a turn.  For new orders, roll 4+ on 1d6, with some nationality modifiers.  New orders take effect the end next turn.
In the amendments, additionally an orders network needed to be specified for each side, and orders needed to go up and down the order chain.

Victory
Victory goes to the side that has troops left on the table that have not broken or withdrawn, or has control of most objectives.

Game Turns

Pre-game stuff
·         Layout the table with all sorts of terrain - roads, buildings, fields, hills, hedges etc
·         Determine if objectives are going to be used and define them
·         work out the initial orders for the units (easy to do with a map)
·         Determine pre-bombardment impact areas.
·         Start the first turn

A Turn

Initiative
·         Roll 1d6 each for initiative. Better commanded sides get modifiers to the roll. Higher roll gets to choose who moves first and fires first in each phase of the turn.

Movement  (initiative player gets to choose who moves first)

Spotting
·         Attempt to spot troops and perform speculative fire at moving/firing but unspotted enemy

Aircraft
·         Test or arrival of planes, conduct attacks and AA fire.

Fire Phase  (initiative player chooses who fires first)
·         HE, Anti-Tank and small arms
·         Last turn suppression lifted

Close Quarters phase
·         Grenades, flamethrowers etc
·         Hand to hand fighting

Morale phase
·         Unit morale tests
·         Higher unit tests (generally only required if lots of lower units broken/lost)

Orders
·         request change of orders
·         implement fresh orders

Note:  All moving and firing is alternate, so troops are removed immediately upon loss.

Arcs for firing and moving

Each vehicle or infantry unit has a arc 22.5 degrees to either side.  This is the arc used to determine what a unit can spot or fire at.  AFV turrets cannot pivot until engine damage.

Movement

Command and control
Each infantry figure of a company must remain within 12” of their officer.
Each AFV of a regiment must remain with in 24” of the command vehicle.
ALL company officers must remain within 48” of the battalion officer.
Snipers and engineers may operate up to 48” away.
If officer is killed, a new figure takes his place, but this may cause a penalty in a morale test.
The rules do not allow subunits to be split away, meaning an company MMG had to stay within 12”.  The amendments contained rules on operating subunits outside normal command radius.

Speed
Generally infantry move around 8” on road, 6” in the field and 4” on hills.
Mediums AFVs move 10” on roads, 8” in the field and 5” on hills.
Heavy AFVs move a bit slower and light AFVs faster.
Half-tracks move fast on roads (12”) but only 6” in fields.
Infantry get a charge bonus  if moving into contact.
There are penalties for linear obstacles, reverse, turning etc.

Unmounting Troops
Unmounting does not penalise any movement for the vehicle but  unmounting units have a limited move.  Generally troops cannot unmount  within 9”-15” of an enemy.  However,  German half-tracks/tank riders have no restriction on distance, and may dismount into contact. And count as charging!

Movement & Firing
No anti tank weapon or AFV mounted AT gun  may move and fire in the same turn, except hand held AT weapons such as a bazooka. Note the amendments changed this to allow move and fire.
All infantry weapons may move and fire.
Vehicle machine guns may fire after the vehicle has moved at close range.
The amendments included a new motivation test (4+ to pass on a d10 +/- modifiers) for infantry that were under fire.  The motivation test needed to be passed before an infantry unit could move.  Not passing had not other effect than the unit could not move.  The amendments came out at the tail end of us playing Take cover.  The modifiers were similar to the morale test, so we simply have infantry units under fire needed to pass a morale test, rather than use a d10 and another table.

Disruptive fire
If a unit moves through arc of fire or from open to cover an unmoved enemy may use disruptive fire against it.  The firing unit cannot fire in upcoming fire phase.

Spotting
Spotting is done per infantry company or individual vehicle or individual crew served gun.
May test against any enemy in arc. While it might seem restrictive, there are notes in a Tactical Memoir by Dave arguing the validity of this approach.
It isn’t easy to spot troops.  Generally if they are not in the open and haven’t fired or moved you only have a chance within 8”.  If they are concealed and fired/moved you still only have a chance up to 36”. Spotting is based on range, infantry/tank, open/concealed/total cover and moved/fired.

Speculative fire
If an enemy unit was visible but  fired or moved within your arc but failed to spot (e.g. moved into cover) then you may be able to speculatively fire on the target.  The amendments loosened the restriction on speculative fire.

Suppression
A unit that is suppressed only moves at half-speed and cannot do any other actions (such as firing) for a turn.
To suppress and infantry unit/element requires at least double the firepower (or equivalent) from Small arms, and must have scored at least one casualty.  Vehicles may only be suppressed by Indirect HE fire. Indirect HE will suppress if a casualty is scored; Direct HE will also but requires two guns firing.
Suppression is important (as in my opinion it should be).

Aircraft
There are rules for potential random air support.  Aircraft fly a certain type of mission e.g. spotting, bombing, ground attack.  This dictates how they move, spot and attack.  Attacks are carried out the same as HE, small Arms or anti-tank depending on the weapon type.  Anti-aircraft fire has its own to hit and damage chart, similar to the vehicle one

Indirect HE fire
Indirect HE fire is firing from mortars, howitzers or off-table batteries of guns.  Range examples:
Light mortars 4” to 18”
75mm to 85mm  4”-72”
90mm-105mm 8”-144”

Indirect elements do not have to be on the table (unless their range is shorter than the table!)

Indirect can be pre-planned, pre-game bombardment, observed, barrage.  Generally observed,
so will also have a Forward Observer (FOO) who will be calling in fire.  For some smaller mortars, the unit itself is the forward observer. Battalion assets can be called in by company officers.

Multiple guns in a single unit/battery fire at the same place but roll a die for each gun to determine casualties.

Method
·         Place impact template where you wish fire to land
·         Forward observer rolls 1d6 for radio link (2+ with some modifiers)
·         Roll 1d6 to see if registered target (3+ with some modifiers)
·         If registered, roll 1d6 per gun, +/- some modifiers and check casualty chart.
·         If applicable, check for building structural damage
·         If applicable, roll 1d6 for possibility of building fire.

If register fails, target is automatically registered nest turn.
Once fire is registered, firing will continue until FOO requires cease fire, or change or target.

For an example of  Structural damage: 50-105mm guns score 1 structural damage point and a single storey house has 10 points.  Other guns score larger damage. When this limit is reached, the building collapses and may cause casualties.

The impact template is a 3” circle for up to 100m weapons, 5” for up to 155mm.

Smoke
Fired smoke may not hit target – use d10: 1-8 not on target  (the impact template has 8 off centre  points for placement), 9 on target, 0 is misfire.
Each gun produces a strip of 2” smoke that drifts for 3 turns and then dissipates.

Example
Two medium mortars (81mm – gun group 6) firing at a target 36” away.  Mortar is its own FOO.
Place impact template – covers two infantry figures in the open.
Roll for link – need a 2+.  Assume successful
Roll to register – need a 3+.  Assume successful
Roll for casualties – rolled a 2 and a 5.  No modifiers.  The 2 scores 1 casualty and the 5 scores 2 casualties.  All figures are dead.

If the infantry figures were in a building then roll for casualties becomes:  rolled a 2 and a 5.  Hard cover modifier of  –2 changes rolls to 0 and 3.  The 0 causes no casualties and the 3 scores 1 casualty.  The building receives one structure point of damage and a roll of 5 shows it did not catch fire.

Direct HE fire
Direct HE fire is when a tank or howitzer gun fire HE directly at a target.  Each gun fires individually.  The amendments increased significantly the range for Direct HE.

Method
·         Roll 1d6 per gun to hit +/- some modifiers
·         Roll 1d6 on the casualty chart +/- some modifiers
·         If applicable, check for building structural damage and possbility of fire

Anti-tank fire
Anti-tank guns/weapons are rated from 1 (best) to 10 (worst). For example, a Tiger II has a 2 gun, a Panther has a 4 gun; a Panzer IV has a 5 gun.  The American M4 Sherman has a 6 gun. A bazooka is a 8 gun.

Method
·         Measure Range
·         To hit, roll 1d6, need a 4+ and +/- some modifiers
·         If HIT, roll 1d6 and +/- some modifiers to determine potential damage using a damage table. Major modifiers are +1 light tank,  -1 Heavy.

Under 18” give a bonus to attempt to hit, over 60” is harder to hit.

Targets over 36” cannot be damaged by guns of size 5 or more (most medium tank guns).
The is a small chart with the 10 gun types on one side and range bands (close, battle, long, extreme) on the other.  The intersection gives the damage result, one of three possible – Ricochet, Disabled or Kaput.
Ricochet does nothing except once have 3 ricochets, roll for crew bailing out (generally 5-6 on 1d6).
Disabled will knock out a S or P vehicle and test for passenger casualties, plus may destroy a towed gun.
Disabled for L/M/C/H will cause crew bailing out test and either disable movement OR main gun. Two Disabled = Kaput.
Kaput is a vehicle blows up, crew killed, test for  passenger casualties.

Example
A typical example to give idea of hitting a target.

Panzer IV (medium with gun 5) is firing on a Sherman tank (medium with gun 6) at 20”.  Neither moved.

TO HIT: roll 1d6 and get a 3.  Modifiers are target stationary (+1) this move so it is now a 4.  4+ is required so a hit!
TO DAMAGE: roll 1d6 and get a 4.   no modifiers. Cross reference gun type 5 at battle range (18”-36”)  is R:1-3 D: 4 K:5-6.

So a 4 is a Disabled result.
 
Sherman rolls a 3 for crew bail out (they stay) and a 1 for damage type (guns or tracks) so tank is immobilised but can still fire its guns.

Infantry AT notes
Infantry hand held antitank uses the same system as other antitank fire but range is limited e.g. a Bazooka range is 6”.

Small Arms fire
Each infantry figure is armed with a Rifle or SMG.  Crew served weapons (MMGs, mortars, anti-tank guns) have a crew of three figures.  Machine guns are classed as a number of infantry figure equivalents e.g. an MMG fires as if it were 4 figures.

Rifle/SMG figures can be combined into fire groups with a maximum of 6 figures and no more than 2” between one figure and the next.  Targets can be anything up to a company or a P or S vehicle.   Machines guns fire individually but do have a target template that limits the number of enemy figures that can be targetted.

SMGs have a maximum range of 6”.  Rifles and LMGs can fire out to 18”.  MMG/HMGs out to 36”.
Vehicle mounted MGs may only fire up to 15”.

Method
·         Roll 1d6 +/- modifiers
·         Check roll against a table indexed by number of figures firing to determine casualties.

Example 1
4 Rifle infantry figures that are moving fire at 6 infantry figures moving behind a hedge.  Range is 10”.
Roll of d6 is a 4. –1 for target in soft cover,  -1 for target moving, -1 for firer moving,  +1 for rifles at this range.   This is a final die of  2 with 4 figures firing, which is 1 casualty.

Example 2
Stationary German MMG opens up on 4 figures that can be covered by the template crossing the road.  Range is 30”.
Roll of d6 is a 5.  –1 target is moving, +1 for MMG at this range.
Final die roll of 5 with 4 figures (MMG equivalent) is 2 casualties.

Close Quarters Phase
Must be in base to base contact with enemy.  Split into melee groups by company that are in base to base contact.
Roll 1d6 per side for each melee and add modifiers.

Highest score wins and loses 1 figure.  Loser loses 3 figures.  On a tie both lose a figure.
Loser must withdraw immediately move one move distance back or one room (if in building).
Winner may move up to 3” inches immediately.

Morale

Basic Morale (Company level)
Basic morale tests are taken at the company or tank regiment level and is based on casualty loss.
Units are militia/partisan, regular, veteran or elite.  Regular troops will test when they lose 30% of the unit. Veterans at 40%.  Tests occur based on this percentage loss, and for every loss thereafter.  Morale types are also used to modify the initiative roll.

Method
·         Roll 1d6 and add an subtract modifiers

Infantry carry on if score 1 or more.  Negative scores will result in pinning a unit (cannot move) or worse, withdrawing, or even worse, routing.  To advance with a unit that has withdrawn requires a 1d6 roll of 3+.

Vehicles/Artillery carry on  if score of 3 or more.  Lesser scores have effects similar to infantry.

Higher Morale (Battalion/Brigade)

There comes a time when even higher commands will decide it is time to withdraw.  When casualties/withdrawing/routing reach 40% of command size, test and test every time a figure is lost after that.

Roll a 1d6 and add/subtract modifiers.  2 or more is fine.  Lower scores will result in pulling back for a number of turns.

Nationality distinctions
There are various national distinctions throughout the rules.  Examples include:
·         German troops are more likely to get initiative (e.g. German regulars get +1 to initiative roll, British regulars get +0).
·         Germans can close assault with half-tracks.
·         Rules for defying the Fuhrer’s orders of no retreat.
·         The Russian and German Police force.
·         Russian Commissars.
·         Russians before Stalingrad are more likely to break.
·         Germans are less likely to bail from tanks than allies.

Verdict
I liked them when I was playing them. I still like them. At the time I started playing them, in 2001, I had a 20 year background in Tractics, and a little of Combined Arms and Squad Leader for miniatures.  Take Cover! was like a breath of fresh air.  Although it plays with battalions - with 1 figure = 1 squad/section/squadron - it plays tactically more like a  game next level down, so it wasn’t that hard to make the jump.  It is simpler to play than Tractics etc  but not simplistic.  It is a good representation of combat at that level – I don’t know but it is fun to play.  So I can’t really pin down what I did like – kinda ‘old school’, tactically rich, not lots of exceptions in the rules.

Issues
So, what didn’t I like?  Most of them are minor.

Individual figures – moving individually based figures rather than multiple figure bases just takes longer.  Sure, it is easy to remove casualties, but when a battalion often has (excluding crew served weapons that have the crew based with the weapon) over 50 individual figures to move, the game just takes longer.  And Take Cover will often have two battalions on the table.  The solution is to play with just about a battalion a side, which is what I was doing at the tail end of my playing.  I am also thinking of moving the whole system to one level down where a base = 1 section and 1:1 for vehicles.  Will change almost none of the rules except simplify the small arms combat table and possibly increase arcs of fire slightly. 

AFV damage just seemed a little two detailed – damaged could result in crew bailout, immobilised or guns out.  While you can always abstract away and justify anything, this one seemed a little harder. One resolution suggested on the TakeCover yahoo group was just assume damaged vehicles moved at 1/3 rate and were -1 to fire.

Plays mostly like skirmish when it is a battalion game.  Common criticism and also applies to Rapid Fire.  While ignoring it at the time, it does bug me.  After reading through a lot more rules in the last 6 years, I think the game would operate just as well at a  level of detail down with no change to the rules, except maybe increasing spotting and arc of fire arcs.

Saturday, 29 January 2011

Zama refight with Rally Round the King

Background
So, the DBA refight over and done with, onwards to something I find more exciting.  While Warrior Kings was my favourite fast play ancient set, this has been replaced by its updated successor, Rally Round the King.  Very similar but better.
I gave Rally Round the King a go when it first came out,and produced a battle report.

In the Warrior Kings Callinicum refight, I used centimetres rather than inches for movement.  I have reconsidered, and was tempted to go with maybe 2/3rds of an inch per original inch (as RRtK is designed for a 4'x3' board and I am using 2'x2') but will go with inches for this refight.  Should certainly makes things faster, which is not a bad thing with all the AC4, REP5+ troops.

Forces

Roman
1 Heavy Cavalry: Melee, Mounted, AC 4, REP 5, Figs 3
4 Light Cavalry: Skirmish, Mounted, AC 2, REP 4, Figs 2
4 Velites: Skirmish, Foot, AC 2, REP 4, Figs 2
4 Hastati: Melee, Foot, Elite-trained, Combo-weapons, AC 4, REP 5, Figs 4
4 Principes: Melee, Foot, Elite-trained, Combo-weapons, AC 4, REP 5, Figs 4
2 Triarii (one with general): Melee, Foot, Elite-trained, AC 4, REP 6, Figs 4
4 Light Infantry: Melee, Foot, Undisciplined, AC 2, REP 3, Figs 3

Carthaginians
1 Heavy Cavalry: Melee, Mounted, AC 4, REP 4, Figs 3
2 Light Cavalry: Skirmish, Mounted, AC 2, REP 4, Figs 2
2 Elephants: Melee, Foot, Elephant, Undisciplined, AC 2, REP 4, Figs 1
2 Skirmishers: Skirmish, Foot, AC 2, REP 4, Figs 2
4 Light Infantry: Melee, Foot, AC 2, REP 4, Figs 3
8 Medium infantry: Melee, Foot, AC 4, REP 3, Figs 3
4 Heavy Infantry: Melee, Foot, Elite-trained, AC 4, REP 5, Figs 4
2 Heavy Infantry (one with General): Melee, Foot, Elite-trained, AC 4, REP 6, Figs 4

As with DBA, a bit of a tough call on where to place the generals.  So I put them at the back, same as in the DBA refight.  Note that the general figure on the table is just there to remind me what unit has the general.

War rating will be 2 for each side.  I thought about 1 as each side may not need more than that, but it seemed just a bit harsh.

Deployment
As per my standard deployment, but here is is modified with the extra stands:


Or a view from the top:

Overview

Special rules
Carthaginians will go first.
If it looks like the cavalry battle is going to end really fast, I may just stop them for a couple of turns.
Also, the Numidian Light infantry cannot be activated until a Carthaginian comes within 6".

Tactics
The aim of the Carthaginians will be to prolong the cavalry clashes as long as possible and defeat the centre as fast as possible.  Strangely enough, the Roman plan is to hasten the cavalry clashes, and defeat the Carthaginians lines, one by one.  Fairly straightforward.  We will see how close to history we go.
 
Turn 1
An elephant attempts to charge an opposing Velite, but doesn't pass the wanting to charge test and halts.
The second elephant charges an opposing Velite, who shoots, scores no hits, and retires. The Elephant pursues, re-contacts to Velite and routs it. Elephant does not pursue.
The Roman light cavalry charge the opposing light cavalry, both Carthaginians shoot, scores 1 hit, and both retire.  One light cavalry pursues, recontacts the light cavalry and routs it.   The light cavalry pursues off the board! Luckily in RRtK, a unit can come back next turn is pursuing off the table.  Hmmm, seemingly a slight problem with keeping the movement rates the same for a small board, but I actually like it.

The early Numidian clash

The Roman Hastati move up, and one charges the elephant that broke through the Velite line. The elephant and a Hastati are in melee - Elephant receives two hits, Hastati one.  Post melee test sees the elephant give ground (another hit for the elephant) and the Hastati followup.  What a fun game!  Much more activity than the DBA refight.

The elephant pushes through the Velites into the Hastati.

Turn 2

Attempt to charge with the elephant that failed last time, and succeeds.  Opposing velite fire, scores a hit, and routs. Elephant halts.
Elephant in melee with the Hastati routs while the Hastati gives ground and do not pursue.  Elephant routs directly back and contacts the Carthaginian first line who halt.  Elephant inflicts no hits but the Light Infantry inflict a hit on the Elephant.  Light Infantry give ground and the Elephant routs again and so is removed from the board.  Light Infantry pursue.

Move a Carthaginian skirmisher up to within range.
Romans tidy up the Hastati line and move up a Velite to within range of a Carthaginian Skirmisher.
The Velite fires at the Carthaginian skirmisher that moved up earlier. Skirmisher retires. Note: The retiring Skirmisher passed through friends behind it.  I've dome this for other skirmishers retiring throught the rest of the game.  This is not so. The question on can retiring Skirmisher interpenetrate friends came up on the THW mailing list.  The answer is no, as per the rules.  Reading the rules, this is so: when skirmishers are moving, there are times they can interpenetrate.  When retiring, they are treated just like any other unit, so should stop when meet a friend (and take another hit).

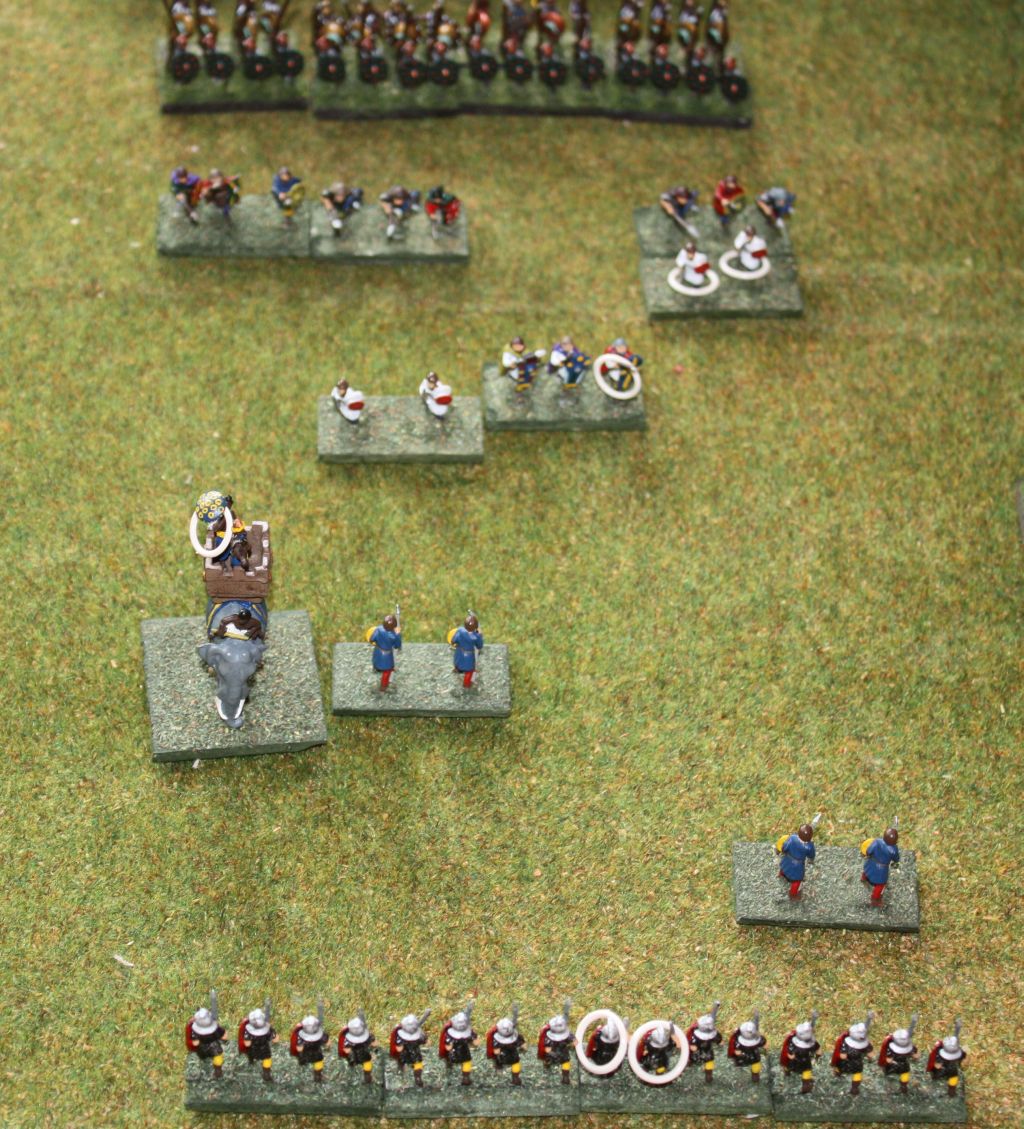
The fragmented skirmishers (and an elephant that just will not charge!)

Turn 3
Carthaginians failed to do anything, but a Roman Velite managed to rout a skirmisher.

Turn 4
Carthaginian light infantry manages to force a Velite to retire, but does not pursue.  At this rate, the Elephant is never going to pass two dice and charge.  3 or less on both dice is a 25% chance, so hopefully soon.  But no matter, as the Hastati line charges it (and an infantry unit).

Hastati line in combat

Light infantry routs, elephant routs and rampages back towards the light infantry line, but all it manages to do is force a skirmisher to retire before it routs again (via a received fire test from the skirmisher).  No hits received to the Hastati.  Tough bastards, and dish it out too  - +1 for elite trained, +1 for combo-weapons is at least a die roll of 3, and an average of 5.5!  And they outnumber the opposition currently too - an average of 6.5 damage per Hastati element.  With the new line up on contact rules, it means an adjacent friendly unit is normally in corner-to-corner contact with the enemy unit  So in the case above, while the elephant was directly in contact with one Hastati, the adjacent Hastati rolled a die in melee as well. 

Turn 5
Carthaginians try to charge with the light infantry but halt.  They move up the second line to behind the light infantry.
Hastati line charges the light infantry (it is in two battles - 2 on one and then 2 on 2).  The lone light infantry routs and the Hastati pursues but fails the attempting to charge (it would meet the Carthaginian second line). The other ( two on two) actually sees a Hastati hit.  In the ensuing post-melee, a light infantry routs the opposing Hastati gives ground (another hit), but pursues into a Carthaginian Skirmisher that fires (another hit!) and retires.  The Hastati pursues, but does not charge into the second line (passed only one dice on the wanting to charge). The other light infantry gives ground.

For the Romans, I am tempted to also move up the Principes to give the Hastati a bit of a REP boost, but I used up the 2 War Rating points charging the Hastati.  I will do it next turn.  I haven't forgotten about the Numidians, and will focus on them soon.  Not doing anything with them helps me not having to introduce a "do nothing with the cavalry for a few turns" rule.

Oops, the Principes (bottom) are a fair distance from the Hastati that is coming into contact with the Carthaginian second line.

Turn 6
Carthaginian second line charges the Hastati. This could highlight a mistake where I should have brought up the Principes earlier to be directly behind the Hastati  for support.  Second Line receive 4 hits from the Hastati. Note about hit allocation - one of the units in melee is a light infantry and so receives a hit first. The die roll for damage was 18 so first hit to the Light infantry (AC2) leaves 15 more to allocate - one each to the other 2 second line; this leaves 5 to allocate which goes to the light infantry.  The last 2 points are not enough to inflict a hit on the AC4 second line and so is ignored.  
The Hastati receive only 1 hit in return.The Carthaginians roll a double 6 for being involved in melee - oops.  with REP 3 and three friends in contact, this would normally be great, but any hit and they are stuffed on boxcars.  One unit is a light infantry with 3 hits, and the other 2 are second lines with hits.  They are stuffed.  All 3 units rout.  Being outnumbered doesn't help either.The Hastati give ground (extra hit each) and the only ones that pursues is the middle one with 4 hits! Luckily, it halts on its wanting to charge test.

Hastati clashing with the Second line

The first combat line melee results in Romans destroying 3; Carthaginians 0.  But the Hastati are not in great shape.  And hits cannot be removed (another thing I like about RRtK).  Note the total losses so far are Romans have lost 3 units to Carthaginian 9.

The Romans moved up the Principes and the Triarii.

Turn 7
Carthaginians second line charges the Hastati line again.The Hastati pass 0 dice for the receiving a charge (a 6,5 and the best unit has a modified REP of 4 - original REP 5 +1 friend -1 hit).  The 3 Hastati in the line rout (one to the right is off by itself and was not charged - seemed like to much to tempt fate to do so).  Fascinating how nature balances itself out. No Carthaginian pursues.

The Hastati, except one, evaporates.  Principes at the bottom of the picture are advancing to assist.

Romans move up some Velites - can't waste them!

Turn 8
Carthaginian moves the lone skirmisher from behind the second line to in front of it, conveniently in front of the Velite.

Right Velite shoots, inflicts a hit.  The Carthaginian can only halt than advance as it already has an enemy in front and within the enemy's charge reach.

The Velite scores a hit!

Principes continue to move forwards, and join up with the last Hastati.

The centre Velite shoots and forces the Carthaginian skirmisher to retire.

Turn 9
The Carthaginian line charges, mainly to avoid more hits from Velite missile fire. The Carthaginian unit with the hit only passes one dice so halts.  So the Velite hit was important and a useful thing to do.  I feel better - I wasn't sure.  The Velite between the lines routs and the Carthaginian pursues into the Principes.  So we end up with a front of 4 Principes Vs 3 Second line:

Principes to the rescue and contact the Second line.

Romans inflict 4 hits, Carthaginians 2.  As well as being REP 3, the Carthaginians are outnumbered, so their post-melee test may not be pretty - one routs, rest give ground.  The Romans roll a double 6! but with REP 5 and two friends in contact for the units with 1 hit, all is fine - They follow up.

Principes are cleaning up the Second line.

The right Velite inflicts another hit on the Carthaginian who retires, but cannot due to the unit behind, so takes another hit!  And then the Hastati charges it, melee results in the Carthaginian routing, Hastati pursues into the Carthaginian unit that was behind the first one.  It routs.  Hastati has cleared out two units with no hits to itself.

The Principes continue the melee (move up another Principes into corner to corner contact so it is three units to two). Principes inflict 3 hits, the Carthaginians 2; post-melee test sees the Carthaginians rout - no surprises there with 4 hits and REP 3 and a roll of 6,5.  A Principes pursues (note: to pursue after a continuing melee, a roll of greater  than original REP is required, so a Principes will only pursue on a 6, which it rolled)  into the last remaining second line that was behind one of the routed units.   The second line unit fails both dice for receiving charge (it is a REP 3 so not much chance of it staying).  There is no Carthaginian second line left.

Overview with the Carthaginian Second line routed.

Turn 10
Carthaginian Third line charge into the Principes (and the last Hastati on the Carthaginian left).

This is where the final clash gets interesting - Carthaginians has 6 units - REP 5 and 6 (the two REP 6 units are in the centre).  Romans have 5 units - Hastati and Principes, and 2 Triarii in reserve (bound to move up when the Romans have a turn).  So it is going to be close.  All are elite trained.  Due to the way the Roman line has been staggered, there are actually 3 melees.

The Third, and last line, of the Carthaginians enter the fray of what becomes a very long battle.

First melee: Romans give ground.
Second melee: Continue melee.
Third melee: Continue melee.

Continue melee are fairly rare in most of the games I have played as after a hit or 2, most units cannot pass both dice.  But REP 5 and 6 with a few friends in support - reaction test? don't even bother to roll!

Early days of the battle line clash - hardly any hits each!  It gets much worse.

Romans finally get their act together on the Numidians - I forgot that the Skirmisher cavalvy could fire against the enemy, doing bits of potential damage (like the Velite has done recently).  I think is was playing DBA in the previous game where they had to contact, and RRtK does not allow contact until hits are greater than equal to REP.  Ah well, it may have made a little bit of a difference.  There is one Numidian that comes back onto the board (1 use of the war rating) and moved up the other against the opposing Light cavalry (2nd war rating).  Triaii use their move (they must continue move at least 1/2 their move) to wheel towards the left, where the Principes line is in most danger of collapsing.

Turn 11
Carthaginian Numidians fire and cause opposing Numidians to retire. Take that, traitors!

The battle line clash continues - all the Romans are in contact with one another, and so are the Carthaginians, so I'll call in one melee (in hindsight, last turn should has possibly been only two melees rather than three). three Romans units give ground (which gives them a hit as well).

No routs or retires, just a few more hits.

2 Roman Numidians move to face the Carthaginian one.
Triarii move up to provide some stiffening to the left side of the Roman battle line.

The clash continues as two separate melees:
melee 1 (right two units): Romans give ground, receiving additional hits (as chance would have it, both roll 1,6 for post-melee test - The general helped ensure the Carthaginians passed 2 dice, while the Romans only pass 1)
melee 2 (left two units with general and Triarii in the rear): One Carthaginian gives ground.  The general really helped here too for the Romans.


Still no routs or retires, but the hits are now piling on. The Triarii have joined to the left rear.

Check out those hits!  The Hastati is buried under 6 hits on the far right of the Roman line!

Turn 12
Numidians fire on the Roman Numidians; eventually the Carthaginian retires off the board.  Even though the Roman skirmishers do not need to roll to pursue (as it is not melee), I make them do so to simulate the actual battle.  One Roman pursues off the table (it can come back later as did a previous pursuer).

OK - the battle line clash continues!  It is two different melees (Carthaginian right unit and then the other three line units form the other melee) due to give grounds last turn. Three hits each and every Roman unit on the front line has 4 hits!

The first melee results in both giving ground, which mean neither do and both get an extra hit!
Unsurprisingly, the Hastati with 6 hits routs.  The other give ground.  There is a Principes with 7 hits in there.

A rout! (on the right - a Hastati).  More hits...


Romans move a Principes to fill a gap. Battle line clash again, three melees - two flanks units are each a melee and the centre two is the other.

The centre two Principes rout (they did have 7 hits each so it was not unexpected). The left most melee would have seen both units rout but simultaneous rout means neither do.  Interesting as the Roman unit currently has so many hits it cannot pass no matter what it rolls; the opposing Carthaginian modified REP is a 1 so is hard to pass too.  Unless the general and more friends appear, these two units with continue meleeing until the end of the game!  I do not see a problem with this - quite a few battles in ancient history had troops fighting until the end of the battle (and one side then flees).

The centre Principes finally rout.


Turn 13
Hmmm. For the battleline, the Carthaginians have two unhurt units, and three with 4 or more hits.  Romans have three unhurt units,and one with 7 hits.  They also have some skirmishers that can charge when it gets bad.  There is also the Heavy Cavalry that have been standing off since the start.  Not game to charge with the Romans - the one additional REP does increase the chances of winning the flank, but losing it would be bad.
The Carthaginians could charge a flank, but the Triarii would automatically pass both dice, so what would be the point.

The Carthaginian Veteran does not charge into contact with the opposing Triarii - it would lose the flanking friends, and no longer be adjacent to the general.
The nearly never-ending melee ends - neither scored a hit and the Carthaginians passed one dice.  The Romans routs.

The leftmost Principes routs.

Romans charge in with the Triarii.  No need to roll a check with REP 6.  On the Roman right, both units could have routed so neither do.  It is looking bad for the Carthaginians, who cannot pass a test, but the opposing Roman has a modified REP of 2 - not good either.

On the Roman left, the Carthaginian routs.

Triarii are now in the front line (on the left).

Turn 14
Carthaginian general wheels to attack flank of the Roman general Triarii unit.  The Romans have a modified REP of 8, so would pass any test, and so do not count as flanked.  But now the roman general unit could potentially be outnumbered and so a -1 in a test.
The Carthaginian veteran  facing the Triarii General rout.  Ah well.

The other melee of the Carthaginians and Principes becomes a never-ending melee - both are the same REP and both units cannot pass a test.

Never-ending melee on the far right. There is a gap in the Carthaginian centre. The leftmost Carthaginian unit routs next melee. 

The left most Triarii and the General Triarii charge the opposing veteran unit.  Post melee for the veteran - 2 hits on a REP 5 lone unit and outnumbered...hmm...passed 0 dice.  Rout. Romans pursue. 

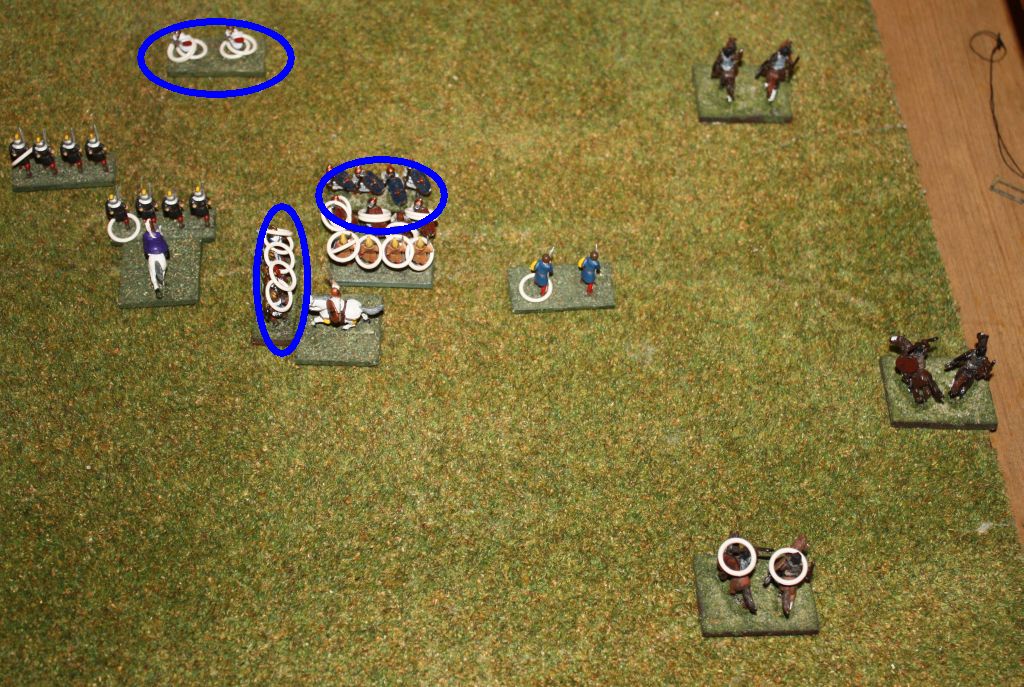
The battleline and surrounding units.  Carthaginian units circled in blue.

The Carthaginians only have one unhurt unit (REP 5) and the Veteran general unit (with 5 hits). Oh, and a foot Skirmisher with 4 hits.  The Romans outnumber this by two, and also have the Numidian cavalry to assist.  The Heavy cavalry is still at a stand-off.  I'm giving this to the Romans.  It was close though.

 
Overview at game end.

Verdict
A long game.  This was due to the high quality troops.  Two Rep 4 lines (AC4) will not last long and will often fail at least one dice.  Two REP5-6 lines will almost automatically pass both dice for at least turn or two.  As a comparison to Armati, two average lines clashing will take just as long to resolve as 2 quality lines.  Ah well.  I enjoyed it, but is wasn't as fast play as normal - probably because there are lots of troops!  The casualty rings on the figures are normally no problem, but when I got to 6 or more, it was getting hard to keep them on. RRtK works fine for an infantry game like Zama.  My enthusiasm for it has not waned.  On a final note, Zama is not really suited to fast play, and I think I will try out only one more ruleset with it.  That one will be the fastest I know, Mighty Armies: Ancients.

Sunday, 2 January 2011

Zama refight with DBA

Background
For the first refight of Zama using different rulesets, I thought this time I will get DBA out of the way first. Although not that fond of it, it is the most popular ruleset for less than 1 hour on a 2'x2' table. So it will offer some comparison for later rules.

Forces

Roman
1 Cv - Heavy Cavalry
4 LH - Light Cavalry
4 Ps - Velites
4 Bd - Hastati
4 Bd - Principes
2 Sp - Triarii (one with general)
4 Hd - Light Infantry

Carthaginians
1 Cv - Heavy Cavalry
2 Lh - Light Cavalry
2 El - Elephants
2 Ps - Skirmishers
4 Ax - Light Infantry
4 Sp - Medium infantry
4 Sp - Heavy Infantry (one with General)

A bit of a tough call on where to place the generals.  So I put them at the back.

Deployment
As per my standard deployment map but rather than link to it, here it is:


Or a view from the top:

Setup - spotted that the Romans had 2 Cv during turn 1, but the extra base appears in this picture. And in DBA, generals are not separate but part of a unit.  Fixed all this after this picture taken. 


Special rules
Carthaginians will go first.
If it looks like the cavalry battle is going to end really fast, I may just stop them for a couple of turns. Note from post-game: I did not have to do this.
Also, the Numidian Light infantry cannot be activated until a Carthaginian comes within 6".
Victory will have to be when I call it as using the normal DBA breakpoint will not see the rear lines ever get into contact.

Tactics
The aim of the Carthaginians will be to prolong the cavalry clashes as long as possible.  In the centre it will be to defeat the Roman lines, one by one.  Strangely enough, the Roman plan is to hasten the cavalry clashes, and defeat the Carthaginians lines, one by one.  Fairly straightforward.  We will see how close to history we go.
 
Turn 1
The Carthaginians shuffle the lines forward; the Romans do also, and move forward the cavalry on both flanks. The Roman LH moves a double move with some spare PIPS. Light Horse use additional PIPs to make additional moves so long as it does not start of finish within a base width of an enemy.  Both leave enough room between the skirmish line and the next line in to allow for recoils, flees etc.

Turn 2
Carthaginian elephant and skirmisher line charge the Velites.  Outcome: all 4 Velites recoiled.  All the Romans could do was charge their Numidian light horse into the Carthaginian Numidian Light Horse.  It is a 4 Vs 2 battle. But the outcome was a Roman Light Horse recoiled.  I am used to thinking in units and see the LH as a unit but the Roman LH is really 4 individual units and so next turn individual bases could wrap around the flanks which will turn recoils into destruction.


Elephant line about to clash with the Velites

Turn 3
Elephants and Skirmishers charge in again and the rest of the lines move further forward.  One Elephant and Carthaginian Skirmisher lost, but a Roman Velite lost and another flees.The Carthaginian Numidians in contact result is the destruction of two Roman Light Horse; one in the Carthaginian turn, one in the Roman turn.  This flank is not going so historical.   

 Light Horse flank - Roman LH on the sides, Carthaginian in the centre.

Turn 4 and 5
Turn 4 had PIP roll of one each - Elephant and skirmisher charge the Hastati, and are bounced.


Elephant charges in again. Roman Velites attack the Carthaginian first line.  No damage, just a few recoils for each side.

Elephants with auxilia close behind (too close!).  Two Velites defending on the right.

Turn 6 and 7
Elephant and Hastati clash again for no effect, except the elephant recoils into an Auxilia, destroying it. Wow! Historical outcome. I did have the first line about 80mm behind but the Roman Hastati moved forward to contact after a recoil, and the elephant recoiled again - into the Carthaginian first line.  Carthaginian first line destroys a Velite.

Then the second (and last) Elephant is gone. Hastati move forwards, only 1 inch from the Auxilia now.  7 turns and only really the skirmisher line has contacted.

Overview at end of turn 7.  Romans at the bottom.

Turns 8 and 9
Some re-arrangements of the front lines.  Romans now have two Velites on each flank of the Hastati line - this will provide the valuable -1 modifier for attacks.  This is one thing it is still hard for me to grasp about DBx, even after 15 years - the longevity of skirmishers.  Especially compared to Armati where they are removed on contact with just about everything!  Hastati destroy another 2 Light Infantry.
An aside on the cavalry flanks: Historically, the Romans won both flanks, pursued the enemy cavalry and returned near the end of the infantry battle to finish them off in the rear.  In this refight, there is a stand-off between the two cavalry units as they are the same combat strength.  And the Numidian light horse is now two units versus two units and so is quite equal - neither side wanting to press the issue and possibly give an advantage to either side.  So, while I thought I may have to wave a hand to prevent the cavalry entering the infantry battle too soon, they may never actually enter...


Turn 10 and 11
The last Auxilia of the Carthaginian first line is destroyed.  Thinking back, the tactic  for the roman, and the Carthaginian, would be to extend the flanks with the psiloi and/or light infantry.  The Romans did so with two of the fleeing Velites, and they have an advantage going up against the second Carthaginian line.  This began to be a theme in later turns as the lines were extended to stop advantages.

The Hastati and the Carthaginian second line about to clash.

The lines meet...and the result is a few recoils on each side. 

Turn 12
Next turn, a Velite turns onto the flank of a second line - it the Romans score a recoil, it will be destroyed.  Which it is.
Carthaginians bring into the line their Cavalry on the flank (so much for my aside earlier) to gain an advantage - and manage to destroy the pesky Velite on the flank - now the Carthaginians have an advantage there.  One of the Carthaginian veterans moves up to combat the Velite on the other flank, and recoils.  Sometimes I have to stretch my imagination to understand DBA results.

Each of the the clashing line flanks fragments (but soon restored).

Turn 13 to 15
Romans split the Principes line to either side to support the flanks of the Hastati.

Carthaginians play the same trick as the Romans did earlier - wheeled a Skirmisher on the flank of a Hastati.  Local advantage- a Spear with two supports Vs a Blade - 4 Vs 3.  Spears win 10 to 9.  Hastati cannot recoil and destroyed.
Romans bring their cavalry into the fray as well.


The line (much extended) meets again.  The Spears recoil. The trick is trying to get a good enough local advantage - the Romans managed it by recoiling a few Spears leaving one lone Spear with two Roman supports beside it - making it a 5 vs 3.  But just a recoil.  Possibly the Romans can afford to close the door with some Blades as they have more of them.  Will have to see.

The battle lines extended, with the advantage to the Romans.

Turn 16 to 18
The lines, which contains almost all the remaining troops with both sides also having a 2 unit reserve, clash.

The lines clash.

The line clash went on for a few more turns.  The Carthaginian cavalry was destroyed first, making the Carthaginian right flank quite open.  This was followed by the rightmost Spear unit next turn which is really leaving that flank open! And then another spear unit from both flanks.  With the Carthaginians down to only 3 Spear unit, and the Romans having lost nothing, I called it a victory for the Romans.

The remainder of the lines.  The three Carthaginians are centred on the general at the top.

Overview of the filed at game end.

Verdict
It was a long game - 18 turns!  There is nearly twice the elements for a normal DBA games, and also the game is staged over three lines of troops. So it is unsurprising it took so long.  I estimate there was at least 2 hours playing time.  I think that DBA, compared to some of the other rules I'll try out, it not well suited to fast play when multiple lines are involved. Once again, as per the Callinicum DBA game, I did enjoy the game but found it not as historically representative as I like.  Some things went quite historical - the Elephants impacting the Carthaginian first line, the Principes did help extend the line of the Hastati which is similar to parts of the original battle.  The to and fro when the heavy troops clash is well represented. But the skirmishers hung around which still gets to me.  I understand the reasoning, it just does sit comfortably with me.  Still, a good game. There are others rules I like more so I think this will be my last solo DBA effort.  If all the Zama refights take this long though, I am only going to replay it a few times before moving on to a different battle.