Monday, 16 December 2024

Battle of Lugdunum 197 AD using Ancient Battlelines Clash

Introduction

This is game 68 in play testing my ancient rules by replaying historical battles.  I started by using my own rules Ancients Battlelines Clash (ABC) but recently using a similar set of my rules, When Warriors Collide (WWC).  I recently updated ABC with some learnings from WWC, so back to using ABC!  I am play testing rules by replaying all the Peter Sides scenarios from his Historical Battles books, and some others I find along the way.  ABC is designed to finish in around 30 minutes on a 2’x2’ or smaller table; I am currently using a 40cmx40cm table.

Battle of Lugdunum, 197 AD

Septimus Severus as Emperor faces another ursuper, Clodius Albinus, in Gaul.  This battle is said to be the largest ever between Roman forces.

Scenario source: Peter Sides Ancient Historical Battles Volume 1.

Link(s):

Wikipedia: https://en.wikipedia.org/wiki/Battle_of_Lugdunum

Command and Colors scenario: https://www.commandsandcolors.net/ancients/index.php?option=com_content&view=article&id=733

Troops

Romans (Severus)

2 LDR, 3 HC, 2 HI, 1 LI, 1 LA.

Breakpoint: 2.5

Rebels (Albinus)

1 LDR, 2 HC, 3 HI, 1 LI, 1 LA, 1 CP.

Breakpoint: 2.5

Scenario

Map: Open except for a patch of rough ground 1BW wide and extending 3BW from Severus's left flank in front of his forces (concealed traps).

Special rules: None.

Deployment

Romans (Severus):

HC LI HI HI* LA HC* HC

Rebels (Albinus):

HC* LA HI HI HI LI HC.  Camp is behind left flank on the table edge.

Deployment, Severus on the left

Severus needs to win on his right flank and make sure he does not lose in the centre, or at least the centre needs to hang on long enough so the right flank can be turned.

Severus left flank is weak as moving through the rough round will disorder the cavalry.

Game

Severus advances the right and centre.  The rebels advance their centre and left flank in response.  The archers on the flank forces Severus and his personal heavy cavalry back. 

Light archers forces Severus back

The other Severan heavy cavalry charges but is disordered.  Severus and his cavalry charge the archers.  The archers disorder the cavalry, the cavalry continues their charge and disorder the archers

Right flank, part two - the melee

On the left flank, the Severan light infantry move into the rough.  In response the Rebel light infantry moves to just outside of range.  These are both in place to support their main battle line and threaten the enemy.

Light infantry standoff

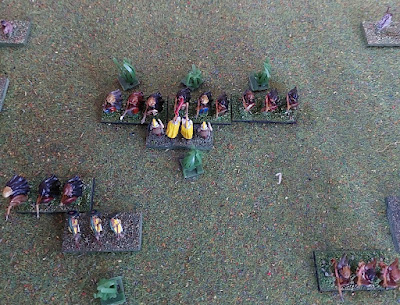
On the Severan right flank, the HC manages to win the equal melee and Severus destroys the archers.  The camp is wide open!

The right flank is open and the way to the camp is clear

The Rebel battleline advances and clashes with the Severan troops.  Disorders mostly all round (the Severan side coming out slightly worse off. 

Ancient battlelines clash

The next round of melee one of the rebel legions is routed.

The rebels lose a legion

And the next round has Severus lose a logion and their archers to the Rebels.  A lone elite legion is left in the centre.

Severan centre not looking good

However, Severus and the heavy cavalry have been advancing on the camp and finally manage to attack it.  They manage to break in and begin looting.

At the camp gates

This means the rebels reach their breakpoint and flee.  Severus wins!

Verdict

While this was one of the largest numerical roman battles ever, my scaling it down probably did not do it justice.  But it was fun and quick to play.  It was also quite close.  The rebels could have won if they had managed to destroy a heavy cavalry (it was a 50/50 chance either way for the heavy cavalry clash) and routed the last legion in the centre. 

An aside on rules

I kept tweaking my Ancient Battlelines Clash rules and about a year ago was over doing so. I went back and updated When Warriors Collide that were similar but for grids and also using a CRT based on Bill Banks Ancients.  I recently moved them from a CRT to 1d6 combat but the combat just seemed a bit too complex with a build-up of modifiers.   I then went down a rabbit hole of looking at the Pz8 based ancient rules as I was looking at using the Pz8 as a basis for some skirmish rules.   And then looking at doing 3x3 grid ancient rules.  And then realised I could just retro fit a little of When Warriors Collide into Ancient Battlelines Clash and I could be satisfied and continue to play battles on the 40cmx40cm table.  And I have been for a week so far, a good sign. Lol

Monday, 18 November 2024

Battle of Issus 194AD - battle report using When Warriors Collide

Introduction

This is game 67 in play testing my ancient rules by replaying historical battles.  I am using another set of my rules, When Warriors Collide (WWC).  I am in the process of writing up the rules but the current draft is here:  When Warriors Collide V3.0e.  I am play testing rules by replaying all the Peter Sides scenarios from his Historical Battles books, and some others I find along the way.  WWC is designed to finish in around 30 minutes on a 2’x2’ or smaller table; I am currently using a 40cmx40cm table.

Battle of Issus, 194 AD

Septimus Severus is declared Emperor, as was Niger as governor of Syria. Severus attacks Niger to defeat his rival.

Scenario source: Peter Sides Ancient Historical Battles Volume 1.

Link(s):

Wikipedia: https://en.wikipedia.org/wiki/Battle_of_Issus_(194)

Troops

Romans (Severus)

2 LDR, 3 HC, 2 HI, 2 MI.

Breakpoint: 3.5

Rebels (Niger)

1 LDR, 2 HC, 2 HI, 2 LA.

Breakpoint: 2

Scenario

Map is a hill covering from centre to Niger's baseline, tapering to corner on right flank. Cliff on Niger left flank.  Large wood on Severus left flank half on hill, half not.  About 2.5BW (Base widths) from edges and 2BW wide.

Special rules: None.

Deployment

Romans (Severus):


HC HC* (lined up with gap between side and woods). HC MI HI* HI MI (all facing hill)

*=leader

Rebels (Niger):


On hill LA HI HI LA (aligned with Severus).  One each HC behind each LA. Left HC with *

*=leader

Game

At start, Severus on the left

Severus’s main battleline fails to move in a timely manner (rolled a 1 to move twice!).  But the left flank cavalry starts the flanking manoeuvre.

Niger responds by moving his right cavalry to protect the flank

Severus left flank

Finally the Severus main battleline moves while the left flank cavalry has managed to engage the defending cavalry.  Due to the delay in the main battleline moving, Niger and his heavy cavalry move to stop the flanking manoeuvre. A terrible melee sees Severus’s cavalry disordered (rolled a 1).  The next turn the cavalry managed to rout Severus. Not going the way Severus hoped.

Behind the woods – Severus’s cavalry on the left, opposing calvary on the right.


Severus is routed.

On the main battleline, the Rebel’s light archers fire but all it does is make one Auxilia advance.  Subsequently the archers are charged by the auxilia, the light archers are dirodered but the auxilia also contacted a rebel legion that routs the auxilia.  On the right flank the auxila and light archer clash and both disordered. 

Archery on the battleline


Auxilia gone

The battleline clashes and the elite Severus legion does badly and is disordered whiel the opposing legions is not.  The remaining Severus cavalry charges into range of the light archers that manage to disorder the cavalry.

View of the main battleline

Niger’s cavalry charges the remaining Severus cavalry and disorders them. The heavy cavalry is now flanked by the rebel cavalry as well as fighting to the front and it routed.

The remaining cavalry at the rear is surrounded by rebels.  And routs.

The Severus side has exceeded their army breakpoint (losing Severus does not help) and so the rebels have won.

End

Note: I did play out one more turn but the Severus’ side lost another heavy cavalry to archery fire and a legion.  For no loss to the rebels.

Verdict

I thought that would be a tough but relatively easy victory to Severus.  Severus rolled so badly and the rebels rolling so well (never seen so many 1s or 6s at just the right time for a one-two rout).  A very enjoyable game to watch unfold.  Historically the flank attack worked but the delay in the main battleline clash meant Niger could afford to send his cavalry to the other flank for support.  Closer than expected.  Could easily have gone to Severus will different dice rolls.

Thursday, 31 October 2024

Operation Jupiter 29 – Alone on the Hill. 20mm WW2 battle report.

Introduction

This is game 29 in replaying the scenarios from the Briton Publishers Operation Jupiter skirmish scenario book.   Links to previous games are on this blog page.

Rules used

I am using my WW2 rules that I had for a 3x4 grid that I then made a gridless version for 2’x2’ games.  These games are larger forces on a bigger table (half a table tennis table or 4x5’x5’) so I have modified them a little so now added a few things from my older rules - unit card activation and now each figures is not suppressed but a section can be if fired on by enough dice.  They are very similar to rule I used 10 years ago.

Scenario

The Germans must advance and take over 50% of the British foxholes that are the orchard defence.

Troops

British

British

1xCompany HQ (4 figures)

1xPlatoon (10 figures)

1xVickers MMG

1xPIAT team

2x6pdr AT guns

2 25pdr missions (good availability)

Germans

Germans

1xKompanie HQ (5 figures)

3xZug (8 figures each)

2xPanzerIVG

1x80cm mortar battery (average availability)

Deployment

Deployment

The British setup in a broad line across the centre hedgeline in the orchard.  One section is a little forward and the MMG, 6pdr and CHQ is in the centre.

Game

Germans on the table

Germans all move on.  Aim is to reach the hedgeline and then work out best tactic from there.  The two tanks to hang back.  The Germans continue to advance although failing to spot units.  Finally the centre Zug spots the forward British section.  They open fire but fail to inflict a single hit.  The British are holding their fire, and the radio operator just cannot get through!

Germans at the hedgeline

The next turn sees carnage.  The Germans manage to get one up on the British – the Zugs cross the hedgeline, successfully spot the British in the foxholes and KO 3 figures and suppress a section.  The Kompanie CO calls in the mortars and suppresses the Vickers MG.  The British radio still has no success (in the actual battle, the radio operator was very successful and called down accurate fire).

The Germans advance and fire

The British do manage to inflict hits on the 2nd Zug and is has received 50% casualties, check morale and routs.

2nd Zug routing

The German 1st Zug charge the forward British section (now only 1/3 of its starting strength).  The British lose, but do take one of the Germans with them.

1st Zug charging the lone defender

The 1st Zug then charges the Vickers MMG.  Surprisingly, the British inflict a hit and the Germans do not.  However, the Vickers is suppressed so retreats and abandons the gun.

1st Zug Vs the Vickers MG crew

The 3rd Zug charges the 6pdr and the crew put up a valiant fight but rout, taking one German with them.

3rd Zug Vs the 6pdr crew

The Germans have taken 4 of the foxholes in the time (it is turn 6!) and are victorious.

End

Verdict

The British failed to call in the artillery throughout the game (required a 4+ to call and hit and had 6 chances to do so).  The game would have been a lot closer if they had got in a couple of artillery requests.  The Germans would have had some suppressions (that would have made them stop for aturn or two) and maybe even a Zug rout.  Either way, they would have had less troops to fight and may not have made it in the 6 turn limit.  Although in that case the Germans would have thrown in the tanks that were barely used in this game.  It is only one play but it felt balanced, just unlucky for the British.

This is the last of the four games that I played over a weekend in late September.  I believe I have only three more Operation Jupiter games to play out of the 30 in the scenario book.  Maybe over Christmas. 

Sunday, 20 October 2024

Operation Jupiter 28 – Edge of the Plateau. 20mm WW2 battle report.

Introduction

This is game 28 in replaying the scenarios from the Briton Publishers Operation Jupiter skirmish scenario book.   Links to previous games are on this blog page.

Rules used

I am using my WW2 rules that I had for a 3x4 grid that I then made a gridless version for 2’x2’ games.  These games are larger forces on a bigger table (half a table tennis table or 4x5’x5’) so I have modified them a little so now added a few things from my older rules - unit card activation and now each figures is not suppressed but a section can be if fired on by enough dice.  They are very similar to rule I used 10 years ago.

Scenario

This is a tank Vs tank game.  Each side must knockout every opposing tank to win, or force the other side to leave. There is no turn limit.
Troops

British

Brits

1xFirefly (veteran crew)

4xShermans

Germans

Germans

1xStugIIIG

2xPanzerIV

1xPanther

1xMarderIII

Note the MarderIII is substituting for a sdkfz251/22 as I don’t have a model for the latter.

Deployment

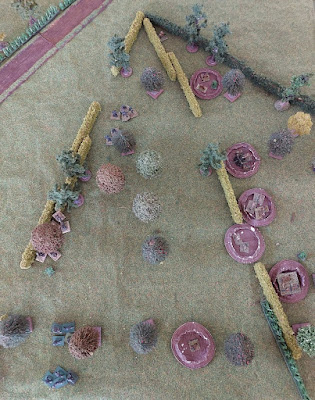
Battlefield

I am activating using one card per vehicle.

My money is on the Germans as they have the better guns.  I did think this would not be too exciting  - my rules for tanks are fairly simple: 1d6 to hit with a few modifiers and 1d6 to penetrate (using attacker gun and defender armour modifiers).  Miss or damage (2xdamage=KO) or KO.  But it was quite a tense game after all, mainly as there was terrain to navigate around.

Game

The first few turns were spent getting the vehicles on the board. The Firefly hanging back as it has an excellent gun for long range fire.

The lead PzIV gets to the hedge corner, spots the Firefly and fires.  And misses.  Firefly fires back and also misses.

Overview

More moving.  The Shermans and Stug in the orchard fail to spot each other (visibility limited to 18” if not firing and need a 5+ at that range).

A suppressed PanzerIV manages to damage the Firefly.  Not good news for the British.

Damaged Firefly

Even though damaged, the Firefly gets a shot off at the Panzer IV and destroys it.  The first KO in the game.

PanzerIV destroyed

More movement and some firing at the Firefly.  A Sherman damages the Marder.

Tanks in the orchard

The Firefly damages the Panther.  The Panther returns fire but for no effect.  The nearby PanzerIV also fires for no effect.

Damaged Panther

The Marder is then destroyed.

Marder KO

Finally, the Stug damages a Sherman.

The Stug damages a Sherman

The Firefly fires at the Panther again and the Panther is destroyed.  The Germans are 3 vehicles down and decide to retire.


Verdict

As I said at the beginning, I did think it would be a dull game.  Turns out it wasn’t and I enjoyed it a lot more than I thought I was going to do.

Monday, 14 October 2024

Operation Jupiter 27 – Regain the Point. 20mm WW2 battle report.

Introduction

This is game 27 in replaying the scenarios from the Briton Publishers Operation Jupiter skirmish scenario book.   Links to previous games are on this blog page.

Rules used

I am using my WW2 rules that I had for a 3x4 grid that I then made a gridless version for 2’x2’ games.  These games are larger forces on a bigger table (half a table tennis table or 4x5’x5’) so I have modified them a little so now added a few things from my older rules - unit card activation and now each figures is not suppressed but a section can be if fired on by enough dice.  They are very similar to rule I used 10 years ago.

Scenario

The Germans have 6 turns to recapture the orchard from the British.

 Troops

British

British (already deployed)

1xCompany HQ (4 figures)

1xPlatoon (10 figures)

1xPIAT team

2x17pdr AT guns

2 25pdr missions (average availability)

Germans

Germans

1xKompanie HQ (7 figures)

2xZuz (10 figures each)

3xTiger 1 (veterans)

 Deployment

The British deploy the 17pdrs to the rear but lined up on the gaps in the hedgerow.  The platoon is against the hedgerows with the CHQ as a reserve.  The PIAT team is at the corner edge but not sure how useful it will be.

The German entry viewpoint.  Note the gaps in the hedgerows.

Game

6 turns is not long.  The Germans will need to bring on everything fast – One Zug first, then send the Tigers through the gaps in the hedgerows.

Tigers come on, as does the first Zug. Then the 2nd Zug and lastly the Kompanie HQ.

Germans are all on.

The British platoon (well, the two sections in range) fires at the lead Gruppe and two figures are KO. (now end of turn 2)

A solitary figure

The German 1st Zug fire back but for no effect, the 2nd Zug moves to the hedgeline and manages to rout a British figure.  But the British first section fires back again and 3 more German figures are gone.

A British section is down a figure and suppressed

It is getting a little attrition-like with both static on the hedgeline and exchanging fire.  The Germans manage to inflict two more casualties.

The foxholes have less troops than at the start

The British first section fires with 6 dice.  Need a 5 or a 6 to KO a figure, they do not hit a thing.  The German return fire and KO 2 British figures.  The Tiger tanks move to the hedgeline to help the infantry.

Tigers on the move

The 17pdrs have been waiting for this and open up, damaging a Tiger (can’t move).

The 17pdrs are lined up for this though

It is now end of turn 4, 2 turns to go.

The British CO successfully calls in the 25pdrs on the centre hedgeline.  Only one casualty, but the 2nd Zug is suppressed.  The 17pdrs fire again and the center Tiger is kaput (very lucky)!

One Tiger down.

The British 1st section is under fire and retreats.  The German 1st Zug and Kompanie HQ infantry advances deeper into the orchard.

Germans advancing

The German 2nd Zug attempts to rally but some figures decide to rout, causing 2 morale checks and the 2nd Zug pulls back a full move.

Retreating 2nd Zug

The British 1st section fails a morale check and retreats off the table.  The Germans win!  It was the 6th turn as well.

Final positions

Verdict

Another loss to the British.  Another great and also close game – it could have easily gone either way.  And I remembered the British artillery support that was used to good effect.