Saturday, 27 May 2023

Battle of Philippi 42BC using Ancients Battlelines Clash

Introduction

This is game 62 in play testing my ancient rules by replaying historical battles.  They are definitely a work in progress as I again vacillate between mechanisms.  These rules now require no markers, are based of a gridded version I did previously but the movement rules owe a lot to Phil Sabin’s Phalanx game.  Games are designed to be played solo on a 50cmx30cm table and finish in under 30 minutes.   Note the 50cmx30cm – I am playing on a 60cmx60cm.  The depth does not matter greatly as just deploying the opposing sides closer to one another.  They are still at their core Ancient Battlelines Clash so still calling them ABC version 6.


Interlude

I have been soul searching for a while on why I am actually using my own rules to play these games.  Originally it was to create some rules that were fast and solo friendly for a small table and chronologically playing historical battles was a good way to test them.  But more recently it is the reading of and the playing of the historical battle that if more important.  I still will be using my own rules as I want something fast and very solo friendly but these historical battles will be less about the testing of the rules (although they do get tested by playing the battle scenario) and more about actually playing the battle.  So I expect the rules will continue to change, they already have gone through three major rewrites anyway!

Between this battle (done back in April 2022) and this one in September I have played about a dozen games with my 6mm forces on a 12x12 gridded table. These are using a mashup of Phil Sabin’s Phalanx for movement and my older rules for the reactions and results. 


Post script

This is the last outing with a variation of my Ancient Battles Clash rules.  I have been tweaking them for 12 years and after several hundred games with them I have moved to my own rules based on Phil Sabin’s Phalanx for movement and 1d6 with some simple results for combat.  The next replay is with Phalanx and then after that is the mashup. 


Battle of Philippi 42BC

The last battle in the Wars of the Second Triumvirate between the forces of Mark Antony and Octavian.

 Wikipedia entry: https://en.wikipedia.org/wiki/Battle_of_Philippi


Troops

Roman Second Triumvirate

Right Wing (Octavian)

3 HI, Legions

1 MC, Cavalry

1 Camp

1 Leader


Left wing (Antony)

5 HI, Legions

1 MC, Cavalry

1 leader

Breakpoint: 11


Roman Liberators

Left wing (Cassius)

4 HI, Legions

1 MC, Cavalry

1 Camp

1 Leader


 Right wing (Brutus)

4 HI, Legions

1 MC, Cavalry

1 Camp

1 Leader


Breakpoint: 11


 Scenario changes

Reduced the forces by about 80% and flipped the battle map (the Marsh on the left is now on the right).


Deployment

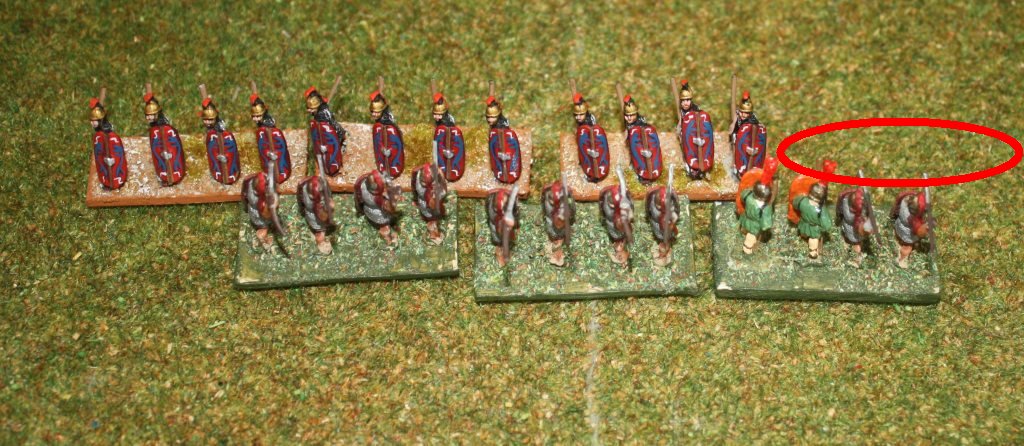
Deployment

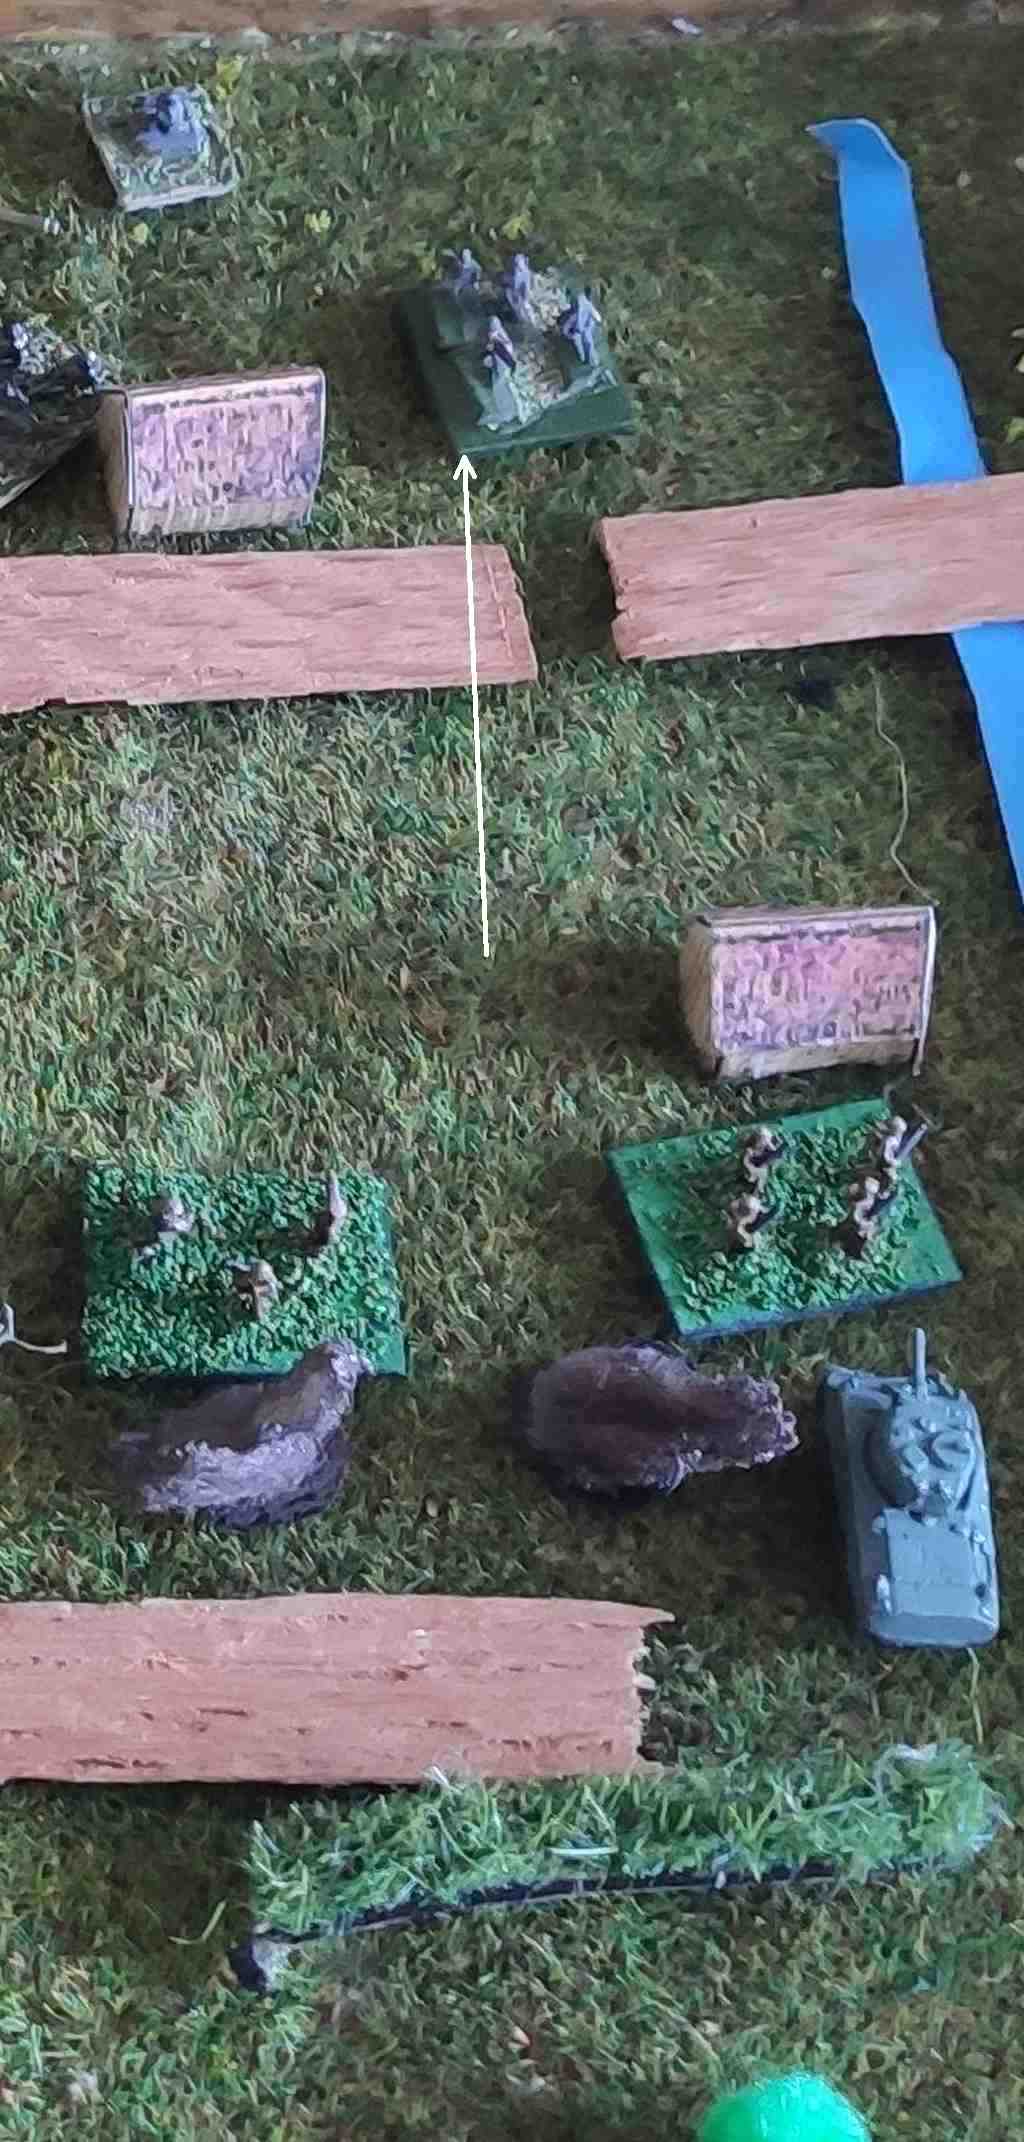
Quite a different deployment to the usual battle.  There are two wings facing one another but also the flanking force of Antony’s (1 HI in my scenario on top of the hill on the left) is facing most of Cassius forces.


Game

Note: originally I had the narrative going back and forth between each flank.  As each flank was a distinct battle I have split the game report into Antony Vs Cassius and Octavian Vs Brutus.


Antony Vs Cassius

Antony (left) Vs Cassius (right). Antony's flanking force is on the hill


Antony advances and engages with Cassius forces on the defensive line but all locked in melee.

Antony and Cassius’s forces engage


Cassius rearguard forces advance up the hill and are locked in melee with Antony’s flank force.

Antony’s flank force is engaged by Cassius’s forces

Antony Vs Cassius sees Antony’s cavalry flank attack a legion that is destroyed, the cavalry pursue and being looting Cassius’s camp.

Cavalry helps destroy a legion and then loots the camp

Cassius routs Antony’s flanking force.

Antony flanking force is no more

The Antony holding force at the defense line is routed and some units loot the camp, others are going around.

Looting the camp


Octavian Vs Brutus

Octavian (left) Vs Brutus (right)


Octavian advances.  Brutus also advances legions only into Octavian’s legions, also now all locked in melee.  Did not charge the cavalry as that is a straight 1:1 and no advantage there, unlike the legions that is 4 legions to 3.

Brutus engages with Octavian’s legions

Octavian manages to rout an opposing legion

Routed a Brutus legion


Final moves

Antony manages to rout the cavalry unit and Octavian routs another legion.  This results in the combined Cassius and Brutus army reaching their breakpoint.

Antony routs Cassius’s cavalry


Octavian manages to rout another of Brutus’s legions


Rule changes

None.


Verdict

I should have done them as two distinct games on the same table as there is no interaction between the two combats.  It then could have had one side win while the other side loses.  Instead it was overall losses that saw the Liberators lose.  It was a very close game and could have gone either way.


This the last game played with Ancients Battlelines Clash.  They have been fun but I am have currently moved to 8x8 grids and a mashup of Phil Sabin and 1d6  combat.  So still playtesting via the Peter Sides’ scenarios, but with different rules!  They actually have similar results but less complex and still reflecting my view of ancient battles.

Tuesday, 9 May 2023

Battle of Munda 45BC using Ancients Battlelines Clash

Introduction

This is game 61 in play testing my ancient rules by replaying historical battles.  They are definitely a work in progress as I continue to vacillate between mechanisms.  At least for this game I used the same rules as game 59 and game60!  Games are designed to be played solo on a 60cmx60cm table and finish in under 30 minutes.  They are still at their core Ancient Battlelines Clash so are calling them ABC version 6.

This is the 2nd last game I played using rules loosely based on Ancients Battlelines Clash.  It is posted a year after I played it.


Battle of Munda 45BC

The final battle of Caesar against the Optimates takes place in Spain.

 Wikipedia entry:

https://en.wikipedia.org/wiki/Battle_of_Munda


Troops

Roman

Romans


4 HI (swords) elite

3 MC

2 LI

Breakpoint: 8


Latienus (Optimates)

Latienus’s troops


5 HI (swords)

2 MC poor

2 LI

Breakpoint: 8


Scenario changes

Reduced the number of units, and also added 2 Light infantry to Caesar’s side.


Deployment

Romans on the left, Latienus on the right


Game

The Caesarean side big chance is the left flank and equal chance in the centre.  Will advance the left flank and centre into attack.  They do this.  The Caesarean side generally comes off worse –Latienus’s forces have a first turn advantage of being uphill.

Clash in the centre (from the Optimates point of view)

The Caesarean left flank charge in.  Latienus’s LI routs, as does Latienus’s cavalry.

Caesarean left flank in combat


The Caesareans loses a legionary unit.  The left Caesarean cavalry charges a Latienus legion unit in the flank and it is destroyed.

Caesarean cavalry charges into the flank of the opposing battleline

Another two rounds of melee in the centre and the rebels are holding on, just.  But then they quickly lose two legionary units and their army flees the field.

End game


Rule changes

None!


Verdict

Another short game that was fun.  I am still toying with rules with no disorder markers and grids so will see whether I stick with these or the gridded rules. I do find they are similar to play and not hard to move from my own gridded rules to non-gridded rules, and vice versa.

Tuesday, 2 May 2023

Battle of Thapsus 46BC using Ancients Battlelines Clash

Introduction

This is game 60 in play testing my ancient rules by replaying historical battles.  They are definitely a work in progress as I continue to vacillate between mechanisms.  At least for this game I used the same rules as game 59!  Games are designed to be played solo on a 60cmx60cm table and finish in under 30 minutes.  They are still at their core Ancient Battlelines Clash so are calling them ABC version 6.

This is the 3rd last game I played using rules loosely based on Ancients Battlelines Clash.  It is posted a year after I played it.


Battle of Thapsus 46BC

In Tunisia, Caesar engages the remaining Optimates forces gathered against him.

Some internet links of interest:

https://en.wikipedia.org/wiki/Battle_of_Thapsus

https://prufrockian-gleanings.blogspot.com/2017/11/thapsus-refight.html

https://www.commandsandcolors.net/ancients/maps/78-caesars-civil-war-49-45-bc/352-318-thapsus-46-bc.html


Troops

Roman (Caesar)

Caesarean Romans


3 HI (swords) elite

4 HI (swords)

2 LI, elite (elite to represent anti-elephant tactics)

2 MC elite

1 Leader

Breakpoint: 12


Roman (Pompey)

Pompeian Romans

5 HI (swords)

5 HI (swords), poor

1 Medium infantry

2 LI

4 MC

2 LC

2 Elephants, poor

1 poor leader

Breakpoint: 20


Scenario changes

Reduced the number of units to fit into a 2’x2’ space.


Deployment

Deployment


Game

Caesar advances just the flanks.  The Pompeian right flank falls to move, the centre advances (best chance to win in the infantry clash) and the left flank enters into combat with the Caesar’s right flank

First blood on the Caesarean right flank

The Pompeian light infantry manage to disorder Caesar and his cavalry and then retire from the field.  The anti-elephant light infantry inflict a disorder on the elephant before being destroyed.  The Caesarean cohorts behind advance and rout the elephant that depletes the Pompeian cavalry behind them.

Caesarean left flank engages

On the left flank, Caesar’s units did not do as well – both sides Light infantry did nothing before routing, but the Caesarean cohorts did deplete the elephant.  In the next round of melee the elephant routs. The cohorts pursue straight into the Pompeian cavalry.  The Pompeian cavalry inflict 2 depletions on the cohorts (heavy infantry require 3 depletions before routing, most other units are 2)

Caesar’s flank cohorts pursue into the opposing cavalry but take a lot of damage

Back on Caesar’s right flank, Caesar and the cavalry and cohorts charge into the enemy cavalry. One Pompeian cavalry is routed.  This is the same on the Caesarean left flank (one Pompeian cavalry unit is routed.).  But in a later melee the Caesarean cavalry is routed.

Caesar’s left flank

Finally the Pompeian battleline clashes in the Caesarean one.  The Caesarean line has not moved on the assumption that they will not come away as well from the clash.  So they have waited for the Pompeian lines to engage.  Disorders here and there.

View of the main battleline from Caesar’s side

On the Caesarean right flank Caesar’s forces have defeated the opposition.

Caesarean right flank is now Caesar’s.


Overview

On Caesar’s left flank the Caesarean forces are overwhelmed and that flank belongs to Pompey.

It is now a race to see which flanking cavalry makes it first to the battleline to make a difference to the combats going on there.

The flank cavalry form each side race to the centre

Caesar makes it first.

Caesar in the rear of the Pompeian battleline

He routs one of them in contact (can only inflict damage on one unit per melee)

The Pompeians then get their chance to melee and roll really badly.  Pompey is wounded as his unit routs. 

The battered battleline

This is enough for the Pompeian side to reach their breakpoint and flee the field.  Caesar’s side was only one legion away from their breakpoint as well.  It was a close game!

End game

Rule changes

None.


Verdict

My rules have survived playing twice with no changes. I do enjoy them.  They are a little different but I like them.  Admittedly only two games but hey, it is keeping my interest!

I have been leaning on the last few years to try and minimise the units on the table.  This game had a lot of units, mainly as I could not see how to do the battle justice without deploying so many different units into the battlelines.  Looking ahead to the next few battles Thapsus seems to be an exception and I can get back to much smaller battles. 

Tuesday, 25 April 2023

Battle of Pharsalus 48BC using When Warriors Collide

 Introduction

This is game 59 in play testing my ancient rules by replaying historical battles.  I have gone back to free form movement on a 60cmx60cm table, compared to a 12x12 grid.  No other changes to the rules other than now using a ruler.  I don’t know whether I will go back to gridded for ancients or not.  Who knows?  This is the third time I have gone to gridded and back out again. (Spoiler: I did for Game 63 onwards)

Update: After the first melee, I changed the results table for melee and missile and added back in disorder (hits) and some reactive moves.  So it reintroduces some of my older mechanisms back in but the results table is cleaner (it looked more like DBA with each unit type having their own results – now it is a single table with limited unit types referenced.   I could not help myself but adding in reactions for solo play.

This is the 4th last game I played using rules loosely based on Ancients Battlelines Clash.  It is posted a year after I played it. 


Battle of Pharsalus

In the midst of the Roman civil war, the two opposing generals face off in Greece.


Troops

Roman (Caesar)

Caesarean Roman line


4 HI (swords) elite

1 HI (swords) (represents the cohorts with the cavalry on the right flank)

2 LI

1 MC elite

1 Elite Leader

1 leader

Breakpoint: 10


Roman (Pompey)

Pompeian Roman line


8 HI (swords)

2 LI

4 MC

1 poor leader

Breakpoint: 13


Scenario changes

Mainly reduced the number of bases to fit onto a small table.  I used a normal HI (swords) to represent the 3000 (or thereabouts) legionaries Caesar had placed with the cavalry.


Deployment

Deployment, Caesar on the left, Pompey on the right


Game

End of first move of both sides see them closing quickly.

The battlelines close in.

Caesar, the cohorts and his cavalry charge the light infantry and rout them.  They then pursue into the Pompeian cavalry.  A few depletions.

Caesar in melee with the opposing cavalry


Another round of melee sees a Pompeian cavalry routed, and the accompanying Caesarean light infantry retire.

The opposing Roman legions meet.  Caesar’s legions roll badly, but then so does Pompey’s and it evens out.  Caesar’s legions are elite so may hold out longer.  The cavalry melee continues.

Legions melee in the centre

Two Pompeian legion is lost but the Caesarean legions are being depleted.    On the cavalry melee, two Pompeian cavalry are routed.  Caesar pursues one of them.  The remaining Pompeian cavalry unit wheels and charges the reduced legion in the flank but both remain in melee.

Cavalry flank now has less of Pompey’s units.

Another legion of Pompey’s lost in the centre.  The cavalry on the flank of Caesar’s heavy infantry rolls badly and routs.

Pompey’s side is broken.

This breaks the army of Pompey and Caesar has won.   


Rule changes

I updated the movement rules to work without grids.  I added in some reaction moves when fired at or an enemy moves into a Zone of Control.   While most units can take two hits, heavy infantry can take three.  I have wanted to do this for a long time and it really works here showing the grind of heavy infantry melees.


Verdict

I really liked the way the game played out and the interactions.  I did play about a dozen games previous to this game with the 12x12 grid and no “hits” (mostly with 6mm figures), 

Wednesday, 19 April 2023

Holiday games – battle reports for WW2 and Ancients and some SF RPG

Introduction

It seems my gaming mojo is increasing.  We were going to the beach at Cooloongatta for a family 5 day holiday; so I thought why not take the three portable games I have recently been interesting in playing?

I managed to get in some Ancient games, a WW2 game and some SF RPG action.  There is a detailed report for each.  Some of the photos are a little poor as I was using my phone and I have not a lot of practice of using my phone in documenting battle in progress. 

Portability

Into a document box (40cmx30cmx7cm) I packed a grassy A4 page for the WW2 game, an 8x8 small gridded timber square (I will use the plain reverse side for the SF stuff), three boxes containing the 6mm WW2, 6mm ancients and some 20mm railway figures that I use for my SF RPG games.  I also packed some ww2 terrain and a one page QRS for each game.

Unopened - picked this up second hand for a few dollars and put in the centre veneer feature to cover up a crack


Opening the box.  WW2 terrain in the plastic packet on the left (under it is 6mm ww2 forces), top is 6mm ancients box, lower is 20mm railway figures.  At the far let next to the box are the A4 QRSs.


Blurry but this is with two figure boxes removed - on the left  is the 6mm ww2 box that was under the terrain packet, some large (Society of Ancients) dice (each figure box also has smaller dice in them as well).   The a4 grassy page and the 8x8 gridded timber square also shown.


Ancients

I have modified Phil Sabin’s Phalanx to work on an 8x8 square grid and with about 6-8 units a side (rather than the standard 10). The number of commands is reduced by 1.  I start play with the units deployed for battle – I am more interested in how the battle played out than the deployment from camp as per Phalanx.  On holidays, I decided to play Marathon as it was easy to setup.  I managed to play it 6 times on one day as each game was only about 5-10 minutes.  This was because the Athenian breakpoint was after the loss of 2 units and this happened a lot. After playing the game I considered should I add a unit to the Athenian side?  It was only when I finished for the day I remembered the Defence Bonus for phalanxes if being attacked from only non-phalanx units.   I played two games the next day with the correct Defence Bonus and both were nail–biters.

And then I played the Battle of Hydaspes just to do something different.  I do a full battle report for it below.

Battle of Marathon

Athenians

2 Hoplites

3 Hoplites – poor

Persians

1 Heavy Infantry (Archers)

2 Heavy Infantry –poor (Archers)

4 Medium infantry (Archers)

Notes:

Poor units subtract one from the Fortunes of War die.

Heavy Infantry attacking Medium Infantry get an Attack Bonus.

Archers being attacked from the flank give the attackers an Attack bonus.

Selection of Marathon game photos

A selection of photos over the 6 or so games.

Marathon setup


Persians (top) attccking a hoplite (with the green marker)


Hoplites attacking some Sparabara (with green marker)


Hoplites successfully routed the Immortals (where green marker is)


General (unit with cavalry) and others have routed a hoplite (where green marker is)

Bonus Battle – Battle of Hydaspes

I thought I would give the Battle of Hydaspes a go as well.  I know the units fairly well as it is a favourite battle of mine.

Macedonian

3 Phalangites

1 Heavy Cavalry – good with general

1 Heavy Cavalry

1 Light infantry

1 Light Cavalry

3 Command points

Indian

2 Elephants, one with general

1 Chariot

3 Medium Infantry (Archers)

1 Medium Cavalry

Note:

Medium Cavalry being attacked by heavier cavalry give the Attackers an Attack bonus

2 Command points


Game

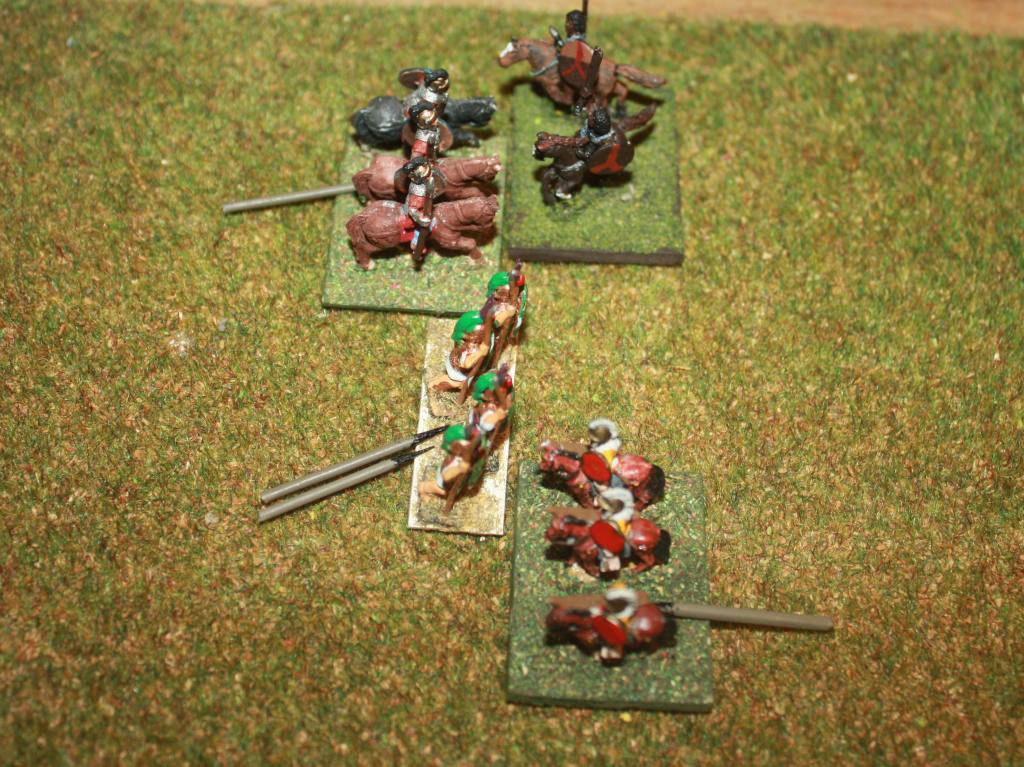
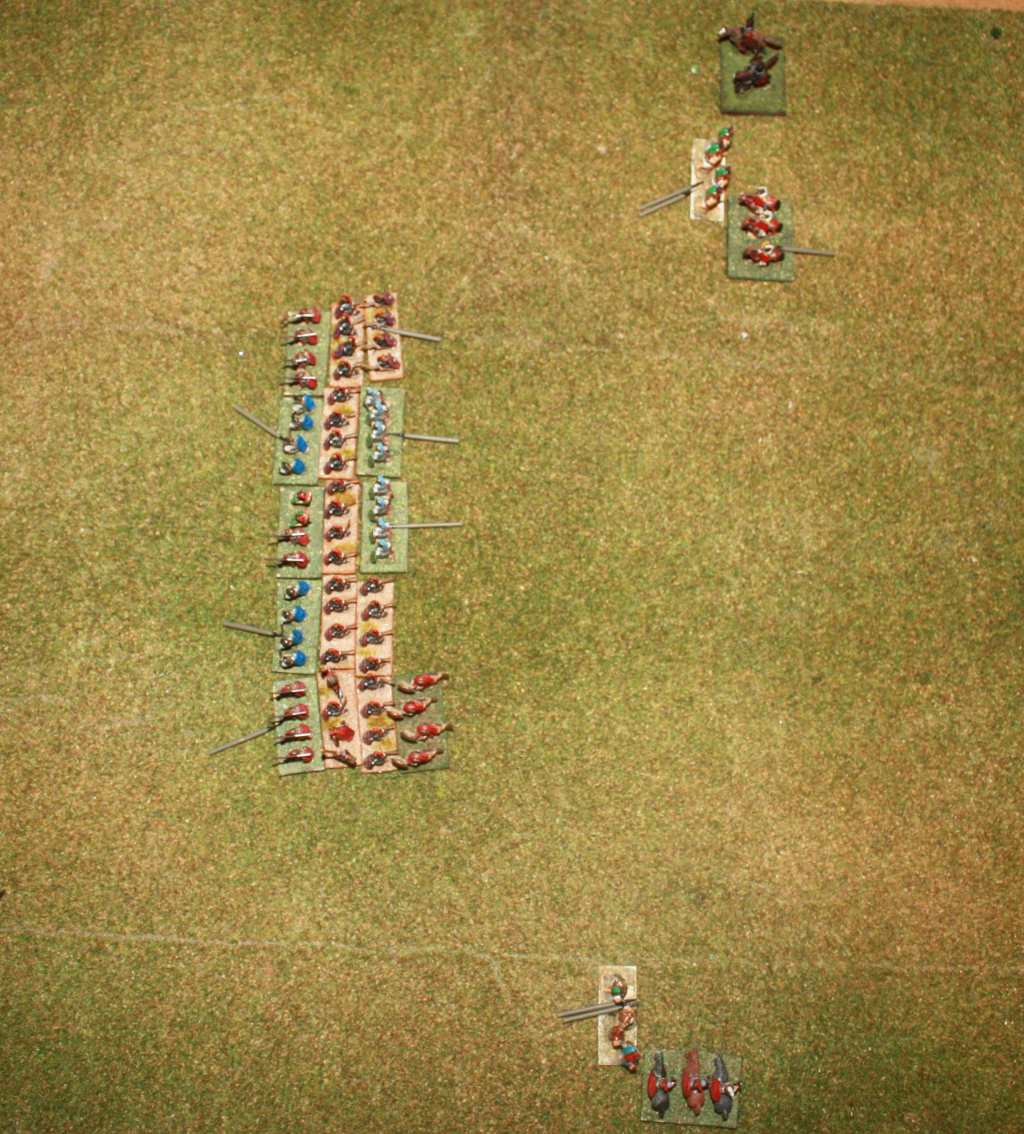
The forces deployed.

Deployment.  Porus at the bottom, Alexander at the top.

The Indian Cavalry charges into the Greek Heavy Cavalry.

Right flank cavalry charge

With the assistance of some Indian infantry, the Indian cavalry routs the Heavy cavalry

Macedonian cavalry routed

The two elephants, with Porus, charge into a phalangite unit and it is routed

Macedonians lose a pike unit in the centre.

On the Macedonian left flank, an Indian heavy infantry is routed by Pikes and Peltasts, but the Indian Cavalry is positioned on the flank.

Indian cavalry flanks a light infantry

And it is gone.

In the centre, two Pike units are ready to inflict some damage.

Pikes lined up against the Elephants and Archers


And the archers are routed.

On the Macedonian right flank, finally Alexander and his Companions charge into the enemy Chariots.

Companions facing the Indian chariots

The Indians have lost 3 units and are broken. Macedonians win!

And the Chariots are routed!  Position at end game.

Thoughts on Phalanx

I am not sure how long I will keep using Phalanx but it is fun to play.  I really like how it works and shows the challenges faced by each commander in the historical battles. But it is so fast!  I may tire of it soon; it provides interesting and challenging games but can see I may want something that has a bit more chaos and so more solo friendly.  I am already working on a version with more dice rolling J


WW2

I orginally did setup this scenario to play with other rules and not on a grid.  Bt never played it. I chose this to play on my A4 4x3 grid as it seemed it would easily translate to the small grid.  I looked over my ww2 4x3 grid rules from a year ago and could see no changes required.

The scenario is A Bridge too Late from the web magazine Frontline Observer.  The scenario is still available at the Wayback Machine.

Scenario

A small British force have managed to take a bridge across a canal into a town that the Germans are defending.  British reinforcements are coming from another side of the town.  The Germans win if they can take the bridge back and prevent the British from taking it back for as long as possible. (British minor victory if hold the bridge and 50% casualties inflicted by turn 8, major victory if hold the bridge until turn 11). 

I modified the forces slightly to match what I had brought with me.

German

5 sections with 1 platoon leader

2 Panzer IVG

Breakpoint: 4 lost.

British

The British force

1 section (bridge defenders)

Reinforcements (may enter turn 2 onwards):

    4 sections with 1 platoon leader

    2 Sherman M4

Breakpoint: 4 lost.

Terrain grid (4x3)

Buildings     Buildings     Buildings    <river+bridge> Light cover

Buildings     Light cover Building      <river>              Light cover

Light cover  None          Light cover <river>               Light cover

Game

Deployment sees the Germans focus on the rear buildings to protect the bridge.  An advance Gruppe is in the centre to stall a British advance that is likely to focus on coming up the right side of the village.  A single British section holds the bridge on the other side of the river.

Deployment.  British will enter from the bottom of the image.  One section is the bridge defenders (top right)


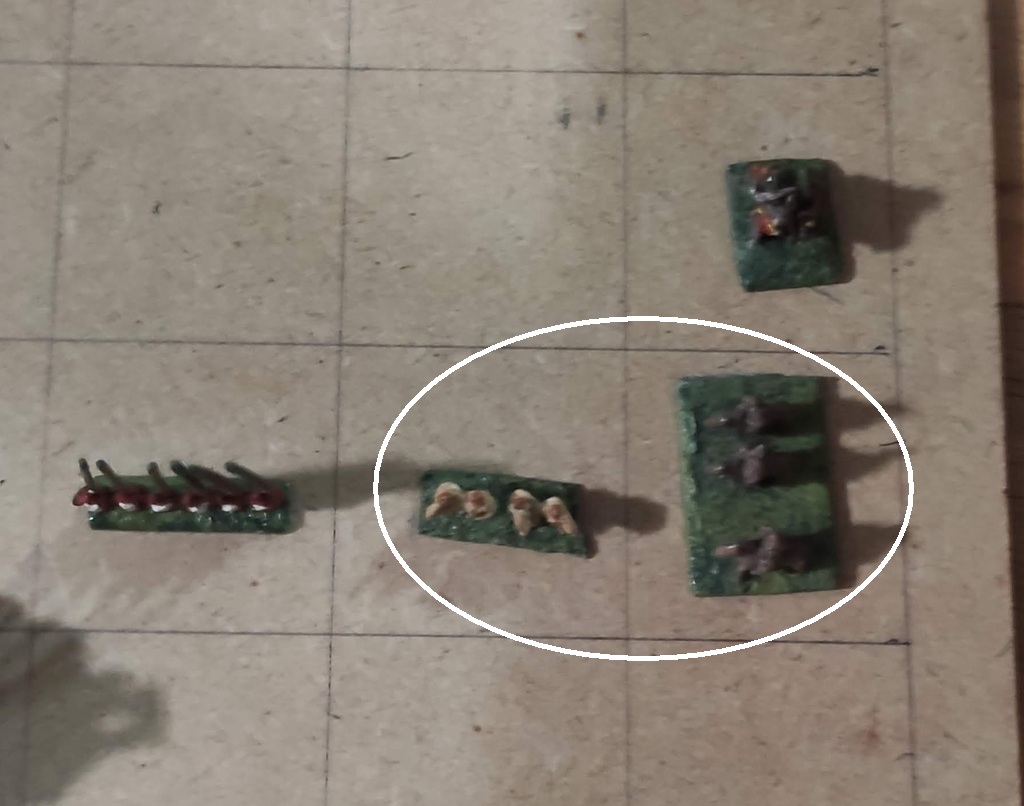
The 4x3 grid.  I have highlighted the one square that sees all the action (bit of a spoiler).


The Germans spot the Brirish bridge defenders and fire with everything they have.  The defenders are routed! (rolled all 5’s and 6s’!)

The Germans fire at the bridge defenders

The British reinforcements enter.

Two British sections supported by a Sherman enter on the right flank.

The Germans react and move an extra Gruppe in to support the Gruppe in the centre.  They also move one Gruppe to the other side of the bridge as that will help with victory.

Germans reinforce the centre building


The British assault the building.  The Germans fire at them as they advance but miss entirely! In the ensueing close range battle all the infantry on both sides are supressed.   The Germans are forced to retreat as the British have an unsuppressed Sherman in the same area..

The British assault!


The Germans retreat

In the centre the British bring on most of the remaining force - 2 sections, a Sherman and  the commander.

Most of the remaining British force enter in the centre.


The Germans throw everything they can into the centre building occupied by the British – 2 Gruppe, the commander and a tank.

The Germans assault the British occupied building.


Poor German dice rolling and excellent British dice rolling see the Panzer IV and a Gruppe destroyed and the other Gruppe suppressed.   The Gruppe is forced to retreat.  The British force it still intact (although suppressed).  This is not good for the Germans if they cannot dislodge the British.

Panzer IV destroyed.


Germans retreat


The British attempt to unsuppress the sections but one routs and the other remains suppressed.  The Germans take this opportunity to then assault with what they have left and able to move - one Gruppe and one Panzer IV.  The Gruppe is suppressed while assaulting.  In the ensuing firefight the Sherman and Panzer IV are destroyed, leaving one Gruppe and one British section.

The Germans assault with what they have left and can move.


A Gruppe and a section is all that remain of the firefight.

The other British force splits  - one advancing in the centre and the other Sherman, a section and leader into the contested building.

The British advance into the centre an contested building

The British lose a section in the melee.  They are at their breakpoint (the Germans are one away from theirs) and decide to cut their losses and retreat.  The Germans hold the bridge and so score a victory!

 Thoughts

Really enjoyed this game.  At the end of my last blog post of a 3x4 game a year ago I wrote I was thinking of expanding the game to 6x4 so I could play scenarios, as most scenarios are designed for 6’x4’ tables.  I think I will be fine with 3x4 – the above scenario was designed for a 6’x4’ table.  I will look over for scenarios that may convert easily to 3x4.  I am surprised the ww2 3x4 rules have held up – I made no changes to the rules to play them this time.  Normally there is some situation that comes up I have not thought about and need to tweak them slightly.  I guess the simplicity of them helps so that they don’t need much changing anymore.

I am still going to keep playing the Operation Jupiter campaign in 20mm, just need to decide on rules J


SF RPG

I have been playing around with solo SF RPGing for quite a few years and chop and change my own rules all the time.  This time around, I am reusing some rules I wrote late last year and played though about 20 adventures with them.  I have removed most of the modifiers to the various tables so just about everything to set up scenes, encounters, NPCs etc is just a straight 1d6 roll.   I have also made it a lot more friendly to a single PC being in the game. The only exception ito straight rolls are task rolls – there are 6 tasks and have 1-2 modifiers.  I also made the tasks similar in results to make it more consistent.  And it all fits onto 2 (dense) pages.  If you are familiar with Two Hour Wargames Lovecraft’s Revenge it sort of follows that framework but with some Two Hour Wargames 5150 New Beginnings Quick Play type encounters.

Game

This is not so much as narrative as describing the game events.  There are only pictures for the first few scenes.  As I was using a single 2 sided A4 sheet to play the game, I did not have room to put in my normal narrative tables to flesh out NPC names nor descriptions of objects, clue, locations, obstacles, hazards etc.

Opening scene

Yent is a hospitality worker from an industrial, worker background seeking atonement.  Yent skills are excellent physical, excellent technical and good social.  They are armed with a handgun and also have a tech kit.  Yent is starting in Leewin, a rough area of the planet.  They are looking for someone highly experienced to give them an aim in life (objective: find person, class: Achiever).

Yent

Yent encounters a hazard (table and chairs as I had them in the box) and loses some funds to fix things after he fell over them.

Yent with tables and chairs


Oops


Yent meets a cunning mechanic and try to obtain some information but the mechanic knows nothing (result= ignore).

Finally Yent meets a Commander who tells Yent about some lost treasure to seek.

Yent meeting the commander

Scene 1

The Commander asks to be escorted to the nearby desert location. On the way they meet some workers that provide some advice (in rules terms a hint that provides a +1 bonus to a subsequent die roll). 

Yent get some advice from a worker


They then are approached by a ganger. Yent’s extremely poor attempt at negotiation sees the ganger draw their handgun and shoot at Yent, but misses. Yent returns fire and the ganger drops to the ground.

Finally they reach the desert but two shady dealers jump them.  They shoot at Yent but Yent manages to make a run for it and escape.

Yent not going very well in negotiating with some criminals (the two figures to the right).


They have reached the destination, Yent hoping the Commander will help with a clue.  Yent fails miserably to extract a clue from the Commander.  What is worse the Commander takes extreme offense and tries to melee with Yent who runs away.  

There was a lot of really bad dice rolling for Yent when talking to others.

Scene 2

Yent needs to travel to the rural area to hopefully get a clue through investigative methods. After overcoming an obstacle, Yent questions an entertainer and gets some information. They successfully talk their way out of trouble with some criminals before meeting a Patron.  Tough talking get more relevant information.  Meeting another high achiever reveals nothing.  Yent finally gets the information to put everything together by talking to a senior bureaucrat on their own estate.

Scene 3

Staying in the rural area, Yent needs to find an object.  Yent manages to overcome a hazard on the way to the plantation that may hold a clue.  It does and Yent manages to find the object that provides  another clue to seek the lost treasure.

We will leave the adventures of Yent here (as that is as far as I have played!).

Post-game

After the encounters I played out above I realise I have set the roll required for a task success too high – on average a PC is going to succeed at a task about 50% of the time (after modifiers) i.e. a 4+ on a d6.  In my games, PCs are larger than life and should be doing better than that.  So I have since changed the rules and now success will average 2/3rds of the time, a 3+ on a 1d6. 

Holiday verdict

Well, it worked.  I packed a game for each era into a box and played at least one game from each.  So my mojo cannot be that low – I did not have to force myself to play.  My focus since the holiday has been on the 8x8 ancient rules.  But who knows how long that lasts before I am distracted by something else.  Actually, I have been distracted by the Shooting’ Iron rules I found recently. Simple 1d6 rules for Wild West skirmish but I am using some old Warhammer 40K figures I have to test them out.  Simpler than Fistful of Lead and alternate figure activation – will see how I go!