Showing posts with label advance to cover. Show all posts

Saturday, 31 May 2025

WW2 20mm battle report British Vs Germans 1944 using my own rules

Introduction

I play a game with my 20mm WW2 forces – Late war British Vs Germans – on a 4’x5’ table.

Background

In the last few months, I have had 4 games using One Hour Skirmish Wargames with 2 people a side.  I do like the rules but they are not as fast as mine 😊 The half a table tennis is still setup from a previous game so I just repurposed the table and figures for a solo game using my own rules.  These are the same rules I used for the half a dozen or so games on the 2’x2’ board from last year.  These rules are fairly similar to my WW2 Advance to cover but close combat uses the same mechanics as ranged fire.  One day I will write them up - currently a one page QRS.

Scenario

A British Recce company needs to make its way through a German occupied town in late 1944 and take the church to facilitate opening up the road.

Battlefield

Forces

Each figure represents about 3-5 soldiers (so around 6-10 figures for a platoon).

1:1 for vehicles and crew served weapons.

In this game, platoons are around 6 figures.

British


1 Company HQ of 3 figures

3 Platoons of 6 figures each

2 Cromwells

1 81mm mortar

German


1 Company HQ or two figures

2 Platoons on 6 figures each

2 MMGs

2 Panzerschreck teams

Deployment

The German MMGs are situated on the two flanking hills.  While a bit of a forward deployment, hopefully they can inflict enough casualties to slow the British down as they advance through the wheatfields.

One platoon is deployed to defend approaches the bridge and any approaches via their right flank. The other platoon defends the left flank approaches to the church as also a possible counterattack into the church.

The Company HQ is in the church.

The British will advance to the house before the bridge and also on their left flank.  The left flank offers better protection than via the right.  The house will be used as a base to advance across the bridge.  The Cromwells will deploy on each flank and then hopefully set them on each hill to support the infantry advance across the bridge and into the village.

Game

British 1st and 2nd  platoon advance.

The British 1st platoon is shot at by the MMGs.  Only one casualty (average would have been 2).

British view after advance of 1st and 2nd platoon

The 2nd  platoon get one casualty from the machine guns .

The Cromwells come on the battlefield but don’t spot the MMGs as the latter are concealed, even though they fired.  The 1st platoon race up to hide behind the building

1st platoon find cover behind the central building

The second platoon continue to advance to cover.

Second platoon managed to get behind the hedge

The second platoon fail to spot the MMG and cannot even fire in the general direction as the platoon has moved

The first platoon move into the building, manage to spot an MMG on the hill and fire, but do not hit them at all.

1st platoon firing at the MMG

The second platoon fire at the MMG as they managed to spot it.  They destroy the MMG (very lucky dice).  The British third platoon enters.

Overview, 3rd Platoon in foreground

MMG manages to destroy another figure in the building (first platoon). The first platoon fires back and reduces the MMG to one crew.  Again the MMG removes another soldier in the first platoon. The platoon have to do a morale check that they fail and have to retreat (6”) and are suppressed.

First Platoon retreats

Cromwells fire on the MMG but for no effect. Another turn and another firing of HE and the Cromwells take out the MMG. The Third Platoon move up to the house formerly occupied by the first platoon.  The Company HQ also enters and advances towards the building.

The company HQ arrives

There is a general advance for the British and also the first platoon recover from suppression.

3rd Platoon move out of the house to hide behind the wall near the bridge (apologies for the sun!)


Second platoon makes it to the hill on their left flank

The Cromwells take up position on each Hill.

The British are ready for the assault - either third Platoon across the bridge or second Platoon dashes down the hill across the Ford to the left of the bridge.  Third platoon will try the bridge.  They enter the bridge but fails to spot and the German infantry nearby and so the British have nothing to shoot at.

3rd Platoon advancing over the bridge (German view)

The Germans are distracted and this enables the British on the bridge to continue to move. They advance straight to the building with the German first platoon and a melee ensues.

Melee in the building

The Germans have the better position being in cover and not moving.  They manage to inflict three casualties on the British.  The British only inflict one on the Germans. The British pullback and are suppressed.

Retreat to the bridge

To add insult to injury the Germans fire at the British at the retreat and score another casualty. The British platoon check the morale again and the platoon decided to retreat back to their own lines (left the battle).

The Cromwells fire on the building and between the two of them manage to score another German casualty.

The British Major manages to call the 81mm mortar onto the German occupied building and scores two casualties.  The Germans pass their morale check.

Second platoon race down the hill to occupy the building

Second platoon race down the hill to occupy the building.  The British platoon now manage to spot the Germans behind the wall and fire for no effect. The Germans return fire that is also ineffectual.

British facing off to Germans

The Germans get off some more fire and score one casualty on the British.  The British return this fire to wipe out the Germans (wow excellent dice!). The remaining British platoon decided to cross the bridge.

Crossing the bridge

On the other side of the bridge is the Panzerschreck team but the British don't see it.

The Panzerschreck team fire at the running British soldiers, misses; the British soldiers return fire and destroy the team.

Panzerschreck firing at the soldiers on the bridge

The British have so few units left.  They will not be able to spot any Germans in the buildings until they get within 6” so the Germans will sit tight.  The British need to decide where to move next and if the Germans open fire then the Cromwells can blast them with HE.

The British on the bridge move forwards closer to the church. The Germans take a risk and the three figures in the opposite building fire on the moving British soldiers. Amazing dice roll and destroy all three British figures!

British soldiers under attack by the Germans

The Cromwells open up on the building but the first shots miss. They get another chance and destroy a figure and suppress the building.

The British soldiers in the building race across the street to get closer to the church
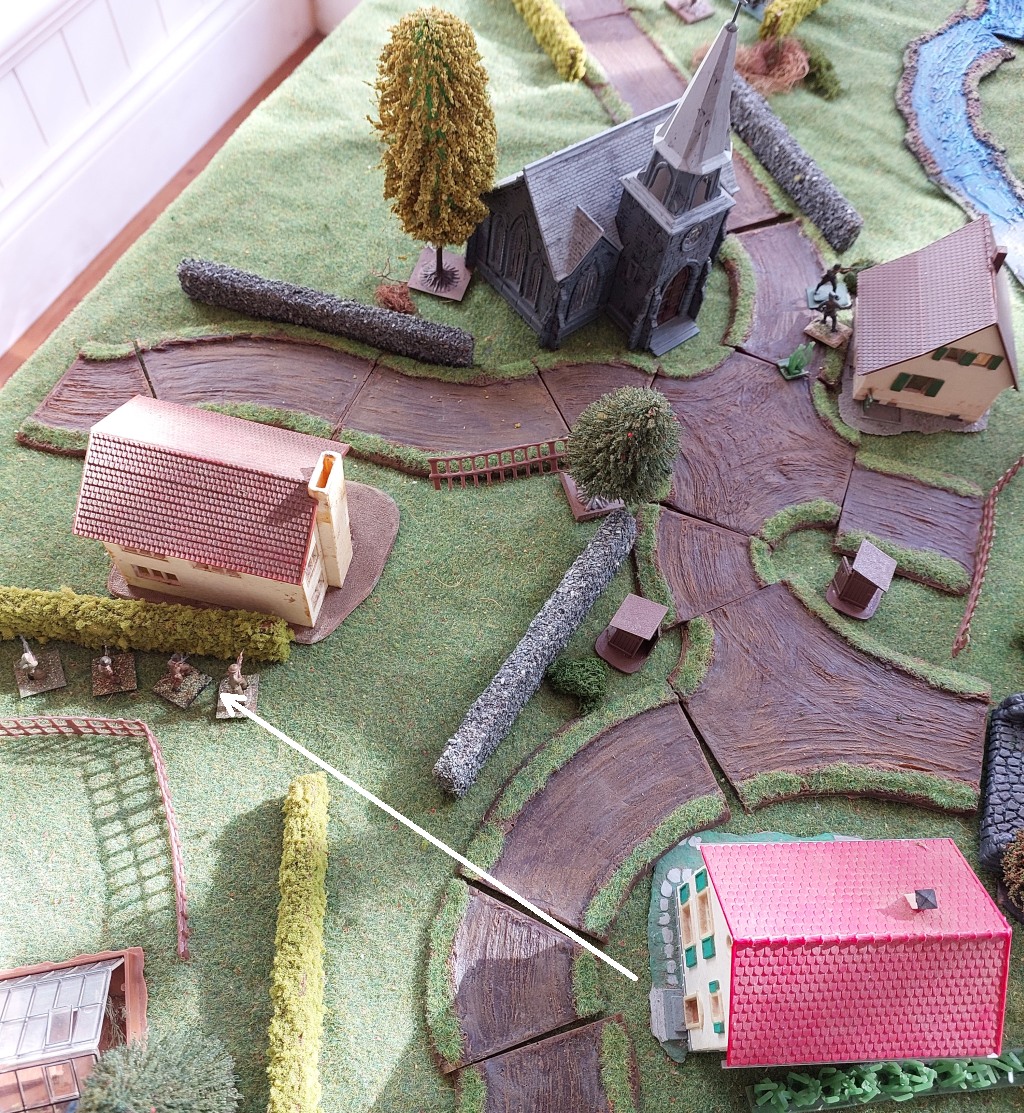
Racing close to the church

Germans unsuppress and fire on the British Platoon, score a casualty but the British platoon - even though at half figures - is still okay.  The British really have no choice for victory but to charge the church.  They do so - it is occupied by the commander and one other soldier and a melee occurs

Melee in the church (after the Brits have driven off the Germans)

The Germans fire first but fail to inflict any hits. The British then rout both of the enemy and occupy the church.

The remaining Germans fail morale and retire from the battlefield.

Remaining Germans

The British succeed!

Verdict

I was not sure how hard or easy this scenario would be.  The defending Germans had 2 MMGs and two platoons, compared to the attacking British 3 platoons and 2 Cromwells. And the handheld anti-tank weapons have a shorter range in these rules (6") compared to 18" in One Hour Skirmish Wargames.  The British are advancing across wheatfields but to offset that the Germans need to defend the town.  In the end it was very close.  About two-thirds through the game I did not think there was much chance of the British winning but they managed to win two major firefights (against the Germans behind the wall and then in the church).  So they were quite lucky.  Poorer dice in these two instances could have easily seen the British lose some more casualties and morale checks would have seen them retire from the battle.

It was a great game.  Never tire of getting out the 20mm WW2 figures on half or a full table tennis table.

Thursday, 31 October 2024

Operation Jupiter 29 – Alone on the Hill. 20mm WW2 battle report.

Introduction

This is game 29 in replaying the scenarios from the Briton Publishers Operation Jupiter skirmish scenario book.   Links to previous games are on this blog page.

Rules used

I am using my WW2 rules that I had for a 3x4 grid that I then made a gridless version for 2’x2’ games.  These games are larger forces on a bigger table (half a table tennis table or 4x5’x5’) so I have modified them a little so now added a few things from my older rules - unit card activation and now each figures is not suppressed but a section can be if fired on by enough dice.  They are very similar to rule I used 10 years ago.

Scenario

The Germans must advance and take over 50% of the British foxholes that are the orchard defence.

Troops

British

British

1xCompany HQ (4 figures)

1xPlatoon (10 figures)

1xVickers MMG

1xPIAT team

2x6pdr AT guns

2 25pdr missions (good availability)

Germans

Germans

1xKompanie HQ (5 figures)

3xZug (8 figures each)

2xPanzerIVG

1x80cm mortar battery (average availability)

Deployment

Deployment

The British setup in a broad line across the centre hedgeline in the orchard.  One section is a little forward and the MMG, 6pdr and CHQ is in the centre.

Game

Germans on the table

Germans all move on.  Aim is to reach the hedgeline and then work out best tactic from there.  The two tanks to hang back.  The Germans continue to advance although failing to spot units.  Finally the centre Zug spots the forward British section.  They open fire but fail to inflict a single hit.  The British are holding their fire, and the radio operator just cannot get through!

Germans at the hedgeline

The next turn sees carnage.  The Germans manage to get one up on the British – the Zugs cross the hedgeline, successfully spot the British in the foxholes and KO 3 figures and suppress a section.  The Kompanie CO calls in the mortars and suppresses the Vickers MG.  The British radio still has no success (in the actual battle, the radio operator was very successful and called down accurate fire).

The Germans advance and fire

The British do manage to inflict hits on the 2nd Zug and is has received 50% casualties, check morale and routs.

2nd Zug routing

The German 1st Zug charge the forward British section (now only 1/3 of its starting strength).  The British lose, but do take one of the Germans with them.

1st Zug charging the lone defender

The 1st Zug then charges the Vickers MMG.  Surprisingly, the British inflict a hit and the Germans do not.  However, the Vickers is suppressed so retreats and abandons the gun.

1st Zug Vs the Vickers MG crew

The 3rd Zug charges the 6pdr and the crew put up a valiant fight but rout, taking one German with them.

3rd Zug Vs the 6pdr crew

The Germans have taken 4 of the foxholes in the time (it is turn 6!) and are victorious.

End

Verdict

The British failed to call in the artillery throughout the game (required a 4+ to call and hit and had 6 chances to do so).  The game would have been a lot closer if they had got in a couple of artillery requests.  The Germans would have had some suppressions (that would have made them stop for aturn or two) and maybe even a Zug rout.  Either way, they would have had less troops to fight and may not have made it in the 6 turn limit.  Although in that case the Germans would have thrown in the tanks that were barely used in this game.  It is only one play but it felt balanced, just unlucky for the British.

This is the last of the four games that I played over a weekend in late September.  I believe I have only three more Operation Jupiter games to play out of the 30 in the scenario book.  Maybe over Christmas. 

Sunday, 20 October 2024

Operation Jupiter 28 – Edge of the Plateau. 20mm WW2 battle report.

Introduction

This is game 28 in replaying the scenarios from the Briton Publishers Operation Jupiter skirmish scenario book.   Links to previous games are on this blog page.

Rules used

I am using my WW2 rules that I had for a 3x4 grid that I then made a gridless version for 2’x2’ games.  These games are larger forces on a bigger table (half a table tennis table or 4x5’x5’) so I have modified them a little so now added a few things from my older rules - unit card activation and now each figures is not suppressed but a section can be if fired on by enough dice.  They are very similar to rule I used 10 years ago.

Scenario

This is a tank Vs tank game.  Each side must knockout every opposing tank to win, or force the other side to leave. There is no turn limit.

Troops

British

Brits

1xFirefly (veteran crew)

4xShermans

Germans

Germans

1xStugIIIG

2xPanzerIV

1xPanther

1xMarderIII

Note the MarderIII is substituting for a sdkfz251/22 as I don’t have a model for the latter.

Deployment

Battlefield

I am activating using one card per vehicle.

My money is on the Germans as they have the better guns.  I did think this would not be too exciting  - my rules for tanks are fairly simple: 1d6 to hit with a few modifiers and 1d6 to penetrate (using attacker gun and defender armour modifiers).  Miss or damage (2xdamage=KO) or KO.  But it was quite a tense game after all, mainly as there was terrain to navigate around.

Game

The first few turns were spent getting the vehicles on the board. The Firefly hanging back as it has an excellent gun for long range fire.

The lead PzIV gets to the hedge corner, spots the Firefly and fires.  And misses.  Firefly fires back and also misses.

Overview

More moving.  The Shermans and Stug in the orchard fail to spot each other (visibility limited to 18” if not firing and need a 5+ at that range).

A suppressed PanzerIV manages to damage the Firefly.  Not good news for the British.

Damaged Firefly

Even though damaged, the Firefly gets a shot off at the Panzer IV and destroys it.  The first KO in the game.

PanzerIV destroyed

More movement and some firing at the Firefly.  A Sherman damages the Marder.

Tanks in the orchard

The Firefly damages the Panther.  The Panther returns fire but for no effect.  The nearby PanzerIV also fires for no effect.

Damaged Panther

The Marder is then destroyed.

Marder KO

Finally, the Stug damages a Sherman.

The Stug damages a Sherman

The Firefly fires at the Panther again and the Panther is destroyed.  The Germans are 3 vehicles down and decide to retire.


Verdict

As I said at the beginning, I did think it would be a dull game.  Turns out it wasn’t and I enjoyed it a lot more than I thought I was going to do.

Monday, 14 October 2024

Operation Jupiter 27 – Regain the Point. 20mm WW2 battle report.

Introduction

This is game 27 in replaying the scenarios from the Briton Publishers Operation Jupiter skirmish scenario book.   Links to previous games are on this blog page.

Rules used

I am using my WW2 rules that I had for a 3x4 grid that I then made a gridless version for 2’x2’ games.  These games are larger forces on a bigger table (half a table tennis table or 4x5’x5’) so I have modified them a little so now added a few things from my older rules - unit card activation and now each figures is not suppressed but a section can be if fired on by enough dice.  They are very similar to rule I used 10 years ago.

Scenario

The Germans have 6 turns to recapture the orchard from the British.

 Troops

British

British (already deployed)

1xCompany HQ (4 figures)

1xPlatoon (10 figures)

1xPIAT team

2x17pdr AT guns

2 25pdr missions (average availability)

Germans

Germans

1xKompanie HQ (7 figures)

2xZuz (10 figures each)

3xTiger 1 (veterans)

 Deployment

The British deploy the 17pdrs to the rear but lined up on the gaps in the hedgerow.  The platoon is against the hedgerows with the CHQ as a reserve.  The PIAT team is at the corner edge but not sure how useful it will be.

The German entry viewpoint.  Note the gaps in the hedgerows.

Game

6 turns is not long.  The Germans will need to bring on everything fast – One Zug first, then send the Tigers through the gaps in the hedgerows.

Tigers come on, as does the first Zug. Then the 2nd Zug and lastly the Kompanie HQ.

Germans are all on.

The British platoon (well, the two sections in range) fires at the lead Gruppe and two figures are KO. (now end of turn 2)

A solitary figure

The German 1st Zug fire back but for no effect, the 2nd Zug moves to the hedgeline and manages to rout a British figure.  But the British first section fires back again and 3 more German figures are gone.

A British section is down a figure and suppressed

It is getting a little attrition-like with both static on the hedgeline and exchanging fire.  The Germans manage to inflict two more casualties.

The foxholes have less troops than at the start

The British first section fires with 6 dice.  Need a 5 or a 6 to KO a figure, they do not hit a thing.  The German return fire and KO 2 British figures.  The Tiger tanks move to the hedgeline to help the infantry.

Tigers on the move

The 17pdrs have been waiting for this and open up, damaging a Tiger (can’t move).

The 17pdrs are lined up for this though

It is now end of turn 4, 2 turns to go.

The British CO successfully calls in the 25pdrs on the centre hedgeline.  Only one casualty, but the 2nd Zug is suppressed.  The 17pdrs fire again and the center Tiger is kaput (very lucky)!

One Tiger down.

The British 1st section is under fire and retreats.  The German 1st Zug and Kompanie HQ infantry advances deeper into the orchard.

Germans advancing

The German 2nd Zug attempts to rally but some figures decide to rout, causing 2 morale checks and the 2nd Zug pulls back a full move.

Retreating 2nd Zug

The British 1st section fails a morale check and retreats off the table.  The Germans win!  It was the 6th turn as well.

Final positions

Verdict

Another loss to the British.  Another great and also close game – it could have easily gone either way.  And I remembered the British artillery support that was used to good effect.