Showing posts with label when warriors collide. Show all posts

Monday, 18 November 2024

Battle of Issus 194AD - battle report using When Warriors Collide

Introduction

This is game 67 in play testing my ancient rules by replaying historical battles.  I am using another set of my rules, When Warriors Collide (WWC).  I am in the process of writing up the rules but the current draft is here:  When Warriors Collide V3.0e.  I am play testing rules by replaying all the Peter Sides scenarios from his Historical Battles books, and some others I find along the way.  WWC is designed to finish in around 30 minutes on a 2’x2’ or smaller table; I am currently using a 40cmx40cm table.

Battle of Issus, 194 AD

Septimus Severus is declared Emperor, as was Niger as governor of Syria. Severus attacks Niger to defeat his rival.

Scenario source: Peter Sides Ancient Historical Battles Volume 1.

Link(s):

Wikipedia: https://en.wikipedia.org/wiki/Battle_of_Issus_(194)

Troops

Romans (Severus)

2 LDR, 3 HC, 2 HI, 2 MI.

Breakpoint: 3.5

Rebels (Niger)

1 LDR, 2 HC, 2 HI, 2 LA.

Breakpoint: 2

Scenario

Map is a hill covering from centre to Niger's baseline, tapering to corner on right flank. Cliff on Niger left flank.  Large wood on Severus left flank half on hill, half not.  About 2.5BW (Base widths) from edges and 2BW wide.

Special rules: None.

Deployment

Romans (Severus):


HC HC* (lined up with gap between side and woods). HC MI HI* HI MI (all facing hill)

*=leader

Rebels (Niger):


On hill LA HI HI LA (aligned with Severus).  One each HC behind each LA. Left HC with *

*=leader

Game

At start, Severus on the left

Severus’s main battleline fails to move in a timely manner (rolled a 1 to move twice!).  But the left flank cavalry starts the flanking manoeuvre.

Niger responds by moving his right cavalry to protect the flank

Severus left flank

Finally the Severus main battleline moves while the left flank cavalry has managed to engage the defending cavalry.  Due to the delay in the main battleline moving, Niger and his heavy cavalry move to stop the flanking manoeuvre. A terrible melee sees Severus’s cavalry disordered (rolled a 1).  The next turn the cavalry managed to rout Severus. Not going the way Severus hoped.

Behind the woods – Severus’s cavalry on the left, opposing calvary on the right.


Severus is routed.

On the main battleline, the Rebel’s light archers fire but all it does is make one Auxilia advance.  Subsequently the archers are charged by the auxilia, the light archers are dirodered but the auxilia also contacted a rebel legion that routs the auxilia.  On the right flank the auxila and light archer clash and both disordered. 

Archery on the battleline


Auxilia gone

The battleline clashes and the elite Severus legion does badly and is disordered whiel the opposing legions is not.  The remaining Severus cavalry charges into range of the light archers that manage to disorder the cavalry.

View of the main battleline

Niger’s cavalry charges the remaining Severus cavalry and disorders them. The heavy cavalry is now flanked by the rebel cavalry as well as fighting to the front and it routed.

The remaining cavalry at the rear is surrounded by rebels.  And routs.

The Severus side has exceeded their army breakpoint (losing Severus does not help) and so the rebels have won.

End

Note: I did play out one more turn but the Severus’ side lost another heavy cavalry to archery fire and a legion.  For no loss to the rebels.

Verdict

I thought that would be a tough but relatively easy victory to Severus.  Severus rolled so badly and the rebels rolling so well (never seen so many 1s or 6s at just the right time for a one-two rout).  A very enjoyable game to watch unfold.  Historically the flank attack worked but the delay in the main battleline clash meant Niger could afford to send his cavalry to the other flank for support.  Closer than expected.  Could easily have gone to Severus will different dice rolls.

Saturday, 6 January 2024

Battle of Mons Graupius 84AD using When Warriors Collide

Introduction

This is game 66 in play testing my ancient rules by replaying historical battles.  I am using another set of my rules, When Warriors Collide (WWC).  I am in the process of writing up the rules but the current draft is here:  When Warriors Collide V3.0e, .  I am play testing rules by replaying all the Peter Sides scenarios from his Historical Battles books.  WWC is designed to finish in around 30 minutes on a 2’x2’ or smaller table; I am currently using a 40cmx40cm table.

Battle of Mons Graupius

The Caledonians attack the Romans when the latter march on the Caledonian grain supply.

Wikipedia: https://en.wikipedia.org/wiki/Battle_of_Mons_Graupius

Some battle reports:

https://amsterdamwar.game.blog/2022/03/12/mons-graupius-as-wargame-test-drive-scenario/

https://hereticalgaming.blogspot.com/2016/04/the-three-battles-of-mons-graupius.html

https://hereticalgaming.blogspot.com/2017/12/polemos-spqr-battle-of-mons-graupius-i.html

Command and Colors scenario:

https://www.commandsandcolors.net/ancients/index.php?option=com_content&view=article&id=731

Troops

Roman

Roman

4 HI Legionaries

4 MI Auxilia

2 HC Heavy Cavalry

2 Leaders

Breakpoint: 3

Caledonian

Caledonian
4 WB Warbands

2 LI Skirmishers

2 CH Chariots (poor so x1/2 in melee)

2 LC Light Cavalry

1 Leader

Breakpoint: 3

Scenario changes

Reduced the number of units.

Deployment

Deployment

Game

Roman auxilia move and split into two groups to be able to block the opposing 6 units.  Some Light Cavalry and Light Infantry fire at the approaching right flank auxilia for no effect.  The Light Cavalry retreats but causes the opposing auxilia to advance into a light infantry.  Subsequent melee sees both disordered.

Action on the Roman right flank

On the Roman left flank the Light Cavalry fires for no effect and the Light Infantry fire, disorder the auxilia and then retreat.

Action on the Roman left flank

The Caledonian Light Cavalry fires and disorders another auxilia on the Roman right flank.  The right flank auxilia destroys the Light Infantry in melee.

Overview of first battleline status

An auxilia charges a Chariot and it is disordered.  Another auxilia charges another chariot and it is also disordered.  An auxilia charges the Light Cavalry, the Light Cavalry fires at the auxilia and routs it.  The Light Cavalry retires.

Auxilia causing some disorders, but the rightmost auxilia is disordered.

Heavy Cavalry moves to within range of the Light Cavalry. Light Cavalry fires and retreats.  Missile fire causes the Heavy Cavalry to retreat as well.  Light Infantry charges Auxilia in the centre but is disordered.  Light Cavalry fires on Heavy Cavalry and Heavy Cavalry disordered.

Current battleline

Roman right cavalry continues to try and close with Light Cavalry but is routed by missile fire in the end.  Most unexpected.

Roman Cavalry routed by British Light Cavalry

The auxilia move up to harass the Light Cavalry and the Light Cavalry are forced to retreat.

Auxilia harassing the Light Cavalry

On the Roman left flank things are going better with a chariot and the Light Infantry routed by the efforts of the auxilia and advancing Heavy Cavalry.

Clearing the British right flank

Auxilia rout the chariot and move to the flanks to let the Legion line advance.  The Roman Cavalry on the left charges the Light Cavalry that retreats.

Romans have cleared the first line and ready to assault the hill.

The Roman Heavy Cavalry manage to pin the opposing light cavalry and disorder them.  The Roman legions charge up the hill.

Legions advance!

It was all 1:2 (except the Roman leader) so mostly the legionaries disordered.  Now the Warbands do not get the 1st melee bonus The Romans are now mostly 1:1. Managed to get an auxilia on the left flank and that warband was routed.  Next turn it advanced to the flank of another warband and that too was routed.  The Heavy Cavalry also managed to rout the Light Cavalry.

Tenacious Auxilia on the Warband flanks.

The Britons are at their breakpoint and so retire from the field.  The Romans have won!

End game

Rule changes

None. 

Verdict

A long game as there were two battlelines to get through.  Otherwise an interesting battle with some new troop type interactions tested.

Battle of Boudicca's Revolt 60AD using When Warriors Collide

Introduction

This is game 65 in play testing my ancient rules by replaying historical battles.  I am using another set of my rules, When Warriors Collide (WWC).  I am in the process of writing up the rules but the current draft is here:  When Warriors Collide V3.0e.  I am play testing rules by replaying all the Peter Sides scenarios from his Historical Battles books.  WWC is designed to finish in around 30 minutes on a 2’x2’ or smaller table; I am currently using a 40cmx40cm table. 

Battle of Boudicca's Revolt 60AD

Boudicca leads an uprising against the conquering Romans.

Wikipedia: https://en.wikipedia.org/wiki/Boudican_revolt

C&C ancients scenario: https://www.commandsandcolors.net/ancients/scenario-list/conquest-of-britain-43-60-ad/408-boudicas-revolt-61-ad.html

Troops

Roman

Romans

4 HI Legions

2 MI Auxilia

2 HC Cavalry

2 LDR

Breakpoint: 4

British

Britains

4 WB

2 LI

2 CH (no missile fire)

2 LC

1 LDR

Breakpoint: 3

Scenario changes

I reduced the number of units to fit onto the small board.

Deployment

Woods are on both sides of the table.

Britains on the left, Romans on the right

Game

The Romans advance, as does the British.  The British right flank Chariot charges the opposing Roman Cavalry and both are disordered (it was a 1:1 attack).  The light cavalry stayed out of it awaiting the outcome.  In a subsequent turn the Chariot is routed but the Heavy Cavalry do not pursue.

British Chariot and Roman Cavalry in melee.

The right flank Roman cavalry charges the British light cavalry that fail to get off effective missile fire and is disordered.

Cavalry action on the Roman right flank

The Roman legions advance into range of the British screening light infantry.  The Roman auxilia stay behind to guard the flanks.  The skirmishers inflict a disorder on one Roman unit but the other is forced to advance and in the subsequent melee the light infantry is destroyed.  The Romans are now within charge range of some warband units, one of which decides to charge.  Both the British warband and Roman unit are disordered.

Initial clashes on the battleline.

The left flank Roman Cavalry charges the light cavalry (else the light cavalry would shoot at the heavy cavalry in its turn). It will end up being a 1:1 melee but better than sitting there being shot. The light cavalry fire as the Roman cavalry charge in for not effect.  The Light Cavalry manage to retreat but the Roman Heavy Cavalry pursue.  In the subsequent melee the light cavalry are disordered.  In the next round of melee (next turn) the light cavalry is routed.

British light cavalry in melee with Roman Heavy Cavalry.

The remaining British light infantry fires for no effect at the Roman legionaries.  One warband charges a Roman legionary unit and the warband is disordered.

Warband in melee with the Roman legionary unit

The remaining left flank British chariot charges the Roman auxilia.  Both are disordered.

Chariot in melee with the Roman auxilia

The Roman right cavalry, even with great odds, does not manage to rout the light cavalry.  The adjacent Auxilia does rout the chariots.  The Roman leader does not rout the opposing warband. 

The right side of the Roman line not doing as well as expected.

Roman left flank – one chariot gone but the rest locked in melee.

British light infantry fires at a Roman unit for no effect and the light infantry retreat.  The Roman unit advances into the British warband with the leader.  Must attack (at 1:2) and rolls the worst result – “1” and routs.  The Warbands pursue.

Roman unit pulled into melee with the British leader warband.  Doesn’t end well for the disordered Romans.

The right side of the Romans do well this time.  The heavy cavalry routs the opposing light cavalry, a Roman legionary routs a warband.

Roman right side clearing the opposition

The Roman leader charges into the last untouched warband.  1:1 and rolled a 1! Romans disordered.  Roll again to see if leader incapacitated.  Rolled a 1!  Oh dear.

Roman leader charges a warband but is cut down.

The Romans start manoeuvring on the flanks to bring those units into the centre but then the other Roman leader routs the opposing warband and the British have reached their breakpoint and flee the battle.  The Romans win!

End game

Rule changes

Note that this game was played prior to my 30 games in 30 days so these rules changes occurred before those 30 games.

Prior to the game I changed leaders to be a 1.5 multiplier, rather than 2.  At the end of the last game I did mention I thought they were too powerful.  In Bill Bank’s Ancients they were really makers than moved per turn for local focus of effort.  Not the case with my rules. Also, I have made undisordered WB value 3 rather than 2 (and then only a x2 multiplier for 1st melee rather than x3).  WB should be a bit stronger again HI and MI than they are currently.  

Lastly, melee was always optional unless charging.  So a lot of the 1:1 melees would not occur as the risk is equal for both sides.  And made the game slower, less decisive and more predictive.  So now if you are at 1:1 or greater or charging you must melee.

Added back in a fire and retreat for Light infantry and cavalry.  Last game I said it did not seem like a problem; now it does J

Verdict

The Romans had the slightly superior force but the British could have got lucky.  They did manage to incapacitate the Roman leader but it was too little too late.  A fun game. 

Sunday, 31 December 2023

30 ancient games in 30 days - games 26 to 30 (final games)

Introduction

Games 26 to 30 in the 30 games in 30 days using my own rule son a 40cmx40cm table with 15mm figures.  Replaying some historical battles based on some Bill Banks Ancients user written scenarios.  Details can be found at this introductory blog post: https://shaun-wargaming-minis.blogspot.com/2023/12/introduction-to-30-games-in-30-days.html

In this post are these battles:

  • ZELA, 47 BC, Pontines vs Romans
  • MEDWAY, 43 AD, Britons vs Romans
  • BRENTWOOD, 44 AD, Roman (Claudius) vs Britons (Caractacus)
  • SAUMIZEGETUSA, 105 AD , Dacians vs Romans (Trajan)
  • ARMENIA, 114 AD , Armenians vs Romans (Trajan) 

ZELA, 47 BC

"Veni Vidi Vici!"

Link: https://en.wikipedia.org/wiki/Battle_of_Zela_(47_BC)

Map: Open.

Special: Pontic scythed chariots are 8/- as in 8 combat value and are routed if they do not rout enemy, or are disordered or required to retreat.

Pontines (bp 2.5): 1 LDR, 2 CH, 2 HC, 1 HI, 2 MI, 1 LI.

Deploy: HC* LI MI HI MI HC.  CH in front of this line.

Romans (bp 2.5): 2 LDR, 2 HC, 3 HI, 1 LI.

Deploy: HC* HI HI* HI LI HC.

Deployment, Pontic on the left.

Romans have the stronger centre and I don’t think the Scythed chariots will change that too much, although they will disorder the legions and a 1 in 6 chance of a rout!  Hit and miss really.  The Pontic left flank is stronger than the Roman right, and the Roman right is stronger than the left.  So it may well be that the battle is decided by various flank attacks.

Scythed Chariots must move and cannot turn so they advance.  The Pontic left Heavy Cavalry advances.  The Romans advance their centre and left flank.  Scythed Chariots disorder a legion unit and rout the Light Infantry (a lucky 6).  One Scythed Chariots continues off the board, the other is routed as it did not rout the legion.

Scythed chariots contact the Roman line. A Light Infantry is already routed.

The Cavalry clash on the flanks but not routs on contact.  Subsequent melee see Pontic victorious on their left, and the Romans victorious on the right.  They move to get to the flanks of the infantry battleline.

The Romans finally contact the Pontic infantry line.  The Light Infantry fires for no effect and retreats.  Across the line there are quite a few disorders, even the 2:1 combats.

Ancients battlelines clash.

The Pontic Medium Infantry and Heavy Infantry are routed, as is one of the Roman legion units.  The Pontic side flees and the Romans have won.

End game

A close game. Closer than I thought it would be!

MEDWAY, 43 AD

Distracted by a crossing of light troops in their rear, the Britons turn and assault the legionaries who have made a surprise river crossing in their rear.

Link: https://en.wikipedia.org/wiki/Battle_of_the_Medway

Map: River on Roman baseline with bridge in centre one unit wide, otherwise Open.

Special: Chariots are poor.

Britons (bp 3.5): 1 LDR, 2 CH, 5 WB.

Deploy: CH WB WB WB* WB WB CH.

Romans (bp 2.5): 1 LDR, 3 HI, 2 MI, 2 LI.

Deploy: LI HI HI* MI LI.  Enter turn 2 over bridge: HI MI.

Deployment, British on the left

The forces are about equal.  The British Chariots, although poor, can be powerful if they can flank the less numerous Romans.  The Light Infantry have an even chance Vs the poor chariots.   If the British warbands get a good result on their first melee charge then they have a chance to win.  The Romans are not going to advance until the reinforcements come on. 

The Chariots advance on both flanks and contact the Light Infantry that retreat and missile fire.  One chariot is disordered.   The chariots just cannot seem to engage the Light Infantry due to the missile fire (the chariots are forced to retreat).

The warbands advance and on turn 2 the roman reinforcements arrive and split up to bolster the line – the incoming Heavy Infantry to the Medium Infantry only flank.  The warbands make contact and due to an excellent first charge dish out a lot of disorders, rout a Medium Infantry and wound the Roman general!

Mid game

After a lot of indecisive melees finally a warband routs a roman melee.  The Romans have lost!

End game

Well, that did not go as expected.  The chariots were ineffectual, the warbands did get damage and the Romans did not even rout a single unit.  Losing the Roman general did not help either.  I think for the Romans I needed to be more aggressive with the Light Infantry against the chariots rather than just maintain a standoff.  The scenario is worth a replay.  It is interesting.

BRENTWOOD, 44 AD

The culmination of Claudius' campaign against the Britons. (Note: This is based upon Robert Graves' fictionalized account in Claudius the God, rather than the real battle!) http://www.relativerange.com/ancients/scenario/brentwood.gif

Link: https://en.wikipedia.org/wiki/I,_Claudius

Map: On British side (left ro right): wood (2 units wide), hill (6 units wide), marsh (2 units wide).  Takes up whole half.

Special: Britons lose if camp is taken.

Roman (Claudius) (bp 2.5): 1 LDR, 1 EL, 3 HI, 1 MI, 2 LI.

Deploy: HI in the edge of marsh,  El LI in the edge of woods, rest HI HI* MI LI  .

Britons (Caractacus) (bp 3.5): 1 LDR, 3 CH, 1 LC, 1 HI, 3 WB, 1 CP.

Deploy: In woods: WB WB, then on hill HI* LC CH CH CH, then marsh, WB.  Camp in centre rear of hill.

Deployment, Romans on the left

A very unusual scenario, if is only fiction.  The Romans need to attack the flanks and hopefully the centre quickly or else may get flanked.  They may even make it to the camp from a victorious flank.   The Britons need to win a flank and hopefully hold the centre.

Elephants advance into Warband and both disordered.    The other warband advances towards the Light Infantry but the Light Infantry retreats.  It is a bit of an impasse as neither the Elephant nor warband unit can attack at 1:1 as they are in the woods that ½ an attack value.  I may need to change it so both attacking AND defending unit is halved.  So I change the rules J  And then the elephant is routed.  Later the Light Infantry is chased down and routed as well.

British right flank, elephant routed shortly after this.

The legion on the right advances towards the warband that charges but the warband is disordered.  Next melee the Roman unit is disordered.    Subsequent melee saw status quo.

Main infantry battleline advances onto the hill.  The warband advances towards the Light Infantry and the Light Infantry is disordered and later routed.  The Light Cavalry fires for no effect.  The Roman legionaries advance into the chariots and there are disorders everywhere.   Next melee the chariots will be at a disadvantage now disordered.

Battle on the hill.  The Light Infantry is soon routed.

The chariots are all routed, the legions advance on the camp.  The Light Cavalry faces off against the Medium Infantry.  The Heavy Infantry and warbands are desperately trying to get to the hill to help out the camp.  But the camp falls before the warbands get to help.  The camp is looted and the Romans win as the British army has broken.

End game

Another interesting scenario.  Lots going on.  I even got to do a rule change!

 SAUMIZEGETUSA, 105 AD

Trajan's first campaign battle against the rebellious Dacians.

Link: https://en.wikipedia.org/wiki/Battle_of_Sarmizegetusa

Map: Hill centre of Dacian side, 4 units wide.

Special: None.

Dacians (bp 3): 1 LDR, 1 HC, 1 LC, 1 HI, 4 WB, 1 LI.

Deploy: HC WB  on hill: WB HI* WB WB,  LI LC .

Romans (Trajan) (bp 3): 2 LDR, 2 HC, 4 HI.

Deploy: HC HI HI* HI* HI HC.

Deploy, Romans on the left.

The Dacians need to stay on the hill if they can to get the bonus of being uphill.  Otherwise the flanks are fairly equal and can be tied up to stop them supporting the centre attack. The Romans need to attack the Warband, hopefully break up the line when they impetuously charge.  They have two leaders in the centre so that is an advantage.  The Heavy Cavalry on each flank can hopefully delay the opposing flack forces so the infantry can be routed.  

The Romans advance the centre and the flank units move up in support.

The Roman centre does not tempt any warbands to break ranks so they charge up the hill into the Dacian infantry. A few disorders, mostly on the Romans and one of the Roman leaders dies.  But at least the Romans all survived so they will have the advantage next turn. 

Infantry clash on the hill

Bad luck next turn sees one Roman unit rout.  But then in a stroke of excellent luck (three 6s) sees three warbands in the centre rout.

Meanwhile the Dacian right flank advances and contacts the opposing Heavy Cavalry – disorders all round.    Bad luck sees the Heavy Cavalry rout.
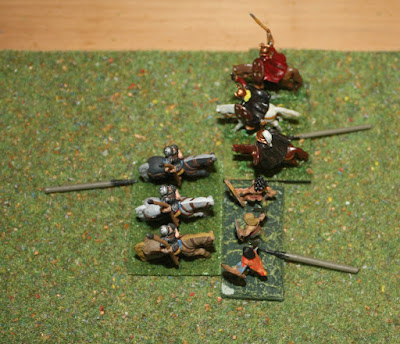
The Dacian right wing attacks the lone Heavy Cavalry

Before the Dacian wings have a chance to come to the rescue in the centre the Romans encircle the remaining Dacian Heavy Infantry and it is routed.  The Dacians have lost!

No end game picture as I forgot.

A close game.

ARMENIA, 114 AD

Trajan's final eastern battle against the Armenians and their Parthian allies.

Link: https://en.wikipedia.org/wiki/Trajan%27s_Parthian_campaign

Map: Two small hills at rear to both sides of the Armenian edge.

Special: Romans must take camp for a win, else most they can achieve is a draw.

Armenians (bp 3): 1 LDR, 1 HC, 4 LC, 1 PX, 1 LI, 1 LA, 1 CP.

Deploy: LA MM PX HC* LC LC LC LC, Camp on right hill.

Romans (Trajan) (bp 3): 2 LDR, 2 HC, 4 HI.

Deploy: HC HI HI* HI* HI HC.

Deployment, Armenians on the left

Interesting setup.  The Romans need to focus on the camp but there are a lot of units on the other side.  The first thing to do is refuse their right flank and move forwards with the left and centre towards the camp.  The Armenians need to break the Romans before they can break the camp. 

Romans advance the Heavy Cavalry and legionaries, drifting to their left.  The Heavy Cavalry on the right flank moves to protect the legions flanks.  The Armenian’s all advance except the left flank Heavy Cavalry that turns to move to right flank.   The Heavy Cavalry and Light Cavalry dance around a little for no real effect.  The Light Cavalry units fire on the legions for no effect.

Early manoeuvring

The Armenian left flank has managed to engage the Roman Heavy Cavalry.  The Armenian Phalanx is engaged by a legion and is soon routed.  One of the Light Cavalry routs due to a Roman legion.  The Romans also have a few disorders on them due to Light Cavalry arrows. 

Mid game

The Armenian Medium Infantry is gone, as is another Light Cavalry.  The Heavy Cavalry manages to hit a legion in the flank but the romans are only disordered.  The Heavy Cavalry is then also attacked in the flank and it is routed.  Another Light Cavalry is trapped from the flank and routed as well.  The way is open to the camp.  The Romans will win as they have not taken a loss and can capture the camp. 

End game

A very interesting game with all that Light Cavalry.  A bit of crowding at the bottom of the hill.  I am surprised more Roman units were not lost.

End of 30 games

Well, that was fun.  I may have to do that again some time, or maybe not!  At least play more of these historical scenarios using these rules, easy to set up and fast to play.  There are only a few hundred more to try J