Sunday, 20 October 2013

Gaming on a Cruise, including Mighty Armies AAR

The Short Story

So I end up going on a cruise with the family. So what do I do - I take some figures to get a game in.  It gets better as the other families I am going with all have gamer dads. Yes, we gamed.  It included:


The Pacific Dawn off Lifou in New Caledonia - it was tough!

The Longer Story
Background
So a female friend of a friend organises to go on a 7 night cruise on the Pacific Dawn to New Caledonia and Vanuatu (from Brisbane were we live) and keen to get others to go.  My wife's best friend decides to go as well so naturally we booked to go as well.  All up there was 31 of us - about 16 children from 5 to 10 years old and 15 adults.  All the dads ( the 6 male adults) that went are gamers of one form or another.  It just turned out that way - some of us had never met, some were acquaintances etc. Most of us had never gamed against one another. We had fantasy role players, War Machiners, boardgamers, ex-WK40K's and me, the historical miniature gamer (although I have a large boardgame past).

We all brought something (although again, none of us actually worked anything out before or even talked about it).  This post is mostly my point of views of the games I played.

The miniature rules
I knew if I took minis then there would be at least one person to play - the guy I play Armati against about once a year was going.  I did take along the Armati rules - just a cheat cheat, I know the rules fairly well I was not going to cart all the rules.  But in case others wanted to play, I tarted up my one-page Mighty Armies Ancients rules.  Simple and yet great fun.  The tarting was upgrading the unit combat values in line with Mighty Armies 2nd edition and modifying a couple of the rules to be in line with the 2nd edition.  I also made sure that just about every rule was covered, or at least had a reference to it to jog my memory,  on the one page. It also had a couple of my tweaks included. I only have the MA and MAA PDFs and did not want to print out all the rules, short as that may have been.


The one page Mighty Armies ancients rules reference.
Note that I was planning to run either or both Intro Armati on 2'x2' (core + 50 points) and Mighty Armies Ancients with 40AP on 2'x2'.

The minis
I was hoping to use a document box to store a couple of armies, the rules, a felt mat and dice etc.  I bought some foam to layer in the box to shock proof the minis

What I had to put together - document box, some foam green felt and a bunch of small terrain pieces.

It turned out that once I put the two layers of 20mm foam with miniatures between them there was enough room for the 2'x2' felt mat and a few pieces of paper.  So I got a small plastic container and put the terrain, dice, rules etc into that.

Things that were more tedious than I thought: 
1. I had picked up a green throw rug from IKEA a few years ago as you can never have enough terrain mats!  I had no used it, so I would just cut out a 2'x2' square.  Felt does not cut as easy as I thought - it stretches a lot.  Next time I would just go with green cotton, although now I have the felt mat, it does have a bit of weight to it which was good.

2. I selected about 40 15mm DBx bases that could form an army of Greeks, Macedonians and early and Late Achemenid Persians.  Making the indents in the foam was more tedious than I thought.  I used scissors and fingers to rip the holes.  I thought it would be easier, but with hindsight it was always going to take a while.

Anyway, everything packed in fine, and there was no damage at all.

How it packed together - document box with figures on right and small plastic container for everything else.
I also packed Family business and Naval War is they were staple games I played in the 80s while wait for people to arrive for games.  I have no played either since about 1990.

The gaming setup
It was a 7 night cruise and 3 days of those was on islands.  The best time we found for gaming tended to be mid to later afternoon - that was when there seemed to be a gap in activities of interest (playing games after Martini Masters may not have been the best idea).  The other time was evening after the main show finished - about 9:00 onwards.  to be fair, we did socalise at this time as well and I think only gamed two nights.  Games longer than 1.5 hours were a struggle.  With so much on, 1/5 hours was about the longest break we got!

Since day one we seemed to have drifted to a standard spot on the promenade deck.  We had smooth sailing the whole trip and the place we staked out was out of any wind.  It was a place all of us knew we could go any there would be someone from our party there.  The tables were a good size - nearly 3 feet round glass tables.

Munchkin and Super Munchkin
I had actually not played either of these.  They form an excellent narrative and I found Super Munchkin (I only played one game of this) fun but long.  These were played in the first few days of the cruise but finishing a game proved difficult for the guys and the only time one was finished was when they started with level 5 heroes.  The "real gaming" started on the 2.5 days on the journey back from Port Vila.

Super Munchkin in action on the promenade deck.
 Star Wars: X-Wing
One of the guys had packed the Star Wars: X-Wing starter set.  I had three games of this - once as each tie fighter and once as Luke.   This game fit perfectly on the round table.  It was loads of fun.  I had played Wings of War about 8 years ago and had a blast with that but I like Star Wars: X-Wing just as much, if not more.  As soon as I came back I scoured the internet looking for the cheapest place to get it but have so far resisted.  I know I am going to break down and get it, the question is just how long!  Christmas is looking like a good excuse....

Family Business
Only one other person was familiar with this game but all that played it wanted to play it again.  It was as good as I remember it.  Fast, full of light hearted revenge and banter-driven.  What more can someone ask for.  I originally had the first edition which had a lot of information on the cards so you never had to refer to the rules.  I lost it and picked up a second edition which is not so good as it just has the heading.  I am tempted to write the description of the cards on the cards - it really makes the game go faster.

Family business in action on the promenade deck (different day to Super Munchkin)

Mighty Armies Ancients
We got in one game.  I had not bothered to write up army lists but had worked out AP points for the various units.  so I just selected what seemed like 40AP of Greeks and Early Achemenid Persians.  From memory the army lists were something like this:

Greeks:
7 Hoplites, phalanx (extra +1 if front and back row is phalanx) and fearless (no drive back)
2 Peltasts
2 Skirmishers
3 Heavy Cavalry

Persians:
1 Immortals
4 Sparabara
2 Heavy Cavalry, with bows
2 Light cavalry, with bows
2 Light Infantry

We played 2 a side but did not split the sides.  I think by the second move everyone had figured out the rules.  I briefly explained the rules and said "I may have left something out, but it will only come to me if it is to my advantage and I can say 'actually, you can't do that'".  So, on about turn 4, they bowfire (shooting I) at the general with a number of troops and I then remember a rule and say "actually, the general has 6 combat value so you cannot actually cause any damage.  I did say that I may remember some rules if they are to my advantage!"

A good move by the Persians sees the Horse archer move to the centre of the field to escape some hoplites on that flank.  On the other flank the pride of the Greek cavalry charged directly ahead into the Immortals and Sparabara.  Two were lost to bowfire, and the other died in the resulting melee. 

The game after about 3 turns.  The greek cavalry on the lower right was wiped out for no losses to the Persians
Meanwhile, the Greek smaller hoplite group and peltasts ganged up on the Persian cavalry and it was lost.  The horse archers tried to rescue them, but they were also lost.  The main battle was set between the main Hoplite unit and the Sparabara unit.  It was very close, one unit dying per turn until finally the Greek general, last base standing, was destroyed.

A bit later on.  The Persian cavalry to the top right was wiped out.  The main battle units clashed in the centre.

Playing the game was so much fun, everyone wanted to play until one side was eliminated.  The Greeks lost, but there was only about 3 Persians left on the table!  The whole game from unpacking, explaining the rules and playing until one side was gone was 1 hour.

One side had lots of bows, and the other side had none.  I used the shooting rules as it was in the rules.  It helped that all the bow-armed units were only Shooting-I.

Other games
3 people tried Naval War but it does not work well with 3, as they found out when the Destroyer squadron turned up early, they could not get rid of it and one player was out on turn 3!
2or 3 people tried out King of Tokyo - from all reports a fun game.
There were a number of games of Sequence going during the cruise.  I did play one game.  You have to think all the time so it is very quiet - not much room for banter.
Strangely no Eurogames.  Which is not a bad thing as I am not really a fan of them!

Verdict
A hoot!  I go more gaming in on the cruise than I have in the last few years.  And a wide range of games too. I was not the most prolific gamer in the group but gave it a good go - some stayed up a few nights to play.  If you ever get to go on a cruise with some gaming mates, you need games that take about 1 hour, and do not take up that much room.  And you can easily play miniatures.  I think if we had got in a game of Mighty Armies at the start, we may have got in another couple games later on.  No matter though as there was plenty of gaming choice available and we all had a great time, both gaming and non-gaming.

Monday, 16 September 2013

Battle of Sentinum 295BC using Ancient Battlelines Clash

Introduction
This is game 17 in playtesting my ancient rules by replaying historical battles. Previous games used my rules called Ancient Warrior  Battles.  The latest version is on its own blog page. I am playtesting the rules by replaying all the Peter Sides scenarios from his Historical Battles books.  ABC is designed to finish in under an hour on 2'x2' tables.

Battle of Sentinum
It is the third Samnite war and the Samnites gather allies to defeat Rome.  The Romans manage to draw away some of the enemy troops and are left facing the Samnites and the Gauls.

Here is a link of interest that I used to create the scenario:

Wikipedia article

Troops
Romans
Roman and allies - Romans infantry are the two deployed 4 units deep

2 Legionaries, HI, protection 0, line relief
2 Spear, HI, protection 0, phalanx, line relief
2 Spear, HI, protection 0, phalanx, fortitude +1, line relief
2 Skirmishers, SI, javelins
3 Heavy Cavalry, HC

10 Latin Ally troops, LI
4 Latin Ally Skirmishers, SI, slings
1 General, +1 command ability

Breakpoint:14

Samnites and Allies
Gauls on the left, Samnites to the right.

Samnites
10 Spearmen, LI, fortitude +1
1 Heavy Cavalry, HC
1 General

Gauls
8 Warbands, LI, impetuous
3 Skirmisher, SI, javelins
1 Heavy Cavalry, HC
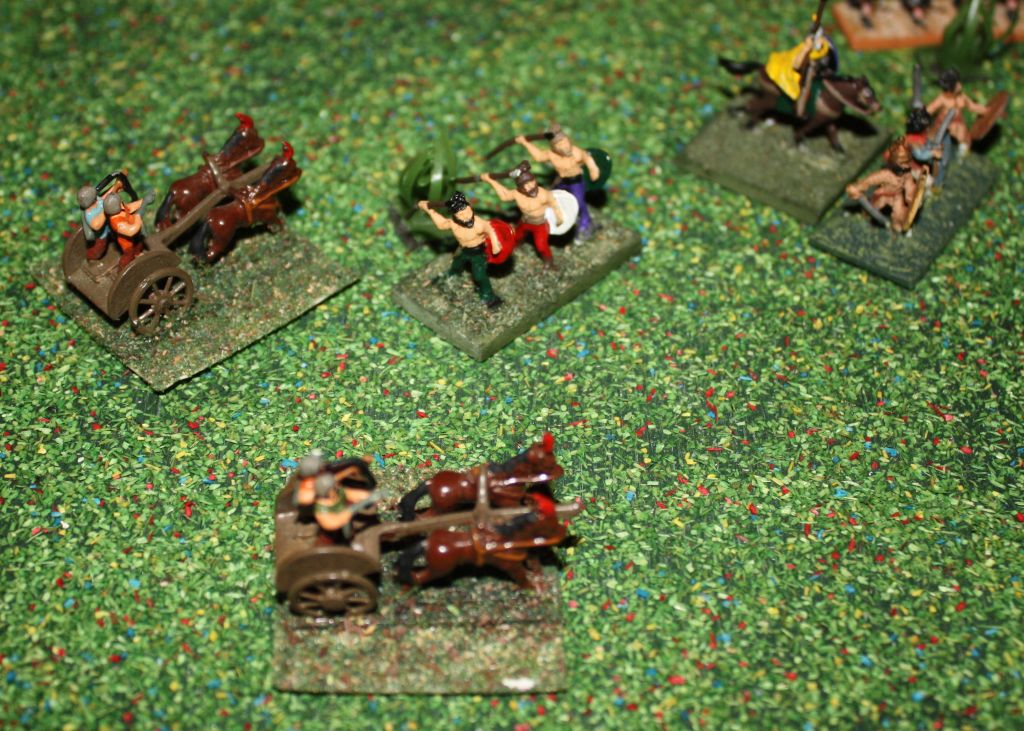
2 Chariots, MCH
1 subgeneral

1 Samnite Camp

Breakpoint: 13

Each general can only command their own troops.  

I do not have any of the Samnites as models so are represented by various Late Roman Auxilia. 

There are a lot of troops for a small board!

Deployment
Deployment:

An overview of deployment - Gauls and Samnites (with camp to the rear) on the left

The Game
Romans move first.  Not sure they will do so well against the Gauls, but they better chance against the Samnites so advance on the right and only slightly on the left.

The Romans right advances

The Gallic warband group

Gallic cavalry and Roman cavalry locked in melee on Roman left.  The warband group advances, as does the Samnites. Note the warbands are now split into two waves.  This is due to an echelon rule where, for a warband, a unit in a rear rank behind a retreating front unit will be disordered and will need to move into the vacant space, and will not get a charge bonus.  But if separated, the warband unit will still be disordered, but will be able to charge in with the charge bonus.   If the separation is more than 6cm, then the warbands will not be interpenetrated by the retreating front line (retreat distance of 6cm for light infantry warbands).

Samnites charge and ensuing melee sees a Latin ally routed.

The Roman right from the Roman side.  Cavalry in melee on the right and the Roman allies in centre not doing so well (green markers are disordered markers).  One lot of Romans in 4 lines can be seen on the far left.

There is a cunning plan for the Gauls on the Roman left - the cavalry melee with the Romans has the Romans at a +1 advantage due to be supported.  Gauls do have a general, the Romans have the command marker (a +1).

Roman cavalry on the lower left in combat with the Gallic cavalry.  The gallic chariots are in reserve,ready to pounce.  And to the right can be seen the advancing warbands.

During the Gallic turn, the Gallic general is moved to the chariots.  It is hoped the cavalry will be defeated and then rout.  The Roman cavalry will likely pursue into proximity range of the Gallic chariots, who will likely charge.  The chariots will be at an advantage as they are not disordered and also will be supported while the Romans no longer will be.  It worked just as planned. And the command marker is captured.  A command marker is deployed for the +1 command ability, and is not a general, so while is does not count towards the breakpoint, it does reflect a loss of the marker and so won't be on the table any more.

The Roman Cavalry in melee with the Gallic chariots, just before the cavalry routs.

Warbands charge in.  A lucky 6 sees a Hastati unit retreat though the other "ranks" (ranks here representing the Romans lines).  As they all have the line relief ability,  interpenetration has no effect.

The Roman lines in melee with the warbands.

Note the rear line of warbands is 6cm behind the first. An unlucky retreat roll (a 6) will see the retreat distance become 8cm and then interpenetration will have an effect.  Will take the chance.

Samnites move into close combat.  Mostly disorders and so locked in melee.

On the Roman right, the Romans are doing OK against the Samnites.

Over next turn or two, a Latin ally unit and a warband is lost. Line relief is working well for the Romans.

The second Roman heavy cavalry in reserve manages to make it around the flank to hopefully cause havoc in the rear.
The Roman reserve cavalry heading for the Samnite camp.  The game ended before they had a chance to do some looting.
Some Samnites units in the centre failed orders rolls for a number of turns and so were unable to clear the centre of the one lone Latin ally that was defending it.

Facing the lone Latin ally at the bottom centre are 4 Samnite units that just did not follow up the opportunity to attack (failed order rolls).

Another turn on both sides sees the Roman centre finally fall.  Importantly, the Gallic general and a warband charges into a disordered legionary unit and routs it.  The Roman reaches their breakpoint and so have lost.

A very happy Gallic general with warband.


The Gallic chariots were in the process of turning to reenter the battle.


End game.  Remaining Roman units are circled in red.  Not that many.

Verdict
I really like this scenario - Romans, warbands, stacks of light infantry (medium infantry in some rules) and an interesting setup.  The rules work as I expected them to, always a good thing.  There was a lot of troops - about double what I would recommend for a game with my rules.  I am still not sure whether the Samnites should be poor heavy infantry or good light infantry.  Sticking with the latter for now.  The Medium Chariot troop type worked well for the Gallic chariots.

I have been looking for a scenario to test other rules with as I am close to being over the Battle of Heraclea.  I was thinking one with warbands if there was one I liked.  Bibracte looked good, but Sentinum could be a contender if I cut down the number of bases by about 50%. Sentinum has more troop types in it!

Side note on Imperator
Lastly, I have been busy since having received Bill Bank's Imperator boardgame.  I love how this game may work.  This may change once I play it :-)  I have spent the last week madly doing up a spreadsheet to take a lot of the tedious bits out - events, random provinces, ownership of provinces etc.  Hopefully I will start to play a game soon and replay the battles using my rules.  I will try out the first scenario which is Middle-Eastern in 1700BC.  Back to chariots!  I will still be replaying the Peter Sides scenarios and also doing some other battles on the side to test out the rules. All part of the plan to have a lot of the playtesting done by early next year so I can get back to testing out other rules - the original aim of the blog!

Wednesday, 4 September 2013

Battle of Caudine Forks 321BC using Ancient Battlelines Clash

Introduction
This is game 16 in playtesting my ancient rules by replaying historical battles. Previous games used my rules called Ancient Warrior  Battles.  The latest version is on its own blog page. I am playtesting the rules by replaying all the Peter Sides scenarios from his Historical Battles books.  ABC is designed to finish in under an hour on 2'x2' tables.

Battle of Caudine Forks
During the second Samnite War, the Samnites managed to trap a Roman army in a defile.  Eventually they let the Romans go.  So this scenario is creating what happened if a battle actually occurred.

Here is a link of interest that I used to create the scenario:

Wikipedia article

Changes to the Peter Sides scenario
I reduced the Romans to a single line of spears (in DBx, Spears benefit from a rear rank but my rules the rear rank bonus is included in a single unit of troops). Note that if I was replaying it, I would give the Romans two ranks of spears using my rules.  Otherwise the odds are very much against them - the two ranks would give them a bit more of a change.   I also reduced the forces by about 1/3 to account for me shrinking the table size from 36" to 24" wide.

Troops
Romans

5 Legionaries, HI, phalanx
2 Latin Allies, LI, fortitude +1
1 Heavy Cavalry, HC
6 Skirmisher, SI, slings
1 General
 
Breakpoint: 8


Note that the scenario had Tullian Romans with all Legionnaires as Spears, so I have used that.

Samnites

18 Samnites, LI, fortitude +1
2 Heavy Cavalry, HC
1 General

Samnite Allies (behind the barricade)
1 Spearmen, HI, phalanx
1 Heavy Cavalry, HC
2 Skirmisher, SI, bows
1 General
Breakpoint:13

I do not have any of the Latins and Samnites as models. And I definitely do not have 18 of anything that could stand it for them.  So the Samnites use various Late Roman Auxilia and others.

Deployment
Deployment:
Romans in the centre with Samnites Light Infantry on the hills and facing a small force behind the barricade to the top of the picture.
The GameSamnites move first and charge down the hill to the Romans.

From the roman side - Samnites charge down the hill into the sides of the roman line.


It will be frontal attacks and not flank attacks (although it may look like it).  For a flank attack the attacking unit must be at 90 degrees or more to the rear side of the defending unit. 

The Samnites force the Latin Allies on each flank to retreat but stop against the Legionary phalanx.  A lucky 6 on the left side of the ravine see a Legionary disordered but not the attacking Samnite unit (who is with the general). Some Roman skirmishers are also cleared. Note that a group of units, when moving, does not have to maintain the front line - some units can move a little further than others, so long as sides are still touching.

The Roman right flank after combat


...and the Roman left.

Roman turn went badly as expected.  Heavy Infantry can only wheel or move, if they do both they are disordered, very bad for a phalanx.  Best hope is to advance slightly in an inverted U to ensure any attacks will be on the front.  Unfortunately they will count as unsupported, but the phalanx CV of 5 will offset this a bit.  I must admit, the fact that the Samnite have a unit to the rear means even when they advance or pursue due to action test, that they still count as supported is good for them (unsupported is a -1 modifier to just about any test, including combat)  And a roll of a 1 saw the Legionary Vs the Samnite generals rout.

Legionary units form a U shape in the centre.  Will not count as supported but gives them a good chance of protecting the front, and next move bringing the fight to the enemy (except the game ended before then!)

Samnite turn goes well and and at the end of their turn the Roman breakpoint is reached.  Not surprising.  Overwhelming numbers and no room for Roman manoeuvre.  The Samnite tactic was to throw themselves at the Romans this turn.  Light Infantry +1 fortitude is a CV (Combat Value) of 3 Vs Phalanx with a CV of 5 -1 for unsupported is 4.  If the Samnite can cause a disorder, and they will on a roll of 3 or more, then the Phalanx CV will drop to 1 so the turn after they will be at a big disadvantage.  They managed to attack some legionary unit a couple of times this turn and gt rid of another two.

Game end.  Roman cavalry at the bottom and a couple of Legionary units in the centre.


Verdict
Very fast (Samnite turn, Roman turn, Samnite turn) but a surprising amount of action went on.  And it was fun - mostly because of the unusual layout of the scenario.

Sunday, 1 September 2013

Battle of Veseris 340BC using Ancient Battelines Clash

Introduction
This is game 15 in playtesting my ancient rules. Previous games used my rules called Ancient Warrior  Battles.  The latest version is on its own blog page. I am playtesting the rules by replaying all the Peter Sides scenarios from his Historical Battles books.  ABC is designed to finish in under an hour on 2'x2' tables.

Note the Peter Sides scenario is titled Battle of Suessa but my search of the internet did not find it. I did find the exact same battle under the title Battle of Veseris. 

Battle of Veseris (or Vesuvius)

The first battle of the Latin War sees Romans move to Capua to engage with the Latin allies

Here are links of interest and that I used to create the scenario:

Wikipedia article
HistoryofWar article

Troops
Romans
The Romans in 4 lines.
2 Legionaries, HI, protection 0, fortitude +1, line relief
2 Spear, HI, protection 0, phalanx, fortitude +1, line relief
2 Spear, HI, protection 0, phalanx, fortitude -1, line relief
2 Heavy Cavalry, HC
4 Skirmisher, SI, slings
1 +1 General

Samnite allies in the rough.  On the right flank.
5 Samnite Infantry, LI, fortitude +1
1 Samnite Cavalry, HC
1 Samnite sub-general

Breakpoint: 12

Romans general can only command Romans, Samnites only the Samnites.

Latin Allies
Latins and Campani - facing the Romans

Latins and Campani
1 Legionaries, HI, protection 0, fortitude +1, line relief
2 Spear, HI, protection 0, phalanx, fortitude +1, line relief
2 Spear, HI, protection 0, phalanx, fortitude -1, line relief
1 Heavy Cavalry, HC
2 Skirmisher, SI, javelins
1 General

Aurunci and Sidicini in the rough.  Facing the Samnites.

Aurunci and Sidicini
6 Allied Infantry , LI
2 Skirmisher, SI, javelins
1 Heavy Cavalry, HC
1 Samnite sub-general

Breakpoint: 10

Each general can only command their own troops.  

I do not have any of the Latins and Samnites as models.  So the Latins use Republican Romans, but different figures the the Romans; and the Light Infantry are represented by various Late Roman Auxilia.

Deployment
Deployment:

Romans and allies to the left, Latins and allies to the right.  The brown is rough ground.

Romans are stronger than their Latin counterpart so that should be their focus.  The Aurunci and Sidicini are stronger that the Samnites on that flank so that will be their focus.

The Game
Romans advance, Aurunci and Sidicini advance.  Skirmishers are cleared in front of the heavy infantry while the light infantry get close in the bad going.

Latins  in the foreground advancing on the Romans.

The Aurunci and Sidicini in foreground about to contact the Samnites
Combat in the rough - a few retreats. And I have just realised I had forgotten that Light Infantry are 1/2 movement rate in the rough and should have been moving slower.  It does mean that close combat should have occurred two turns later than it has.

Combat in the rough - the Samnite have been forced to retreat a few units.
In a turnabout, the Cavalry-light infantry clash sees the Aurunci light infantry rout the cavalry unit (a 6 in the second round of melee after both disordered in the first round).

Aurunci light infantry in contact with Roman cavalry.  Both disordered.  The cavalry are subsequently routed.

The left most Latins charges the opposing Romans.


Latins (bottom in two lines with general)  in melee with Romans (in three lines)
Each "column" is fronted by a Legionaire unit (Heavy Infantry), a -1 fortitude phalanx in the middle and a +1 fortitude phalanx in the rear.  The Latins have a general.  All have line relief attribute that means interpretation has no effect, and a disordered unit can swap places with a ordered unit behind it.  The line relief rules worked really well and I am happy with them.  They worked really well to break a melee (normally a 1 or 6 will break a melee between equal unit, a 1 is bad for the attacker, a 6 is bad for the defender.  The line relief allows a fresh unit to perform the combat with a 5 or 6 now being bad for the defender.

So how did it actually play out: The front units were disordered.  In the Roman turn, the Legionnaire units swapped with the -1 phalanx that managed to rout the opposing Latin infantry.  Pursued into the -1 phalanx and subsequent close combat saw both disordered.  In the Latin turn, swapped out -1 fort phalanx for +1 fort phalanx and routs the opposing infantry, pursues into disordered HI  that routs. And then into +1 phalanx that also routs. The Latin General was key in getting the +2 in every combat.

Aurunci manage to rout a few more Samnites.

There are more Aurunci and Sidicini at the front than Samnites.  The latter are losing.


The legionaries melee described previously actually caused the Romans to reach their breakpoint.   I did play out the other legionary "column" but that did not have the swing to cause any routs and simply continued in melee. 

End game with Roman edge to the bottom.  The Latins have control of the Roman right flank and the Latin Allies are doing well in the rough too.

Verdict
I did like the way the line relief rules worked - I have tested them once before and it was good to see that they did work for three deep lines as well.  After this game I did have a deep thoughts about the power of generals (+2 is a excellent modifier for a single d6 roll and the average combat value is 3).  but I did a little bit of reading and researching and soul searching and left it at +2.  The general is not merely the general - it represents a focus point for command and combat across the entire army.  The Roman general should have moved to oppose the Samnite general to cancel out the +2 bonus.  I have done this in a few previous games and it make sense. It also matches Bill Banks Ancients (from which ABC derives some bits from) that had a similar concept to this.  I am good again.

Tuesday, 20 August 2013

Battle of Crimisus 341BC using Ancient Battlelines Clash

Introduction
This is game 14 in playtesting my ancient rules - Ancient Battlelines Clash. Previous games used my rules called Ancient Warrior  Battles.  The latest version is on its own blog page. I am playtesting the rules by replaying all the Peter Sides scenarios from his Historical Battles books.  ABC is designed to finish in under an hour on 2'x2' tables.

Battle of Crimisus

Carthage lands in Sicily with a large army and Timoleon leads a Greek army to stop them plundering Sicily.
 
Here is a link of interest and that I used to create the scenario:

Wikipedia article
Plutarch Life of Timoleon 25-29
Diodorus Book 16.77-80

I also used Lost Battles (Sabin).

Changes to the Peter Side's scenario
The Peter Sides scenario had both forces lines up against one another on a slope with bad going occurring after 1d6 turns.  Looking at Plutarch, Diodorus and the Lost Battles interpretation, it seemed that initially some Carthaginian forces were engaged (10,000 including chariots) and then later more Carthaginians crossed the river and those were then fought.  So I had to go back to the original (translated) sources to come up with a scenario more like the Lost Battle one.  I can see where I think Peter Sides was going with the way he set up the scenario - the initial battle could be seen as inconclusive and not really a melee, allowing one to then set up the battle as a more conventional one. 

I did reduced the units by about 1/3 to account for wider width that was in the original scenario.

Troops
Greeks
Greeks - cavalty on the flanks, skirmishers at the foor of the hill and hoplites and peltasts on the hill.
3 Hoplites, HI, protection +1 phalanx
2 Heavy Cavalry, HC
2 Peltast, LI, fortitude+1
2 Skirmisher, SI, javelin
1 General +1 (Timoleon)

Breakpoint:6

Carthaginians
Carthaginians - chariots, pelatasts and skirmishers represent the 10,000 already across the river.  Heavy infantry, cavalry and more peltasts about the cross the river to the rear.
1 Sacred Band, HI, protection +1, phalanx, fortitude +1
2 Hoplites HI, protection +1, phalanx
5 Light Infantry, LI
4 Skirmisher, SI, javelin
2 Heavy Chariot, HCH
2 Cavalry, HC
1 -1 General (Asdrubal)

Breakpoint: 9

Deployment
Deployment:

Overhead shot with Greeks at the top and Carthaginians and river at the bottom.
Chariots and skirmishers on one side of the river - others in the process of crossing the river.

I had to add rules for crossable rivers - had rules for streams, none for crossable rivers.  Crossable rivers count as difficult terrain (reduces combat value) but take an entire move - stop when contact, one move to get to other side. Count as in difficult when in contact or in the river.    

After 1+d3 turns, all terrain becomes rough (to account for the turn in the weather).  As the movement rate is faster in my rules than DBA, I reduced the random turn range from that in the original scenario (1d6).

The Game
Greeks advance and the flank cavalry charges the chariots.  The Greek right flank manages to rout the opposing chariot (lucky 6 roll and then successful pursuit) and the left flank sees both cavalry and chariot in disorder.
Victorious Timoleon and heavy cavalry (on the Greek right flank)

While on the left, the heavy cavalry (with attached subordinate commander) still in melee with the opposing heavy cavalry.
The rest of Carthaginian army is crossing the river. The right flank Greek cavalry attacks the Carthaginian peltasts and manages to rout one.
 
View of the line from the Greek side.  Note the Greek heavy cavalry in the centre that is rolling up the Carthaginian peltasts while the rest of the Carthaginian army is still crossing the river.

The cavalry routs another peltast, a Greek hoplite advances due to skirmisher fire and forces a Carthaginian peltast to rout; pursues into the river and routs an opposing hoplite.
 
The Greek hoplite in the centre has pursued into the river after routing a Carthaginian Heavy infantry, and is meleeing with a peltast.  The Greek heavy cavalry in the centre has finished cleaning up the peltasts.


A roll of a 6 sees the left flank chariot routed.  This then has the Carthaginians reaching their breakpoint.  They were unlucky to lose the hoplite, I think they would have done a bit of damage once out of the river.
 
A view of the forces at game end.  The Carthaginians are in the river (except for the Greek hoplite from the last picture).
Verdict
Well, that game was faster than I thought.  And I played this is daylight and I am better at photos of the game when playing at night. If I was going to re-do the battle, I think I would only put 1 peltast (not 3) on the side of the river with the chariots and have peltasts more with the river crossing.  As it is the breakpoint can be reached by routing the forces that have already crossed the river and only one more heavy unit the river crossing.

This is the last of the hoplite-type battles, the next is the first battle of the Latin War.  Then there is a whole bunch of pikes (Alexander and Successors) and early Roman battles coming.  But...to speed up playtesting, I have ordered a used copy of Imperator, a light campaign system by the same author (Bill Banks) as Ancients.  As Ancient Battlelines clash owes some of its lineage to Ancients,  I think I can use Imperator to generate a a bunch of battles around a particular epoch.  I may be wrong though - will find out when it arrives. 

Saturday, 17 August 2013

Battle of Crocus Field 353BC using Ancient Battlelines Clash

Introduction
This is game 13 in playtesting my ancient rules. Previous games used my rules called Ancient Warrior  Battles.  The latest version is on its own blog page. I am playtesting the rules by replaying all the Peter Sides scenarios from his Historical Battles books.  ABC is designed to finish in under an hour on 2'x2' tables.

Battle of Crocus Field
Philip comes to the aid of the Thessalians to defeat the Pheraeans.  The Pheraeans were allied to the Phocians (led by Ononmarchos) who invaded Thessaly and defeated Philip.  Philip went back to Macedon but returned the year after with a greater force.

Here are links of interest and that I used to create the scenario:

Wikipedia article
DBM Scenario

Changes to the Peter Sides scenario
The width was 37" so I had to reduce the number of bases by 1/2 to reduce it to 24".

Troops
Macedonians

Macedonians - cavalry to the left, hoplites in centre and flanked by peltasts and skirmishers

3 Hoplites, HI, protection +1, phalanx
2 Peltasts, LI
2 Poor Peltasts, LI, fortitude -1
2 Skirmish infantry, SI, javelin
1 Heavy Cavalry, HC, fortitude +1
1 Heavy Cavalry, HC
1 General (Philip II)

Breakpoint:8

Phocians
Phocians similar with cavalry on the right, hoplites in centre and flanked by peltasts and skirmishers
4 Hoplites, HI, protection +1, phalanx
2 Peltasts, LI
4 Skirmish infantry, SI, javelin
1 Heavy Cavalry, HC, fortitude -1
1 General (Ononmarchos)

Breakpoint: 6

Note on unit types: I have updated missile protection in the rules so that instead of missile protection being expressed as either -1,0 or +1 it is not 0, +1, +2.  It made it easier to do the missile firing - most units are missile protection -1 and that meant for every missile fire I have to mentally subtract 1 from the die roll.  Too taxing and I sometimes forgot :-)  A clear sign it needed change. So now that is one less modifier to normally worry about.

Deployment
Deployment:

Phocians on the left with less cavalry but more infantry. Macedonians on the right.


The Game
Philip moves to proximity range of the Phocian poor fortitude cavalry that stand of charging (rolled a 1 for reaction). Oops, Philip was hoping to draw them out and so have a good flanking force for the next turn. So on the next turn, Philip charges them; Phocian cavalry retreat, Philip pursues and routs them.  But now Philip is a fair way from the line and a turn later than he would have liked.

Philip at the back, near the edge and a long way from the enemy battleline (bottom left)

The Phocian main battleline continues to advance.  They have more hoplites and a general as well so need to get into melee as fast as possible before the cavalry comes back. 


Phocian battleline (at rear) moves very close to Macedonian battleline (front)


Proximity tests are required as the Phocians moved with 4cm of the Macedonians.  It would all be a pass here - the worst result to roll would be a 1. For an undisordered with support, the only effect of a 1 will be for skirmishers, archers, shock and impetuous and none of these needed to take a test so I did not roll.  All Macedonian unit stand their ground.

Macedonians about face their elite cavalry (are greater than 20cm from enemy so a normal move, not a complex one that would likely disorder them).

Philip moves to the other cavalry.  botrh cavalry are now at least facing in the right direction - towards the enemy in the centre.

Phocians fire with skirmishers and charge the Macedonian line.  Some reaction tests on each of the ends with skirmishers and the main hoplite clash saw a few retreats (a 1 and a 6 rolled in combat).

Result, looking from the Macedonian side, after proximity tests and one round of melee.  Green 'bushes' are disorder markers.

Another turn sees two Macedonian hoplites routed, for no loss to the Phocians.  But the Macedonian cavalry comes charging in from the rear.

Macedonian cavalry is approaching the rear of the Phocians


...and slams into the rear of the Hoplite unit with Ononmarchos.  The Phocian unit hangs on though.

The rear attack will only fail to rout the unit on a 1 or 2.  Rolls a 2.  Locked in melee. Elsewhere another Macedonian light infantry is destroyed.  The Macedonians have reached breakpoint - all light infantry and two-thirds of the hoplites gone.

Macedonians lose another unit and lose the game.  This is a view of what the centre looks like.

If the cavalry have not gone so far, the Macedonians would have won; or even if the Light Infantry had hung on one more turn.  Maybe sending both cavalry against the single opposing Phocian Cavalry was not a good idea.  I did think about doing just that but two is better than one, even if the Phocian cavalry is crap against the Macedonian elite cavalry unit.  Bad Macedonian tactic by me.

Verdict
Surprised a little that the rear attack did not work, and had a 1/3 chance of still going.  I guess all attacks against it count as flanked and if it was not for the general attached to the flanked unit, the Macedonian hoplite to the front would have routed it.  So, the general kept them in the game. Otherwise still fast, still fun.