Tuesday, 26 June 2012

Battle of Uruk 2271 BC using Ancient Warrior Battles (001)

Introduction
I have written some fast play ancient rules to replay historical battles on 2'x2' tables.  Here is the link to the rules: Ancient Warrior Battles rules.  I have played a few games with them already but need more testing.  Since 2000, I have always wanted to play all the Peter Sides scenarios from his Historical Battles books.  Marry the two together and we have a match! The link to a page for background and a list of the scenarios is here.

Observant readers will notice that the Battle of Uruk does not appear in the Peter Sides books.  I wanted to have a simple battle with Ancient Near East troops and I found this battle of Akkad Vs Sumer.  So I am going with this one before tackling Megiddo.  It is different to the other battles I will play as there is not a defined army composition or deployment map.  But I've always wanted to play a game in Ancient Mesopotamia.

Battle of Uruk aka Unification of Sumer
Sargon of Akkad defeats Lugal-zage-si of Umma leading a army collected from Sumerian provinces.  See the Battle of Uruk wikipedia article for some information.  More  information and a scenario can be found in the GMT Games Great Battles of History game Chariots of Fire (link to boardgamegeek entry).  I did not use the Chariots of Fire scenario for this game but the game still has good background information. Note that the date of the battle depends on the chronology used - I've gone with 2271BC from Wikipedia.

Troops
There is not much information on the Akkadian and Sumerian armies.  I have used guesses and composition from a number of different army lists (Milgamex, WRG Ancients, FOG, DBM, Ancient Warfare, Armati Warflute lists and Hail Caesar) and the WRG Armies of the Near East.  I have assumed that the onager carts are out of fashion for Akkad, but still used by Sumer.  Akkad army is also differentiated by more loose order archers and some household spearmen.

Akkad
Army Type: Missile
Skilled general +1 (Sargon)
2 Household Spearmen -  Heavy Infantry, light armour, average fortitude, long spears
4 Spearmen - Heavy Infantry, light armour, low fortitude, long spears
4 Light Archers - Light Infantry, light armour, low fortitude, bow, archers
2 Javelineers - Skirmish Infantry, low fortitude, javelin
2 Skirmish archers - Skirmish Infantry, low fortitude, bow
Breakpoint: 8

Sumerian alliance
Army Type: Missile
Average general +0 (King Lugal-zage-si)
1 Onager cart - Light Chariot, light armour, low fortitude, javelins
6 Spearmen - Heavy Infantry, light armour, low fortitude, long spears
2 Light Archers - Light Infantry, light armour, low fortitude, bow, archers
2 Javelineers - Skirmish Infantry, low fortitude, javelin
4 Skirmish archers - Skirmish Infantry, low fortitude, bow
Breakpoint:  8

Note: Breakpoint is worked out as 50% of 2 points per heavy infantry and 1 point per light infantry (0 for skirmishers). An army breaks when reaching its breakpoint.

Deployment
I will use the optional rule that you must deploy in a certain amount of groups.  Akkad can deploy in four groups of units, Sumer in three.  You can split groups after deployment, for a slight penalty to orders.

Terrain is a flat plain.

I rolled for random army deployment.  This is similar to the battle tactics in Rally Round the King.
Akkad will defend along the line and deploy at least 50% of the spearmen in a second line in the centre as a reserve.  This reserve did not play much of a part in the battle until too late.  Bad plan Sargon!

Akkadian deployment

Sumer will focus on their centre and right flank and use missiles to disorder the enemy before using the spearmen as a hammer.


Sumerian deployment

Akkad is the attacker (only advantage here is moving first).


Deployment, Sumer to the left.  Apologies for the shiny board - it glows in the flash but otherwise it very matt.  Ah well.

If you have sharp eyes you will not that a lot of the troops don't really look ancient Mesopotamian.  Some are, but the rest are Assyrian allies and a couple of Persian allies as well.  I got most of these as part of a larger lot of painted figures.  The onager battle cart is a light chariot.  I was not going to paint up special figures for this one-off battle. And the field is grass where should really be earth but I don't have any other surface to play on.

The Game
Akkadians cautiously advance with the left flank kept back in reserve. The Sumerian javelin-armed skirmishers advance with the other Sumerian bow-armed skirmishers and inflict 3 retreats (that covert into destruction) on the Akkadian skirmishers. This leaves the Akkadian leading spearmen a little exposed.

Sumerian javelineers (backed up by heavy spearmen) that routed opposing skirmshers
Low fortitude skirmishers really don't hang around long. 


The exposed Akkadian heavy spearmen after being stripped of their skirmishers

Sumerian troops continue to advance, except the chariot/onager cart keeps rolling a 1 for orders and does not move;  only a 1 will fail. The battlelines get a lot closer and finally the chariot moves.

Main battlelines get close (top centre right).  Akkadian reserve line is at bottom left.
 The Akkadian reserve line (on their right flank) finally moves up and forces the Sumerian skirmishers to evade.  As this reserve line was supposed to be in reserve, I did not move it until a few turns into the game. The Sumerians attempt to rally disorder from the evading skirmishers. Needs a 4+.  Both roll a 1. At least the Sumerians are getting the 1's out of the way early!


Akkadian reserve line (on right) has advanced and caused Sumerian skirmishers (at left) to evade.  Green maker indicates disorder.
Rather than advance the Sumerian spearmen battleline through their own skirmishers, the Sumerians will keep the skirmishers in front and try to inflict some disorder on the advancing skirmishers.  And possibly force some of the Akkadian spearmen to react by advancing and therefore breaking up their battleline.  The skirmishers fire.  The Akkadian spearmen all pass their test (so much for that idea!) and charge the skirmishers, who all fire again and retreat through the rear spearmen.  Retreat = destroyed for skirmish infantry interpenetrating close order infantry.  However, when firing again they did manage to disorder one average fortitude spearmen. The Akkadian spearmen pursue the retreating skirmishers and charge into the the Sumerian spearmen.

Battlelines meet.  Sumer to the bottom, Akkad to the top.  Sargon is top right, King Lugal-zage-si is at the bottom centre.

All the Sumerian spearmen stand to the charge and close combat ensues. Despite the better fortitude of the Akkadians, one routs, one retreats (forcing it to move 1/2 move or 4cm back) and one is pushed back.  The retreating spearmen is pursued for further combat. 

View post combat - note the Sumerian advance(due to pursuing) in the middle.

The pursued Akkadian spearmen unit is routed.  As is the attached Sargon.  Oops.  Well, I did design these rules to be fast!  Akkad has lost 6 breakpoints already (2 more until the army is broken), Sumer none.


State of play, Sumer to the left.  Note the breakthrough of the Sumerian troops in the centre, next to the disordered Sumerian skirmishers.
The chariot is in charge range, but fails its charge orders roll. The Akkadian archer facing the chariot fires and forces the chariot to retreat (archery is not great in this game but the chariots rolled a 1 for being fired on - the only score that would force a retreat).  In the centre, there is a lone Akkadian spearmen against the lone Sumerian spearmen and general.  An Akkadian roll of 1 and Sumerian roll of 6, even with a couple of modifiers for each side, guarantees the Akkadian spearmen are routed off the board.  Akkad has reached their breakpoint and have lost.

Verdict
While an interesting and fun battle, I did not really get the sense I was replaying a historical battle.  It was a good run out for the rules, and cleared up some minor points.  The rules got a good run but it was a fairly familiar straight up battleline Vs battleline.  Compared to other historical battles I've done in the past, I did not get a feel for what the commanders were up against, nor why they did what they did.  But this is fair enough for the Battle of Uruk as it was a free form setup. The entire game took 5 or 6 turns and 1 hour including setup, writing it up as I went and taking the pictures. So maybe 30-40 minutes if I did not blog it.  This is the speed I am looking for, so good so far.  Onwards to some historical battles with the deployment taken out of my hands.

Thursday, 14 June 2012

Heraclea replay with Hordes of the Things (HOTT)

Introduction
I am in the process of replaying Heraclea with different rules on a 2'x2' table.  This is about number eight.  HOTT is not even on my list.  I have used DBA for some previous replays - Callinicum and Zama - and IMO they are OK but nothing great.  I did acquire a copy of HOTT a few years ago as I had read that some people use it for ancients.  But besides reading it and thinking they were similar to DBA, they have sat on the shelf.  But, with DBA 3.0 drafts out, and again reading on some forum about someone using HOTT for ancients, I dug out the rules again.  They are quite different to DBA, especially the combat outcomes.  I actually prefer the combat outcomes in HOTT.  Never fond of Psiloi rear support (which I note is gone in the current draft of DBA 3) and the various quick kills, HOTT is refreshing.  So I thought I would just do a quick game of Heraclea with HOTT to see if HOTT is for me, or at least better IMO, than DBA.  I added in some light troop types and also restricted non-light element movement to only group movement, so it is not strictly HOTT.

I usually have links to rules reviews etc but for HOTT (and DBA), go no further than fanaticus.org THE place to go for all your DBA and HOTT needs.  There is also an active yahoo group.


Rule changes - mostly adding light troop types
HOTT has no light horse (Raiders are the combined DBA equivalent Cavalry/Light horse) or Peltasts (no DBA Auxilia exact equivalent in HOTT) or Psiloi.  It also has no Pike (HOTT Spear represents DBA Pike and Spear). Rather than transpose the DBA troop definitions over, I will create three new troop types that are variations on HOTT troop types.

Peltasts
Treat the same as Warband, except: no unit quick killed by Warband is quick killed by Peltasts; Peltasts do not get a +1 for Peltast in rear support; Peltasts do not pursue after combat.

Light Cavalry
Move as per Riders. Combat factor +2. Combat outcome for less than, but more than half is "Destroyed if in bad going, otherwise flee 600p" - a combination of Rider with fleeing as benefits my perception of their skirmish role.
 
Skirmisher
Move as per Sneaker, Combat factor +2.  No -1 for off-road or bad going.  Combat outcome for less than, but more than half is "Flee 600p". Very like sneakers, but an enemy cannot disregard a poor outcome versus a sneaker.

For the purposes of Heraclea, the AP value of each of these three units is 1. 

Other changes
  • Riders move 400p in good going.
  • Warband and Shooters are swapped on the movement table.  This seems to be a common change.
  • All elements and groups use group movement only, except this can include all about facing or a single element may rotate in place.  Light Horse, Skirmishers and Peltasts can still use single element movement. 
  • Rear support elements are fixed for the game i.e. the rear element cannot move of its own accord.
Note: I am content for pikes and spears to be the same, at least for Heraclea.
Another note: Tempted as I was to add in some factors such as inferior/superior to reflect the Hypaspists or Triarii, I resisted.

With all these changes, maybe I should say I am playing HOTT-ish.

Troop Definitions

Romans
Leves: 4 Skirmishers
Hastati/Principes: 4 Blade
Triarii: 4 Spear (2 in rear support), includes general in front rank
Light Infantry: 1 Peltast
Heavy Cavalry: 2 Riders
Light Cavalry: 1 Light Cavalry
Total AP: 26
 
Epirot
Hypaspist: 2 Spear (1 in rear support)
Pikemen: 6 Spear (3 in rear support)
Hoplites: 1 Spear
Light Infantry: 1 Light Infantry
Skirmisher: 1 Skirmisher
Slingers: 1 Skirmisher
Agema: 1 Knight, including general.
Light cavalry: 1 Light Infantry
Elephant: 1 Behemoth
Total AP:28

Deployment
See deployment description and here is a photo:

Deployment - Epirot to the left, Romans to the right.

The Game
Most of my Heraclea game reports are very detailed to assist in showing how a particular ruleset works.  HOTT is similar to DBA in it mechanisms and there is a lot of detail around the internet on  how DBA works.  This report will not be so detailed, but I will highlight some of the critical parts that I think warrant it.  It still will be reported turn by turn but just the good bits.


Turn 1-3
Low PIPs see not much happen - Romans get to moves forwards, Triarii turn to protect the left flank.  I do like  that there are only four cases for extra PIPs.  It does seem strange going back to movement rates that are the slowest, besides Justified Ancients, in the rulesets I have used so far.
 
End of turn 3 - Romans on the right


Turn 4
Leves contact the Epirot Skirmishers. One Leves flee, one Epirot Skirmisher flees.  The Epirots retaliate by moving up all the pikes and Hoplites into contact with the Leves.  The three Leves contacted are all doubled and destroyed (I treat Skirmishers as "Others" for less than half outcomes i.e. destroyed, in DBA the Psiloi would flee on this result).  Pyrrhus, the Agema and the Elephant are slowly moving down the flank to get to the Roman Heavy Cavalry. I am not enjoying Pyrrhus being so far away from the rest of the army.  The pike group is still within range for it to cost only one PIP to move, but everything else is 2 PIPs. Units further than 1200p (12") from the general cost +1 per PIP to move.

Battlelines are close - a lone Epirot skirmisher is in the centre.


Turn 5
Romans advance and rout a Epirot skirmisher. Pyrrhus, Agema and Elephant finally contact Roman Heavy Cavalry.

Agema and Elephant contact the Roman Cavalry


My 5 year old taking a break from Lego to roll some dice.


Agema and Pyrrhus recoil (a 1-5 die roll) and the Elephants force a recoil.

The Agema, Elephant and Cavalry situation after melee.

The battlelines should meet next turn, they are very close now.

So close, next tun will be the clash.

Turn 6
Elephant destroys the opposing Roman Heavy Cavalry (a 6-1 die roll).  Agema and Heavy Cavalry locked in melee (tied).  Pike line moves into melee with Hastati.  Pikes are at combat value 5 as they are a spear unit with one spear in support (Nice and easy, no caveats for the support except not applicable in bad going.  I much prefer this).  Hastati are at 5.  The first roll was for the Hastati-Pike combat with the Hoplite as flank support:

The last picture with the left most Hastati in it.

My 3-year old son rolled a 6-1 in Epirot favour.

My 3 year old rolled the 6 and the 1 that eliminated the Hastati.  Blue = Epirot, red = Roman (Society of Ancients dice)

Hastati gone.  Was not expecting that.  This could be bad for the rest of the line...but just some recoils on both sides.

Battleline at end of turn 6.

Turn 7
One PIP for Romans. The Triarii was going to move into the flank of the Elephant until I remembered that in DBA/HOTT, elements turn to face on a flank/rear attack if not already contacted on the front.  Unlike all the other rules I have been playing recently.  Damn.  That tactic is not going to work. A Triarii element instead goes into the Agema flank, but Agema still outscores on the combat (with the Roman Heavy Cavalry).
Pikes went in and were recoiled.

Turn 8One PIP for Romans.  Nothing happened.
A pike element moves to the flank of a Hastati and it is destroyed in the subsequent combat.

Pike block has flanked a Hastati in centre that is not in the picture as is was destroyed

Elephant turns to hit the Roman Heavy Cavalry in the flank and it is outscored (due to combat with the Agema to the front) and is destroyed. It was worthwhile, even if the Elephant is likely to be routed by the Triarii next turn -  Romans have lost 11AP, and 13AP is half the total, so only 2AP to go. Epirot is on 1AP lost at the moment.


Elephant flanks Roman Heavy cavalry and destroys them.  Elephant is destroyed by Triarii next turn.
Turn 9-12
Triarii surround elephant and see is destroyed.  Otherwise, lots of positioning and recoils.  The Triarii face-off the Agema:

Triarii and Agema.  The general figures are markers for the units with the general.
But in the Epirot phase of turn 12, this:


A Principes protecting the flank of the line.

became this:

Epirot move up for a +5 to +3 attack.

And a 6-1 roll guaranteed the Principes was destroyed.  Agema recoiled.  The Romans have lost half their AP and have lost.

Overview at game end - Agema and Triarii bottom left.

Verdict
It was OK.  I do prefer HOTT to DBA. DBA 3.0 may change my mind.  Their were a few tactical mistakes I made - I could have shifted some of the Principes in the second line up a lot earlier to lengthen the Hastati line and get overlaps.  This would have made a big difference to the battleline outcome.  I did not mind the restricted moves but it did slow the game down.  Ah well.  If I played again, I think I would go back to vanilla HOTT moves.  Had a good time but still do not love HOTT or DBA. Admire them and like them, but not love.  Plenty of other rules out there for me!

Tuesday, 29 May 2012

Heraclea replay with Milgamex Ancient Warfare

Introduction
Replaying Heraclea with different ancient rulesets on a 2'x2' table.  This is about game eight.  I have been keen to play a game with Milgamex Ancient Warfare for a while, and wrote an overview.  While the rules come with an example of play, if you don't have the rules, you don't get to see the example :-).  This replay is a bit detailed to show how the rule mechanisms work, and if these are rules you may like.

Basing discussion - converting DBM bases to work with the rules
My 15mm armies are based WRG 7th/DBM style on 40mm wide bases.  Ancient Warfare has single figure removal, but also has the concept of stands.  Stands are used to determine a few things, such a column movement is one stand wide.   Also, Ancient Warfare is 25mm based with moves in inches, and half everything for 15mm.  I don't have individual figures and the stands in Ancient Warfare are generally 30mm wide at 15mm scale, based on a number of figures on a frontage defined by troop type; for example, close order infantry has a frontage of 7.5mm per figure, with 4 figures on a stand.  I can track casualties on stands, but the basing is more difficult.  An alternative is to scale the movement distances to be proportional to the stand width.  This would most closely represent what the rules are trying to achieve and not get out of kilter.  30mm bases have .5" as the movement ratio.  40mm bases would then have 2/3rds" movement.  This is just like the Armati ruler, which is in 2/3rds of an inch!  And I have some of these rulers hanging around the house from playing Armati, although I usually play Armati intro, and now use 1cm as the base move for that. Another alternative would be to play that each move is in 2cm, as that is close to 2/3rds of an inch.  The only other discrepancy that creeps in with the Heraclea game is Elephants are based 20mm wide, not 30mm.  Cannot have everything.  In the end, because of the 2' depth of the table, I have gone with .5" movement rather than 2/3rds of an inch. With 2/3rds-inch movement, the units move a little too fast - 3' is really required for 15mm figures so with only 2' depth, I have erred to the small side.  So, even of the figure base sizes are a little larger, I am going with the movement rates as suggested by the rules.

Troops
The rules recommend that units are 10-50 figures in size.  Luckily the rules also have bonuses for multiple ranks, often up to 4 ranks deep.  Some weapons get a bigger bonus e.g. pikes, but others will still get a 'push' factor for being deep.  It is crowded on the table.

Notes on terminology
There are a few abbreviations and explanations required.  The less obvious ones are:
m:xd = move distance as a number of six sided dice.
wpn = weapon.  Common ones in this battle are Ss - short spear, Mm - Melee missile (e.g. pila), Ltt - Light Thrusting Weapon, Ls - long thrusting spear.
bmf = basic melee factor.
arm = armour.
train = training. R - regular, I - Irregular; a - vets, b = experienced, c - green, d - half trained, +e - elite.
pnts = points per figure.
Ldr = leadership (A, B, C or D).
UCV= unit cohesive value (based on points assigned to armour, training and leadership)

Romans
Leves: 4 bases (8 figs), inf, open, m:3d+1, missile:2",wpn:Ltt, bmf:4, arm:none, train:Rc, pnts: 1, ldr:C, UCV:12
4 Hastati: 4 bases (16figs), inf, close, m:3d-2, wpn:Mm, bmf:8, arm:metal+sh, train:Rb, pnts:2, ldr:C, UCV: 21
Principes 4 bases (16 figs), inf, close, m:3d-2, wpn:Ls, bmf:8, arm:metal+sh, train:Rb, pnts:2, ldr:C, UCV: 21
Triarii: 4 bases (16 figs), inf, close, m:3d-2, wpn:Ls, bmf:8, arm:metal+sh, train:Ra, pnts:2, ldr: B, UCV: 25
Light Infantry: 4 bases (12 figs), inf, loose, m:3d, missile:2", wpn:Ltt, bmf:4, arm: none+sh, train:Rb, pnts:1, ldr:C, UCV:16
Heavy Cavalry: 6 bases (18 figs), cav,c lose, m:3d, wpn:Ss, bmf:8, arm:metal+sh, train:Rb, pnts:3.5, ldr:C, UCV: 21
Light Cavalry: 4 bases (8 figs), cav, open, m:4d, missile:2", wpn:Ltt, bmf:5, arm: none+sh, train:Ia, pnts:2, ldr:C, UCV: 11
General: 1 base (1 fig), cav, open, m:4d, wpn:Ss, bmf:10, arm:metal+sh, train:Rb, ldr:C, UCV: 21 good

I possibly could have combined the Hastati and Principes as there are bonuses for 2nd rank in combat.  So rather than meet the pikes in 2 lines of Legionaries, it could have been 1 large block.  But I wanted to see how the rules work and whether multiple line units are a reasonable tactic (they were).
 
Epirot
Hypaspist: 3 bases (12 figs), inf, very close, m:3d-3, wpn:Pk, bmf:4, arm:metal+sh, train:Ra, pnts:2, ldr:B, UCV:25
Phalangites: 9 bases (28 figs), inf, very close, m:3d-3, wpn:Pk, bmf:5, arm:metal+sh, train:Rb, pnts:2, ldr:C, UCV:21
Hoplite: 2 bases (8 figs), inf, close, m:2d+1, wpn:Ls, bmf:6, arm:metal+sh, train:Ia, pnts:2.5, ldr: C, UCV: 18
Light Infantry: 4 bases (12 figs), inf, loose, m:3d, missile:2", wpn:Ltt, bmf:4, arm: none+sh, train:Rb, pnts:1, ldr: C, UCV:16
Skirmisher: 2 bases (4 figs), inf, open, m:3d+1, missile:7",wpn:Ltt, bmf:4, arm:none, train:Rc, pnts:1 , ldr:, UCV:12
1 Agema: 4 bases (12 figs), cav, close, m:3d, wpn:Ss, bmf:10, arm:metal+sh, train:Ra+e, pnts:4, ldr:A
Light cavalry: 4 bases (8 figs), cav, open, m:4d, missile:2", wpn:Ltt, bmf:5, arm: none+sh, train:Ia, pnts:2, ldr: C, UCV: 30
1 elephant: 1 base (2 models, 8 figures/crewmen), m:3d+2, Missile: 1x7", 1x2", bmf:13, arm:none, train:Ic, pnts:15.5, ldr: C, UCV: 11
General: 1 base (1 fig), cav, open, m:4d, wpn:Ss, bmf:10, arm:metal+sh, train:Ra+e, ldr:A, UCV: 30, Inspiring

Note: even though the elephant is one model, I have assumed there are two figures on the base, not 1.  As the elephant is supposed to be on a base 2/3rds the size, this means the "2 elephant" base is now slightly larger than 2 elephants would be.  But one elephant I do not think will be very potent.  In the game, the elephant was impressive and one would have been enough!

Deployment
Deployment is based on my standard deployment for Heraclea, just some units are a wider and all are deeper:

Deployment - Epirot on the left, Romans on the right.  Note that there are 4 bases of Epirot Skirmishers.  This was an error and I removed them after the first movement phase.


There is no "roll for initiative" - each phase of the turn is either simultaneous or in a particular unit order.

Turn 1
Orders
I can already see that with an average move of 3"-5" per unit and 3 movement phases, turns go by fast. But the skirmishers are in the way of the main event.  So for turn 1:
All skirmishers get skirmish order (basically move to within missile range and maintain that range).  Triarii will change formation into a 2x2 block and turn 180 degrees and a move to the position just outside the rear of the Principes.
Elephant and Agema get charge orders Vs Roman Heavy Cavalry (you must specify the target with charge orders).
All other units hold their position.  I will await the skirmish result to see what happens in turn 2.
 
Formation and Facing
Triarii change formation and facing.

Triarii turns to their left
1st Movement Phase
Move:
All moving units on both sides roll their dice for movement distance.  Units move in order of highest roller to the lowest.  While I will not go into it to much from now on, as an example: Roman Leves rolled 3d6+1 for 11, Epirot Skirmishers rolled 3d6+1 for 10, elephant rolled 3d6+2 (+2 for charge) for 9, Agema rolled 3d6 (+2 for charge) for 15. Units move in this order: Agema, Leves, Epirot Skirmishers (who don't move as now Leves in missile range), Elephant.
Missile:
Epirot Skirmishers at Leves: Factor is 6 (4 men +2 first time used in battle), d6 = 3 +2 target open order no armour +1 lacks shields, +0 line formation = 6. Die of 6 with 6 factors inflicts 2 casualties and 1 UCV loss (from 12 to 11).

Roman left flank (from Roman view).  Note that Epirot skirmishers are now (correctly) only 2 bases.

2nd Movement Phase
Move:
Leves move to within javelin range of Epirot Skirmishers.
Agema and Elephant are a lot closer to Roman Cavalry.

The cavalry clash is so close to happenning
 Triarii move to outside Principes rear and halt.
Missile:
Epirot Skirmishers have already fired.  Can only missile fire once per turn, not once per phase.
Leves fire: Factor 8, with a modified die of 9 = 2 casualties, 3 UCV loss (from 12 to  9).

Skirmishers skirmishing (each one down two figures)
3rd Movement Phase
Move:
Agema and elephant contact the Roman Heavy Cavalry.  Was not sure they would hit at the same time with 3 turns of diced movement, but they did.
Missile:
No missile fire - the two units in range have already fired this turn. 
Impact:
If you charge a unit during a movement phase, you have a special combat phase, rather than standard melee (same concept as in Shock of Impact and FOG). So, hang on and bear with me for the first impact phase I've ever done.
Firstly, determine who is impactor and receiver.  If both units were charging or counter-charging, there is an optional rule to determine the impactor.  In this case, the Agema and Elephants are the impactors and the Romans the receivers.  Impact factors for each unit are compared, and a die roll made on a table if the impactors factor is higher than the receiver.  If the value is 0 or less, there is no impact and melee occurs in the melee phase.
Agema factors is 12: base 10 (close order cavalry impactor) + 2 (a second effective rank)
Elephant is  16: base 16 (elephant)
Roman Heavy Cavalry Vs Agema is 1: 4 (close order cavalry receiver) +1 Rb as receiver +2 (second effective rank) -4 (elephant within 5")
Roman Heavy Cavalry Vs Elephant is 1 (same factors as Vs the Agema)
Agema Vs Roman Heavy Cavalry is impact factor 12-1=11, die roll of 4 +1 (note an involved general can alter the roll by one) = 5 or "c/k -7 BK". (c/k = the row index for casualties to impactor/receiver based on enemy units figures. c= 1 (to Agema). k= 4 (to Romans)). -7 UCV loss to Roman cavalry. Agema automatically lose 2 UCV as they impacted. BK is Breakthrough where the Agema will plow through the Cavalry at point of impact, destroying figures in their path. However, the Roman cavalry needs to have suffered at least 50% UCV loss for a breakthrough by enemy cavalry, otherwise it is simply a pushback.  Roman Cavalry were at 21, now down to 14.  Not 50%, so Agema will only pushback the Heavy Cavalry.
...But first the Elephant also needs to be resolved:
Elephant Vs Roman Heavy Cavalry is impact factor 16-1=15, die roll of 2 = a/m -5 BK. a=0 (to Elephant), m=3 (to Roman Cavalry).  Roman Cavalry UCV loss is 5, Elephants lose 2 for being an impactor.  Elephants will breakthrough - move elephant directly though unit and all figures in the path are destroyed.
The remaining roman cavalry in front of the Agema are pushed back 1.5".
Final tally:
Agema loses 1 figure casualty, 2 UCV loss.
Elephant loses 2 UCV only.
Roman Heavy Cavalry loses 13 figures (7 from impact and 6 when the elephant broke through) and 12 UCV (from 21 originally).
In hindsight, the Roman Heavy Cavalry should have charged the Agema for a chance, but even then it was likely to be the receiver with the same result as above.

Cavalry post-impact.  Note the Elephant that has broken through.
 Melee
Agema is still in contact with Roman Heavy Cavalry so a melee happens.
Melee is with first rank only, and up to 1" of overlapping figures from the same unit.  For Agema this is 6 figures and the Roman cavalry, this is 5 figures in melee.
Melee process is each side determines its own factor and subtracts the enemy factor from this.  Roll a die and look up the result on the melee table based on the final factor.  Therefore one side will be looking up with a positive number, the other side with a negative number. Casualties are then determined using a casualty index table and based on figures involved.
Agema factor: 11 from Base factor of 8  +3 inspiring general
Roman Heavy Cavalry: 2 from Base factor 8 -3 suffered breakthrough  -2 elephant close
Agema checking using melee value of 9, Romans with -9
Agema rolled a 2 and result is "p -5". a "p" result on the casualty index table with 6 figures meleeing is  4 figures lost for the Romans. "-5" is UCV loss inflicted so Roman Heavy Cavalry loses another 4 figures (down to 1 figure!) and is now on 7 UCV (from an original 21).

Roman Heavy Cavalry rolled a 6 and result is "g -3" or  Agema loses 1 figure and another 3 UCV lost (now 25 from an original 30).

Cavalry clash post melee.  There is only one Roman Heavy cavalry figure left

Morale
Morale is all about UCV rather than casualty losses.
No surprises - the Roman Heavy Cavalry needs to undertake a morale check:  1d6 = 6 -4 (UCV 20%-39%) -1 (suffered breakthrough) +1 (2 or more  friendly units close) -1 (2 or more enemy units close) -1 (in melee and lost more UCV) = 0 or retreat one phase that occurs immediately.  Unit retreats off the board and will not return.
Epirot Skirmishers at 25% UCV loss -  morale result is result is cannot charge.

The cavalry battle after morale phase.  The Roman cavalry have retreated off the board.
Turn 2
Orders
Epirot Skirmishers to move backwards out of the way.
Hypaspists, Pikes and Hoplites to charge the Hastati.  This means they will also charge the Leves who are in the way.
Hastati to charge the Pikes.
Principes support the Hastati (support in this case will mean the Principes will follow the Hastati).
Triarii to charge the Agema.  The Elephant is in the way so will charge the Elephant first.
Elephant to rotate 90 degrees and charge Triarii.
Agema to rotate about 90 degrees and charge the Principes.  Yes, not the Triarii.  The Elephant should keep the Triarii busy for a turn and so this gives the Agema an opportunity to strike the flank of the Roman Heavy Infantry.  Movement distances are very fast in this game so it is worth doing.
Light troops all defend current position.
Formation and facing
Elephant and Agema rotate in place.

Elephant and Agema rotate to face the Romans

1st Movement phase
Agema and elephant do not move as they changed formation.
All the units rolled a different movement rate, but the Leves actually rolled very low and move second last. Skirmishers, when maintaining distance can move their diced distance during their move and also up the same diced distance again during the opponents move (once per phase).  This allows them to evade from other units, but still have a chance of being caught.  In this case, the Leves, even though they rolled low, have sufficient movement to maintain distance and end up 1" in front of the Hoplite unit.
One thing I did not realise, and is a learning experience for the game, is that i gave charge orders to the Hypaspists, Hoplites and Pikes.  The Hoplites rolled for the most movement, so moved first.  They moved towards the Hastati by the shortest route.  That means they sidestepped slightly to line up with the Hastati.  This meant that the Pike block moved up behind them and are now slightly blocked.  It may still work out by the time melee occurs. 
 
After moving.  The Hoplites are in front of the main phalangites due to moving first.

Missile
Elephant cannot missile fire against the charging Triarii as the Elephant has charge orders.
Leves cause on the Hoplites 2 figures and 2 UCV loss.
Impact
Triarii impact the Elephant and because the Elephant could not move this phase, it cannot count as counter-charging and is the receiver.
Triarii base impact factor = 9 while the Elephant receiver value is 8.  Adding modifiers sees Triarii impacting with impact factor of 5. This results in Triarii losing 1 UCV and no figures, and the Elephant 2 UCV and 2 figures (crewmen - elephant has 4 crew, and the elephant model is representing 2 elephants) and are pushed back.  The elephants only started with a UCV of 11, now down to 7, so they pack a punch but are brittle.  I like that.

Elephant Vs Triarii

2nd Movement Phase
Epirot units move before the Romans so the Hypaspists and Hoplites contact the Hastati before the latter could move.  The Pike block did not move at all as it was to move first, but could not due to the other units so it didn't.  Agema did not reach the Principes, and the Leves retreated behind the Roman lines.
Impact (no missile to do)
Two units impacting one are resolved as two separate impacts.  The Hypaspists faltered (a d6 roll when charging to impact to see if you really manage it - only on a roll of '1' would they falter, so they rolled a '1').  Faltering means that you get the receiver impact factor (this is bad) but not any of the die roll modifiers affecting receiver (this is good).  For the Hoplites and Hastati, both are charging so the higher impact factor unit becomes the impactor.  But they both have the same impact factor - both impact each other.
Hastati Vs Hypaspist: 9 +1 pila = 10  Vs 7 +2 pike +2 rank bonus =11.  As the receiving Hypaspists have a greater factor than the impactor Hastati, there is no impact, and combat is treated as melee to be resolved in the melee phase.  Hastati still lose 1 UCV due to being an impactor.
Hastati Vs Hoplites 9 +1 pila =10 Vs 9 +2 long spear =11.  Resolved by the Hoplites on the +1 table; and they rolled a 1! No effect to either side, except 1 UCV from Hoplites for being an impactor.
 
Hoplites and Hypaspist in battle with the Hastati
3rd Movement Phase
Pike block move but stop when they contact the rear of the Hypaspists, so no combat for them.  The Agema charge into the flank of the Principes, which also brings them into contact with the side of the Hastati and the Leves.  The Leves have enough movement left to retreat so they do that as the Agema charge in.

The Agema hit the Romans in the flank.

Impact
Agema impacts the Hastati and Principes, who will be receivers.  This may be ugly.
Agema Vs Principes: 10 +4 flank = 14 Vs 6 +1 Rb receiver =7. Impact factor is 7. Principes receive 2 figure casualties and 5 UCV loss.  Agema has -2 UCV loss for impactor and causes a pushback.
Agema Vs Hastati sees Hastati lose 2 figures and 4 UCV.  Agema loses another 2 UCV.  Now, the Hastati need to pushback but are in contact with the other Epirot pike unit and so I rule they are destroyed and  removed from the board.

After impact.  Notes Hastati line is gone.

Melee
There are two melees - Triarii Vs Elephant and Agema Vs Principes.
Triarii Vs Elephant:
Triarii factor is 8 +1 long spear -1 enemy elephant =8 Vs Elephant factor of 13 -1 suffered pushback =12.
Triarii inflicts damage on the -4 column and inflicts 4 casualties and 2 UCV loss.
Elephant on the 4 column and inflicts 4 casualties and 3 UCV loss.
Both rolled low on the die and the  UCV loss could have been twice as bad with a high dice roll.
Agema Vs Principes:
Agema factor is 10 +3 inspiring general +3 flank attack +1 cavalry Vs pila =17 Vs Principes factor of 8 -1 pushed back =7.
Agema inflicts casualties on the 9 column, rolls low for a poor result of 3 casualties and 5 UCV loss.
Principes rolls a 6 and inflicts no figure casualties and 3 UCV loss.
Morale
Principes check melee due to loss of Hastati and UCV loss.  UCV is now 11, from a start of 21.
morale die result is -2: d6 = 3 -3 UCV loss -1 unit nearby lost -1 enemy in contact and they lost less UCV. a result of -2 for regulars is rout. move double distance immediately.  They rolled really high dice and move off the board, regardless of if they went away from the Agema, or back to their base edge.
Elephant checks morale at a UCV of 4 from a start of 11. No matter the die roll, they will rout, which they do off the board.

Game end.  Note the empty space in the centre that used to have the Hastati and Principes.  Triarii at the bottom right.

The Romans only have one heavy unit of the board - the Triarii.  While they are in good shape, the Agema have some life left in them, and the Epirot also have a large pike block that has been untouched so far.  The Hypaspists and Hoplites are in average condition to fight but still have the capability to inflict a few casualties.  I call it a tactical win to the Epirots.  There is a method of using point calculation for victory in the rules and level of victory based on a ratio if I was really keen, but I am not.

Verdict
Fast game.  Lots of easy to use tables.  I liked it.  As per my overview, it does show it ages with tables, but it has some great mechanisms in there.  It really needs a much larger table to shine.  I would play these rules again.  They are really fun and not complex.

Tuesday, 15 May 2012

Milgamex Ancient Warfare overview

Background
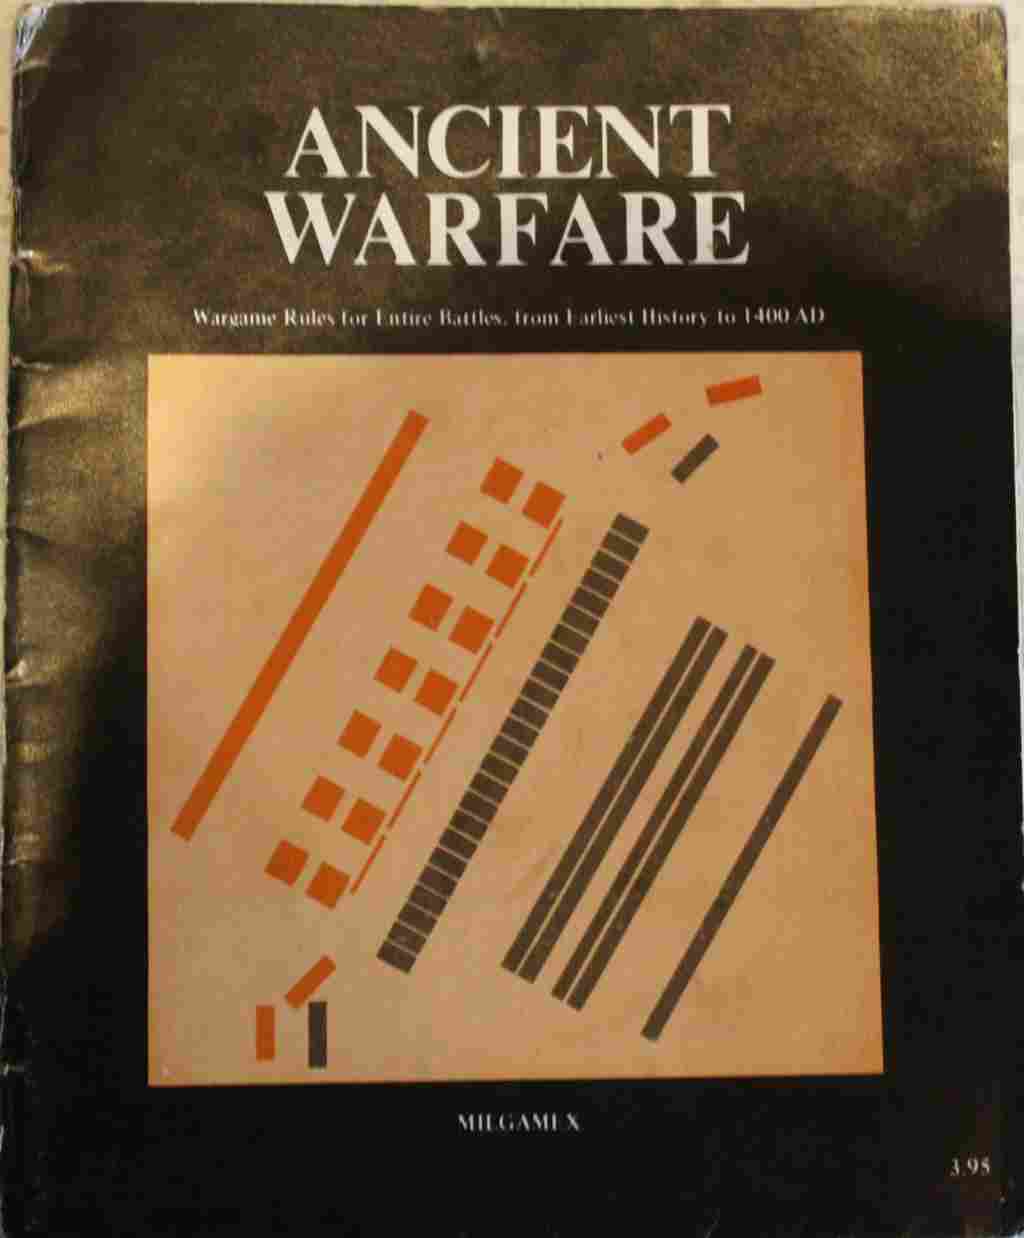
I first became interested in these rules a few years ago and was intrigued that they came out in 1975 and seemed to have some innovative mechanisms in them.  Fast forward to 2012 and I see them on eBay; as a rules junkie how could I resist?  When I first started playing in 1979 with WRG 5th Edition Ancients, I wish I knew about these instead.  They are (and probably were at the time) under appreciated and I hope to remedy some of that, 37 years on.

This is an overview not a review.  I played a game and a half but with WRG 7th/DBM sized bases, not individually based as per the rules.  I also played small sized games (on 2'x2') which would not have given me a full appreciation of the rules.

There is nothing much I can find about these rules on the internet except a boardgamegeek entry by the owner of the blog I live with cats, who also has an short discussion blog entry on the rules.  A bio of the author - Arnold Hendrick - may be found on his blog about page and also an interview with him in 2009.

For a quick summary: the rules are detailed, take a few hours to play, uses individually based figures (1 fig = 50 men) formed into units, combat is per unit and you track unit combat effectiveness that is as important figure loss. Casualties and melee is in terms of figures, no keeping track of actual men lost (unlike WRG 1st to 6th).  It has copious charts and tables.  It contains mechanisms such as random movement rate (rolling for movement distance), unlimited march moves and an impact phase followed by a breakthrough phase that is distinct from the melee phase.  Out at the same time as the WRG 4th edition rules, they are very different.

What you get


Ancient Warfare, copyright Milgamex Company 1975.  Written by Arnold Hendrick and playtested by members of the New England Wargamers Association. For earliest history to 1400AD, and includes War of the Ring Middle Earth rules and army lists. 40 pages in a small point font (small for me). 20 pages of rules including a couple of small explanatory diagrams, 9 pages of optional rules including sieges, 8 pages with 21 army lists for European armies 450BC to 200AD, 3 pages of Middle Earth special rules and army lists. There are no terrain setup rules at all, but there is a detailed terrain effects table. There are also 3 sheets that come with the rules - a detailed example of play, a unit roster and a huge two-sided sheet with the numerous charts and tables to play the game.  Many of the charts and tables are not in the rulebook, and are needed to play.  My copy had no sheets so this is where my special thanks go out to the kind soul in the US who scanned a copy of the sheets so I could actually play the rules.

Bases and measurements
Rules are written for 25mm miniatures but for 15mm, all measurements are halved, including base size. I will refer to movement rates etc for 25mm.  Individual bases are fairly standard for the time - for example open order infantry is 30mmx30mm, close order infantry 15mmx20mm, open order cavalry 30mmx40mm, close order cavalry is 20mmx40mm.  Each figure represents about 50 men. All other measurement is in inches.  Dice used are d6s.

Everything has a point value and point values are referred to throughout the game - both points and percentage increases based on characteristics are used.

Average armies are 600 points for play on a 7' table with a width of 4'-6'. I work this out to be about 300-600 figures. 15mm 600 point games are recommended on 4'x3'. Smallest recommended army size is 300 points and at 15mm that means a 2'x3' so 2'x2' is not outside the realms of possibility for small games that I replayed.  However I found using 15mm and halving movement distance that 2' depth still had the units starting too close together and a minimum 3' is required depth for 15mm.

Troops and Unit Cohesive Value
The most important value in the game is UCV, unit cohesion value. UCV in my games tended to vary from around 12 (foot skirmishers) to 30 (Elite units such as Macedonian Companions or Roman Triarii). Units may have any number of figures, but 10-50 is suggested as the most reasonable. I went as low as 8, which was OK and no higher than 30. Large units can soak up casualties but won't necessarily dish out much more than smaller units, and also be less mobile, so the 10-50 recommendation seems a good guide.  UCVs are kept secret for each side. Morale checks are taken at the end of a game turn and are NOT based on figure loss - only UCV losses.  Figures may be removed as casualties from a unit and reduce the combat value of the unit, as does UCV loss to some extent.  UCV and figures are lost through melee and missile fire. Results for melee and missile are always in terms of figure and UCV loss.

UCVs are based on troop characteristics. Troops characteristics are the same for all figures in a unit:
Armor: 5 values from no armor to full cataphract, +2 for a shield
Leadership: A (excellent), B, C or D (terrible)
Training: Broken into three subcategories -
    Regulars: 4 categories, veterans to half-trained
    Barbarians: 2 categories - experienced or young
    Irregulars: 3 categories - experienced, inexperienced, untrained

Generals are of 4 types - inspiring to inept.

Camps are optional.

Game Sequence
Setup
There is a terrain effects table, but no rules on terrain setup except "players agree on terrain".
Units are drawn on a deployment map and then each side deploys.

The following is the sequence for a turn.  Players conducts each phase simultaneously.
 
Orders
Write orders for each unit (orders are from a set list).  Units may have standing orders.

Formation and Facing
Rearrange units as per orders.  Players may roll to force this to be consecutive.
First Movement Phase
a) Dice for distance for each unit with movement orders. Units that rearranged cannot move in this phase.
b) Highest rollers move first.  Rollers on equal move distance move simultaneously.
c) Fire Missiles.
d)  Units that contacted enemy units resolve impact melee effects.
Second movement phase
As per first but rearranged units may move.
Third movement phase
As per second movement phase.
March movement phase
Units march moving do so.  March move is an unlimited distance move, but carries penalties to missile and melee.
Missile use by non-marching units resolved after marches.
There is no impact in this phase.
Melee resolution phase
Units in contact resolve melee.
Morale resolution phase
If you have to test morale, do so here and apply effects instantly.

It took me a little while to get used to giving orders that last for three movement turns, a unit can move a lot in a game turn!

Things to note: You cannot change orders during a turn.  Missile fire is possible per phase, but you need to pick when, as you can only fire with a unit once per TURN.  If a unit contacts an enemy unit during a movement phase there is an impact melee.  It is quite likely units will still be in contact in the melee phase and so will undertake combat again i.e. For first contact, you are likely to melee twice in the one game turn.

Orders
Orders are formation/facing changes and action orders.  Action orders are:

Charge unit 'X'.
Charge by most direct route.
Cannot missile fire.
Initiative charge
Not for regulars.
Remain stationary unit activated by an enemy charge, or if enemy gets within 10".
No missile fire.
Skirmish against unit 'x' at 'x' range
No impact allowed, must have missile ability.
Move to within x range and maintain it.

Other action orders needing no description are:
  • Defend current position
  • Move to position x
  • Fall back

Standing action orders given to a unit at the start of the game are a choice of
  • Cover unit 'x'
  • Tactical reserve to unit 'x'

There is a page of rules for attaching generals (a general must be ordered to attach to a unit), casualties to the general (possible when alone or attached to a unit) and what happens when a general is lost (all units will undergo morale checks with some bad modifiers).

Formation and facing
This is the only place to adjust facing or formation. If you change formation or facing you cannot move or count as charging in the first movement phase.  The next three movement phases allows some restrictive turning, but no other changes in direction or formation. Facing changes are by defining rotation, in degrees, on the unit's centre. Formations are:
  • Line - not over 2 bases deep
  • Reinforced line - must be 3 or 4 ranks deep
  • Block 'x' deep - ranks = depth.  Last rank may not be complete if insufficient figures
  • March Column - deploy on stand wide (stands are 2-5 figs depending on unit type. Allowed to use special march movement. No impact or missiles.
  • Square - only infantry
  • Positional defense - stands arranged along a position, e.g wood line, in defense
Particular formations provide die roll modifiers in receiving missile fire, for example. 1 line deep unit is +0, 2 line deep is +1, Reinforced line or Block is +2.

Movement
All troops have a random movement rate e.g. loose order infantry is 2d6+3", Legionaries are 3d6-2", Horse archers are 4d6+1". Highest pip rolled is penalty if moving in difficult terrain.  Units must move full distance unless orders dictate otherwise. Charging units must add 2" to their move.  Units of both sides move in order of speed, fastest to slowest.  Units move individually - there is no grouping of units.  This does mean than charging into opposing units with one or more friendly units in the same phase may not happen if you start a fair way apart.  The movement dice is random enough that unit get out of step fairly quickly over a number of phases, and units MUST move. Because units may move at different rates, if you have units that are not moving straight ahead, they may move in front of one another, blocking movement paths for slower units.  I found this out ordering multiple units to charge one enemy unit.  The faster unit moved in front of the slower one, blocking the path for the slower unit and so the slower unit could not engage with the enemy.
Turning and sidestepping is only allowed to units charging or skirmishing, or to avoid impassible terrain.  This make it a bit interesting to ensure units don't run into each other as non-chargers just move straight ahead, and possibly into difficult terrain.
 
Skirmishers try and stay within ordered range and can move forwards, backwards, wheels, sidestepping to do so. They can only do so up to total distance rolled, then they stop and can be contacted.  But they can use movement rolled to move to within ordered range, and then that movement distance again to stay within ordered range. I never caught skirmishers with non-skirmishers - their movement rate was always high enough they could move backwards far enough.  But if I had played more games, or larger games, chance would dictate that they would roll lower than the unit they were skirmishing against, and be caught.
March movement is basically unlimited movement (there are limits for elephants and artillery).  Marching units have to be one stand wide, cannot impact, missile fire and get negative modifiers when fired on and in melee.  But it is a handy thing for reinforcements and the like.  Due to the small table I was using, I never got to use march movement.  But it would be very useful for reinforcements coming onto the table and moving units between flanks. 

Missile
Missile fire is optional and has its own table (die roll is the row, factor is the column) and factors.  Range for a troop type is found in the army lists but generally infantry archers are 9", horse archers 7", javelins is 2".  Some units allow a second rank to fire. Arc of fire is 60 degrees to either side except elephants and light cavalry are all round.  Missile fire can take place at any point a unit moved through. Missile fire causes figure casualties and UCV loss.  While missile fire is a step in each of the three movement phases, a unit can missile fire only once per turn NOT once per phase. 

Impact and Melee
Impact only occurs on contact if at least one unit has charge orders.  If no unit contacted has charge orders, it is a classed as a melee and is resolved in the melee phase after all movement is completed for the turn.  If both units have charge orders, both units are impactors, otherwise one unit is the impactor, and the other the receiver.

Impact has its own combat table, combat modifiers and results. Unit types have different factors depending on whether they are infantry or cavalry, open or close order, impactor or receiver. Multiple ranks give a bonus based on weapon type (no multiple rank bonuses in melee).    Impact is performed by comparing the factor result of the impactor Vs the factors of the receiver, roll a die and looking up the result on the table (die roll is the row, factor is the column).  The table lookup gives the outcome for both sides - the degree of figure and UCV loss.  The degree of figure loss and number of figures in the unit are then used to determine actual figure casualties inflicted e.g. degree of loss is 'e' and figures in the friendly unit is 20 so the number of figure casualties inflicted on the enemy unit is 3 .  The impactor always loses a least 1 UCV and both sides usually lose some figures. The receiver may be pushed back and if the impactor is cavalry you may get the satisfying breakthrough where you carve a line through the enemy unit and continue on.  Even better, much much harder, is if cavalry is the impactor and scores really well, the receiver is eliminated entirely.

Melee is different to impact.  Work out combat factors for each unit.  The basic melee factor for each unit is determined by unit type, weapon etc.  Add in some factor modifiers - some modifiers are similar to impact, most are not.  Compare against the enemy factors to get your melee factor.  Each unit looks up their melee factor on the melee table (die roll is the row, factor is the column) to see how many figure casualties and UCV losses they inflict on the enemy (one unit will be looking up using a positive melee factor, the other with a negative one).  The is no push-backs, breakthroughs etc, just inflicting casualties and UCV losses.  Melee is a grind until someone fails a morale test or voluntarily retreats.

Morale
Morale checks are taken when a nearby unit routs or is destroyed and when the unit UCV loss is 20%, 33% and then every morale phase the unit is at 40% UCV loss.  So UCV is really important - figure losses only impact how many figure casualties may be inflicted in impact and melee.  Morale is a d6 with a few modifiers.  The results can be pass, retreat for one phase, no charges next turn, no charges for rest of game or rout.

Victory
The game ends when the number of daylight turns is reached.  Number of daylight hours left in the day for the battle is rolled at the start of the game. Winner is determined by UCV and point value ratios.  During the game, two concession requests can be made of the enemy - if the enemy is a certain % of the original UCV unit total (e.g. a regular army will concede is down to 40% of original UCV unit total) the enemy loses.

Optional rules
There are a couple of pages of recommended rules:
  • limiting the number of units and types of commanders available to an army
  • various events that will cause a unit to test obedience to their orders e.g. loss of a certain percentage of UCV
  • visibility rules
  • regular trained infantry may ignore up to 1/2 a move in one movement phase allowing them to pause, and potentially gain a tactical advantage
  • additional charge and counter charge test to see if a charge falters
  • dismounting cavalry, mounted infantry, transport units

Other optional rules included are career generals,spies and scouts, strategic reserves, forced marches, weather determination, special formations, simultaneous movement (recommended for 3+ players), restricted missile use, artillery crew replacements, night combat and 3 pages of sieges and fortification rules.

Army Lists
Army lists are provided for  21 states from 450BC to 200AD in Europe and the Near East.  There is matrix showing, for each state, potential enemies and potential allies.  There is also an additional mercenaries army list that can be chosen from for certain armies.

What did I think?
If you have made it this far, you may realise that these are not simple rules.  But nor are they complex.  There are a lot of tables (one each for impact, melee, missile and morale with different factors for each one), but that seemed to be the way of a lot of the rules back then.  They are actually straightforward to play.  Much of the length of the rules is for completeness for every situation that might come up.  The rules themselves are 20 pages, which is not too bad.  The reference sheet is very handy (for other rulesets that is not always the case).
I did like playing them.  I could see dizzying possibilities of converting them from individual figures to element based  (not hard as there is only a few cases as you could still track losses with casualty markers) and simplifying the tables.  But there are a lot more rules for me to try.  I wish these were around in Brisbane in 1980 - WRG 6th put me off ancient gaming for 10 years.

Tuesday, 8 May 2012

Milgamex Tactical Ancients Armies Overview

Introduction
While researching Milgamex Ancient Warfare rules, I also came across some references to another publication of Milgamex - their ancient army lists.  Intrigued, I bought a copy.

The dry details
Milgamex Tactical Ancient Armies 2900 - 1250 by Arnold Hendricks, copyright 1977.  Stapled booklet with 44 pages with thicker card cover.


There are about 140 ancient army lists.  It also covers off Middle Earth with 9 army lists and about 3 pages of special creatures and associated. rules.  Rather than list out the armies - they cover eastern and western armies - here is a picture of the index of the ancient armies. Click to enlarge.


The book also contains 1 1/2 pages of WRG rule variations and interpretations; and a 2 page map of Eurasia with complimentary text on the locations of many of the civilisations. 

Target audience
The army lists are targeted to compliment the WRG 5th Edition Ancient Rules for both army lists and defining the wargame depiction for all the troops types.  Other things to note:
  • There are no points.  The army lists are used to assist in defining an armies units, but the unit point cost is that used by your rules.
  • The troops are described in WRG 5th style - MI, LMI, LI, Irregular, Regular etc.  Weapons description is slightly expanded to that is WRG.
  • The lists are aimed a a 1:20 figure scale as per WRG 5th. But really they could be used at higher representation.
  • The lists are aimed at games that use figures formed into units such as WRG 5th.  This is important as you select units from the army lists, not figures.

Army selection
Most armies lists of that time, and still are, a list of troops/figures/elements with minimum and maximum allowed to be purchased.  This may be expanded with potential updates to troops types and other restrictions such as "if you buy these, you must also buy these other troops".  Examples are WRG Ancients and Armati.  While common, these are other types of army lists such as Rally Round the King with a half the army's units defined and the other half is randomly diced for. Milgamex Tactical Ancient Armies uses a different type of selection.
 
Each army lists has four columns for unit selection: required troops, standard troops, limited troops and special troops.  Each column has zero or more unit types.  Each army list will also define recommended sizes of units in figures and also if there are any other special limitations such as "infantry units cannot exceed cavalry units".  Here is a picture of the Early Imperial Roman 0-200AD list.  Click to enlarge.


Required troops
The first column of troops types is the required troops.  Each army must have 1 or more units of each type listed in this column.  These are the only mandatory troops for an army.  In this instance the army must have a least one unit of HI Legionaires.  The army could be all HI Legionaries.
Standard troops
The second column are the standard troops.  Each army can have zero to unlimited units of standard troops.
Limited troops
The third column are limited troops.  Each army can have up to 2 units of each of the special troops types listed.  Also, the number of special troops figures cannot exceed that of the total of required and standard troops.  In this example, special troops are the Marines and LI Barbarian Allies so anywhere from 0 units to 2 Marine units and 2 Barbarian Allies units could be chosen.
Special troops
The last column are the special troops.  An army can have up to one unit of each of the special troop types listed. And the number of special troops figures cannot exceed the rest of the army.
Proportions
The special cases are always in terms of proportions for various units and/or troops types.
Organization
The organization section is where unit size in figures is defined.  Not all army lists are as prescriptive as this list. Unit sizes are based on historical patterns adapted to the 1:20 figure to man ratio.

This gives an average army size.  You increase the minimum number of required troops and the maximum number of limited and special troop types for larger games.

What do I think?
It is a new method of selecting army units I had not come across before.  I am not sure it is better or worse than other systems.  I do like that it is focused on units and not figures.  I find I use them to look up troops types in preference to the WRG Ancients lists.  I do not know how well they would go (or did go!) for tournaments.  But for pick up games they are easier to use than the WRG Ancients lists as they are a less lenient on the different types of units you can acquire.  I tend to play historical scenarios so the lists are not so useful in that context.  But I shall see if I can apply them to other games.  It would not be hard, especially as the unit types are well defined and so it is simply a matter of converting the WRG description into the ruleset troop definitions.